Hello, all!
I've been lurking therpf for quite some time now since I became interested in building costumes. I can't thank the community enough for the tips, tools and how-to's you all have put out in the world.
Well, I absolutely love Destiny. Have been following it since they released the idea publicly in 2012 so I decided to make my own Hunter suit for the upcoming Phoenix Comicon May 28th-31st. I wanted to challenge myself with something i haven't seen done yet, which is why i chose the Crota armor. (and it just looks really cool anyway). I started the build in January and have been slowly chipping away with whatever free time I have had, but I'm finally posting the build for you all to see!
So I went ahead and got some EVA floor mats from Lowe's to do this in. Everything you'll see is hand drawn, no templates, no pepakura, just hand drawn from reference.
It definitely was a lot harder than I anticipated. From the start, It's been one heck of a learning experience and countless hours of trial and error. Mostly error. Haha
Hopefully when it's all said and done, it'll look similar to this.


Here's the chest/back armor along with the shoulder bells I made out of the foam, glue and acrylic caulking.
I used a dremel and some heavy grit sandpaper to grind out the organic looking textures.
The chest plate was really tough to do and i ended up remaking it because i got a little too crazy with the hot glue and ended up making a huge mess and the second attempt was better.
.

I knew the shoulder bell was going to be hard to make, but 6 hours of cutting, shaping, shooing my cat awayand some filler, i was finally able to get the shape i wanted.


The left shoulder pad was a little easier compared to the other one, but it took a second for me to figure out how i was going to get clean lines around the shapes, so i found a video on youtube and i cut into the foam with an x-acto knife about halway through and i used my heat gun to open up the cuts i made and i was super pleased with it.

i'm still figuring out this website, so forgive me if the layout looks crazy.
Well, once i got everything shaped, glued, got the battle damage dremeled and spots filled, I moved onto painting!
I chose the Predawne shader because it's the main shader I use and i absolutely love the colors.
I used a krylon automotive primer for the base and a metallic silver spray paint for the under layer. I used some masking fluid in between layers to get layered battle damage look. I then used an acrylic antique gold paint i got at Hobby Lobby for the main color and did a black wash over the entire thing to make it look like it's seen some things.

Yayyy weathering


So once i got all the weathering done on it, I started working on the thrall skull, claws and the knife on the leg.
unfortunately, i cannot find any pictures of the molding of the knife, but once i finish it, i'll post it. In the mean time, here's my first attempt at scupting and molding anything.

I asked my father-in-law to help with the mold process since he's experienced in such matters so we made a silicone mold and strengthened the mold with plaster of paris and some gauze strips. Then we pulled the clay out and casted the skull in resin!

First pull was a success!

I took a break on the hard parts for the meantime and began to work on the clothing portion of the suit.
I've never used a sewing machine before, so this was a hard beast to tame and i still barely know what i'm doing.
I basically made a vest with the stomach pattern on it to pull over a long sleeved excersize shirt.
The pattern was hard to try and replicate, but i did the best i could with what i had and knew.
i ended up throwing away the first attempt because it was crooked when i finished and i couldn't fix it. But the second run was way more successful. I used an old t-shirt that fit me comfortably as my template and cut out the vest accordingly.

Test fit. so happy it worked.

if anyone has seen the Relentless Harness' stomach pattern, you'll know it's an insane looking design, so i just found some quilted vinyl fabric and used that.
close enough.. haha

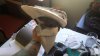
SO I ordered a mask from the talented Steven K. Smith and i could not be anymore pleased with it. It looks and fits great.

(decided to do a little test fit with the mask on)

I wanted a sweet gun for my hunter and i went with the Fatebringer.
I got the 3d print off of etsy and i'm stoked. going to fill, sand and add LEDs hopefully next week.

I've been lurking therpf for quite some time now since I became interested in building costumes. I can't thank the community enough for the tips, tools and how-to's you all have put out in the world.
Well, I absolutely love Destiny. Have been following it since they released the idea publicly in 2012 so I decided to make my own Hunter suit for the upcoming Phoenix Comicon May 28th-31st. I wanted to challenge myself with something i haven't seen done yet, which is why i chose the Crota armor. (and it just looks really cool anyway). I started the build in January and have been slowly chipping away with whatever free time I have had, but I'm finally posting the build for you all to see!
So I went ahead and got some EVA floor mats from Lowe's to do this in. Everything you'll see is hand drawn, no templates, no pepakura, just hand drawn from reference.
It definitely was a lot harder than I anticipated. From the start, It's been one heck of a learning experience and countless hours of trial and error. Mostly error. Haha
Hopefully when it's all said and done, it'll look similar to this.
Here's the chest/back armor along with the shoulder bells I made out of the foam, glue and acrylic caulking.
I used a dremel and some heavy grit sandpaper to grind out the organic looking textures.
The chest plate was really tough to do and i ended up remaking it because i got a little too crazy with the hot glue and ended up making a huge mess and the second attempt was better.
.
I knew the shoulder bell was going to be hard to make, but 6 hours of cutting, shaping, shooing my cat awayand some filler, i was finally able to get the shape i wanted.
The left shoulder pad was a little easier compared to the other one, but it took a second for me to figure out how i was going to get clean lines around the shapes, so i found a video on youtube and i cut into the foam with an x-acto knife about halway through and i used my heat gun to open up the cuts i made and i was super pleased with it.
i'm still figuring out this website, so forgive me if the layout looks crazy.
Well, once i got everything shaped, glued, got the battle damage dremeled and spots filled, I moved onto painting!
I chose the Predawne shader because it's the main shader I use and i absolutely love the colors.
I used a krylon automotive primer for the base and a metallic silver spray paint for the under layer. I used some masking fluid in between layers to get layered battle damage look. I then used an acrylic antique gold paint i got at Hobby Lobby for the main color and did a black wash over the entire thing to make it look like it's seen some things.
Yayyy weathering
So once i got all the weathering done on it, I started working on the thrall skull, claws and the knife on the leg.
unfortunately, i cannot find any pictures of the molding of the knife, but once i finish it, i'll post it. In the mean time, here's my first attempt at scupting and molding anything.
I asked my father-in-law to help with the mold process since he's experienced in such matters so we made a silicone mold and strengthened the mold with plaster of paris and some gauze strips. Then we pulled the clay out and casted the skull in resin!
First pull was a success!
I took a break on the hard parts for the meantime and began to work on the clothing portion of the suit.
I've never used a sewing machine before, so this was a hard beast to tame and i still barely know what i'm doing.
I basically made a vest with the stomach pattern on it to pull over a long sleeved excersize shirt.
The pattern was hard to try and replicate, but i did the best i could with what i had and knew.
i ended up throwing away the first attempt because it was crooked when i finished and i couldn't fix it. But the second run was way more successful. I used an old t-shirt that fit me comfortably as my template and cut out the vest accordingly.
Test fit. so happy it worked.
if anyone has seen the Relentless Harness' stomach pattern, you'll know it's an insane looking design, so i just found some quilted vinyl fabric and used that.
close enough.. haha
SO I ordered a mask from the talented Steven K. Smith and i could not be anymore pleased with it. It looks and fits great.
(decided to do a little test fit with the mask on)
I wanted a sweet gun for my hunter and i went with the Fatebringer.
I got the 3d print off of etsy and i'm stoked. going to fill, sand and add LEDs hopefully next week.
Attachments

Last edited:


")


