Vacformedhero
Sr Member
Haven't been here in a while , absolutely brilliant work, and your giving the model credit, your paint work is elevating the standard of the piece as a whole, well done


")
Thanks for the kind words Vacformedhero!
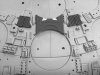
I decided to track down and upgrade some of the parts that aren't quiet right especially on the rear engine deck where some of the DeAgo cast is soft or not right. I have been trying to track down these guys but can't get a positive ID on them yet, could anyone help me out? The closest I have seen is kinda blurry but looks like it could be right, these are off the 1/20 Ferrari 312T3 but I cant make them out.. appreciate any help!
View attachment 680765


.jpg")
.jpg")
.jpg")
Thanks Bwize hadn't seen that site before, great images, looks like we have some work ahead of us!! haha
One of the main things that sticks out to me are those engine grill things, they have a really dumbed down profile that makes them look skinnier than they should, that's gonna be a real PITA to fix, I'm not even sure how I would fix that...hmmm the studio model parts flare out more and have a little vertical wall around the bottoms that gives them a nice seated look onto the surface. I need a lathe! haha
View attachment 681195
the 3 tank parts that go below the bottom 3 look pretty good though just soft on the 4 corner vents. Might keep those as is.

.jpg")