Motion-Controlled Razor Crest: An ILM Inspired Project

MattWinchell

Sr Member
RPF PREMIUM MEMBER
I have decided that I wanted to recreate the motion-controlled reel of various shots of the razor crest, much like what ILM did. My main inspiration was that behind-the-scenes video that ILMVFX posted:

Fortunately, I own a CR-10s and my school in the Bay Area, California, owns a Form 2 which I pretty much have free reign over. With that in mind, does anyone know of a relatively accurate 3D model of the Razor Crest that is ready to print and is about the same scale as the model ILM used for the shots? I have tried researching for one but I am unsure if 1:34 is the correct scale.

Once I do eventually find and print a model, I'll modify the inside to have attachment points for different areas of the model (front, back, and sides). Furthermore, I hope to keep this thread active if I do get the ball rolling.
 
Last edited:
Here are some updates to the project thus far.

I went ahead and bought an accurate Razor Crest stl package off etsy by this brilliant designer name Jeff Lu: Jeff's Razor Crest STL files for 3d printing | Etsy

What's so wonderful about his files is that he sliced them for either an FDM or SLA printer, which makes it easier to make out which parts are more appropriate for a type of printer. Furthermore, he has added a bit of documentation to make the scaling and assembly process easy. I took some time to look over every file to plan out my attack strategy for printing this guy. I first wanted to ensure a decent scale, and after quickly talking with some people on the Razor Crest Builders group on Facebook, I settled on a 1:72 scale Razor Crest, where the Jeff Lu files were initially at 1:100. With that scale, I began printing out the files on my school's Form 2:
PXL_20210422_230819996 (1).jpg
PXL_20210422_231229290 (1).jpg

The Form 2 is an incredibly easy to use machine, and it produces fantastic results with relatively manageable post-processing. In tangent with the print process, I began going through the ILM Razor Crest reel frame by frame on the shots regarding the camera rig.

I was lucky enough to snag several long pieces of 80/20, t-brackets and screws for the build, so I had the parts on hand to measure. I went into Fusion360 and began marking up some very basic shapes for the camera rig. When looking closely at the ILM camera rig (courtesy of John Knoll and co.), the translating stepper motor is mounted directly on the moving rig itself, with a decently clever system.
Screenshot_2021-04-29_131633.png
Screenshot_2021-04-29_131503.png

Much like a 3D printer, the stepper motor rotates the pulley/belt system, and the belt moves, except this time, the stepper motor is not fixed on the end, but rather the assembly itself, which makes everything nice and consolidated. The belts seem to be tensioned with some flat grooved idler pulleys, which can easily be found on amazon. In terms of the stepper motors, ILM is using Stepperonline's Nema 17 & 23 stepper motors. The translation motor is at a 15:1 reduction while the others are a bit unclear. For my purposes, the remaining can be 5:1-10:1 since torque is not too needed for yaw and pitch. Here is an image of the basic CAD I quickly mocked up:
Screenshot 2021-05-02 184131.png

It does look pretty basic, but it's good to have some starting mates in the assembly to get an understanding of scale.

This project and my other work can be found at: www.matthewwinchell.com
 
Continuing with the actual Razor Crest model, I was able to print many more parts out. It's really starting to take shape, and I am hoping to print the remaining parts once I get some more resin cartridges (I am using Formlabs standard Grey V4, resin).

I printed out the engine parts and started to carefully glue and clean up some of the other prints. Here's a rough look at the assembly:
PXL_20210427_182523712.jpg
PXL_20210429_214437598 (1).jpg

Alongside the CAD, I was a bit gitty and decided to do research on the engine lights. In the Facebook group, there aren't many posts regarding specific LEDs, especially for 1:72, so after my research, I went ahead and grabbed an Adafruit Neopixel ringlight. Here is a quick test I did with some wax paper to diffuse the light:
PXL_20210503_020239549.jpg

It's not incredibly bright, but it will look better in the dark when I eventually shoot some shots of the ship in its full glory. Speaking of the ship again, here is a quick CAD model of the ship with a cheap attachment rig using servo city actobotics parts:
Screenshot+2021-04-22+192616.png

There's a clamping line along the length of the ship that can be accessed from the rear hatch, and one from the sides. These mounting points are supposed to be the same as the ones used in the show. A sturdy rod that can be clamped from the assembly will connect from the ship to the ship roll motor.

For now, I am still waiting on a new batch of Form resin so I can print the remaining parts.

As always, this project and my other projects can be found on my website: www.matthewwinchell.com
 
Super excited to follow along here, and impressed at your range of skill/ambition in tackling this! The ILM video on Knoll's rig was surprisingly in-depth for what we normally get with the Disney bts stuff, but still left so many questions unanswered. Absolutely love the idea of a modern home-brew moco system ... best of luck to you!
 
As a quick update, I've printed out nearly every remaining part for the Razor Crest and I am moving on to gluing the whole thing together. I'm holding off on some areas as I am waiting for my servo city parts to come in for the internal clamping assembly.

In terms of the camera rig, I discovered through closer inspection that John Knoll & co used some C-Beam specific platforms from Maker store, or at least the specific products they sell there. I was able to actually snag a 1500mm long C-beam off their site for 35$! I bought a bulk order of that with some other stuff and am hoping it will come in soon.\

I'll make sure to update my website to reflect this progress: www.matthewwinchell.com
PXL_20210511_020350238.jpg
PXL_20210511_020344652.jpg
 
Last edited:
As a quick update. I am taking a break from the project for a tad bit. I have a deadline to get BB-8 painted and rolling, so I'm putting all my focus into that.

I did get my 80/20 c beam and mount plate parts, so whenever I do have the time, I can start building the camera rig.
 
So the break wasn't as long as I thought! I got my BB-8 painted well enough for his shoot & have decided to take a long break from that project (I have been at it for around 5 years).

I wanted to immediately jump back into this project, so I returned first to the CAD. Funnily enough, I was rewatching Adam Savage's interview of John Knoll & Goodson and discovered way more reference images of the camera and model rig:

1.png
3.png
4.png

5.png


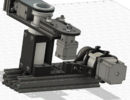
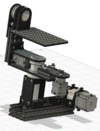
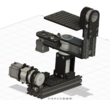
With these images and some previous ones I screenshot, I spent a long two days CADing up the camera rig. As I mentioned in my earlier posts, I CADed everything around a couple of parts, that being the stepper motors, C-beam extrusion, and mount plate. In terms of hardware, I tried really hard to keep it within two screw sizes, M3 & M5. Despite there being several different lengths, you will only find those two sizes, especially since everything was CADed in metric.

Another thing I wanted to mention was the material choice. I was jumping back and forth in my head if I wanted to go the aluminum or the 3D printing route. I eventually decided on 3D printing, to which all of the parts were designed with that in mind. I chose 3D printing for a couple of reasons:

1. I don't have direct access to a machine shop, so producing aluminum parts would take longer
2. I'm pretty adept at 3D printing and feel more comfortable with it than machining
3. I hope to make this open-source for you guys and I know 3D printing is very accessible to many of you.

Furthermore, I will try to experiment with at least two different filaments, PLA & Carbon-PLA. I have never tried carbon-pla, but have heard great things about it. Perhaps I can 3D print the 80T pulleys out of carbon-pla if everything works out. I'd hate to have to bore out a 40mm hole in three pulleys.
 
Here are some images of my CAD. I tried pretty hard to recreate John Knoll's creation, and I think I nailed it pretty well (with 3D printing in mind). The linear stepper motor has more bracket pieces, however, as going for a single bracket mount would guarantee unwanted flex:
Screenshot 2021-06-18 115233.png

Screenshot 2021-06-18 135930.png
Screenshot 2021-06-18 135944.png


In this version of the CAD, I thought socket heads would be a good idea, but I realize it might be better to have the M5x14mm screws be button. I spent enough time on this where I feel comfortable to start printing out some parts. As I mentioned, I will be testing carbon-pla in addition to just pla.

Also, here's a look at the C-beam. It's so long!

PXL_20210618_210406559.jpg


I'm making a lot of good progress and hope to do a test in the near future. Until then, peace!

My other work can be found on my website:
www.matthewwinchell.com
 

Attachments

  • Screenshot 2021-06-18 135944.png
    Screenshot 2021-06-18 135944.png
    1.4 MB · Views: 137
  • Screenshot 2021-06-18 135930.png
    Screenshot 2021-06-18 135930.png
    660.2 KB · Views: 133
  • Screenshot 2021-06-18 115233.png
    Screenshot 2021-06-18 115233.png
    1.1 MB · Views: 141
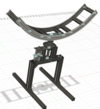
Quick Update: Here's a look at the work-in-progress motion-controlled miniature rig. I was able to find the quarter circle rails that were used thanks to a kind guy on discord who's been helping me identify certain parts and such.

I think the biggest challenge will be CADing up a mounting plate where V-wheels are attached to in addition to the motor that will be swinging the model along the curved rail.

Screenshot 2021-06-21 154741.png

I'll post again soon when I have a decent mockup of the full thing ready.
 

Attachments

  • Screenshot 2021-06-21 154741.png
    Screenshot 2021-06-21 154741.png
    726.4 KB · Views: 124

Your message may be considered spam for the following reasons:

If you wish to reply despite these issues, check the box below before replying.
Be aware that malicious compliance may result in more severe penalties.
Back
Top