Here?
View attachment 1473838
Thank you sir.
Yes, very zoomed. As you know, you can't even SEE those superglue smears until I take a picture to post. It's usually why they're better in the next picture because I start removing them once I see them... IN THE PICTURES. It's a conundrum.
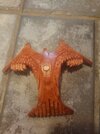
Ok, little confession here myself. I ain't got a clue about accuracy either! I'm using the exact same reference that has been mentioned and shown in this thread already and ain't got a CLUE what the majority of them parts is I'm looking at. I do know some here or there, maybe, but not alot. Just fiddling with this model kit, I've found out that the reference shows a model that changed severely since it was filmed for the show. All I'm doing is replicating what I see in those few pictures only to find out that MIGHT not be correct. Take, for example, those parts I built a few posts ago I called "snake scales" that turned out to be SOME kind of 1/12th scale Ferrari engine. Did I whittle the right kit? Who knows. I found 20 pictures of a 1/12th flat 12 ferrari engine and picked one that gave me something to go by. I helped that I found a good picture of a sprue. Those pieces you mention, again, I believe are some form of formula one racing car cowls. Looks like on the reference, there's about a 1/12th with a 1/20th inside of it. COULD BE WAY OFF here. don't know. What you see in those pictures is a 1/12th and 1/20 vac-formed over a wooden shape, I whittled, made out of .010" sheet styrene. Your "comment" that you called "critique" actually made my day! Fiddling with that inner ring took a minute or two!
C'mon, you can hit me harder than that!
")
Seriously though, Thank you!