Millennium Falcon Bunk Bed Build - TFA Details 5/8 Scale

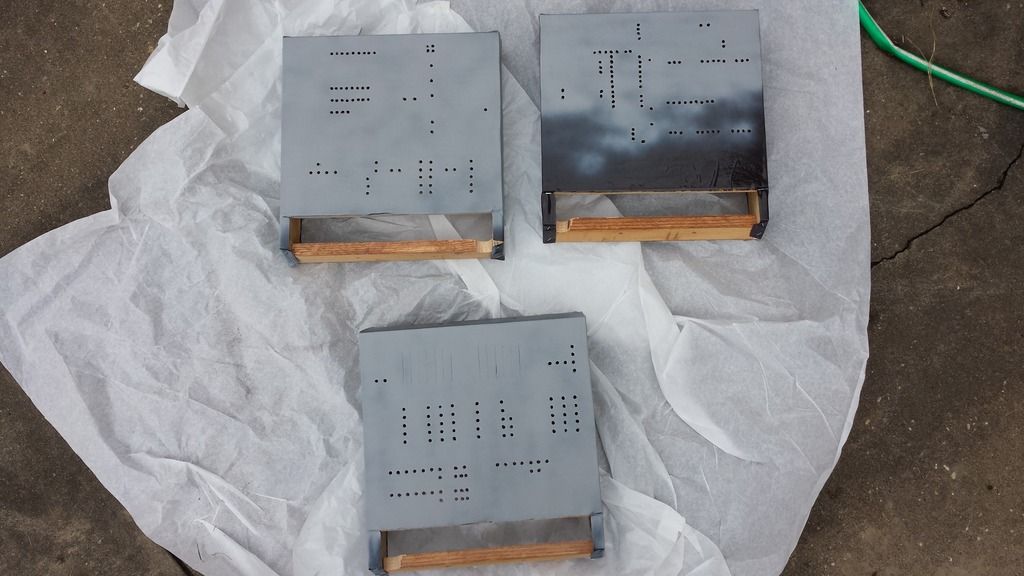
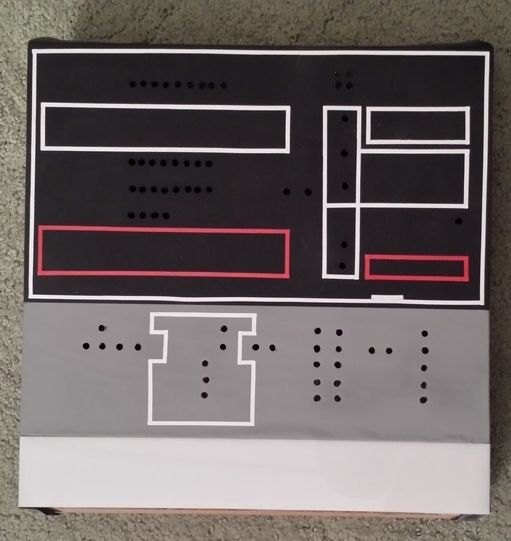
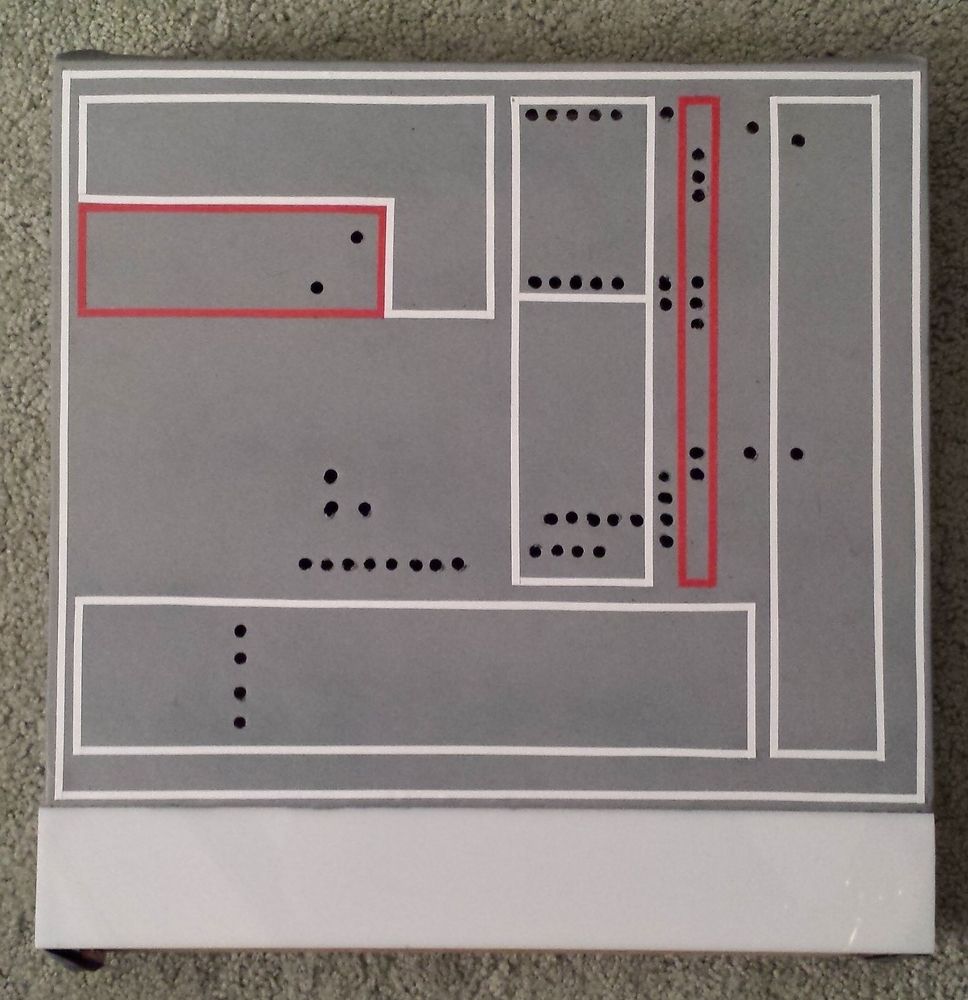
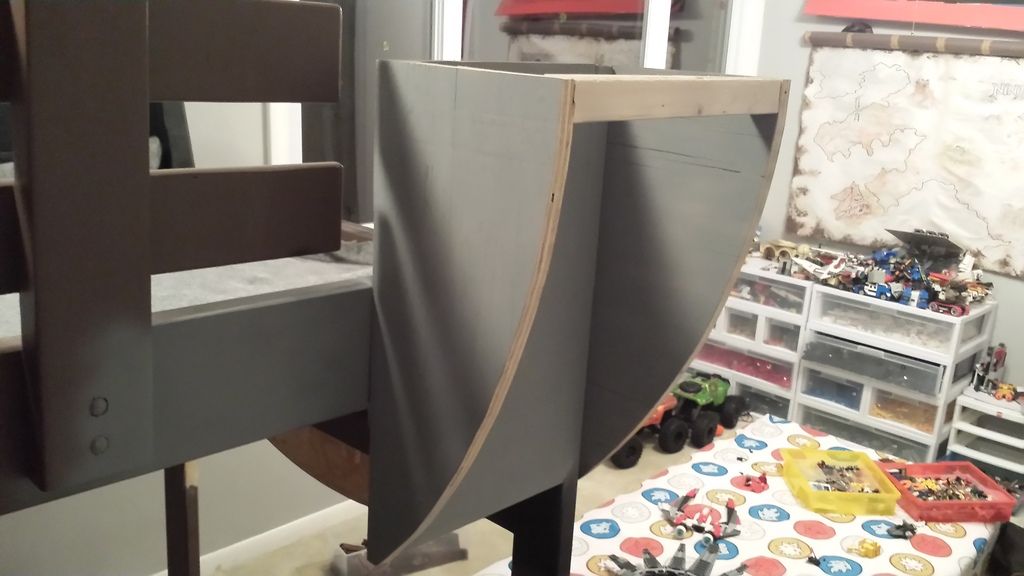
Any day I can work on this is an accomplishment in and of itself. I managed to get outside and poke about 300 holes in the four panels. I originally used a soldering iron to burn a hole through with the idea that it would cauterize the edges and make it stronger. All it did was make it a stinky, ashen mess. Not to be discouraged, I took the operation inside and used a hole punch from a leather working project. This worked like a charm and I am thrilled with the results.

20160314_192442_zpshmky1t2b.jpg


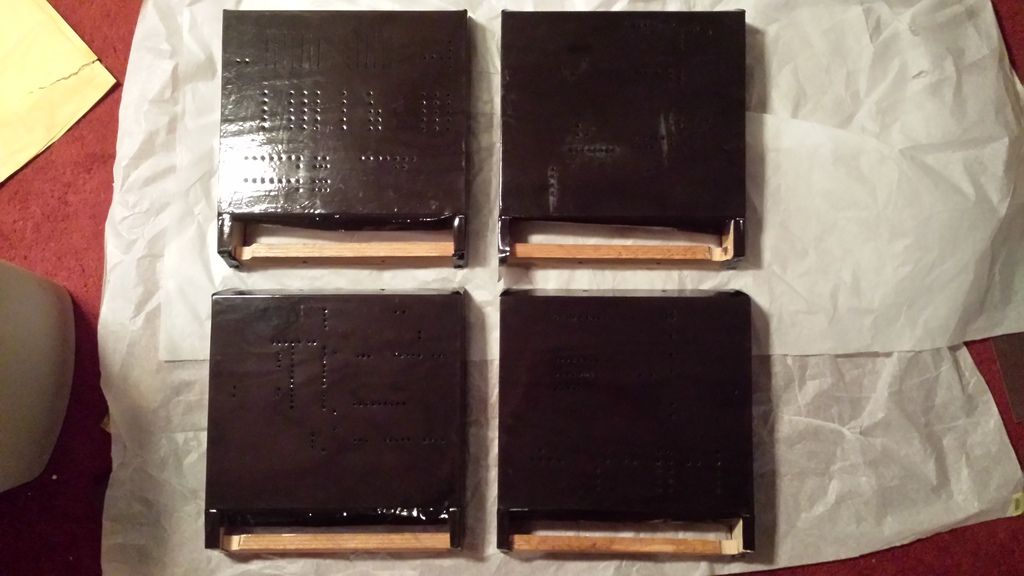
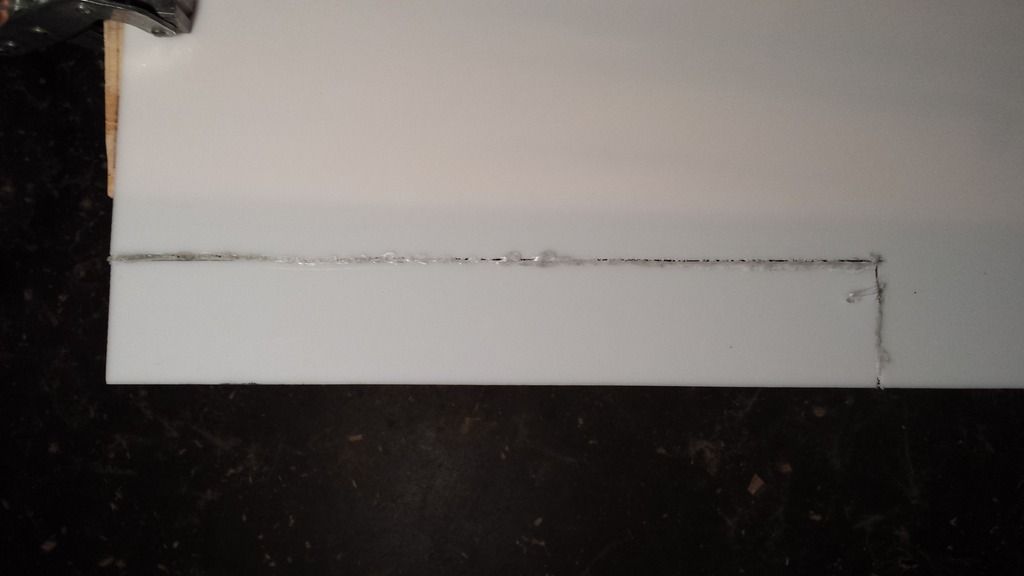
The trick is to make sure you’ve got a solid base. A good clean hit means a lot less clean up with your X-acto knife. Also, try not to destroy your fingers… I’m 9 for 10 in that department.

20160314_192602_zpsozmyksim.jpg


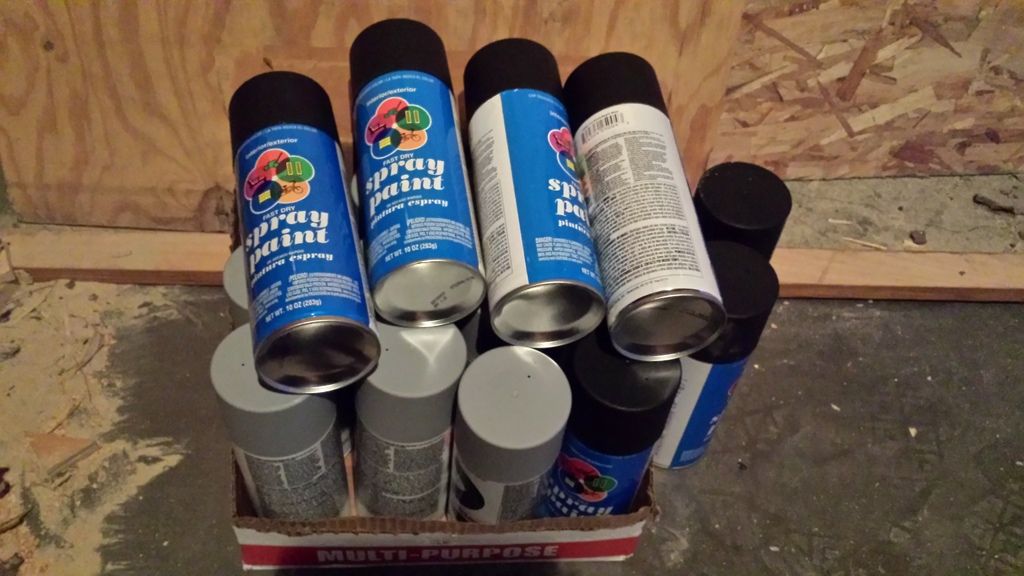
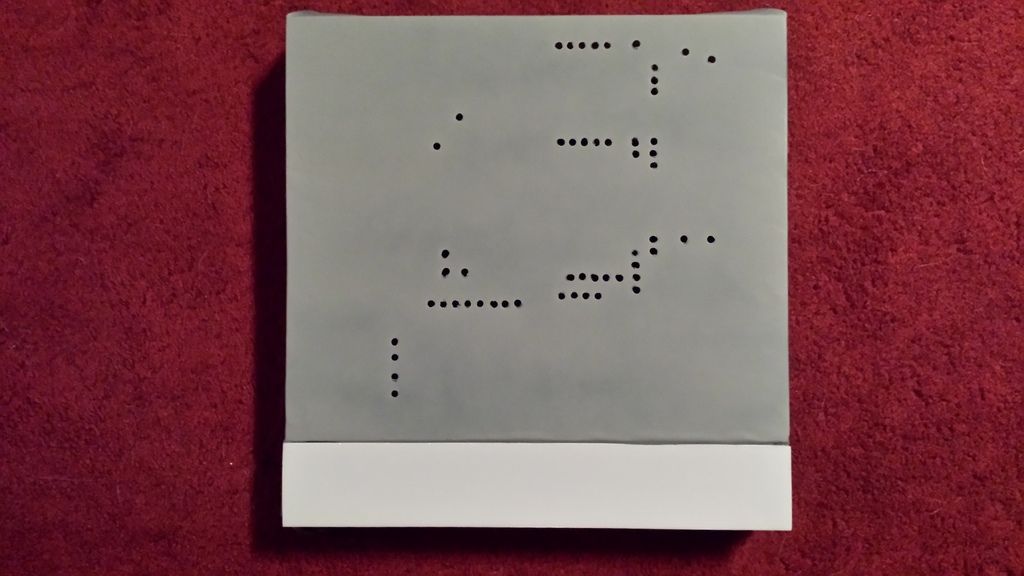
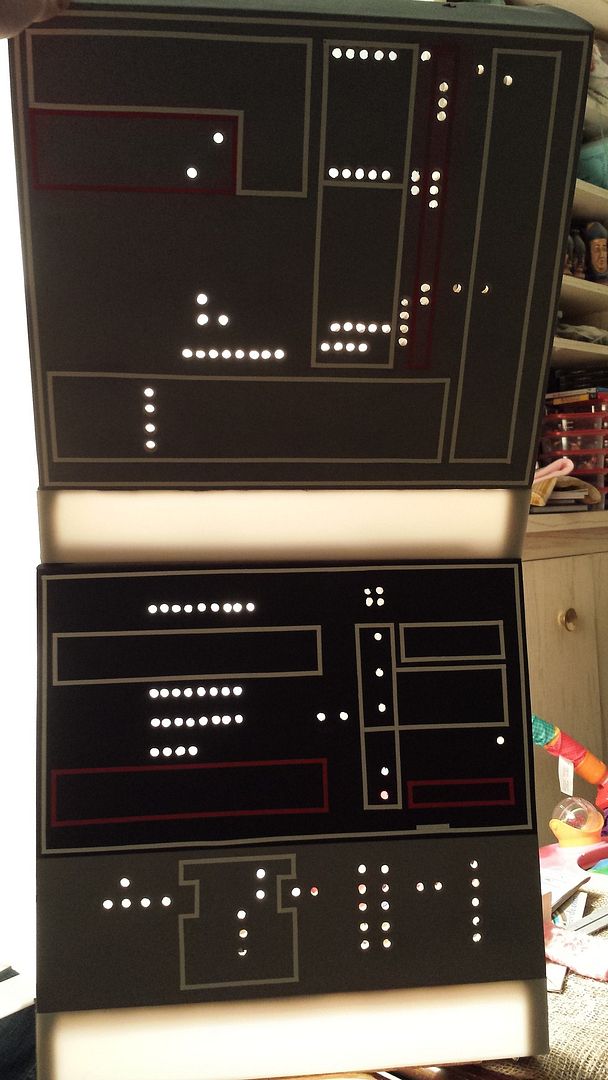
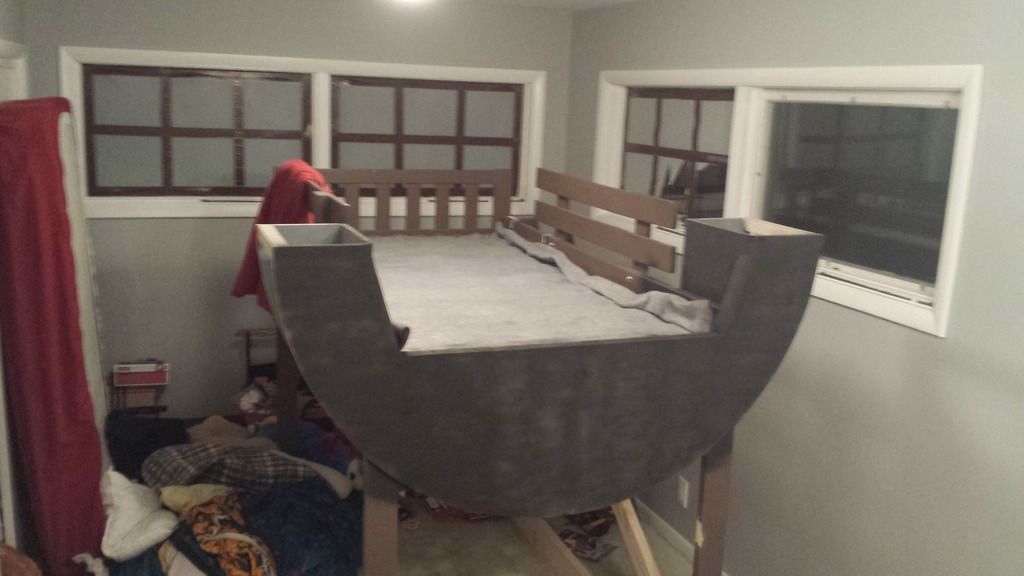
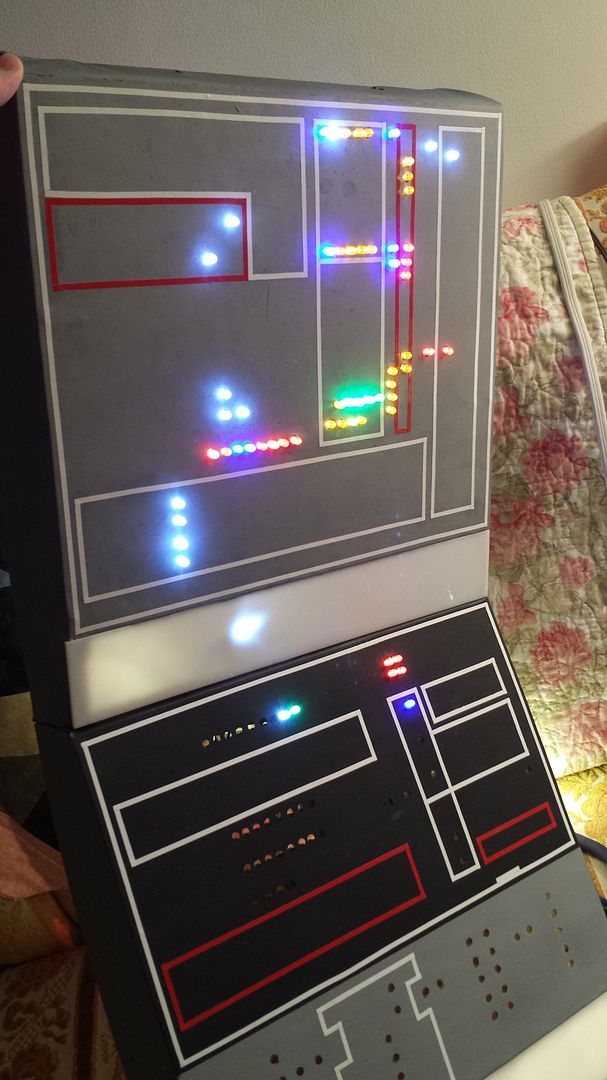
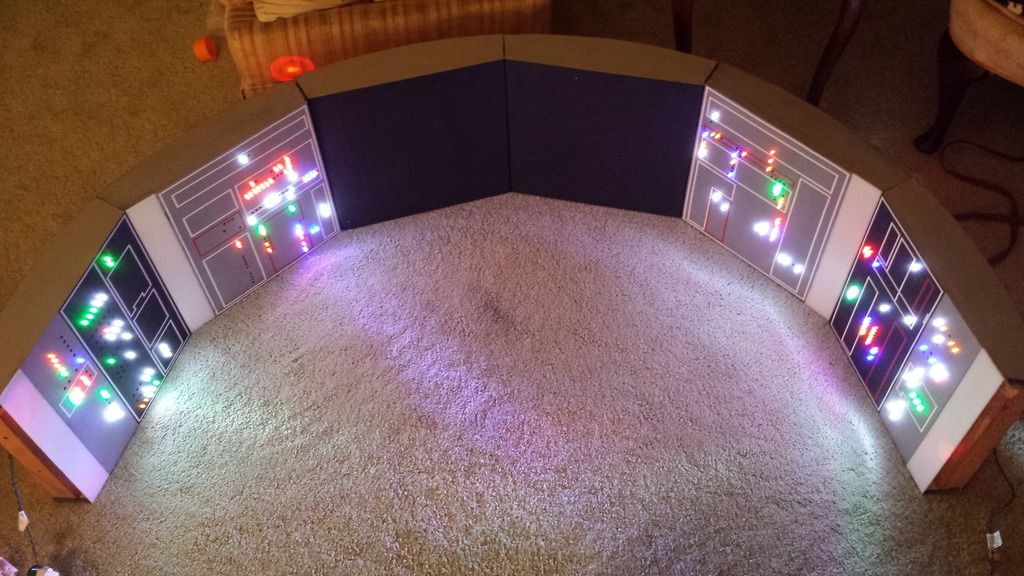
Finished all the holes and held it up to the light to get an idea of what it will look like. I’m very happy with the progress. Next up, I’ll rough and paint the surface... then comes the lights!!!

Thanks all and I’ll keep building!

- - - Updated - - -

can't wait to see the complete one

I can see it in my mind's eye. Sir Alec Guinness is there in ghost form :)
 
Before the torrential downpour we received, I got outside and threw a coat of grey on a couple panels. Enjoy!

20160315_163447_zpsqg4ijkxe.jpg


Humidity was high and my paint supply, low. It's patchy but I was just doing a light coat to start. I roughed the vinyl with some 320 grit sandpaper before starting. I'm hoping to get them all finished tomorrow.

20160315_163419_zpsu865ikx1.jpg


Co-pilot's side panel with the EQ looking controls. I plan on making some custom faders and jamming them in... I'd be surprised if it works lol.

Short and sweet tonight but I'll keep building!
 
My goal was to paint all panels and prongs tonight. Well, mission accomplished! Enjoy :) After a trip to the store, I was locked and loaded.

20160316_192941_zpsang4o1vt.jpg


The lower panels incorporate both black and gray. There’s some artistic license involved in the layout since the centerline of my ship varies from the screen prop. The top two panels (not pictured) are all black with gray sides… which I’m realizing as I write this that I forgot to paint the sides. :facepalm

20160316_212457_zpsbiylalri.jpg


Next step in construction is to add the light bar. I have a large piece of 1/8” plexiglass that literally fell from my bathroom ceiling a year ago. Rather than throw it away (or fix the problem) I saved it. Sometimes, it pays to be a pack rat.

20160316_211953_zpsexmrgevs.jpg


It’s a little big but you’ll forgive me… I’ve never cut plexi before. I was in for a shock when I cut it with my jigsaw and it immediately melted back together! :lol

20160316_210413_zpslpgr8man.jpg


I snapped it loose and filed the edges but is there a better way to do this? Maybe score and snap? I suppose it worked and that’s all that matters.

One more general question. I’m using flat paint for all this but should I be using a semi-gloss? If so, I can go over the paint with a clear coat or something. It’s something I didn’t notice until trying to re-create. Looks like we’ll be watching ESB tomorrow night.

I’m not sure if I’ll have the opportunity to work on it tomorrow but this weekend is gonna see some major progress. My jigsaw has been napping long enough!!! Thank you all for your kind words and support… I’ll keep building!

- - - Updated - - -

Awesome man, great dad! can't wait to see more.

Thank you, Fuzzual! More is on the way!!!
 
This weekend was exceptionally fruitful! I was able to finish painting all the panels and begin the fun part of adding some details. I had such a blast that I forgot to update my thread ;) The plexiglass responded well to my ******* file and I got all four sections cut to size and glued down with E6000. I am using 1/8 inch pinstripe tape ordered online.

My clamps would not work to hold the plexi while the E6000 set due to the curvature of the back of the panel. That meant holding it in place by hand. Ugh! Binge watching Daredevil season 2 made this part more tolerable.

7ef9ab17-3198-4995-9608-03fba015a984_zpsvhx0b9xh.jpg


The grey spray paint I use is a different brand than the black and is not sticking quite as well but with the black vinyl underneath, any scratches or smudges appear darker and weather the panel quite well. After a few weeks of play, they’ll fit right in to the grimy Star Wars universe.

f6772d35-340c-4014-8085-a5a1e21393f9_zpsb2koykz4.jpg


I re-assembled the pilot side panels and held them up with a lamp behind.

1458613663890_zpsijc6zbq3.jpg


I also sprayed a layer of paint on the bunk bed section. Even with the windows open (despite 40 degree temps) and fans going, the whole house stunk. That means I’ll be picking up a quart of grey and black to finish that up by hand.

20160321_201930_zpsxf0egtsi.jpg


I’m planning on making these side areas accessible storage using some cabinetry hardware. The wood grain on the back is making the perfectionist inside me cringe. It’s just a little thing… but details like this are what make or break a project. I will hit it with wood filler, sand, and re-paint.

20160321_201955_zpsbdf4vwam.jpg


Finally, don’t mistake a lack of updates for a lack of progress. As I say when I close every post, I’ll keep building!!!
 
I’ve never cut plexi before. I was in for a shock when I cut it with my jigsaw and it immediately melted back together! :lol

I’m using flat paint for all this but should I be using a semi-gloss? If so, I can go over the paint with a clear coat or something.

Hey HW,

Do you have access to a laser cutter? Is there a graphics shop or lab in your area? That would really help. If not, I would try scoring the plexi over and over until you think you can snap it. Unfortunately, the jigsaw generates too much heat...

Also, When I apply pin stripes I immediately spray several coats of Satin Clear (3-5 coats) - a semi-gloss or gloss will be too reflective. This keeps the pin stripes in place and also adds a bit of the reflective surface you're looking for.

Hope this helps! Looking forward to the next update!

EDIT: If you want to add any greeblies let me know. We might be able to help. :)
 
We found an hour tonight to get the kinds involved some more. They worked their little fingers to remove lights and I clipped off the tabs. The light string itself has a mount for the tab that I had to remove with a pencil grinder (dremel) although a file and patience would suffice. The picture will explain better. Left, an unaltered Christmas light with fancy tab. Middle, some oversized ******* that won’t fit anywhere (there’s a few of these on the light string). Right, a clean, finished light ready to be pressed into service.

20160321_231324_zpsdvibnyb1.jpg


And press them in I did! I am SUPER excited about how this is looking. I plan on covering a few white and blue with ½ inch square plastic to better mimic the actual prop.

20160322_213520_zpsi4gy9oij.jpg


I ran out of time (and pinstripe tape) so I’ll order more and get after it again tomorrow. Why have I jumped to this finishing stage before completing the rest of the falcon you ask? Not that you did, but I’m kinda scatter-brained and like to work on different things. I’m also working on yokes but I haven’t made a lot of progress on that, just bits and pieces. Once I complete the 6 cockpit panels and re-paint the bed frame, I’ll start building out. That means the actual cockpit and seating area. Then, the center console with yokes, nav screen, and of course, more lights and pinstripe. Last will be the outer skin. That’s the plan, anyway… but things may change. As always, I’ll keep building!
 
Hey HW,

Do you have access to a laser cutter? Is there a graphics shop or lab in your area? That would really help. If not, I would try scoring the plexi over and over until you think you can snap it. Unfortunately, the jigsaw generates too much heat...
Thanks SK! I don't have access to a laser cutter but luckily, the plexi is all done.
Also, When I apply pin stripes I immediately spray several coats of Satin Clear (3-5 coats) - a semi-gloss or gloss will be too reflective. This keeps the pin stripes in place and also adds a bit of the reflective surface you're looking for.

Hope this helps! Looking forward to the next update!
That's a great tip about the satin finish. I'm thinking of doing that after finishing up with the lights to dull them and make them less... um.. headache inducing? Your thoughts?
EDIT: If you want to add any greeblies let me know. We might be able to help. :)
I REALLY appreciate the greeblie offer! I think we've got everything we need but I'll keep that in mind.

- - - Updated - - -

Fantastic!
Thanks HEMADEW!
 
That's a great tip about the satin finish. I'm thinking of doing that after finishing up with the lights to dull them and make them less... um.. headache inducing? Your thoughts?

Hey HW,

I would suggest using a rubbing compound (not polishing) and buff the lights to a dull haze - that's a LOT of buffing. But seeing they are already installed the satin finish "might" work. But I don't know how the heat from lights would or might effect the finish.
 
Disastrous night tonight! I was down to installing the final 20 or so lights when half of them went out! I knew there were going to be set backs but I spent 3 hours on those panels!!! Now, I have to find the short or yank the lights and start over. :angry

I’ll keep building… and re-building.
 
My family and I enjoyed spring break but now it's back to business. Several RPF members posted a link to the panoramic view of the Episode VII cockpit. If you missed it, here it is:
http://www.starwars.com/news/star-wars-360-view-the-force-awakens-set-panoramas-at-starwars-com
While this is SUPER cool... I'm not trying to get every nook and greeblie exactly right. I am trying to capture the feel of it within my space, budget, and time constraints and so far, so good.
I had to remove most of the lights I put in the panels after several went dead. I no longer have enough to complete the panels (or even fill in the holes!) but I'm going to assemble them anyway and perhaps move on to the nose section this weekend. Progress is slow but slow progress is better than no progress.

I'll keep building!
 
Finally took some pictures to prove I’ve been back to work! I get about 1 hour a night after the kids go to bed to tinker with the quiet stuff. I finished the pinstripe and got all the lights (that work) put into the panels. I’ll need to order more and of course, they’re hard to find out of season… even on the internet! I’ve decided against assembling the panels just yet since that would make installing additional lights more difficult. Enjoy!

Pilot side

20160405_203717_zpskqkzadva.jpg

Co-pilot side

1e169fcc-01e2-48e0-b17b-1d859616dbaa_zps6pe5pwsf.jpg

The whole canopy!

20160405_203549_zpsyvd3eseh.jpg


The lights are too intense so I’m thinking of installing a dimmer switch… that should work, right?

I’m hoping to get back in the garage tomorrow and make some more saw dust. Until next time, I’ll keep building!
 
Back
Top