MCU Spider-Man - 3D Print Files/Pattern - FREE

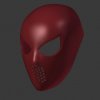
Hello guys! Its was a free time so i made Spidey CW FaceShell to Ken Landrum's lenses. Anybody intrested?: )
View attachment 647981

Also I don't suppose it would be possible to add holes so that the 3d printer is spared from using too much filament? Like the image below? Or would it be better to just drill them in after? Thanks!

625x465_10068802_6944940_1459338565.jpg
 
Has anyone already 3D printed Kenlandrum's new webshooters? Would love to see pictures of them as I'm still thinking about ordering them!

I'm trying to print out the new webshooters but the files aren't working out, I had the same problems with the CW file when Ken first made the file but eventually I got it to work. If I get them printed out I'll snap a pic and what I did on my 3d printer to get them out
 
13663581_10210191613889168_1859231364_o.jpg

The file was kinda faulty, it would fill in the lens area but I'm not sure if it was my printer or not. I sent the file through the netfabb cloud service to repair it in case it was damaged and it came out perfectly! If you need the specs on my printer lemme know but I'm using the Aio Zeus with a 20% infill, and the extruder distance was .12mm
 
Last edited:
Something I noticed that isn't on your file is on the black band that goes around the boots is supposed to go down and has a small gap thing. It is also this way on his Homecoming suit. I would change it myself but I'm no where near skilled enough.

wp_ss_20160730_0007.png
 
Has anyone tried printing the Home Coming web shooters? I spent a good two weeks trying to print it out and I tried a couple things but I've had trouble with both the top and the bottom. First I tried printing it out right from downloading it, but the sides weren't being supported, so I added support which created a mess in my 3d printer. It would only support the body but not the sides. I tried fixing the print in case it was damaged but same thing would happen when I tried to print it out. I noticed that on the file the sides are at an angle View attachment 651658 so what I decided to do was flip the print upside down then add supports and print it out. I finally had a tangible piece instead of a glob of extruded filament but the pieces were very crude. I forgot to take a picture of the bottom but here is the top.20160805_142617.jpg This pic shows the supports20160805_143042.jpgThe print shifted in the beginning so I'm missing a piece on the bottom so I'll be crying for days about that as I reprint two more but. If your printer has a heated base I think they might come out beautifully, without having to flip it upside down. Flipping it upside down lessened how much support there was but the top of the web shooter is just not clean at all. I printed them at 60% with the extruder at .12mm. It took 4 hours and 48 minutes. My print speed was 80 mm/s for EVERYTHING which could be the reason why it shifted in the beginning and why right side is so wrecked. It didn't help with the all around time for the print I thought it would but it was going just as slow if I had used the default speeds on my printer. But hey, if I want a damaged looking webshooter I could use that one -_-" Good luck guys
 
Don't know if this was posted before, but this is IMO the best reference of the lenses
CmJy7Y2VAAAzf-9.jpg
Also, this pattern is looking amazing, only thing I would update are the seamlines
 
I know they're visible but I don't anyone has pointed it out
The cartridges aren't flat black anymore
They have silver edges and dark burgundy accents


Sent from my iPhone using Tapatalk
 
Capture.PNG

Looks like there's two layers to the top and a bunch of new details on the bottom. Also it's gotta be rubber or something flexible for the long part that attaches to the button. Could be the reason why there's two layers. One is flexible and the other isn't.
 
First of all, I have been following this thread since it started. Just lurking, but I have to say OMG thanks everyone for the interesting read. A HUGE thanks to Kenlandrum for starting it and the amazing free art! I didn't see any one add these, so here are some pics I came across. Hopefully they help with the project in some way. Again thanks

spider-man-swings-into-action-on-set-09.jpgspider-man-swings-into-action-on-set-13.jpgSpidey-Night-12-817x759.jpg
 
..and looks much better than the final result in the movie with raised webbing :D.
While I do agree with what we got in the movie was not as good looking as the real thing, I do prefer the flat web lines on the CW/Homecoming suit as opposed to the raised webs. After the Raimi trilogy and the Amazing Spider-Man 2 it's a pleasant change to see a different approach to the character's design without doing something radically different like the first Amazing Spider-Man films outfit.
 

Your message may be considered spam for the following reasons:

If you wish to reply despite these issues, check the box below before replying.
Be aware that malicious compliance may result in more severe penalties.
Back
Top