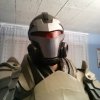
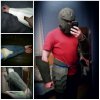
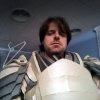
Mass Effect Blood Dragon - 2014

eidylon

Active Member
Okay, so while I've done about a half-dozen props, I completed my first cosplay about a month ago. For my first attempt, I had chosen the Mass Effect / Dragon Age crossover Blood Dragon armor. I figured the fact that it had a lot of large, flat areas without too much detail would make it easier for a first build. It also however made for large open areas where it was hard to hide bad seams and foul-ups! Live and learn - lol .

I started it shortly after NYCC 2013, and had some false starts, and some slow going at the beginning. But then I think it was about July or August I had time to buckle down and go whole-in and managed to finish it in time for NYCC 2014! This was my first time dressing up in costume since Halloween when I was about 5 or 6 years old! LOL Was a tad bit nervous, but a veteran cosplayer friend who went with me assured me "Don't worry, once you're in costume, it's really nothing!" She was right! :cool

I also threw together a foam version of the M-358 Talon heavy pistol to go with my armor, since the con was rumored to be throwing away people's non-foam props. May do a separate write-up on that, but it's pretty similar to my prior Talon build, just out of foam instead, and with a little less detail as it was thrown together in about 20 hours.

I went with a different color scheme than the usual shades of silver. I took my colors - with a little liberty - from this reference image...
1000px-ME2_Blood_Dragon_Armor.png

I'm working from the files extracted by Darhood, and then unfolded by Zero-Sama and myself.
The complete set of files is zipped up and available here: All Blood Dragon Pep Files .

I'm going to split the write-up into a number of posts on this thread. So without further ado, let's go!!!
 
Last edited by a moderator:
:: Helmet ::

The smart thing to do, as Joshua Cullen suggests, would've been to start with the feet to get my bearings with the material, especially being my first build. Of course, ... feet aren't exciting! So, I started with the helmet! :cool

Of course, being my first build, there were a couple of false starts here...
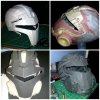
Originally, I had started doing the build in card-stock, figuring to do the whole bondo/rondo thing. After an inordinate number of hours cutting out and taping a zillion little pieces of paper, I started on the bondo process. After many many hours of sanding to little effect, I decided that is not the method for me! I wanted to finish before I turned 50! :rolleyes

So... I started in on a rebuild in foam, with hot glue. I hadn't found the floor mats yet, so I was using some foam I had ordered online.
While I finished this one, it was over-scaled a bit, and the foam was pretty flimsy. I also wasn't keen on how the seams came out.
BUT --- I wanted to move on to other pieces and keep it moving along. So it stayed for the time being.

false helmets.jpg

Once the rest of the build was pretty much done, I came back and rebuilt the helmet. By this time, I had found the Harbor Freight floor mats, with the nice carbon-fiber texture. I had also by this point switched from using hot glue to contact cement for building. For me personally, I find the contact cement works a lot better. I thought the "dry" time would be a problem, but if you plan right, it's not.

IMG_20140713_200055.jpg


Of course for the Blood Dragon, the faceplate of the helm is a very distinct, and unique design... just putting that together makes it already look like something pretty impressive! :cool
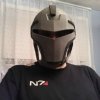
And once I had the bulk of the helmet done, .. well, yeah, it demanded a test fit!

IMG_20140712_034507.JPG IMG_20140721_024537.jpg


After I'd gotten the air-exchangers on the front completed and added on, I chromed up the faceplate with some Krylon metallic chrome spray.
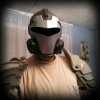
The rest of the armor was all painted with Rustoleum sprays. Once I had it all up, with all the parts on... well, another test fit!

IMG_20140802_024110.jpg IMG_20140805_214757.jpg


Finally, the last piece that needed to be added was the visor. I wanted to do the whole shaped plastic and all, but given time requirements and current skills and equipment, that was out. So I was left searching for how to do this. I know a lot of people in other helms use motor cycle visors, but I wasn't sure if they'd actually fit, given the angled shape of this visor.
Ultimately, I was wandering through STAPLES one day and found my answer!

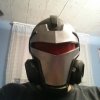
The finished visor in here is simple cut out of a translucent red vinyl file folder! I thought it might be too see-through, but once my head was inside and it was dark behind the visor, it was pretty opaque. All in all, I think it worked pretty well! Given how thin it was, it didn't require too much heating and forming, and I just glued it in on the inside with beads of hot glue along the edges.

IMG_20140921_212238.jpg IMG_20140924_012059.jpg
 
Last edited:
:: Vambraces ::


Next up after the helmet was the vambraces, or forearms. Again, had the same false start here with the inferior foam initially used for the helmet.
Scaling was handled better this time though. I first built the piece out of card stock (but with no intention of bondo/rondoing) to get a sense of the size.
I then worked off that, measured the piece, measured my arm, and adjusted the pep file, rescaling it before reprinting it and building it in foam.

failed vambraces.jpg

Again towards the end of the build, I wound up rebuilding these in the Harbor Freight foam, and scaled down more from the initial ones.
The main length of the vambraces were split in two (upper and lower), with a couple little slat pieces.
If I'd built them now, I probably would've joined the upper and lower halves; I've learned a lot about unfolding along the way of this build.

IMG_20140816_025107.jpgIMG_20140817_041908.jpg


The elbows were far and away the most complex part of the vambraces. Technically they are supposed to be separate and connected with pins.
But I'm not up to the point of doing my own 3D modeling, so I had to go with what the pep had.
While they may have been the most complex part, they also were the best looking part of the vambraces.

IMG_20140822_022027.jpg


As you can see, the original build of these (the one on the right) was just a TAD bit large! :lol

IMG_20140822_022109.jpg


These pieces were some custom additions. I added them mainly to make the top of the vambrace fit tighter around my arm so that it didn't flip around so much. I really like the way they came out though! This little bit of added edging just added an extra "something" to the look.

IMG_20140829_010901.jpg


While the new vambraces were the right size, it was a little tight to get my hand through the narrowest spot.
So I cut up one of the seams on the back of them about half-way, then made some flaps secured with the rare earth magnets.
This allowed them to open for my hand to get through and then secure shut.

IMG_20140826_214242.jpg


Painting was all done strictly with Rustoleum rattle cans. Most Blood Dragons I've seen are done in various metallic shades.
The reference image I was working off of though had more variety in the colors, so I went closer to that color scheme.

IMG_20140903_095414.jpg


While, like most of the Mass Effect armors, there is a lot of lighting on the Blood Dragon, I don't have the skills there yet (nor had the time here).
In lieu of most of the lighting, I used some sparkly foam from Michaels. While it's obviously not quite the same look, it was fairly effective I think.

IMG_20140926_092014.jpg
 
Last edited:
:: Hands ::


The hand plates were fairly simple. Did have to fudge a bit from the pep file though.
There were a lot of little tiny bits and pieces in the pep which were discarded for foam building.

Mainly I just cut out and templated the biggest surfaces of it, ignored everything else and fudged the stuff in between. :cool

IMG_20140503_021540850.jpg


They fit!

IMG_20140503_021707.JPG


These were done with hot glue, not contact cement, but I managed to get some pretty good seams.
That was a combination of the packing tape method (as shown here) and smoothing them out with the tip of the glue gun.

IMG_20140428_013454707.jpg


Hot glued some elastic straps on the undersides which hold them in place on my hands.
There are two ... one at the back, around the wrist, and one up front, goes between the thumb and fingers across the palm.
One basic coat of paint, and a little weathering, and these were done.
Like I said... pretty simple these parts. :)

IMG_20141003_023031.jpg


And that is it for tonight... more posts with the rest of the parts to come!
 
Last edited:
:: Greaves ::

The greaves had two parts... the shins, and the knees. The shins were pretty simple... basically just tailored cylinders.
Basically an even simpler version of the vambraces. Pretty straight forward and simple.

IMG_20140804_004346.jpg


The knee caps on the other hand were a bit more complex. These were another one of those cases where there were WAY too many little pieces in the pep file, most of which were discarded when working in foam. So there was a little bit of adjustment and fudging there. Were some pretty heavy angles too, which I didn't cut very well.
To fill them, I used DAP Dynaflex 230, indoor/outdoor latex sealant, and just kept smudging it into the gaps till they were filled and then smoothed it out with my fingers.

IMG_20140808_010023.jpg IMG_20140811_011437.jpg


Painting was straight forward... plastidip, then the Rustoleum sprays.

IMG_20140815_010625.jpg


The shins and shoes are probably my least favorite piece of this armor... the gap between them winds up making it look like your ankles are skinny little toothpicks! LOL

IMG_20141002_022104.jpg
 
Last edited:
:: Shoes ::


The shoes were definitely the easiest piece of the armor to build. While the pep file didn't contain any such info, and the shoes were not visible in my reference image, I took some liberties with alternating the face of the foam on the shoes. I made some parts flat while others have the carbon-fiber-textured side out. While I was building them, I was afraid the floor mat foam was going to be too thick, and make them too clunky, but once you're wearing them with the whole outfit, they fit in well in that regard. Once completed, they got the usual coating of plasti-dip.

IMG_20140916_212916.jpg
IMG_20140919_093150.jpg

Once the shoes were painted with the base colors, the process of weathering began. I had just read the Foamsmithing, vol. 2 book by Bill Doran of Punished Props. In the book he talks about something called weathering powder. I searched a bit locally but couldn't find any. So I hit on the bright idea to try eye shadow for weathering - I mean, after all it sticks to women's faces, right? Well, maybe it does, but it does not stick to painted foam. That idea was a bust. Since I was getting down to the wire of time, I fell back to the standard acrylic wash for the dirt pass of weathering. Roughly jumbled up numerous shades of brown and black, some orange and a little red. Dipping into water and then just dabbing among the colors, this thin paint mixture was "washed" across the surfaces of the boots and dark colors pressed into all the crevices, wiping most of it off the surfaces leaving just the darkened crevices.

IMG_20140930_013220.jpg
IMG_20140930_231621.jpg


After that, I brushed some thicker, darker colors onto the edges of the different pieces, simulating the edges having brushed through the mud and grime and accumulating more dirt than the rest of the armor would. Once all the accumulated grime and muck was applied and dried, The edges of the edges were hit with an uneven application of my favorite magical weathering tool - metallic silver Rub'n Buff! This stuff does wonders, when it comes to simulating exposed metal where the paint has worn away. If you're not familiar with it, go sparing! A very tiny bit of it goes a very long way!

IMG_20141004_001103.jpg IMG_20141004_004715.jpg
 
Last edited:
:: Tassets ::


The tassets, thigh pieces of the armor were fairly straightforward. They were the third piece I built, and so I was still pre-building in cardstock in order to scale the pieces. As I went along, I got comfortable enough where I would scale without needing to build it first. For the most part, the thighs are just a number of layered pieces, sort of like shingles on a roof. So pretty much it was just cut all the pieces out, curve them, glue them. That was it. No fancy stuff on these. You can see in the second picture how much it was scaled down from the original file size (in the cardstock).

IMG_20140406_235209953.jpg IMG_20140414_025135151.jpg


I still am amazed how much better a piece looks once you plasti-dip it! It goes from obviously being just a bunch of glued together pieces of foam to being a single unified piece. (There were a lot of very visible seams on these even after painting, because I was still learning what I was doing.)

IMG_20140729_221023.jpg


Paint... and weathering. Paint on these was also rather easy. Given the simplicity of the pieces, there was very little masking, and what there was was very simple. The weathering - as always - added a lot to the pieces! In the weathering picture, the piece on the right just has the acrylic washes, the piece on the left has the washes and the Rub'n Buff. As much as I could, I tried to use the weathering, the Rub'n Buff specifically, to mitigate some of the highly visible seams. There were quite a few small holes in the foam, which if I'd known what I was doing I probably would've filled in with the latex. As it was though, I didn't, so instead I hit each of them with a little touch of Rub'n Buff also, kinda figuring that they are small pock marks either from some shrapnel or a shotgun blast or something.

IMG_20140807_014610.jpg IMG_20141004_213121.jpg


And... codpiece. Not really much to say about this one. Probably could've done this all in one piece of foam, but it's pretty much just straight from the pep. Figured I'd include it here, as it goes on the belt with the tassets. lol

IMG_20140427_041031701.jpg
 
Last edited:
:: Rerebraces / Pauldrons ::


The upper arms and shoulders were one of my favorite pieces of this armor, second only to the helmet. The construction of the rerebraces was essentially the same as the tassets. They were constructed of one basic shape, repeated (at slightly different sizes) several times. The last, top piece was the only one that was different. This is the piece that curves over the top of the shoulder. The little white strip in the third picture, it was extremely difficult to get that piece built using the pep pieces, so I just cut a piece slightly larger than I needed, and then eyeballed the cuts on it to get it to fit right.

IMG_20140615_030236.jpg IMG_20140621_013957.jpg IMG_20140623_030012.jpg


The pauldrons on this armor are extremely simple in design. It starts with just a single, basically straight piece of foam that goes over the shoulder. The peaked pieces were a little tricky to glue together, ... I traced them onto the foam as single pieces, structured sort of like ribs attached to a spine. The probably would've been easier to glue if I'd cut each rib out separately. Once they were all glued together though, they did make a very nice, curved piece. Each one is two layers, ... an outer surface and an inner surface. The top edge where they meet didn't QUITE line up with the pep, but it worked out pretty well all said and done.

IMG_20140704_020252.jpg IMG_20140704_204443.jpg IMG_20140721_030029.jpg


You can see in the last picture above how the pauldron connects to the rerebrace. It is secured together with the plastic nuts and bolts used to attach toilet seats to the toilet. Thanks for that tip to Beer Money Props. To give them their base metallic coat, I drilled some holes in a piece of foam and then just screwed the bottom of the bolts into the foam. This allowed for being able to paint them with good coverage without needing to hold them and completely paint my hands! The ends didn't need paint, seeing as they would be inside, and not seen.

IMG_20140803_024516.jpg


Giving this was my first armor, strapping was a bit hard to figure out, and there were some mistakes made. The strapping under the biceps worked out well enough, except I forgot to adjust for left vs. right arms, and so on one arm the buckle is in the back, making it a bit difficult to clasp shut. The buckle to hold the shoulders to the torso required a couple tweaks as I put them in. First try, I glued the strap under the inside of the torso, this was WAY too low. I ripped them off, and punched them through from the TOP of the torso. This was better, but still was too low. The last modification was to shove a small foam shim under the torso side of the clasp. This wound up lifting it high enough that the shoulders then sat properly when worn.

IMG_20140803_024624.jpg IMG_20141123_023954.jpg


Painting was pretty straight forward. Two sections, the metallic and the bone. After that was done came the EXCEPTION to the "straight forward" bit. Being the Blood Dragon armor, it has a big, red dragon emblazoned across the chest, one shoulder and back. To paint this, I attached that one shoulder to the torso, and then just free-handed in the dragon in some red paint as per my reference picture (more photos of this in the torso section to come...). Once I had the dragon painted on, both shoulders got the usual acrylic wash treatment, followed by my trusty old friend Rub'n Buff.

IMG_20140805_012105.jpg IMG_20140930_233608.jpg


The foam I cut the one rerebrace out of had a big ol' air bubble in it. Originally I figured to fill it in with the DAP Dynaflex before painting and make it go away. Then I realized it was a nice opportunity for some good battle damage. So once I had the main painting done, I painted the inside of the bubble with some black paint, to give it contrast and make it stand out. Rub'n Buff was then applied to the edges of the bubble for wear.

IMG_20141004_121847.jpg
 
Last edited:
This is AWESOME!! I Love your use of both sides of the foam. I'm excited to see the end result!

Thanks! Yeah, having the carbon fiber texture on the foam to use for that is SO nice and adds such an extra touch to the build! Unfortunately it was only about half-way through the build before I found where to buy the good foam with that texture - Welcome to Harbor Freight! :cool

Prior to that I was using other tiles that had the diamond-cut safety tread pattern on them, visible in the picture of the inside of the rerebraces. The foam of those tiles was also stiffer, so didn't curve as nicely as the Harbor Freight foam. So the torso, tassets and rerebraces are all missing the nice texture. The torso and tassets I will probably rebuild ... but I really like the way the rerebraces came out. May or may not rebuild those.
 
:: Torso ::


The torso was BY FAR the most complicated piece of this whole project! Ideally, it probably should've been broken down into several different sections that would attach together, but I built it as it was in the pep file, all in one piece.

I started with the simplest and most straightforward piece... the breastplate! This was essentially just a large plate. It was constructed of a number of pieces. Ultimately, it didn't come out quite as good as it could have, because I was still using hot glue on this piece instead of contact cement. The large seams are quite visible upon close inspection, but hold up well enough from a distance after being painted.

IMG_20140504_044731071.jpg


Of the most difficult piece of the armor, the collar was arguably the most difficult piece of the most difficult piece! Ring after concentric ring of foam. Right here was most definitely the most difficult spot to try to manipulate the paper pep into foam. There were a LOT of edges to discard here, and a LOT of constantly very dynamic very angular cuts to make here.

IMG_20140504_183232186.jpg IMG_20140510_020753.JPG


Once all the layers of collars were constructed, I started working outwards from there and back around and over the shoulders towards the back. Most of this was pretty straightforward, although I might build things in a slightly different order if I rebuilt it. I did wind up with on little spot on both sides, visible in the third picture, where I couldn't make the pieces quite fit. I cut some nicely shaped pieces to cover over these gaps later on.

IMG_20140511_193315.jpg IMG_20140517_030653667.jpg IMG_20140519_014739929.jpg


This little detail on the back came out really nice! It's just a tiny little angled edge between the back and the neck and the plane over the back of the shoulder. Despite it's smallness, I just really like how it looks. :cool

IMG_20140519_014834290.jpg


After I was finished up around the neck, I worked down the back. The framework was easy-peasy.

IMG_20140524_042847586.jpg IMG_20140525_022323356.jpg


The details on the back, those were a little tricker. The rectangular thing in the middle ... (power pack?) was fairly simple... cutting out the circle was a little tricky. The inset at the top wound up not fitting quite right, and I had to finagle some trickery around the edges to get it to fit. Those flat things on the shoulder blades were easy to build the flat surfaces. The edging around them gave a little trouble, especially when affixing them into the back of the torso. The white foam basically fit into the holes on the back, and then a nice bead of hot glue around the edges on the inside anchored them in place.

IMG_20140525_133233781.jpg IMG_20140526_121759.jpg IMG_20140531_022521.jpg IMG_20140601_033828.jpg


Once the back was all assembled, it was onwards, around under the arms, to meet up with the breast plate and fill in all the final bits.

IMG_20140602_033516.jpg IMG_20140613_023915.jpg


Once everything was assembled, I had to do some pretty serious gap-filling! This was the DAP Dynaflex latex sealant. Just went to town squishing it in all over the place! Some of the seams were rather big, and some were kinda glumpy from hot glue. But --- time was getting short, and so it had to simply be what it was. You can also see in this picture, on the right side in the middle, a little piece of foam with the carbon fiber texture. These were added on both sides, to cover the gaps that were left in the early stages around the neck.

IMG_20140907_024532.jpg


Once all the gaps were filled, painting began. For the most part, this was a pretty easy piece to paint. Two color tones - the gunmetal/steel and the bone. I also added a third, dark metallic brown on the shoulder blade things and a few other small details. Masking was pretty simple. Tricky only really between the outer, bone-colored collar and the inner collars. Some of the masking also got a little tricky too around the detailing on the back. At this point, I had enough of the pieces mostly done that, yeah, ... I had to try it on! ;)

IMG_20140909_232725.jpg IMG_20140912_025209.jpg IMG_20140912_025310.jpg


Once all the paint was dry, came the scary part! The titular Blood Dragon was all just painted on by hand, free-hand with some red acrylic paint. I got quite nervous doing this part, because it wasn't as cut and dry as "mask and spray". Also, the dragon had to line up across the one shoulder and wrap around the back and look cohesive.

You can also see in these photos the dark metallic brown used, on the shoulder blades, the back rectangle, those "bars" coming up from the shoulder blades, and the smallest piece wrapping around the sides under the arms.

IMG_20140928_013356.jpg IMG_20140928_021905.jpg


And finally, once the dragon was done, the weathering was added. Acrylic dirt washes and edges scuffed up with my old buddy Rub'n Buff.
Where the lights should be in the back, it again got the sparkly foam treatment just like the vambraces.

IMG_20141202_020143.jpg IMG_20141202_020413.jpg


And that wraps up all the construction! *WHEW*! But wait... we're not done yet... the most important step comes next!
 
Last edited:
And Finally.....

So all the construction is complete... and you've got your full set of armor...

IMG_20141005_184006.jpg


First thing to do... put it on... try it out, walk around a bit, get used to your strapping. And of course take a couple shots! ;)

IMG_20141009_225237.a.jpg IMG_20141009_225342_20141009233002089.a.jpg


And then, the final step... TAKE IT OUT AND ENJOY!!!!! :cool

IMG_20141012_122101.jpg John Jiao Photography.jpg


Thanks for reading! Man, I can't believe how long that took to write up... it took even longer to build!
But in the end, I was incredibly happy with the final result!

There's a LOT that could be improved, but for my first effort I was more than satisfied!!
 
Last edited:
This thread is more than 9 years old.

Your message may be considered spam for the following reasons:

  1. This thread hasn't been active in some time. A new post in this thread might not contribute constructively to this discussion after so long.
If you wish to reply despite these issues, check the box below before replying.
Be aware that malicious compliance may result in more severe penalties.
Back
Top