Marvel Thing 2015 build

hapslappy

Member
LETS GET THIS COSTUME DONE!! HapSlappy is Back!!

Hello all,
Starting this build thread because i want to share some ideas and invite suggestions as i work on this build. I am making this for the 2015 NYC Comic Con. show and will also enter here for the 2015 Halloween contest.
I chose the Thing because i have never really seen one done quite the way i felt it should be (this isn't to say i will do any better). He by design is a pile of rocks with uneven edges which by default makes him a very forgiving first costume build i feel.
I want to give props to BioPredator 2012 hulk costume which has inspired me. 1219141820a.jpg

Okay to the build. I started with a cheap hardhat that i used a grinder on to remove the visor portion and ridge around edge. I then set the sizing adjustment as i knew i wouldn't be able to once started. I then covered with a 1/2" couch foam on the top and then a 4" foam was wrapped around it. I dado'd the top edge to get a tight fit on the Helm seen in the next pic.1219141820.jpg
0105151348.jpg0114151837e.jpg0213151704.jpg0213151706.jpg
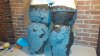
Current progress to date. Scroll for build to this point.
 

Attachments

  • 0118151518.jpg
    0118151518.jpg
    2.8 MB · Views: 184
Last edited:
Having trouble loading pics..keeps turning them sideways. 1219141913a.jpg
I used a basic contact spray to attach the pieces of foam. I added the nose eyebrow and the jaw pieces, making them extra large so as to allow room for carving. This is why i also used a 4" inch foam to wrap the hard hat so that i would be able to carve in facial features. I am going for a version of the thing form an early 1990 comic run where he had a more square and menacing jaw line.
1221141906.jpg As you can see still haven't fixed the picture issue...weird. I drew in the eyes simply to help me with proportioning the face.I used an electric turkey carving knife which has worked amazing well. They can be bought cheap for about 10 bucks. I imagine i will go through several of them. You may also be able to notice the arrow i have carved into the top of the head. This was to help me identify the center line of where the hard hat sits on my head.

1222141604a.jpg*sigh* anyone who knows how to stop these pics from rotating on me please help..lol.
What you see here is a black sheet that i sprayed to the couch foam. I did this for 2 reasons. first i need to hot glue the stones to his head and from experimenting i discovered that the hot glue eats the coach foam . so this will give me a material i can work with, plus if there should happen to be any area not covered properly it will be black not neon green.
1222141659a.jpg
 
Last edited:
The black sheet also helped smooth out any rough edges.
I used a 3/8 EVA foam for the individual stones. I drew them on a large sheet and then numbered them and took a pic before i cut them. Once cut I used a table top sander to round down the edges to give them more of a true stone look.
1224141706a.jpg
I cut a slot in his mouth opening that went all the way through. This is where I also started to carve out the interior of the mask so it was non restricting and breathable. As it turns out the mouth slit is right where My nose is so it breaths very well. My eyes will be under the nose somewhere.(haven't figured this out yet). This will result in me gaining about 3 inches of height. Added with 6" platform shoes i should be about 6' 8".
1225141323.jpgAs you can see the numbers allowed me to reconstruct the pieces with ease.
1226141559.jpgSo it turns out that my actual eyes end up just under the nostrils of the mask.This should work out well as The thing has an ape face and this will allow me use the break in facial features to make eye slots that are not very noticeable.
 
1226141559b.jpgLOL I really hope someone can tell me why it flips my pics sometimes and not others...You may notice here that despite my planning i am working myself into a corner with pieces. I got past this by using a marker and getting the edges near the empty space very wet. and then rubbed a sheet of paper on the area. This transferred the marker onto the paper which gave me an outline with which to work from.
I also discovered that the EVA foam was to thick for the eyebrows and most of the face. It simply wont bend enough, so i used 3 different thickness of a craft pad and a yoga pad. as you can see in these next 2 pics.
1226141558.jpg1226142035.jpg1226141626a.jpg

Guys i am very sorry for the sideways pics..i simply can not figure out why they are loading like this.

In the last pic you will see that i started working on his eyebrows. This proved to be a bit time consuming as i had to hold each piece in place until it dried.
As this build progress i would love the input of this community and their experience, so pls feel free to criticize with constructive suggestions.
 
Last edited:
The eye brows are about done and i began work on the nose...to be honest i am not thrilled with the way it came out but i can come up with nothing better for the time being.
1226142117.jpg1226142117a.jpg
 
Last edited:
Moved on to putting stone pattern on the cheeks. If you look closely you can also see that i started added scaring and imperfections to some of the stones.
I will be airbrushing this so i should be able to add some great effects to the scaring.
.1230141327a.jpg1229141543.jpg1230141327.jpg
Next will be the eyes and then i will start some work on the feet.
 
My platform boots came in finally. 6" lift from rivethead.com. About $80.00. They are surprisingly easy to walk in and fit very well. Also started doing some eyeball work for the face. I will be using clear fish aquarium stones which are flat one side and convex the other. I will then print out a blue eyball and attach to stone. Should give it a real eye effect.
1230141406.jpg1230141328b.jpg1230141316.jpg
You will notice i am keeping the bulk of the foot to the outside of my inseam to allow for easier movment. I will keep adding foam in layers until i have enough raw material to make a giant foam boot.
 

Attachments

  • 1230141304.jpg
    1230141304.jpg
    1.1 MB · Views: 104
Just thought i would share a pic of my basement dungeon where i build this Suit lol.. I know this is a new thread but any suggestions on improvements or feedback would be greatly appreciated.
1229141509b.jpg
 
OK i finally figured out the picture issue with rotation, so no more sideways pics..This is the progress i have made so far on the feet. I decided to go for a booted version of Thing because i want the leg to look seamless. I have noticed in other foam builds that even when the design and appearance of the foot is remarkable that the foot still looks detached and like a giant slipper. I plan to build the cuff of the boot up and dado the top so the leg sets inside of the boot giving it a seamless look.
1230141649a.jpg1230141649.jpg1230141700a.jpg1230141701.jpg
For comparison my foot is a size 11.
 
Last edited:
Okay so i figured i would tackle the eyes. As i mentioned before i used an aquarium stone that was clear and convex on one side, with a cut out of a blue eye on photo paper from the web.Yes i realize he looks like a muppet with pink eyes, white nose, blue mustache, and brown eyebrows. Sadly the pics don't help one appreciate where he is at. Next week i will be putting a krylon stone effect spray on him in preparation for paint.
1231141348.jpg1231141349.jpg1231141453.jpg1231141453a.jpg
 
Question what are you taking the pictures with? If its a phone make sure you edit the pic's in your phone before uploading them. Looks good so far, love the 70's disco shoes for height. The numbering is very cool, I can see how that helps. Good luck, I subscribed to watch your progress so I'll be bugging you from time to time...
 
Question what are you taking the pictures with? If its a phone make sure you edit the pic's in your phone before uploading them. Looks good so far, love the 70's disco shoes for height. The numbering is very cool, I can see how that helps. Good luck, I subscribed to watch your progress so I'll be bugging you from time to time...
Yes thanks i did finally figure that out with the camera phone. all pics will be as they should be now. I appreciate the comment and any future suggestions.
 
Great start with this mate. One of the rarer characters that people try to make, so good luck with it. Seems like you have a good idea of how you want it to turn out.
 
So i did some more cut detail around the eyes to give a more menacing/ scowling look. Also Bought the material i will be using for his shorts, as well as got around to building the body mannequin. i did this just as most do, with saran wrap and duct tape. Then purchased a full body black jump suit and put it on the dummy. I will be gluing the foam directly to this. This will allow me to simply put this costume on like a shirt and pants.
0102151509b.jpg0102151532.jpg0102151525b.jpg0102151539a.jpg

Next Week i will be finishing the boots. I am still trying to work out the body. I have quite the belly on me and i need to somehow incorporate that into the equation.
 
I love the fact that occasionally we get to see a rare character build not seen (at conventions) before.
Your project is a difficult one,so be proud you got this far.I'm a sucker for detail and that you've done very well.
Awaiting new pictures on your progress! And don't worry about your posture; I think when it comes down to getting in shape for comic cons,most of us have some work to do ;)
 
Ok so i was able to get the Stone effect spray on the mask and was able to complete the foam build out of one boot today.
0104151634.jpg0104151508.jpg
I believe i have settled on a base coat paint. Will test it next week. I will then start airbrushing the shadow and darker color effects.

I was able to complete one boot in foam ( when i say complete i mean i still have to do some fine carving before i put material on it). You may notice i put a relief space at the top of the foot which allows me to walk pretty normally. I also hollowed out the inside which should allow for the calf of the costume to sit inside it giving a very real seamless effect.
0104151508a.jpg0104151515.jpg0104151528.jpg0104151615.jpg0104151635.jpg I will finish the other boot this coming week and start sewing the material for the boot covering. I will also start the legs (very worried about this part with the knees and all...lol). Guys please let me know if i am posting to many pics, i can certainly tone it down.
 
This thread is more than 8 years old.

Your message may be considered spam for the following reasons:

  1. This thread hasn't been active in some time. A new post in this thread might not contribute constructively to this discussion after so long.
If you wish to reply despite these issues, check the box below before replying.
Be aware that malicious compliance may result in more severe penalties.
Back
Top