Mark VI Pepakura Iron Man Build

Re: Iron Man Build

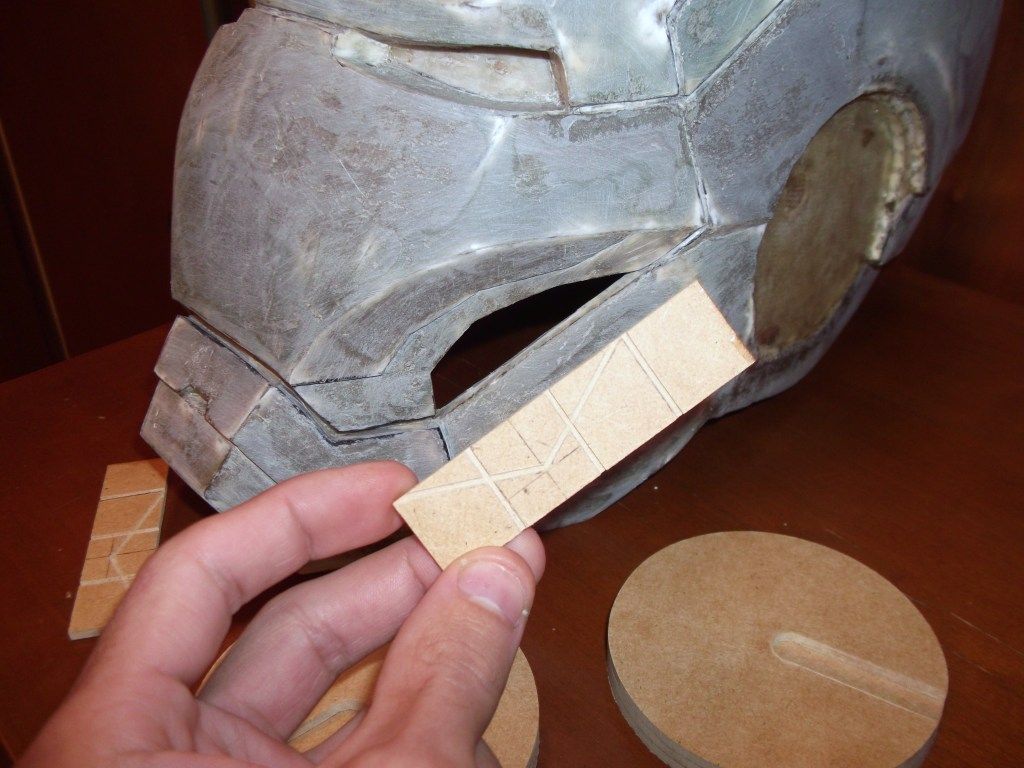
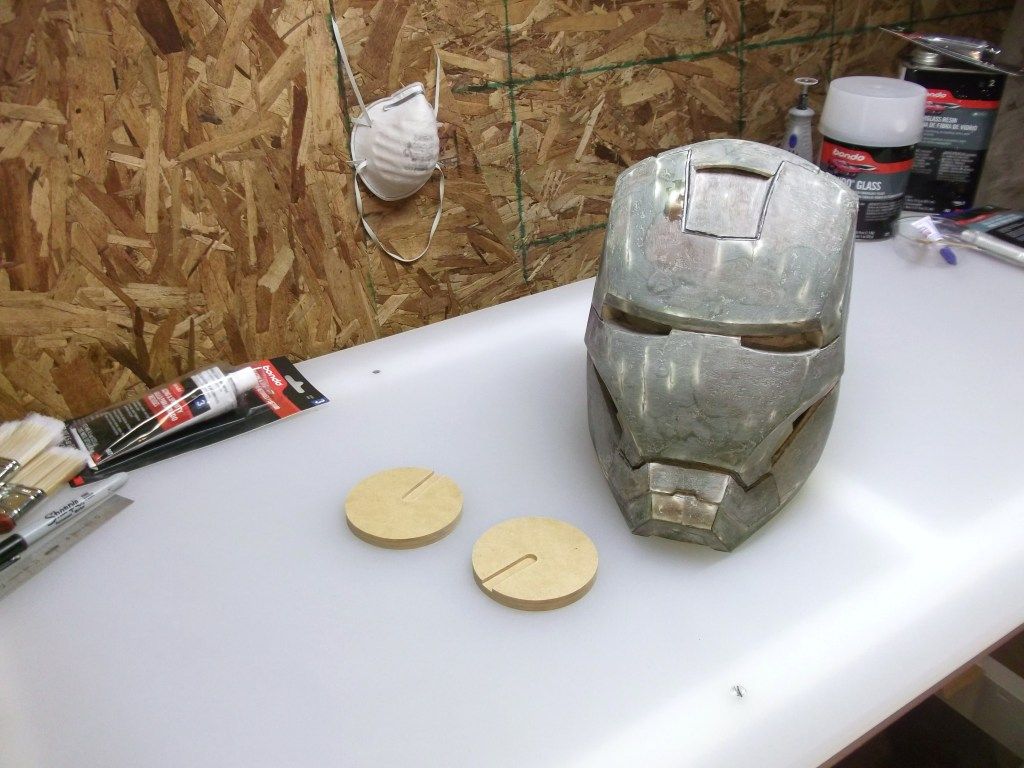
Yeah. Working hard on this baby. Have a couple of the body armor parts done and one arc reactor built using Stealth's tutorial videos. Stealth--your videos ROCK! I wanted to get the helmets finished before cold weather sets in since I'm working in the garage and am in Indiana. Don't want to even think about resin, bondo and sanding indoors... Epoxy eh? If the ears are solid that would be easy. I was trying to figure out how to attach those hollow ears without making a sloppy mess at the bottom seam and used some resin to put a plastic screw holder near the center and figured I'd screw it in from the inside, but I think I'll go with hardboard.
 
Re: Iron Man Build

Note to self...and others starting a fiberglass build...do NOT sand your resined/fiberglassed helmet while wearing shorts, I don't care HOW hot it is...That is all...

Does it still itch?! :)
 
Re: Iron Man Build

Ha, ha...no. I used packing tape all over my legs to try to pull up the fiberglass and it worked pretty well. It didn't itch, per say... It felt like I had a ton of teeny splinters in my legs when I ran my hands along them. I used dubean's shark mark at the default scale. My daughter is 5'6" and I'm 5'2 & 3/4"
 
Re: Iron Man Build

Nice teeth and ears. Did you glue a couple of pieces of the MDF together then and used a router bit for the groove? I'm having a tough time getting the slanted part of the ears nice and even all around. A router would take care of that too I guess. So how are you attaching the teeth and the ear pieces? Fiberglass and resin?

The ears are three pieces layered together with wood glue. First I glued the two bottom circles together...next I drilled a 3/8" hole in the top circle, and cut out the rest of the "groove" with a scroll saw....I then glued that to the other two circles which gave me my detail. The same could be done with a router, but I didn't have the right bit on hand so I did it this way. The angle on the outer edge of the ears will be taken care of with a 45 degree chamfer bit and router.


I would use a 2 part epoxy to attach those parts. It will bond well with all your working matierials, and cure faster.

I planned to epoxy the teeth and ears on. The teeth will also get a layer of fiberglass and resin over the backs.
 
Re: Iron Man Build

In your first post, you posted a bunch of pics (thanks for that). In pic "1-4-47.jpg" - the first one with the 2 helms on a pizza box - which one of the helms is in the rest of the pics with the resin, fiberglass, bondo, etc in your subsequent posts/pics?

As an aside, it took me 2 hours to assemble 1 eye and mount it to the bottom half of the faceplate last night. Ugh.
 
Re: Iron Man Build

The one on the left, which is the one I felt didn't come out well enough for my Type A perfectionist personality, so I did the second one with superglue. My daughter will work that one--she's started with some Bondo but can't work on it like I can since she's in school all day...I'm self-employed, working sporadically to finance my photography habit and earn enough $$ to buy a mongo lens for taking pics of my son on the soccer field so I'm home quite a bit to work on mine..;)

Not everything lined up perfectly with my first attempt. I could see the lines that really should have been mostly covered by the overlapping pieces and it kind of threw everything off enough to create some problems, but I'm overcoming them as I Bondo...

I may be forced to take a break from this for a couple of days though darn it. I was slicing and dicing in the kitchen this morning to get dinner in the crockpot and managed to slice my right index finger badly enough it needed 6 stitches! Oh, the irony that I've been working on this helmet for a couple of weeks using box cutters, exacto knives, razor blades and a dremel tool without mishap and my injury occurs in the kitchen...

Still, went to Harbor Freight after getting stitched up and picked up my rare earth magnets--they seem kind of small though. And picked up some clipboards to make the ears and teeth from. Crap! I'm getting blood on my keyboard...done typing for now!
 
Re: Iron Man Build

Wow great build on the helmet's. Been watching your build and just realized we are just across the river from each other. Hope the hurt finger doesn't slow ya down to much.
I am building a mk 3 out of foam for my 4 year old. Just finished gluing the last piece last weekend. Now the fun of sealing and paint!! Good luck with the rest of the suit.
 
Re: Iron Man Build

Ouch. What's a project without a little blood, sweat and tears though??? Sounds as thought you're 2 for 3 already!

Before I clicked on the pick of your medical tools to realize that's what you're using to bandage yourself, I thought some of those things could help me hold/glue those small parts. :).

Get better.
 
Re: Iron Man Build

Have you taken the magnets out of the package yet? Even though small, they are ridiculously strong.
 
Last edited:
Re: Iron Man Build

It looks like you cut the eyes out when you did the separation surgery. Correct? I was thinking of cutting them out before bondo, yet after fiberglassing. However, I wasn't planning on using mat or fabric on them, just resin in order to give them enough rigidity to leave the eye "shelves". Sound plausible? Thanks for posting your experience. I feel like mine is going so slow and since I'm taking cues from so many people here, I'm not going to have anything to contribute. I'm such a leech.

Yes. It was pretty easy to do it from the back after the faceplate was removed. I used my dremel with a diamond cutting wheel, which is also what I used to separate the bottom. I cut with the dremel until I was close to the corners, leaving it attached pretty much at those spots until I was done with the dremel, then used an exacto knife to finish off and get around the teeth. There was some fiberglass on the sides of the eyes (to support the top and bottom "shelves"), since I wanted the top and bottom to be nice and rigid, but I didn't totally cover them since I knew I'd be cutting off the back. I would bondo before you cut. Everything I've read on here says that's the thing to do in order for you to make sure the helmet keeps it's shape. Plus it's easier to get all your edges lined up if you bondo it before surgery...I would think if the pieces are all separate, it would be hard to do that.

It's OK to leech. Why reinvent the wheel over and over? Everyone on this forum seems to enjoy helping out others and sharing their experience.

Good luck. I know it probably seems like you'll never get there, but it will happen.
 
Last edited:
Re: Iron Man Build

Have you taken the magnets out of the package yet? Even though small, they are ridiculously strong.

Yes, I took them out this morning. Teeny little buggers. Are these the same size as yours? Harbor Freight is great! I got my teeny files there and a bunch of other tools for dirt cheap...
 
Re: Iron Man Build

They sell the rare earth magnets at Harbor freight Tools if you have one close by. They're about 1/8" thick by 1/4" diameter disc shape....come in packs of 10 I think. They're more than adequate...VERY strong. That's what I'll be using, and heck, they're only two or three bucks.

Cutting around the earpiece is done because usually the ears are glued or epoxied on before people start cutting.

Maybe I can help you with the teeth build. It's quicker and easier to redo the teeth than try to straighten the lines.
I ended up doing my teeth and earpieces with hardboard instead of paper. If you're not familiar with hardboard, it is basically the same thing as MDF, only it comes in thinner 1/8" thick sheets. You can get small pieces of hardboard via clipboards bought at Walmart or the dollar store. One clipboard was enough for me to do both ears, both teeth sections, and I still had some left over. For the teeth I did the gaps/spacing in between by scoring the hardboard with a dremel and cutting wheel, then cleaned up the lines with a needle file. No need to Bondo either...just prime and paint them. Still have to chamfer the edge of the earpieces with a router, but you get the idea.

DSCF6559.jpg


Better pic of the earpieces.
DSCF6541.jpg

Just watched your video on this (funny stuff at the end with the little ear pieces...) and realized I also watched a number of your other youtube postings and am subscribed to your channel as LauraLWC3001. The one about mixing and applying bondo to the helm was a HUGE help since I'd never worked with the stuff before. I also had previously watched your video on remaking the teeth.
 
Re: Iron Man Build

What scale did you use and for what size head?

Just realized I didn't answer the "What size head?" question. Just measured and mine is 21.75" measured just above the ears. There is enough room to get some foam padding inside and for wiring to light the eyes and motorize the faceplate. I DID have to add a thin piece of wood and attached it to the underside of the tongue with fiberglass/resin -- like projectearth7, because as I worked on the tongue, that piece kept bending down enough that the edges of the faceplate that fit with the tongue weren't staying aligned on the top.
 
Re: Iron Man Build

Attached four rare earth magnets to the bottom piece and will let them set overnight before I put in the corresponding magnets on the main part of the helmet. Need to reinforce around those babies though, I'm afraid the epoxy won't be enough to keep them there while the helmet is being put on and removed...
 
Back
Top