Mark 42 Cardboard Build

Domonator

Active Member
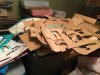
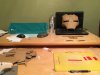
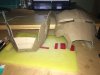
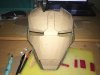
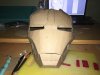
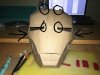
This is my Mark 42 helmet build made out of cardboard. I plan to rebuild this helmet because it is way to big for me. I will probably make this helmet for show or sell it. I use stealths techniques and tutorial series as well as a silhouette cameo to cut out the paper pieces. I have gotten to the assemblying stage. Here are some pictures.
 

Attachments

  • image.jpeg
    image.jpeg
    1.6 MB · Views: 167
  • image.jpeg
    image.jpeg
    1.3 MB · Views: 209
  • image.jpeg
    image.jpeg
    2.5 MB · Views: 150
Having a bit of trouble connecting the faceplate to the helmet. I was thinking of rebuilding the faceplate connected to the helmet instead of being separate. Anyone run into this problem or have any ideas on how to fix it. Here are some pictures. If they appear upside down just click on them. How do I fix this picture problem.
 

Attachments

  • image.jpeg
    image.jpeg
    1.4 MB · Views: 84
  • image.jpeg
    image.jpeg
    1.5 MB · Views: 95
  • image.jpeg
    image.jpeg
    1.5 MB · Views: 112
It looks like you may need to curve the front part of the face plate to make it line up with the helmet pieces. I do the same thing when building my helmets, make the face plate curve and line up with the reset of the helmet it gives it a better look instead of it just being flat faced.
 
You should bring the cheek portion of the helmet in more. If you look at your pictures in the upper, inner corners of theach eyes they should be touching the bridge of the faceplate, in order to obtain this the top portion of the bridge must be bent a little more. As well as you can see the distance between the crown of that faceplate is to great, as zorprime mentioned you should put a little curve in the front it would align these parts and gluing in these areas would help. I would glue the faceplate to the helmet until you resin and glass it. Keep up the good work it's looking nice.
 

Attachments

  • 2015-12-28 13.13.01.jpg
    2015-12-28 13.13.01.jpg
    694.4 KB · Views: 115
It looks like you may need to curve the front part of the face plate to make it line up with the helmet pieces. I do the same thing when building my helmets, make the face plate curve and line up with the reset of the helmet it gives it a better look instead of it just being flat faced.

You should bring the cheek portion of the helmet in more. If you look at your pictures in the upper, inner corners of theach eyes they should be touching the bridge of the faceplate, in order to obtain this the top portion of the bridge must be bent a little more. As well as you can see the distance between the crown of that faceplate is to great, as zorprime mentioned you should put a little curve in the front it would align these parts and gluing in these areas would help. I would glue the faceplate to the helmet until you resin and glass it. Keep up the good work it's looking nice.

Ok thank you for your help, an update will be coming soon.
 
Update #3

image.jpegimage.jpegimage.jpegimage.jpegimage.jpegimage.jpeg


This is what I got done so far. I will not be able to work on it for a little because of a vacation. My questions: is the facial slit supposed to be like that? How do I fix the gap in the cheeks? And what do you think? It will probably be to big for my head so I will be selling it if it turns out good or just have it as a inspiration/something that will hang around my desk.
 
I finished assembling the helmet will have pictures soon. By the looks of it, it will probably be for just display
 
Good work so far on the helmet but you really need to rotate your pics the right direction before uploading them. Also avoid bumping your thread without any progress to show. It's disrespectful to those who are updating their own progress threads.
Once you start building more of it, people that are interested will chime in and comment more and more.

Just keep that in mind man.
 
Makes sense. Thanks Sealth. Any idea how to turn the picture right side up, I am just using the picture button.
 
Makes sense. Thanks Sealth. Any idea how to turn the picture right side up, I am just using the picture button.

You'll have to do it before you upload. are you using windows? you can rotate it in the paint program.

anyways, keep up the good work man. You really applied the cardboard method so well for a beginner and already learned how to make adjustments.

rotate.jpg
 
Just a tip on the resin, apply generously because the cardboard will absorb it. After it dries this is where you can apply some heat to the problem areas and mold them into the proper shape. Just be sure to hold it until it cools, this can be achieved with a heat gun or even a standard hair blow dryer. Looking good though keep up the good work.
 
Just a tip on the resin, apply generously because the cardboard will absorb it. After it dries this is where you can apply some heat to the problem areas and mold them into the proper shape. Just be sure to hold it until it cools, this can be achieved with a heat gun or even a standard hair blow dryer. Looking good though keep up the good work.

Ok sounds good thanks
 
Back
Top