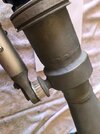
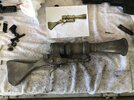
Limited Run Jawa blaster kit (the one NOT made from an Enfield)

Thanks for the kind wishes...having back problems for many years now, but learned to live with them.
It´s just that the pain went up to a level currently, I can barely handle

And yes, these kits should be available for a while, even if I know of at least two other prop-builders working on a resin kit... not as accurate as mine from what I can tell so far ;)
 
Awesome kit wish I did not have to let it go!
 

Attachments

  • zIMG_20171108_182230 - Copy.jpg
    zIMG_20171108_182230 - Copy.jpg
    364.6 KB · Views: 206
  • zFullSizeRender - Copy.jpg
    zFullSizeRender - Copy.jpg
    264.4 KB · Views: 190
  • zJawa_ion_pistol - Copy.jpg
    zJawa_ion_pistol - Copy.jpg
    159.5 KB · Views: 191
Last edited:
Happy that you like the kit :)

Sand the back of the venturi flat, drill a hole (forstner bit) and insert the coupling. You´ll find a recess in the "ring" around the back of the venturi...drill a hole, straight into the coupling, add threading and secure it all with a screw. Check this out:

IMG_9161.jpg
 
Received my kit and going to start working on it this weekend. Thanks Markus. Absolutely wonderful craftsmanship.

Regarding the build itself. Is there a need to attach the back part of the coupling to the handle/stock or will it just rest on the top freely?

Will update progress photos here if that is ok?
 
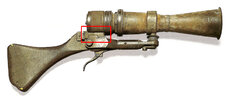
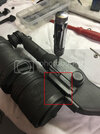
This is the location I am referring to. I do not see a way to secure it other than maybe some glue. Or is it even needed once the receiver is threaded into the Venturi? Seems like there would be a lot of pressure on the screw that attaches the Venturi to the arm assembly. How did any of you other builders secure it? Thanks guys.
 

Attachments

  • Jawa_ion_pistol copy.jpg
    Jawa_ion_pistol copy.jpg
    144 KB · Views: 113
  • C1D7278F-2314-44AC-ACB7-133A518EE428_zpsmzp4eovu copy.jpg
    C1D7278F-2314-44AC-ACB7-133A518EE428_zpsmzp4eovu copy.jpg
    238.1 KB · Views: 108
This is the location I am referring to. I do not see a way to secure it other than maybe some glue. Or is it even needed once the receiver is threaded into the Venturi? Seems like there would be a lot of pressure on the screw that attaches the Venturi to the arm assembly. How did any of you other builders secure it? Thanks guys.

Hey Drew

I drilled a hole all the way through the grip section, starting IN between the trigger frame, extending all the way to the top, where the coupling sits on. You´ll see the plugged holes in my cast and can use these for reference. Once you drilled the hole, it´s just a matter of drilling the mating hole in the coupling and tapping it for the screw. It´s nice and secure on my build!
 
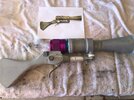
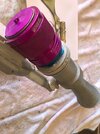
Here is a status update of my progress. Just need to attached the greebie and will be ready for paint. Is this the right orientation of the greebie?
 

Attachments

  • IMG_1515.jpg
    IMG_1515.jpg
    117.9 KB · Views: 114
  • IMG_1516.jpg
    IMG_1516.jpg
    69.2 KB · Views: 108
  • IMG_1517.jpg
    IMG_1517.jpg
    59.9 KB · Views: 103
Back
Top