You are using an out of date browser. It may not display this or other websites correctly.
You should upgrade or use an alternative browser.
You should upgrade or use an alternative browser.
Iron Man MK6 helmet build.
- Thread starter MandoMan531
- Start date
MandoMan531
Active Member
I agree, some of the folds are insane! I gave up on the eyes since I'd end up losing all the details when I resined it. The folded panel lines will basically all be lost too, I'll have to cut them later.
The hands are so hard, no way to read the numbers, ya gotta just be used to pep and be able to wing it.
The hands are so hard, no way to read the numbers, ya gotta just be used to pep and be able to wing it.
Surreal Studios
Well-Known Member
The hands are so hard, no way to read the numbers, ya gotta just be used to pep and be able to wing it.
Ya Zabana's hands are one of the tougher pep builds, but the end result is fantastic!
roblightyeah
New Member
I've been thinking I'd like to pep up a ironman costume someday soon, but after seeing the complexity of just the hands... :confused
I think the word i'm looking for is 'terrified'
The helmet looks fantastic! Your patience and skills are 100% - excellent work dooder!
Rob
I think the word i'm looking for is 'terrified'
The helmet looks fantastic! Your patience and skills are 100% - excellent work dooder!
Rob
MandoMan531
Active Member
Yea I wanted to make the files that weren't likely to change so I went with the hands....I'm waiting for darkside501st' version 2 files so I didn't wanna go and make the arms and end up with better files a little while later. I did prInt some of the forearm files off and made a few of them to get a feel for the scale and I cannot get it right at all. It's so hard to judge and everytime I adjust it never seems right -_-
MandoMan531
Active Member
Little update. No pics today, not much to show. Just smoothing the crown section the best I can. However I did make an account on Shapeways and ordered one of Dubean33's detail sets. Also ordered one of jackies ears so I could try and mold it to cast 2 more durable resin copies. And I'll probably start planning what hinge setup to use soon.
MandoMan531
Active Member
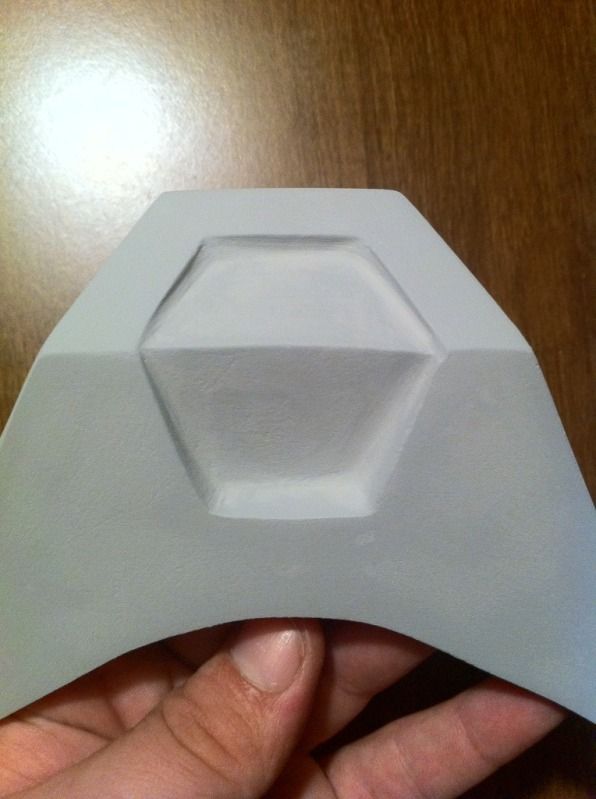
Was working a bit on the recess under the chin and I figured before I went any farther id ask here. Are there any pictures of this area of the helmet? I'm not sure how sharp or soft to make the details in this recess.
MandoMan531
Active Member
Anybody?:confused
jackieisrockin
Well-Known Member
Is this good?

pRoJectEarth7
Well-Known Member
Man, you're doing a great job on your IM Helm...") :thumbsup
:thumbsup
I've encountered the same problem with my helmet build back then and searched for tons of references to get the accuracy I'm aiming for... here you may find it useful (i hope :confused)... http://www.therpf.com/f24/ironman-mkvi-pep-helm-aiming-99-movie-124100/index10.html
Keep building man... cheers!
:thumbsupI've encountered the same problem with my helmet build back then and searched for tons of references to get the accuracy I'm aiming for... here you may find it useful (i hope :confused)... http://www.therpf.com/f24/ironman-mkvi-pep-helm-aiming-99-movie-124100/index10.html
Keep building man... cheers!
MandoMan531
Active Member
Jackie- that looks to be the Mark3. Well it IS because it's the one Iron Monger crushed. You can see theres no Chin/lip dimple, etc. I'm still grateful for the pic because it will help me with another project. But theres too many differences to use it for the mark 6. The lower chin detail is very shallow in that pic...hmm. I'm also not sure if te mark 6 has that bolt/screw in the center of the chin??
Project earth- I've been trying to follow your progress the best I can and all I can say is amazing job! I hope I can get mine to look even close to that good. Im having some areas that are giving me a hard time. Is there a specific page of your thread thatshows the detail I'm looking for?
Project earth- I've been trying to follow your progress the best I can and all I can say is amazing job! I hope I can get mine to look even close to that good. Im having some areas that are giving me a hard time. Is there a specific page of your thread thatshows the detail I'm looking for?
Last edited:
MandoMan531
Active Member
Been trying to fill out the side of the helmet that warped inward. The ear mounting surface was tilted way too far in at the top, so I propped the helmet up and poured a little rondo in it. It's going to be really difficult to get this side right so I hope it turns out good.

Getting there....
Getting there....
Last edited:
Powerhouse70
Active Member
Looking good
MandoMan531
Active Member
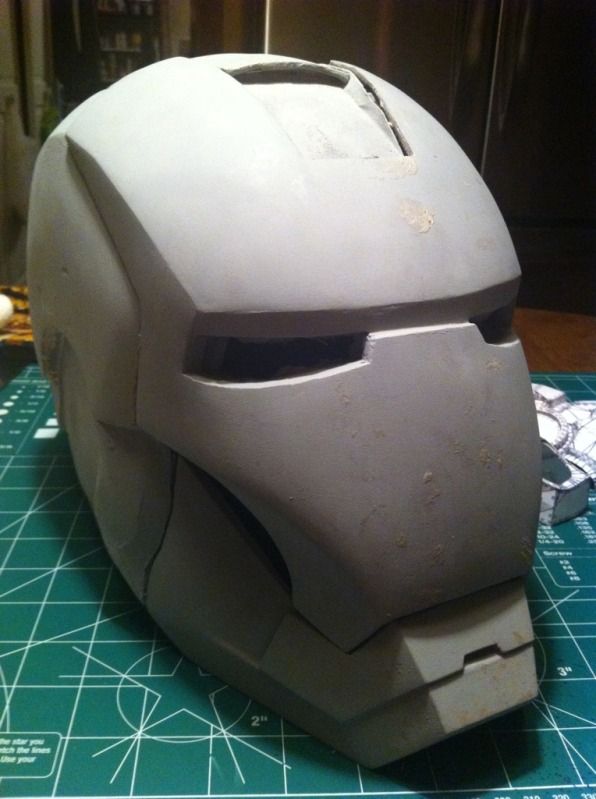
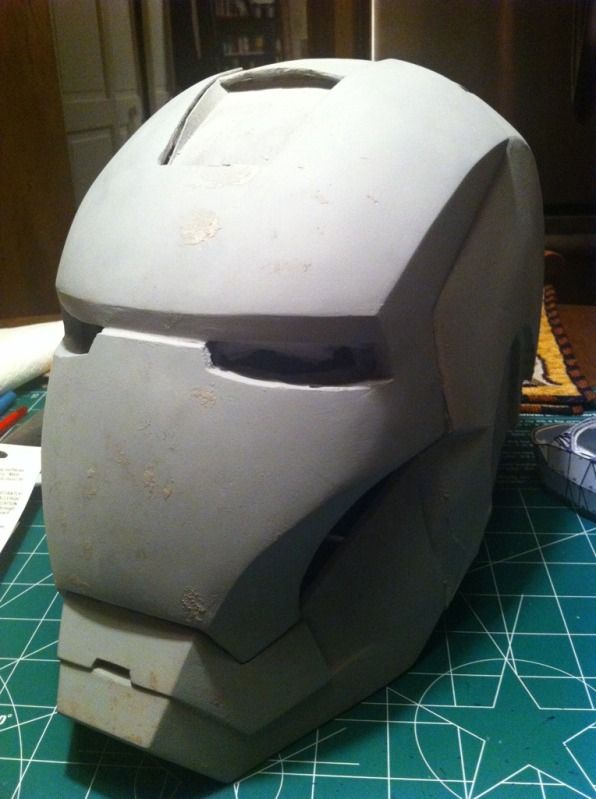
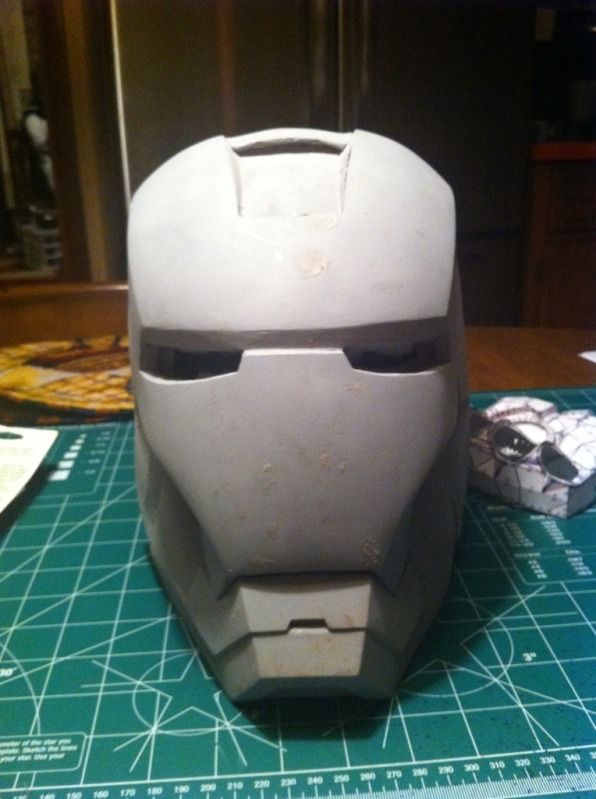
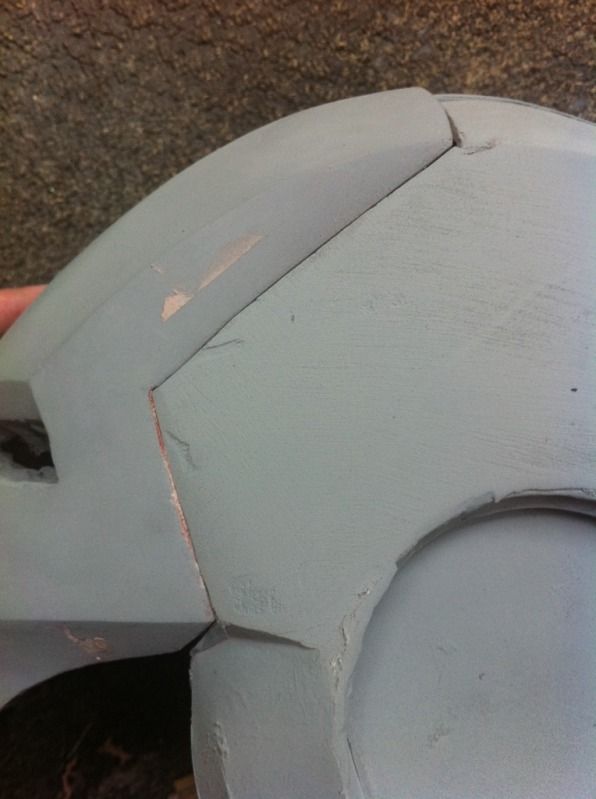
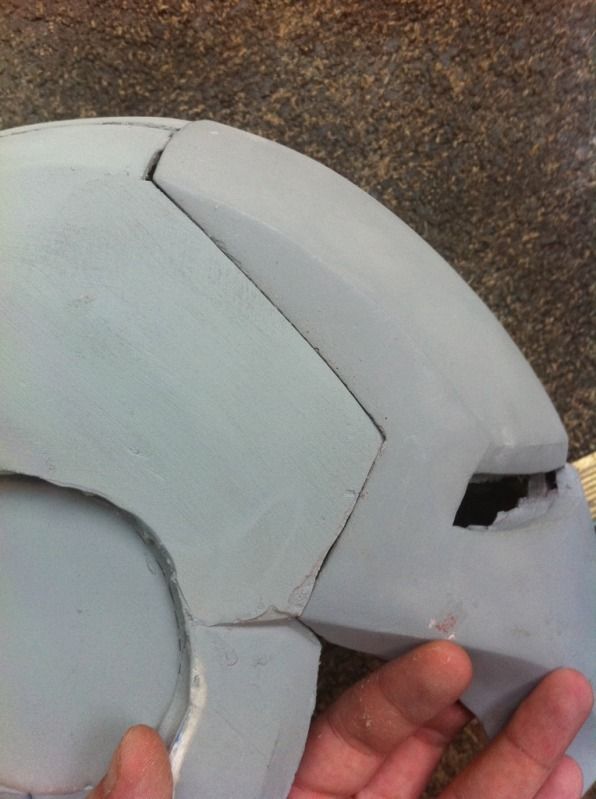
Wellll the faceplate fell off the helmet today about 3 feet to the ground and put a crack through the forehead. Luckily I had some fiber cloth around so I laid some in the back with a little rondo and patched the crack with spot putty. Hopefully it holds. Anyway I continued on with smoothing and thinking about how to reconstruct the ear socket on the side That warped (still kinda stumped). So I moved on a bit and started closing the seams between the face and crown. Bottom pic is the side i had to fill because of the warping.
Shakeitdavey
Well-Known Member
Great work mate, i'll be following the same route as you. Keep us posted!
MandoMan531
Active Member
I'm devising a way to be able to connect the pieces together to work on it as a whole while still being able to disassemble it. It's just way too hard to match contours on the individual pieces, I need to be able to assemble it and have it be sturdy. I have a plan, basically I'm going to attach a 3/4 or so dowel to both the chin and face as pegs. Expanding foam in the chin and face to stabilize the dowels. Carve the foam back and plastic wrap the pegs and inside of face and chin. Assemble the pieces and put expanding foam inside the helmet so it expands around the pegs, creating sockets. The plastic wrap should let me pull the pieces apart. Hopefully haha
MandoMan531
Active Member
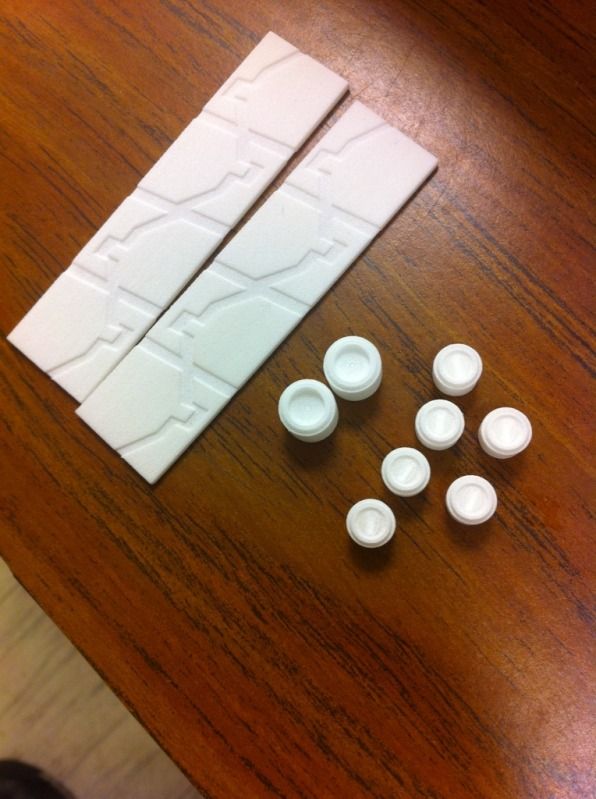
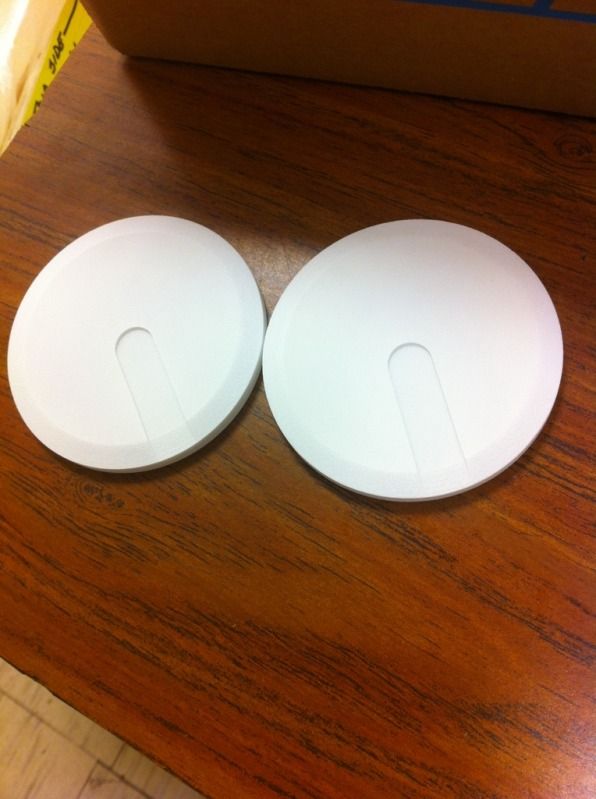
Got a box from Shapeways today. Got 2 of jackies ears and Dubeans detail set. The details look a bit shallow but I think they'll work. The slotted tips for the smaller "bolts" didn't really show up at all, not sure how I'll fix that yet. The cheekpieces I'll trim into the half circle shapes. The ear areas on the helmet are still givin me problems, mocking up the 3D printed ears the mounting area on the helmet looks way off. This discourages me
MandoMan531
Active Member
After cleaning the parts up a bit the detail on the small bolts looks much better. No idea why I overlooked cleaning.
MandoMan531
Active Member
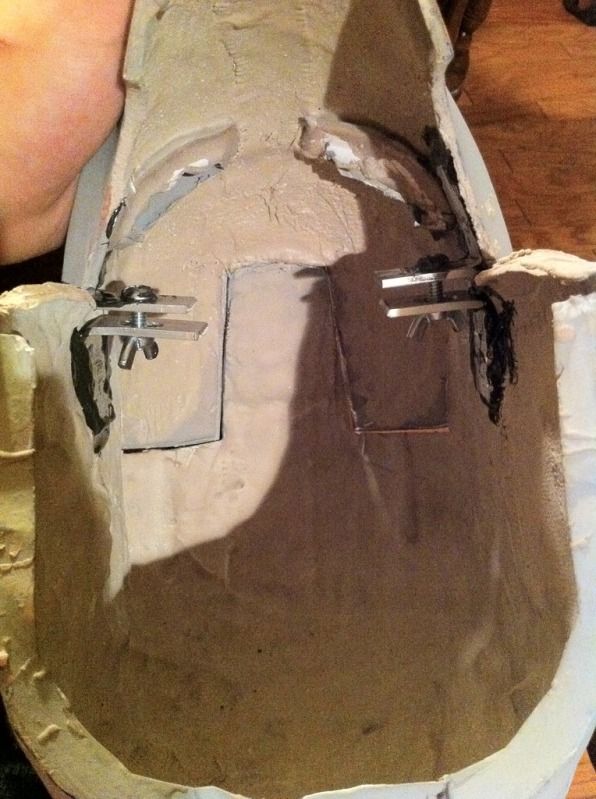
Back to working at this. After thinking about ways to attach the pieces together while still being removable, I came up with this. Holds the faceplate on solid so I can match the lines and contours easier and still removable so I can work on it individually. Now to do it with the jaw and I'm back to finishing it up! It's a bit different lol
I'm using jackies ears from Shapeways, how far are the ears supposed to stick out? Turns out the side I thought was okay, isn't so okay the pic doesn't show it well but the ear is a bit sunken in, not even with the outside of the helmet as I thought it should be. Correct me if I'm wrong. It's definitely a problem with my helmet, not sure how to go about fixing it. I thought the other side was the only side I'd have to fix
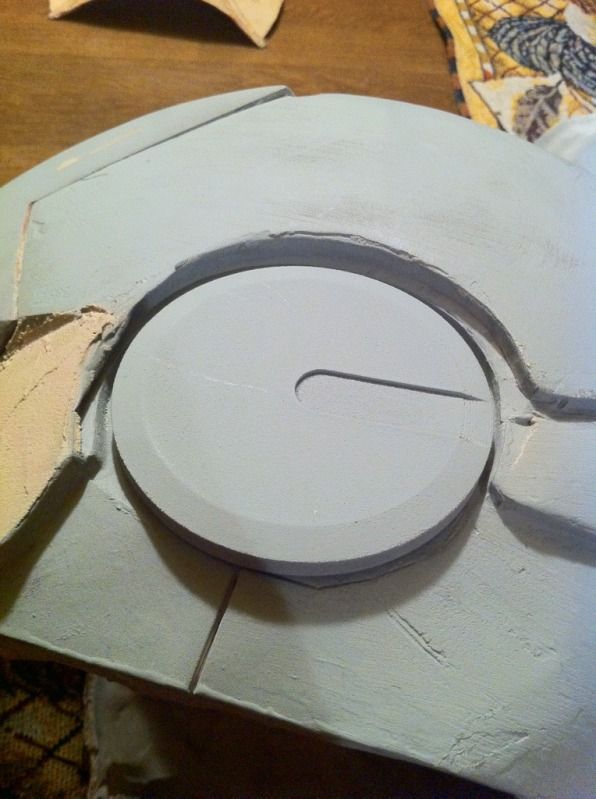
I'm using jackies ears from Shapeways, how far are the ears supposed to stick out? Turns out the side I thought was okay, isn't so okay
the pic doesn't show it well but the ear is a bit sunken in, not even with the outside of the helmet as I thought it should be. Correct me if I'm wrong. It's definitely a problem with my helmet, not sure how to go about fixing it. I thought the other side was the only side I'd have to fix
Bigturc
Sr Member
I think you have a great helmet man, really much much better than most pepped helmet here! Stand back a little bit, and look what you achieved, it's gonna give you another boost to move on!
As for the ear, the size looks correct, can't you just put some putty behind it and push it out of the lid?
As for the ear, the size looks correct, can't you just put some putty behind it and push it out of the lid?
Similar threads
- Replies
- 2
- Views
- 530
- Replies
- 43
- Views
- 3,105
- Replies
- 1
- Views
- 439
- Replies
- 7
- Views
- 706
- Replies
- 1
- Views
- 305