You are using an out of date browser. It may not display this or other websites correctly.
You should upgrade or use an alternative browser.
You should upgrade or use an alternative browser.
iron man mark vi build
- Thread starter SaberTech
- Start date
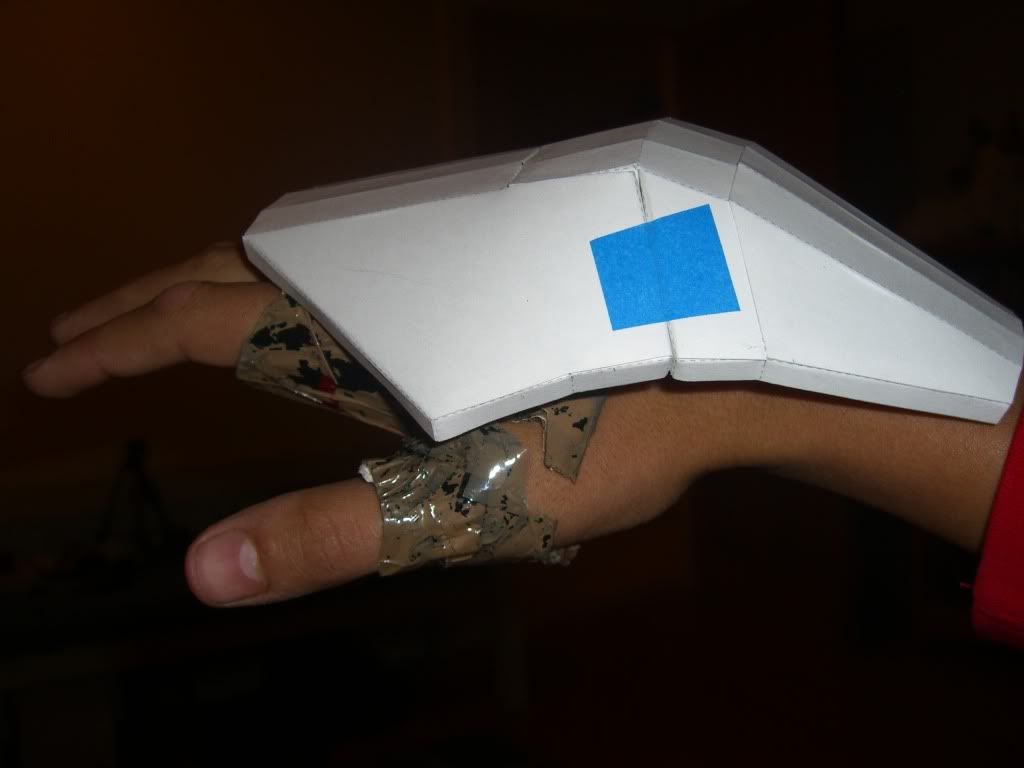
Here is a pic of the face shield I assembled from the pep file.
Dude don't ever use low detail parts. Your project will end up looking horrible. Especially the helmet. The helmet is the most important part.
EDIT: I posted too soon, because now i see your new one.
SaberTech
Well-Known Member
oh yeah that pic was a low res only for experiment purposes ... I wanted to test the pepping process and figured a low res run was the best way to go at first instead of putting in all that effort then finding out i messed something up ... funny it still happened anyway lol
I'm interested in this process but have never tried it so excuse what might be a dumb question. Why not do this with styrene plastic rather than card. Wouldn't that be better?
I know someone is going to say "dumb ass, why didnb't you search and look at x, y or z thread btu i genunely couldn't find an answer.
I know someone is going to say "dumb ass, why didnb't you search and look at x, y or z thread btu i genunely couldn't find an answer.
SaberTech
Well-Known Member
hi harley ... I don't believe in dumb questions ... the card stock is a way some of us have chosen to start with for one reason or another .... card stock seems to work easy and then it will be resined and fiber glassed then bondo will be used to smooth it out ... some of us will possibly choose to mold parts from that in styrene plastic but some won't ... it's just a chosen place to start ... for whatever reason ... I hope this answered your question ... it may not have been what you were looking for but it is the easiest way to explain it ... if you would like I can direct you to the files for starting this process and help guide you along the way as others have helped me so far ... its a great community to learn from
JMar
Well-Known Member
Helmet update,
This is coated inside and out with smooth cast 300 (2 part resin). Easy to work with and can be used in doors (gloves suggested tho). There's three coats but that's because I didn't mix right (it's actually 1:1).
Fiberglass mat apparently will work with the resin, will let you know how it goes.
This is coated inside and out with smooth cast 300 (2 part resin). Easy to work with and can be used in doors (gloves suggested tho). There's three coats but that's because I didn't mix right (it's actually 1:1).
Fiberglass mat apparently will work with the resin, will let you know how it goes.
pr3dato8
Well-Known Member
^ great!
yep, resin is nothing comparing to what fiberglass soaked in resin will do") know it from personal experience.
know it from personal experience.
the only mistake i see is that you have resin stoppin in drips in a lot of places. that will make your body filling job harder. It is always important to cover the helmet equally so that not so much bondo work will be needed. Not saying your helmet is bad, just saying that you made it harder for the future self.
good luck!
Note: i love pwning future self
yep, resin is nothing comparing to what fiberglass soaked in resin will do
know it from personal experience.the only mistake i see is that you have resin stoppin in drips in a lot of places. that will make your body filling job harder. It is always important to cover the helmet equally so that not so much bondo work will be needed. Not saying your helmet is bad, just saying that you made it harder for the future self.
good luck!
Note: i love pwning future self
pr3dato8
Well-Known Member
little update:
i have as said before pepped a bicep
have installed light in my helmet (el sheets)
have cut out all the pieces for the elbow and forearm, will start gluing them tomorrow
ordered an amazing wearable arc reactor (mark 3 one).
the only shame is that al the iron man pieces i will make will be slightly too big for me. by slightly i mean uncomfortable big. oh well, too late to stop now. at least ill have a proper sized suit at some point maybe ill even grow into it
^highly unlikely tho. probably will have to add loads of inside padding
i have as said before pepped a bicep
have installed light in my helmet (el sheets)
have cut out all the pieces for the elbow and forearm, will start gluing them tomorrow
ordered an amazing wearable arc reactor (mark 3 one).
the only shame is that al the iron man pieces i will make will be slightly too big for me. by slightly i mean uncomfortable big. oh well, too late to stop now. at least ill have a proper sized suit at some point
maybe ill even grow into it ^highly unlikely tho. probably will have to add loads of inside padding


SaberTech
Well-Known Member
ok so I know it has been a while since I last updated on my own thread but life can be demanding lol ... anyway I found some time to create a helmet and wanted to show the results to you folks out there that may still be following my thread ... this took two times to accomplish as the first was done 75% of the way and i found that it had some major flaws ... but here it is let me know what you think please
SaberTech
Well-Known Member
alright so I got some more done on the pepping process here ... I got the chest done and both biceps ... the hand guards ... both shoulder bells ... 95% done with the back and the neck seal ... I have printed out the palms and fingers and abs to cut out and put together next ... i will have some pictures up later today to show my work any critique or suggestions form those further along would be welcomed but I fell like I am headed in the right direction so far
SaberTech
Well-Known Member
Thanks Phaeren ... so here are some pics of my progress so far ... I did not include the back piece since it is not done yet ... kinda thinking of redoing it since i have gotten better at pepping and hope to get better results from future parts. I plan to pep everything before I harden any of it so that i can do it all in stages and get better at each stage. although I could really use some help on how to fit the shoulder bells as I have completed the pepping part but not really sure on the exact fit of them ... is someone has a picture of the mark VI shoulder bells hardened and fitted already that would be great ...
Similar threads
- Replies
- 2
- Views
- 716
- Replies
- 43
- Views
- 3,454
- Replies
- 7
- Views
- 816
- Replies
- 1
- Views
- 585