Hero Phaser Scratchbuild

I am new to this thread so I appologize if I am asking something I should already know.

After you make a mold will you be selling these as kits? If so will they also have the metal parts?
 
I have to do two full hero builds to complete my obligations. Then I can start on kits. No I can't supply metal parts, I don't have the means to make them. I have to acquire them from other makers, try Nicksdad and Sporak.
 
Are you taking any more orders on hero build? If so will they come with metal parts?

If not how hard would it be to add metal part to the kits once you sell them?
 
I haven't worked that out yet. It's complicated by the fact that I can't produce those parts myself. Some folks have been stockpiling those metal parts, saving them for the right project to use them on. Anyone who can provide them to me for a build will save some money. But if I have to source them myself it will cost more (a full set of phaser 2 metal parts can run about $200). It'll be done on a case by case basis.

Again, I still need to work out the various costs. I'll start a JY thread when I'm ready.
 
Ok. Is it difficult to add these metal parts to a resin kit if I bUy the metal parts myself?

I have never done one before.
 
That depends on the kit. If it's solid resin, you'll have to drill/cut openings for the parts. Not difficult, but it can take some work to do. Then attach the metal parts with epoxy.

Mine is hollow thin walled fiberglass, easy to cut.
 
That depends on the kit. If it's solid resin, you'll have to drill/cut openings for the parts. Not difficult, but it can take some work to do. Then attach the metal parts with epoxy.

Mine is hollow thin walled fiberglass, easy to cut.

Sorry two more questions.

When you finish the P2 phaser would you be willing to sell that kit with your P1 kit together?

Do you know of any site that gives good instruction on what tools to use when cutting a resing kit to add metal parts. I'm a newbie so I would hate to accidentally mess up such great work by trying to do that.

I love your design by the way! Great work! I can't wait for you to finish so I can but one.


You use a dremel tool or other hand tool that is capable of cutting and sanding. You just need to be skilled with the tool of your choice in order to avoid cutting something that should not be cut. But, if you mess up and not in a big way you should be able to cover a mistake up with Bondo or other filling agent etc..
 
You use a dremel tool or other hand tool that is capable of cutting and sanding. You just need to be skilled with the tool of your choice in order to avoid cutting something that should not be cut. But, if you mess up and not in a big way you should be able to cover a mistake up with Bondo or other filling agent etc..

Cool. Thanks.
 
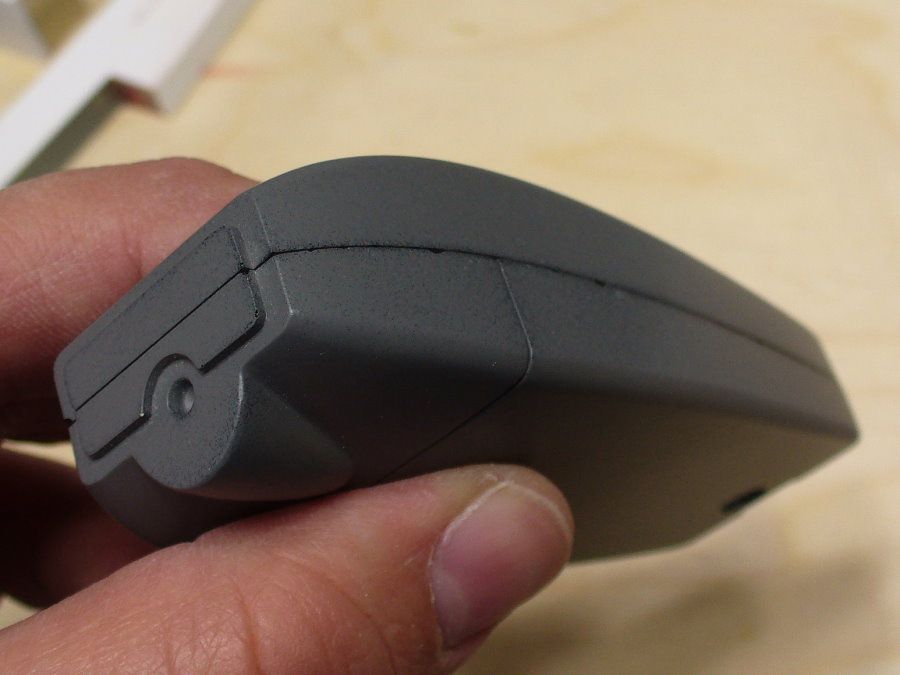
I've done the final shaping on the P2, rounding over the edges.
P1030472.jpg


P1030473.jpg


I then added filler to even out the P1 slot. I taped the two halves together to make sure they match.
P1030477.jpg


After sanding I had to cut through the filler to separate them.
P1030478.jpg


I then added a skin of thin styrene, I'll have pics when it's trimmed up.

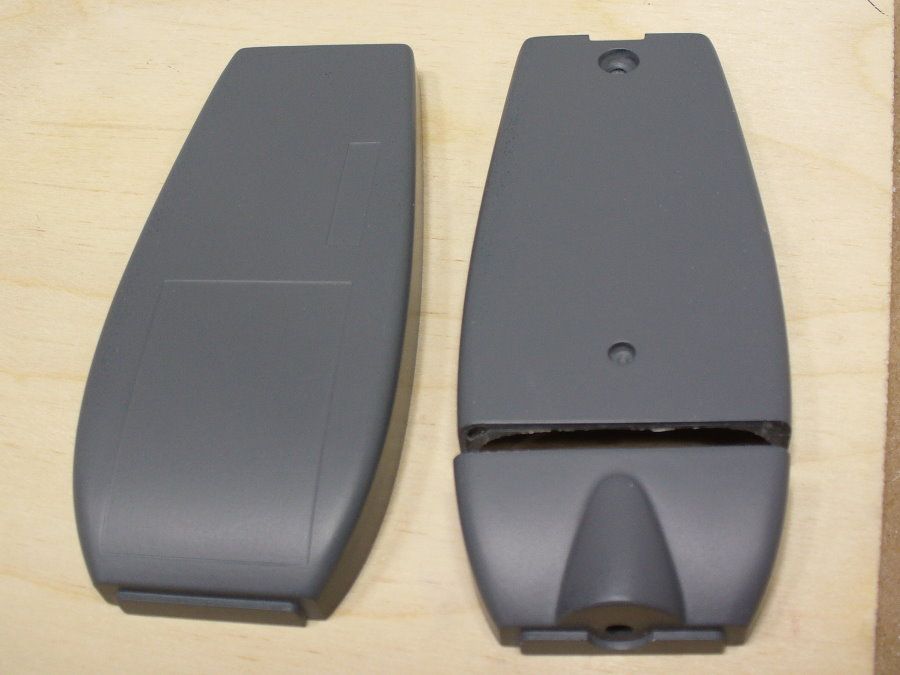
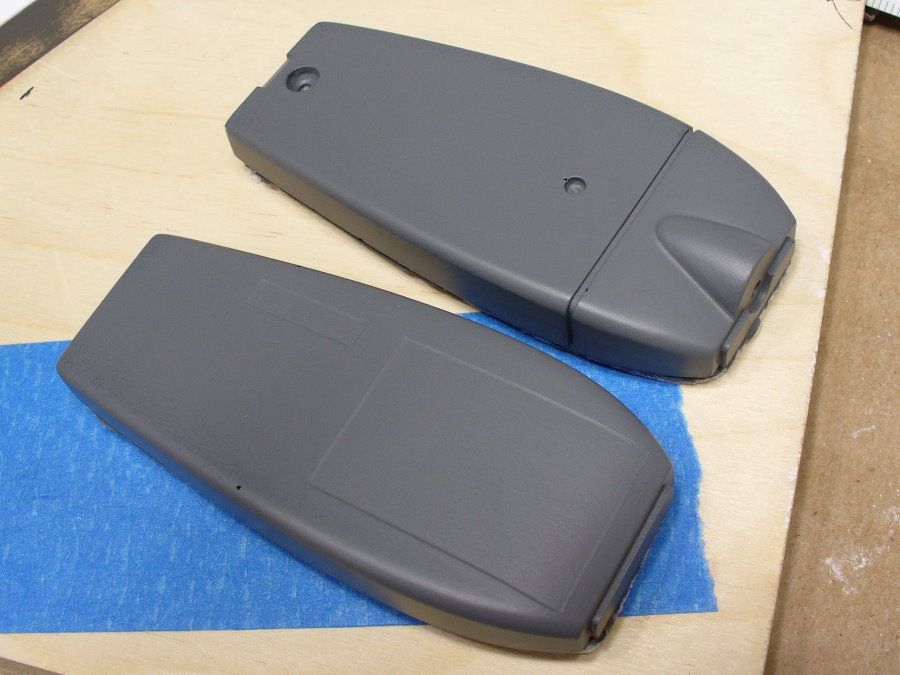
On to the P1, I was hoping that the Watertrap would allow me to use resin as a gelcoat. But it still foams up a little bit. It seems to work okay in a closed mold like the bezel, but not in an open mold like the P1. The black P1 in the above pic is one of the bad casts. So I went back to painting the mold and using epoxy based gelcoat. Here's the first set.
P1030475.jpg


Perfect fit, even better than the first ones.
P1030476.jpg


Second set. Both sets have a few pin holes but not bad.
P1030479.jpg


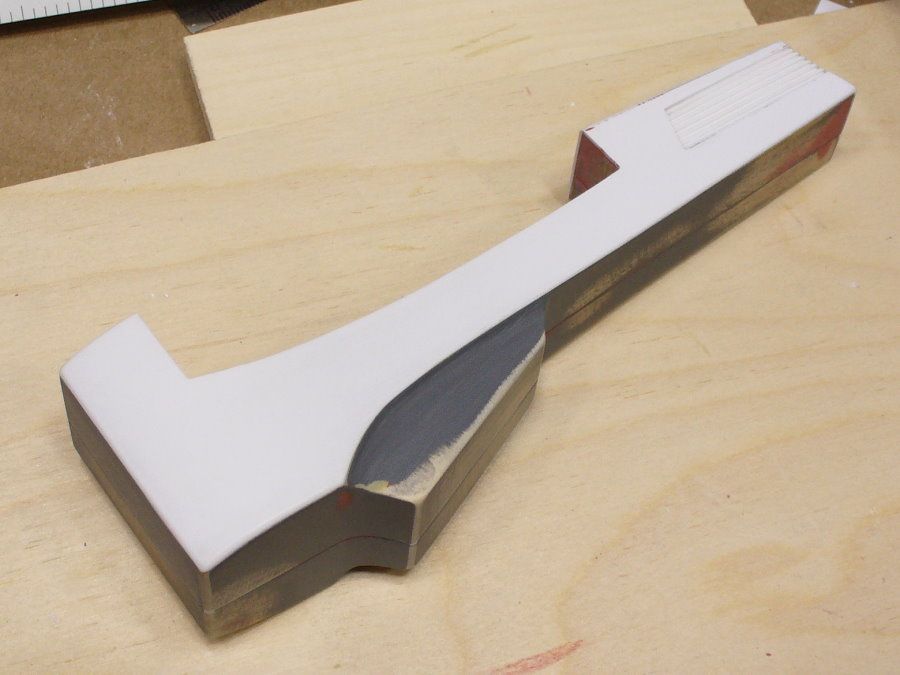
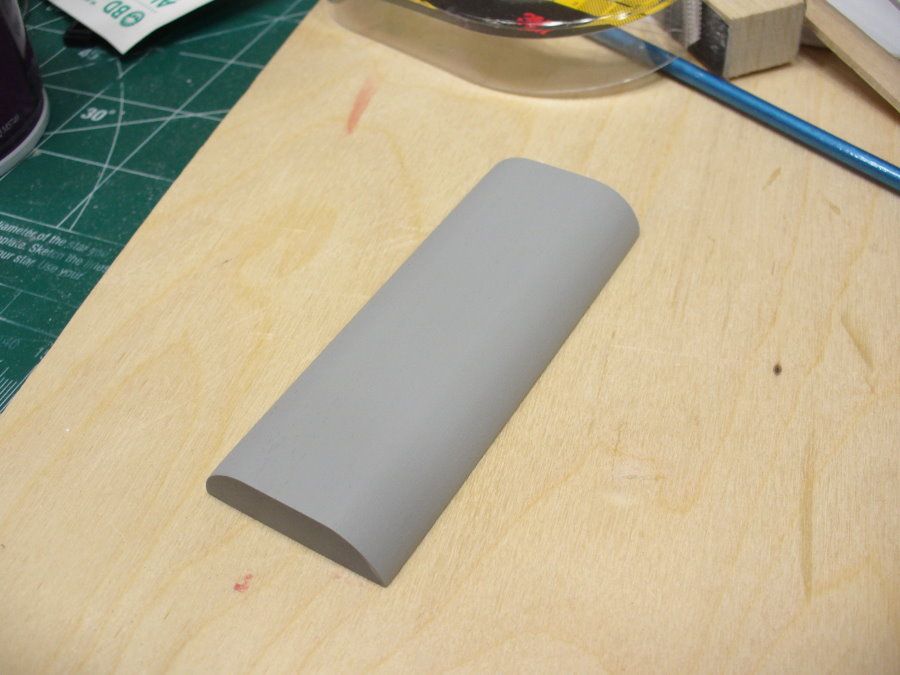
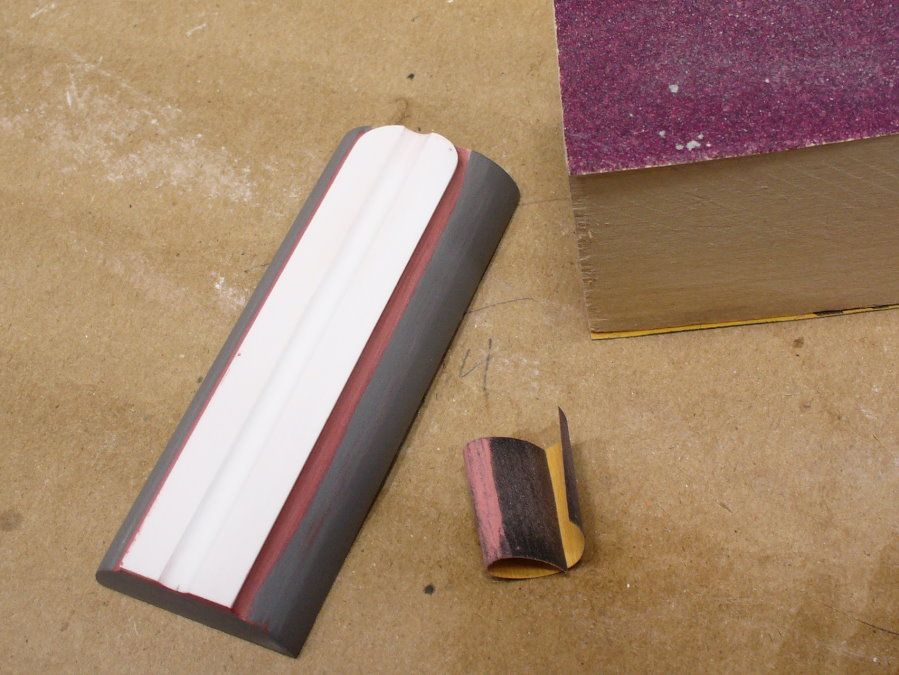
While waiting on primer and filler to dry, I started on the handle. My attempt to bend the brass tube was a dismal failure. I don't want to waste any more time or money on it, so I started a buck for a glass handle. I shaped it in wood and primered it.
P1030464.jpg


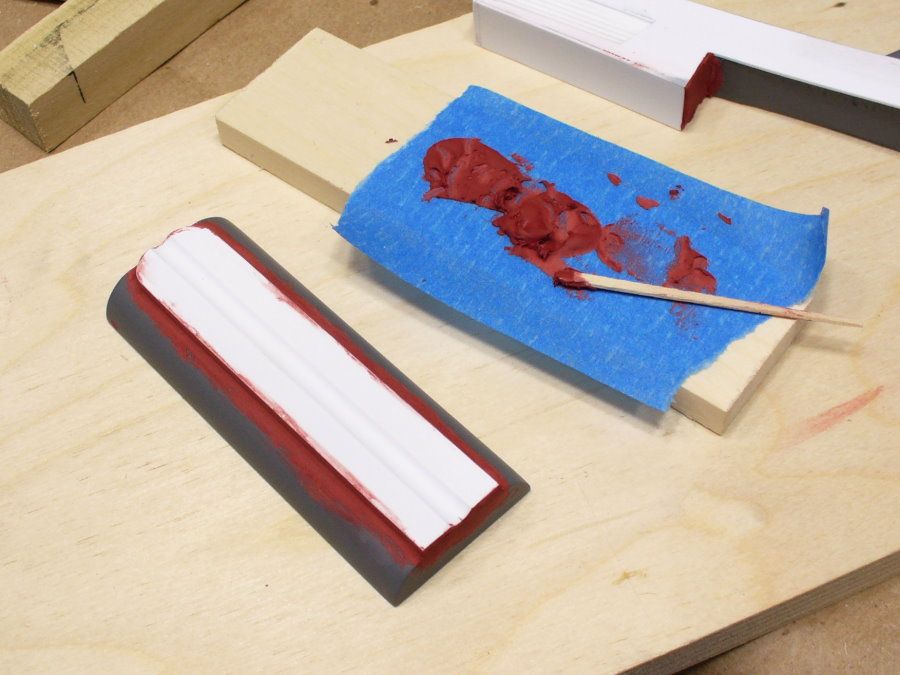
Made the grip with styrene strips, then used a 1/4in rat tail file to shape the center groove. Glued it to the wood then blended in with filler.
P1030469.jpg


Sanded the filler with rolled sand paper.
P1030470.jpg


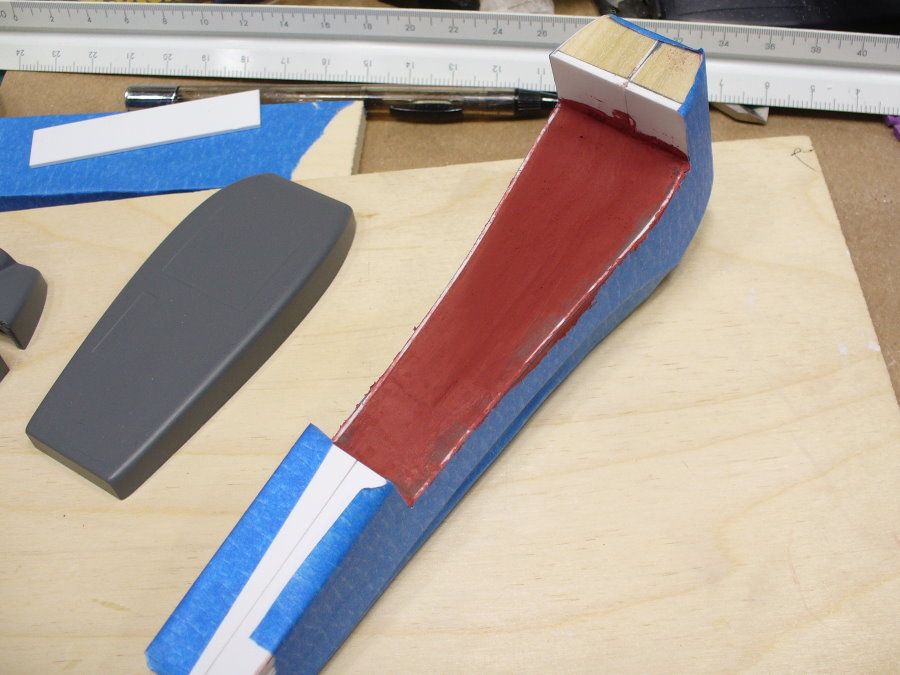
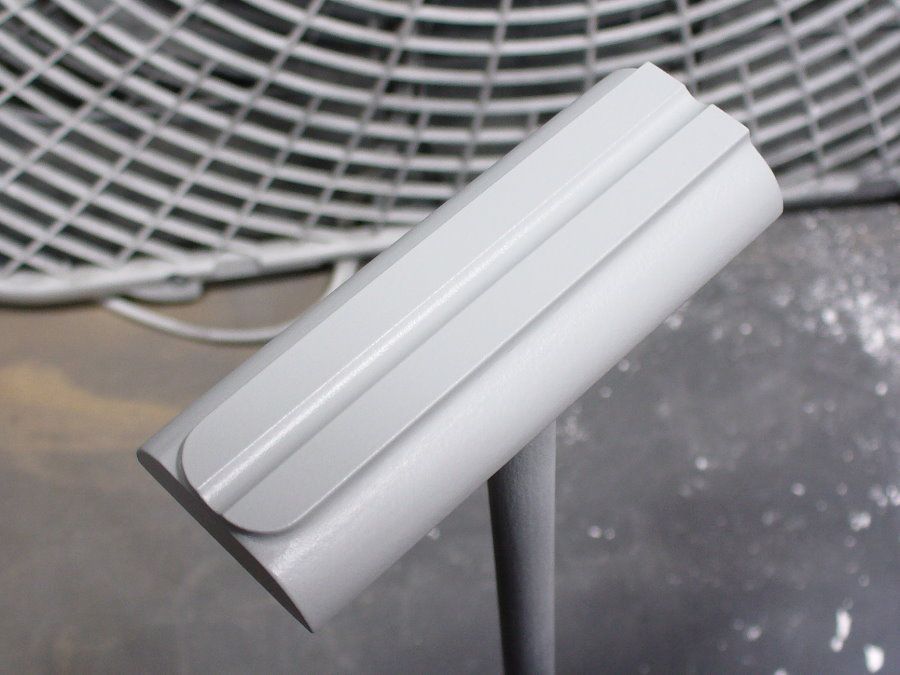
Here it is with the final primer coat.
P1030471.jpg


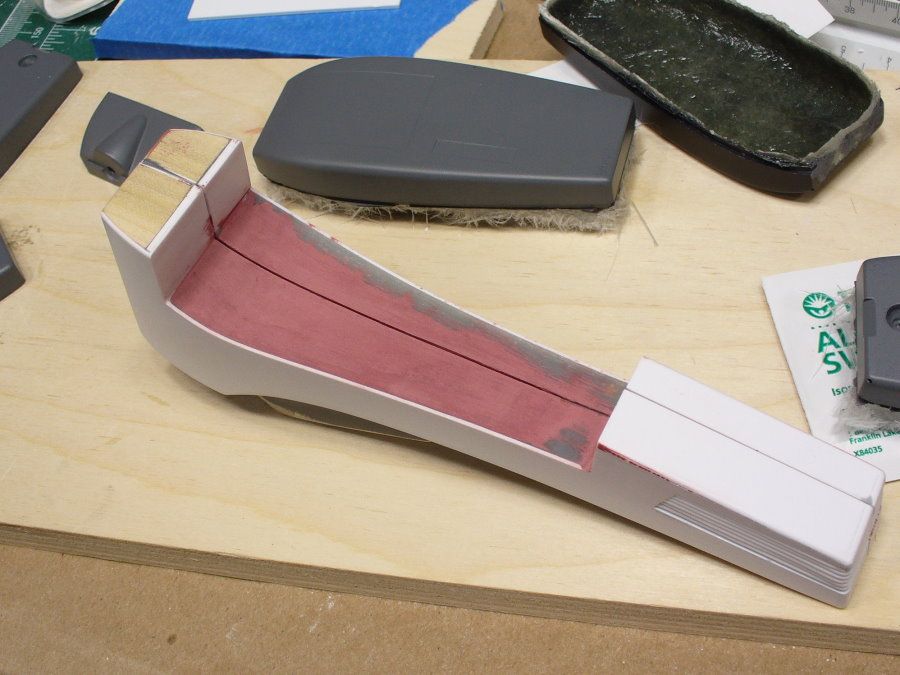
It now has the final paint coat and is ready to mold. I'll make two molds of the one half and cast two copies.
 
That's hard to say. I've made six sets of glass shells and the molds are already breaking down. I have more mold rubber on order.

I don't think I'll be doing too many more in glass, the epoxy is too rough on the mold even when I paint it first. My results with resin haven't been very good either. I live in a humid area, and the resin reacts with the moisture and foams up. I have some new resin coming in that supposedly has lower moisture sensitivity, hopefully it will work. If so I'll just make then in resin.
 
Stopped in to check out how this was going...then also got to see the red putty you recommended to me in action!

Looking just great!:thumbsup
 
Back
Top