Hellboy Rasputin Mecha Glove project?

Re: Hellboy Rasputin Mecha Glove photos?

Happy new year everyone!

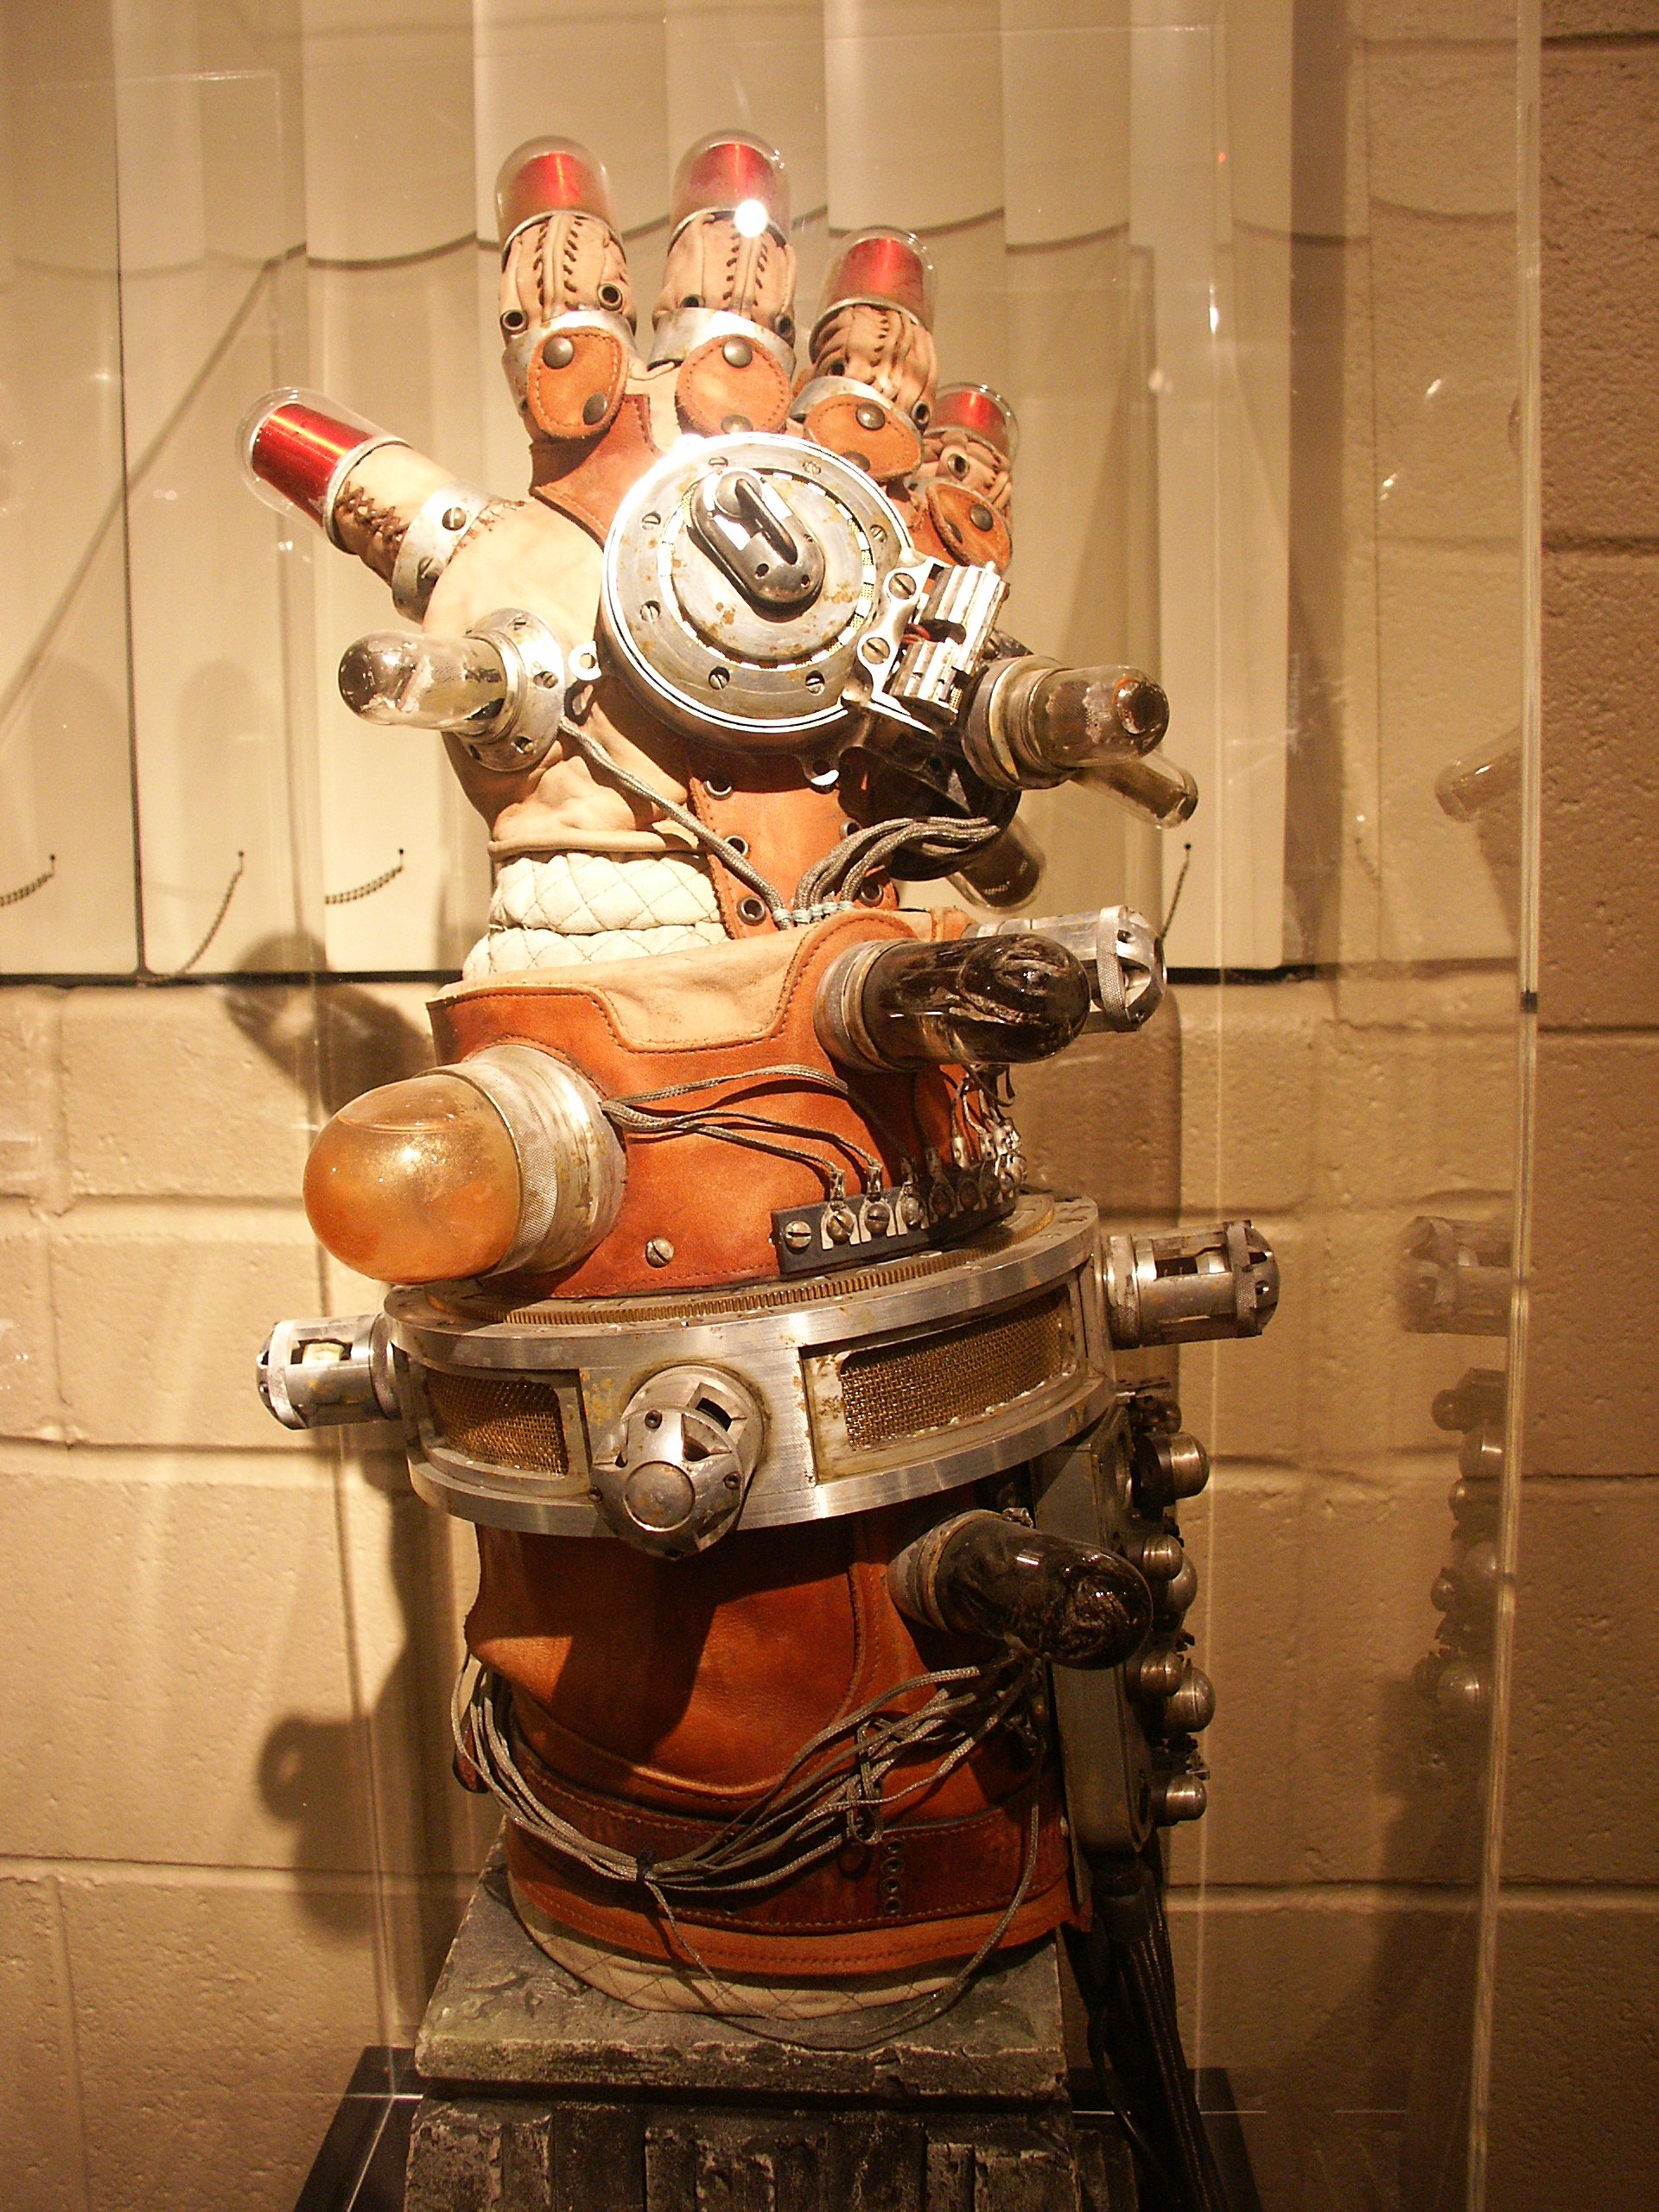
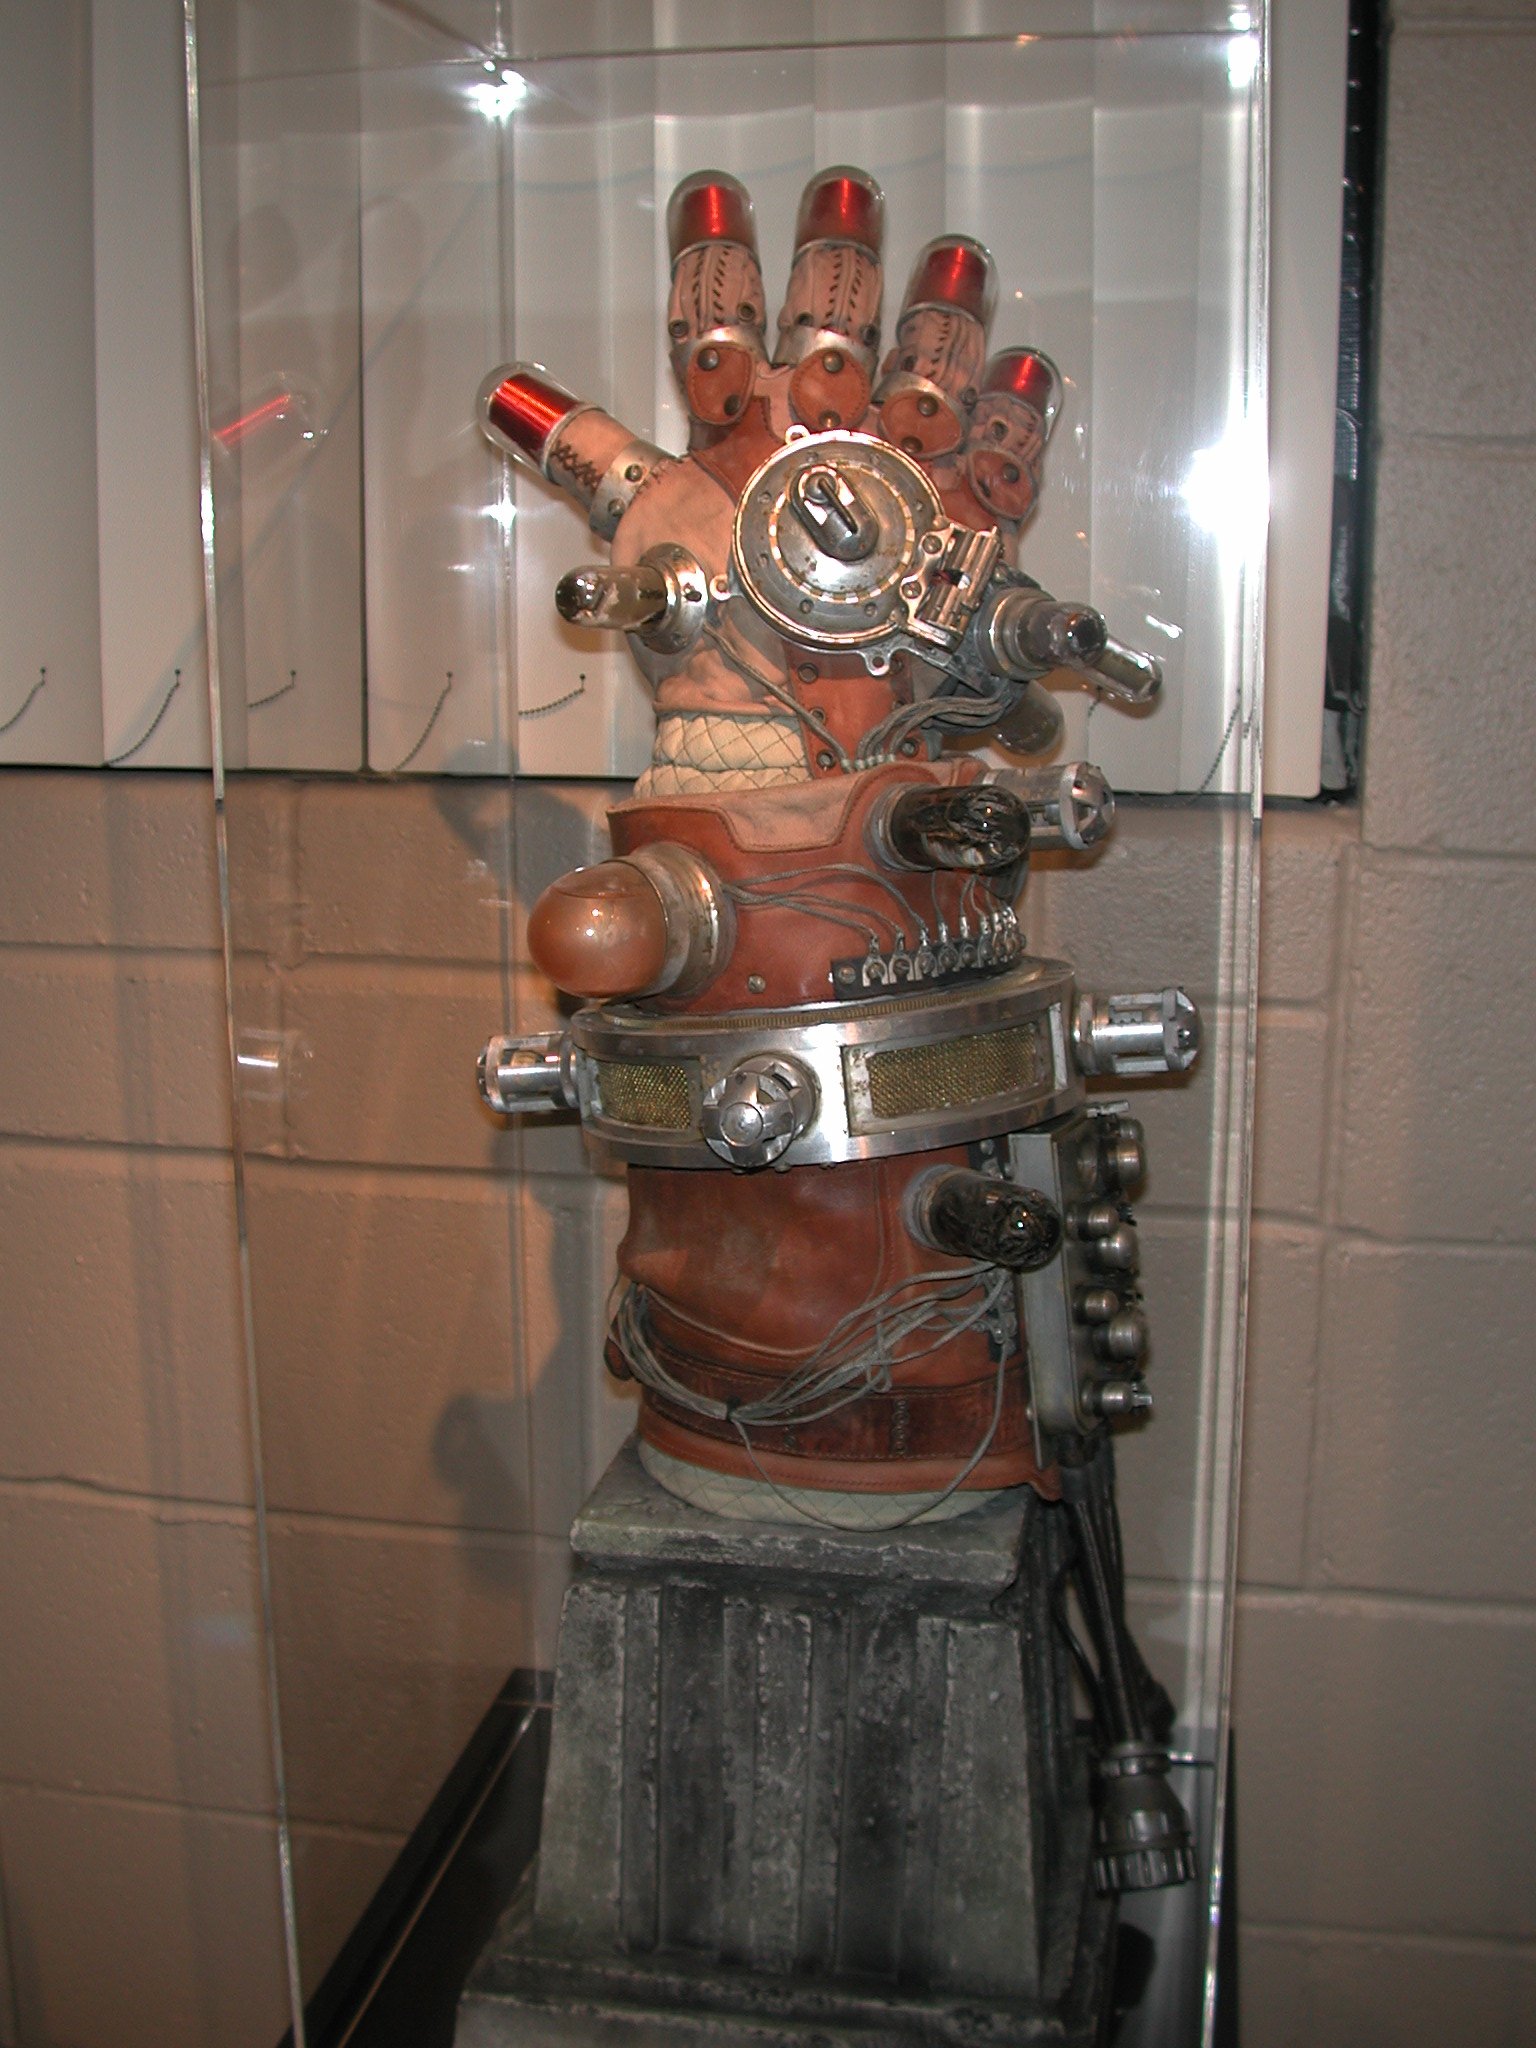
Here's my progress pix.

My cardboard template, marking progress and leather cutting pix of how I've been going so far. Also: I've made one of the tube bases so far.

It'll be clear from the photos that I'm making more than one. This is true. I don't know if any that I make will ever be put out there, so let's not discuss it for now. I always make props in multiples because I practice until I get things right. You'll notice my stitching is far from perfect on the leather.
(which is a medium brown I chose from a local supplier, about a 7-8oz weight, and the stitching is done in a groove made by a stitch groover, I'm not sure they did it that way, but to my eye it looks more accurate. They can be gotten at Tandy Leather)

Question for leather people: what's the preferred method for dyeing the edge of leatherwork?

Yay!
 
Re: Hellboy Rasputin Mecha Glove photos?

Fantastic information Adam, thanks! It's gonna take a good while to sort through it all. :thumbsup

I'm actually getting a tad overwhelmed by the whole thing (damn I wish I still had access to a lathe) but if I tackled Vera from Firefly I should be able to tackle this... somehow. I'm in the middle of doing three BPRD character costumes for next Halloween (Red himself, Liz & Kraus) so this'll likely be something I do alongside.

I at least got some leather samples in the other day! The glove portion looks like natural color suede... it's almost pink in the photos.

I agree. It's lighter weight, more like a 5 oz. It also lines the aluminum pipe of the forearm. I believe the fingers are simply tubes. Albeit tubes with on overhand stitch.

Another question for leather experts:
What is that stitch on the fingers called?

You realize that as soon as I finish with this prop I'm going on to the Schufftein Troll Viewers.
 
Re: Hellboy Rasputin Mecha Glove photos?

The thumb doesn't look like it was attached separately like on a regular glove but you can see some seams along the fingers and in between them suggesting they were done from several pieces.

I was just looking at the Toll Viewers. I may be underestimating them, but they actually look easier to do than the Mecha Glove.
 
Sorry yes, the thumb is definitely a separate construction than the fingers. I think the four fingers were one construction; tubular, the thumb more like a cone.

And I agree about the troll viewers. Structurally they're not that complex. But gorgeous. Shall we start a thread for them? I'd love to get some good reference pix of the box they came in.
 
Awesome work so far! It was also my understanding that most if not everything on the glove was custom. The large ring gear is a real PITA unless you have a decent size lathe with a gear cutting attachment. One way to do it could be to have it water jet cut from .125" brass sheet. To make my prototype gear I generated the gear template using this site:
Gear template generator

Then I cut the gear by hand from plastic sheet. I did it using 2.5mm tooth spacing, which is just close enough to 32 pitch to make it work. Then I drove the ring gear using a 24 tooth 32 pitch gear attached to a servo motor I had converted to continuous rotation.

Pololu has some nice small gear motors that would probably work well and with a simple speed controller the speed could be dialed in just right:
Pololu - Pololu Metal Gearmotors

I also looked for large diameter bearings for the rotating ring and came up empty handed for a low cost off the shelf bearing so I ended up making rollers that spun on axles between two plates. There is a ring between the rollers that locates them on the main tube. It's pretty simple really and this would work great using skate bearings. The hard part would be making a 6" ID locating ring that slips over the main tube.


Actually, that locating ring could almost be styrene. Glued in a set of strips to the 6" tube with an accurate space.

I keep concluding that the spinning ring (except for the gear) needs to be cast. I know I can build it fairly easily from 8" pvc to the correct outer ring dimension (8.25" OD).
the outer dimension of Schedule 40 8" PVC is 8.625 (with an ID of roughly 7.6", there's a lot of meat to play with in there) and can easily be either a) lathed down by anyone with access to a reasonably large machine (or a bowl grip for a standard wood working lathe actually), or b) sliced and then re-joined with PVC glue to the correct OD. The spacer (top and bottom) that fills the gap between that OD and the 6" can be straight PVC board or Cintra, both weld-able with PVC glue, making for a very solid construction. I could do all the work with a good fine-tooth Japanese woodworking saw if I had to.

Once finished, the spinning ring would be primered, and then covered with a bright Rub-n-buff. The high point you could buff it to is roughly equivalent to the low point the painting and weathering of the actual prop took it to.

I love the idea of watercut brass. That's a great idea. 2mm spacing for the gears is also a nice simple approach.

As for the motor, I include, for discussion, a blown up shot with a rough measurement. Guessing how a modeler like Setrakian would work from a place of convenience, I think it's likely that this motor is the guts of a high-power servo, like a Condor or some such. It would make sense as it already comes with a proportional driver already, and it's easy to convert to continuous operation.

Anyone recognize these parts a bit?
 
Here's a quick and dirty drawing of what I mean about the pvc construction in Google Sketchup.


Actually, that locating ring could almost be styrene. Glued in a set of strips to the 6" tube with an accurate space.

I keep concluding that the spinning ring (except for the gear) needs to be cast. I know I can build it fairly easily from 8" pvc to the correct outer ring dimension (8.25" OD).
the outer dimension of Schedule 40 8" PVC is 8.625 (with an ID of roughly 7.6", there's a lot of meat to play with in there) and can easily be either a) lathed down by anyone with access to a reasonably large machine (or a bowl grip for a standard wood working lathe actually), or b) sliced and then re-joined with PVC glue to the correct OD. The spacer (top and bottom) that fills the gap between that OD and the 6" can be straight PVC board or Cintra, both weld-able with PVC glue, making for a very solid construction. I could do all the work with a good fine-tooth Japanese woodworking saw if I had to.

Once finished, the spinning ring would be primered, and then covered with a bright Rub-n-buff. The high point you could buff it to is roughly equivalent to the low point the painting and weathering of the actual prop took it to.

I love the idea of watercut brass. That's a great idea. 2mm spacing for the gears is also a nice simple approach.

As for the motor, I include, for discussion, a blown up shot with a rough measurement. Guessing how a modeler like Setrakian would work from a place of convenience, I think it's likely that this motor is the guts of a high-power servo, like a Condor or some such. It would make sense as it already comes with a proportional driver already, and it's easy to convert to continuous operation.

Anyone recognize these parts a bit?
 
This is one (if not the) of my dream props.

My wife and me took a few pics mostly from the same angle 2005 at Spectral Motion:

mechaglove01.jpg


mechaglove02.jpg


I'll be watching your progress with interest guys!
 
Those are awesome pictures!!!
Thanks.

Any word from anyone on the braided wire shielding?
 
Those are awesome pictures!!!
Thanks.

Any word from anyone on the braided wire shielding?
 
Oh... and about that gear. I was just thinking that Evergreen make styrene sheets that look a lot like that. Might be a quicker solution that having to glur hundreds of strips.
 
I've always wanted to build this prop! But unfortunately budget restraints and available free time are not allowing it anytime soon. I am so glad you guys are working on this and hope to follow your progress. Keep up the great work!

Also here's a random pic I had of the glove... I've got a few more, I'll see if I can dig them up.
gauntlet.jpg
 
Last edited:
That's a great shot. Strangeley, for all the pix I have of the thing, there's only 2 or so that show this angle, in line with the thumb. Took me awhile to see the three screws that secure that top piece of leather. Also note that the 6" aluminum tube has 3/4" holes drilled around it's top edge. You can see them under the uncolored leather that wraps the tube below the wrist.

The gear:
I'm making mine a static prop with lights. That's how it'll be displayed, so i don't need the gear to work. to that end I'm likely going to lasercut mine. I'll likely have extras I'll be able to share.

Here's my info on the gear, blowing this thing up in photoshop and counting the actual teeth.

The pitch comes closer to 1.6mm tooth to tooth, and with a 7" OD gear with a 6.25"ID, that comes to exactly 360 teeth I counted around the perimeter (I counted 45 teeth on 1/8th of the circumference which is what I could clearly demarcate)

The smaller gear I see as being 1/2" dia by 1/2" tall, with 24 teeth around it's perimeter. Probably some brass pinion wire will fit that bill.

I'll post pix of my lasercutting in the next 10 days when I receive parts.
 
I think that plug might be a size 23 tyco plug the back shells and locking rings look similar, you'd just need a lot of weathering and the like.
back shell
plug
but not being able to see the face I couldn't tell ya.

cheerio
 
I think that plug might be a size 23 tyco plug the back shells and locking rings look similar, you'd just need a lot of weathering and the like.
back shell
plug
but not being able to see the face I couldn't tell ya.

cheerio

Holy crap I think you've nailed it. That looks perfect.

I'm going to order some this week!
 
Wow- great info and pics.

Here's how I made the rotating ring assembly- the drawing isn't to scale but you get the idea. The big problem with my sample version was the PVC pipe I used wasn't that round so as the ring rotated it had to have a fair bit of slop in order not to bind so it could rotate smoothly. The outer ring, inner ring and outer ring spacer are screwed together. The ring gear is screwed to the outer ring. The locating ring is fixed to the main aluminum tube.

There are four bearing assemblies equally spaced. There is a solid axle that goes through both bearings and is held in place by the inner rings. The wave washer allows for a bit of movement in bearing distance since I didn't have any way of making sure my locating ring was a consistent width- otherwise it was tough to keep it from binding as it rotated. In between the bearing assemblies are four wide spacers equally spaced (not shown in the drawing) that hold the inner rings apart and add some rigidity to the rotating assembly. In each window there is the mesh screen assembly.

RotatingRingAssembly.jpg
 
Last edited:
Back
Top