Hasbro U-Wing modification

Thanks! Funnily enough that link is to a kit almost identical to the one in my photo, although the picture doesn’t show it that well.

I’ve got three diameters of tube which nest in each other which I can use for the main barrel, so that bit is sorted. I’m sceptical as to whether I can cut the flares bit off the brass flash hider thingies, as the metal is really really thin.

I started cutting down the plastic bit from the original toy and found that this bit is made of really flexible plastic and it’s pretty much impossible to drill through with a pin vice. Maybe it could be done with a power drill but I suspect the plastic would melt. So...looks like I’ll have to model and print the main body of the guns so that I can add in a hole for the led/fiber optic to sit in. Back to the (CAD) drawing board!
 
I was wondering how workable the kit plastic would be. That soft rubbery stuff they use for some parts is nearly impossible to work with or make modifications to
 
oh, and as for cutting the flared part off of those thin brass parts, you could add a tube or rod that fits inside (doesn't have to be metal) to use as support so it does not crush while cutting
 
I'm still quite reticent to cut those brass parts down - I know the minute I do I will find I need something similar for another kit, and they were quite expensive. I'm going to have a go at printing something close to what is on the original toy - my main aim is to have holes in the sides as it helps with the look of the "lasers" when they fire, as you can see them from the side as well as in front. I've also modelled the main gun piece, with a hole for a metal barrel which I can put an led and fibre optic in.

We'll see how they look when printed...

Screen Shot 2020-07-25 at 21.48.01.png

Also added the landing gear struts to Thingiverse if anyone's interested. Again, they will need brass tube or rods to act as the main struts.

 
For pretty much the first time ever my design printed properly on the initial try and didn’t need any big adjustments. I had made the holes for the metal tubes bigger than they needed to be by about .25mm but they still needed to be drilled out a little bit. I was really surprised that the flash hider bits printed properly

C628512F-DB3D-46A4-B196-A030CB9829EF.jpeg
The printed version (top) looks a bit rough here but most of that will look better once it’s primed - I think that sort of mottled look is because I didn’t completely dry the print before curing.

I’ll be adding a larger section of tube over the existing barrel piece to try to replicate the tapered barrel of the original.

I’ll add these files to thingiverse when I get a chance
 
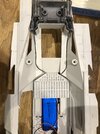
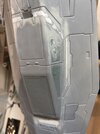
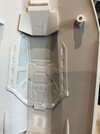
Just wanted to post some pictures of the aluminium wings which Padawan311 was generous enough to send me. I was expecting just the internal frame but there are also panels for the top and bottom as well, complete with panel lines etc. These things are seriously sturdy and look really awesome. Can’t wait to have a go at fitting them onto the toy.

EF0D2373-41A9-470D-ACE6-BB3601DA1700.jpegC0383608-C2B5-4F78-B41C-0AF5FB6E6FA1.jpeg27C2961B-990F-442D-B8FE-311510085957.jpegD0A15A6B-00F5-4F79-B4A6-BE7CB7B275BF.jpeg
 
No more actual progress as yet, but I have found another really good resource for people trying to build a U-wing. This guy built a 1:18 scale U-wing from cardboard: Rogue One U-Wing vehicle playset -- 1:18 scale for 3.75" figures - Toy Discussion at Toyark.com

He goes into a bit of detail about how the inside of the ship doesn't fit into the outside (a la Millennium Falcon), which explains to some extent why I was having difficulties fitting everything in! He also linked to some screen caps which I hadn't seen before, as I didn't remember that the U-wing featured in the film before Scarif. There are some good pictures of the front bulkhead, so I will be modifying my design to add extra details in.

zBmh2Wa.jpg

Starwars screencaps Rogue One pages 17 and 18 are also good.

He also has the idea to use the sound and light effects module from the Revell build-and-play U-wing. I was hoping to add in an adafruit soundboard and a speaker but there is definitely no room for that - so I might pick up the Revell kit and see if I can incorporate the sound board and speakers from that. I might even be able to wire it in so that the front gun LEDs light up when the same button is pressed. The firing won't sync up with the sounds but it's probably the best I can do with the space available.
 
Managed to get a chance to fit the new wings today. I used epoxy to join the wing parts together and then attached the cog parts from the plastic wings to them so they would work with the existing wing folding mechanism. All fit really nicely - I just added in a 1mm shim of styrene to put the cog at the right height.

I’m really pleased with how it looks. I’ll need to add some greeblies to the surfaces of the wings but other than that they’re good to go.

45CDFF68-FB52-47E4-A957-F890F39E357F.jpeg69C89C80-1654-4570-A776-CF813E13ADE9.jpeg
with the original wing to show the size difference
B9E3D27D-361F-4334-8676-4CEC5CB2840E.jpeg

the only problem is that they’re really sturdy which means that they’re too heavy for the synchronised wing folding mechanism to work, so youneed to manually move both wings at the same time. I know the wings weren’t designed specifically to work with the mechanism though, so I was ready for that.

I also printed the new front bulkhead, which printed really well and isn’t twisted like the last one I printed.
088F1D1B-32BE-486C-8DEB-F76553B51929.jpeg
 
Those wings look perfect! I still have to figure out how to scratch some. Leaning towards the square brass tubing for support

As far as the Revell sound/light module, it has one green LED and a few quick pew pew sounds

Unfortunately the whole model is actually part of the model itself and has all the back strip details on it was well as the rear bulkhead

I could take a closer look at it and see if I can get it apart to rip out the electronics. If so, I can send them to you as I already built one with the sound and play part. I have a second one I, but I do not need/want the sound/light for that one. I just need the outer shell of the module since that is integral to the build
Thanks, that’s a kind offer - However I already succumbed to Amazon next day delivery and got the Revell kit delivered already. I cut open the module and pulled out the electronics (and then glued back together so the model isn’t wasted).

i’m going to see whether I can remove the green LED and wire it up to the laser cannons at the front, with a flasher chip so that the lasers are activated along with the sounds when the button is pressed. And I’ve just realised that, since the internal wing folding mechanism doesn’t work I may as well remove it and give myself much more room for electronics. Which is good, because I couldn’t fit the 1000mah battery that I was planning to use under the floor as planned, so maybe I can fit it in the engine bay at the back instead.
 
I’ve been doing some electronics and painting. There are so many dependencies on this model now that it’s getting difficult. I really want to paint the inside but I need to put the wiring from the cockpit and guns under the floor before I can do that.


The problem then is that I need to paint the bulkheads and control panels etc before installing them, so will need to mask them off really well prior to spraying the rest of the interior.

from the reference pics it looks like most of the inside is white(ish), so was planning on using Tamiya insignia white. There are also gray and tan panels which I’ll probably brush paint

I also need to ‘glaze’ the lower cockpit windows but obviously it would be easiest if I did that after painting the interior.

anyway, I printed the front cockpit consoles. They’re 100% made up by me - the reference pictures seem to show that they don’t have any screens/lights etc on them, but I thought that would look boring so I added a bunch of generic greeblie-looking details and I printed holes for fibre optics to go in. There will be a little lightbox which I’ll probably just put a single SMD led in to light these up.

6A49559C-EE68-46C7-81C3-CF0D927812DF.jpeg48EC9776-95A2-46A3-AD8B-B23B10BA5C1A.jpeg

I also painted up the side consoles for the cockpit. The plan is to attach an SMD led to the back of each one and cover it over with aluminium tape to block the light from the rear. The parts are printed in translucent resin so the light should spread to each of the bits I haven’t painted over. I added some white fabric to the back to help diffuse the light.

811866AA-935E-4363-8413-9B31BC82DAE6.jpeg

The wires for the cockpit LEDs and the guns will need to either be just surface mounted on the inside of the ship or I could tape over them with aluminium tape before I paint the inside, which would hide them a bit. I think the wires won’t look that bad if they’re visible.

I also printed some imperial style floor plates, and then cut some very thin acetate, which I gave a light coat of AS20, to back them for the floor. I will attach the acetate after I’ve painted the floor plates.

57A3D417-5920-4503-B39A-464C21306E76.jpeg
 
Had a bit of time to work on this - gave the lower inside a coat of primer and then AS-20, and a test fit of the floor. Once the front guns are stuck in and the wires routed underneath I’ll stick the floor down permanently.
F0C5A986-1227-477E-A857-D7DB367446A7.jpeg
Also sealed up the cockpit with superglue, mr surfacer 500 and perfect plastic putty, and same for the forward engine parts, which had quite large gaps.
A6E11429-FB78-4A3E-A07B-AAD754B8DB04.jpeg
 
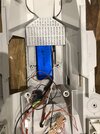
A little update - I’ve been doing some soldering etc. I’ve got the front cannons fitted now, and have started to wire up the battery, USB charger, lower engines, gun leds and the flasher chip for the guns. I’ll need to wire in some kind of connector so I can connect the upper half electronics to the lower half as well.
F2A010B1-AA73-4E65-8FBF-11D9A3498050.jpegE50C9D7A-FE3A-4943-8B12-74B956303119.jpeg
 
Last edited:

Your message may be considered spam for the following reasons:

If you wish to reply despite these issues, check the box below before replying.
Be aware that malicious compliance may result in more severe penalties.
Back
Top