That's very good of you to say mate, thank you.
Yes, I filled all the holes and sanded the logo's off as well as the tiny disclaimer text on the side under the receiver. It wasn't difficult and while it took a little time the overall result I was satisfied with. Did I disassemble the piece? No, I worked with it fully assembled.
I think it should be stressed that I was striving for a blaster that was well used, dirty and well loved not a pristine piece which is far harder to finish and takes a lot longer to complete. As I have mentioned before, I based it on the look and finish of one of the screen used blasters owned by a well-known collector - which looks really beaten up. In essence, my build is meant to embrace the spirit of the blaster from the movie and is in no way intended to be FROM the movie. The overall proportions of the Nerf are not close enough to fool anyone and so I consider it an M41 variant not an M41 itself - much like there are numerous variants (which look slightly different) of say, the AR15.
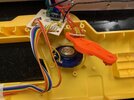
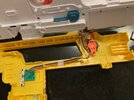
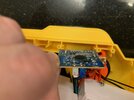
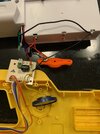
Here are a few pics I took while I was still working on it. I am still weathering the blaster here as you can see from the cleaner underside surfaces. The grip, I painted with wood grain and then weathered it heavily in the upper portions - in the same way a real combat firearm will have cleaner grips where there is constant rubbing.
Good luck. While it might not be accurate its a cracking offering and I know you wil enjoy your journey as much as I have.
MARK
View attachment 1624642
View attachment 1624643
View attachment 1624644
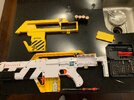
") Time to have a play with it before breaking out the sandpaper and the paints! Where's that local xenomorph hiding... Game over, man. Game over...
Time to have a play with it before breaking out the sandpaper and the paints! Where's that local xenomorph hiding... Game over, man. Game over...