Ghostbusters Ecto-1 Project: The Largest Ever

Man, I love this build, I LOVE the uber attention to the smallest of details, and I love the chest-thumping bluster you put in your posts.

You are building THE BEST!

Great job!
 
Shut up OldSkool! I may be short but I make up for it in BIG ways.

And Hotshot, I'm not in the midwest...Pennsylvania is on the east coast! Hahaha...sorry, I had to go there...just teasing.
 
Well, I don't have an Ecto-2 in the works (sadly), but that's mainly because it won't fit in the back of the Ecto with this:


That is a Ferno Washington model 22 cot, and it's essentially the same exact cot used to make the proton pack rack that slides out of the back of the car. My cot is missing a small, pointless bar accessory that I can't even point out (it looks essentially the same without it anyway).

That picture was taken of it before it was shipped to me, but I do have another one (I have a lot of duplicates...perhaps to make another car???)
 
Well, here are some of my newest photos from California. First, the original dash clock:


This 56-year old baby has been wired up and actually works! That's not all, the rest of the dash is really coming together nicely:


I am currently working with my buddy in CA about doing a bunch of other stuff as we speak. I will be making my second trip to California at the end of May the way it looks, and the intent of that trip is to DRIVE the car...YES! Hopefully the real 1959 steering wheel will be installed by then because that race-car one sure is hideous.

All in all, I can't believe my car once looked like this:


God, I love my car!
 
So the next matter of business is the drip rails above the rear windows. My car was a Landau hearse originally, so it did not have this, but I got real ones when I found the window border moldings.


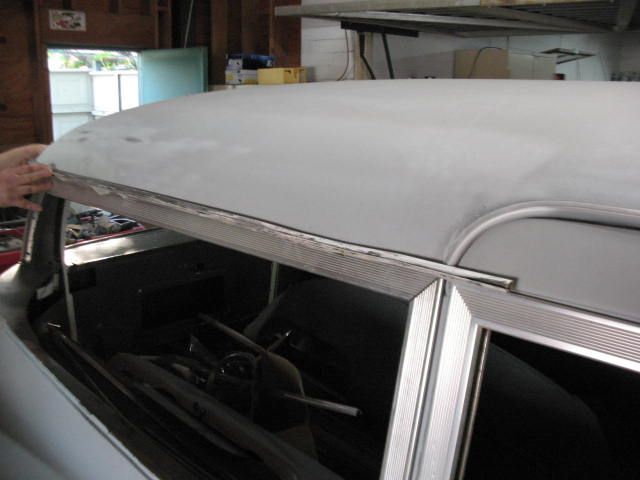
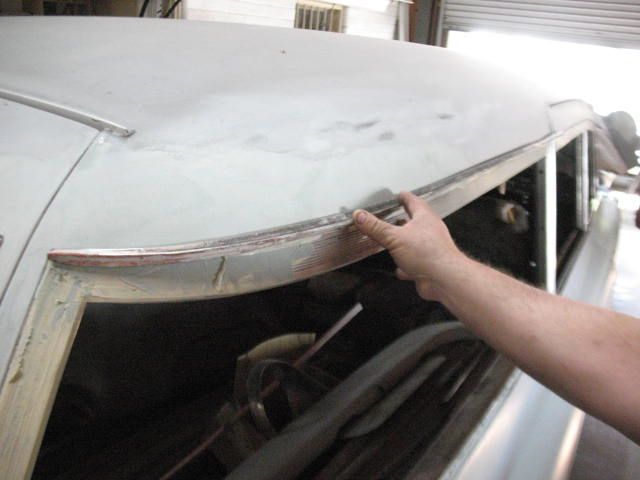
As you can see, I have the pieces. The problem is that they are constructed very strange. They contain aluminum that folds over a lip in which small screws are threaded to connect the drip rail to the car. My guy tried to get the lip exposed to screw the drip rail on, but...


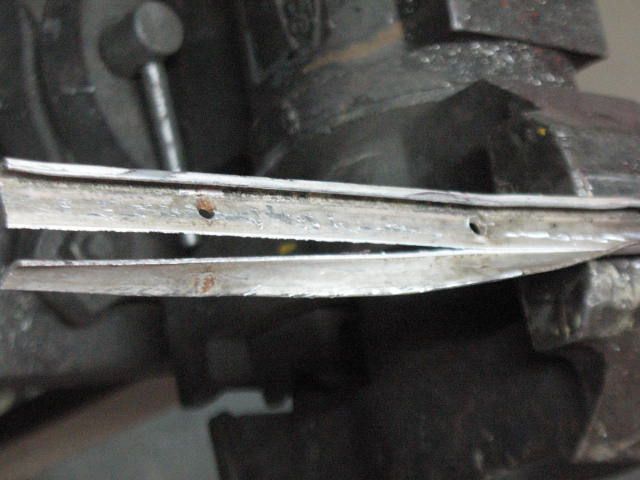
...when you heat and bend aluminum enough it becomes sh*tty. So, long story short, he is building me new drip rails based off of the originals (they'll look better).

As this process is being tackled, the next step of the interior is going to be underway soon: door panel restoration!


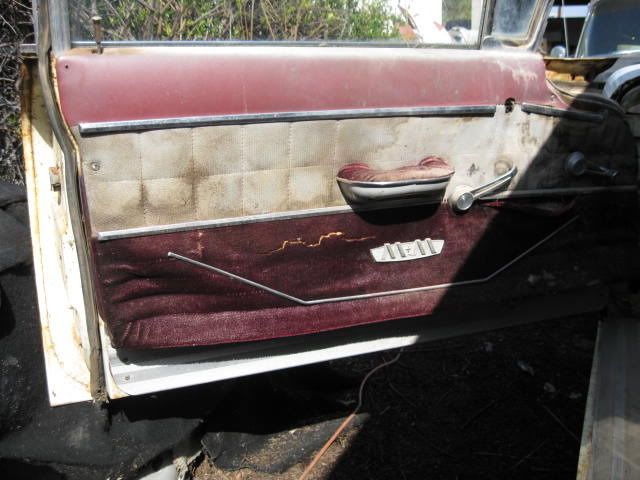
These are nasty and not the correct colors (black and grey). Mine will be reconstructed to look like the movie car's as much as possible. They will likely be produced by the guy who rebuilt my dash - I'm excited!

And, as if that isn't enough, I found an AMAZING garage for rent and it will become the Ecto-1 HQ until I have the funds to build an appropriate garage/house. My plan is to have a garage resembling the firehouse...with a firepole...that can be used for sliding down...or topless dancing (kidding, of course).
 
Don't rule out the topless dancing! That, combined with the Ecto-1, is a sure-fire draw!!!

(Unless it is a bunch of 30+ year old, overweight, Ghostbusters in unzipped flightsuits doing the dancing. That might attract a slightly weirder crowd than you are looking for...:lol)

On a serious note, I feel you pain on the drip rails. I have worked on getting vintage rails/trim to go back on and it is a royal nightmare. With the new engine that baby should be more fun to drive than any Ecto on the road. Hats off to your builder!!!
 
Well, I got another batch of photos late last night. One of them is worth of sharing here at this time. What you see below is the rear of the car ready to be primed. The quarter panels have been blocked. The fender skirts, though not attached in this photo, have been fitted (they were a little loose originally but that has been fixed), and the weld/conversion work is all complete.


Now, for some other random odds and ends...

This next picture is the CB radio for the Ecto. This is a Midland 77-859, the same exact model in the movie car.


Here's a Regency ACT-R20 scanner - it sits on the dash...


This next one is a Gentec 525 dummy load, it sits on the dash with the Regency scanner.


Here you can see these things as they are in the movie car before it was restored a little over 5 years ago:


It's kind of exhausting how much goes into replicating this car...so many parts and so many of them very difficult to nearly impossible to find.
 
OH! And I forgot to post the photos of the door jams restored. They are just as beautiful as everything else so far!


More photos to come soon...thanks again for checking out my build thread!

- Adam
 
Wow the level of accuracy your putting into this is just outstanding! I'm more then a little impressed and a lot jealous. Keep them pictures coming, I love it!
 
Thanks guys! I will have more photos soon. I realize a lot of people can't afford to do something like this. Sadly, if you knew the sub-par standards of a lot of people in the GB community, you'd realize why I'm happy most people can't afford a car like this. If it's going to be done it's got to be done right. Thanks for digging the build!
 
Back
Top