You are using an out of date browser. It may not display this or other websites correctly.
You should upgrade or use an alternative browser.
You should upgrade or use an alternative browser.
Firefly Serenity Resin kit (Shiny) WIP
- Thread starter Sigma-LS
- Start date
Sigma-LS
Sr Member
Ha! I killed many dremels in my day when I was starting out. I babied this one though, and she made it 3 years. Not exactly sure what failed on it. I certainly wasn't pushing the motor hard.
Well, got a bite on Craigslist for one for about $50. Gonna go check it out. Pawn shops will be closed until after Fat Tuesday.
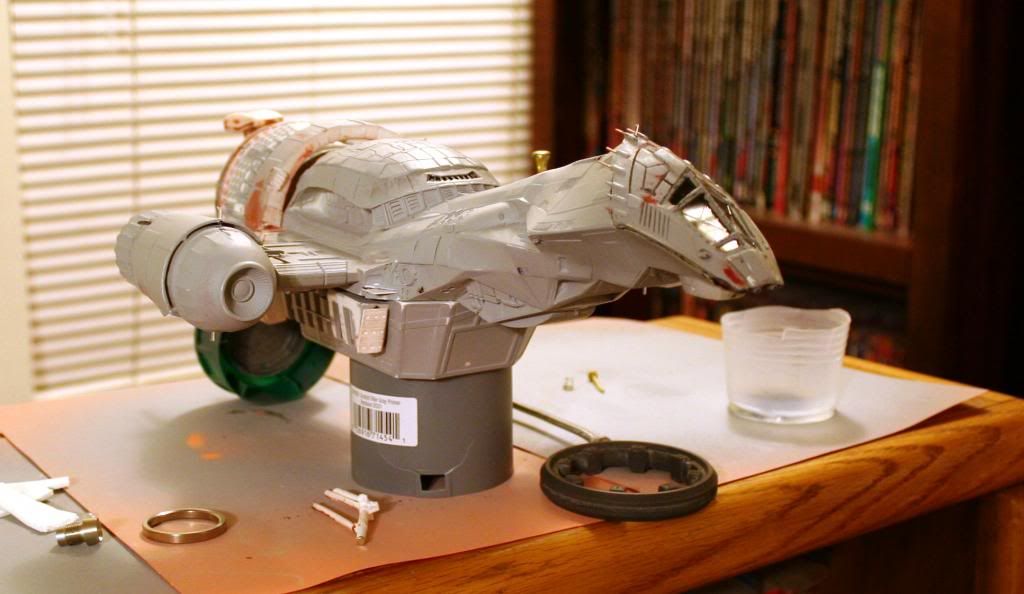
I zapped the bulb with some Testor's Dullcote and it worked perfectly. No more problems on the back end. Now to clean up the rest of the reactor seams for the two rings and redrill a couple bubble spots for the tube mounts and I can mask and primer the back end of this baby.
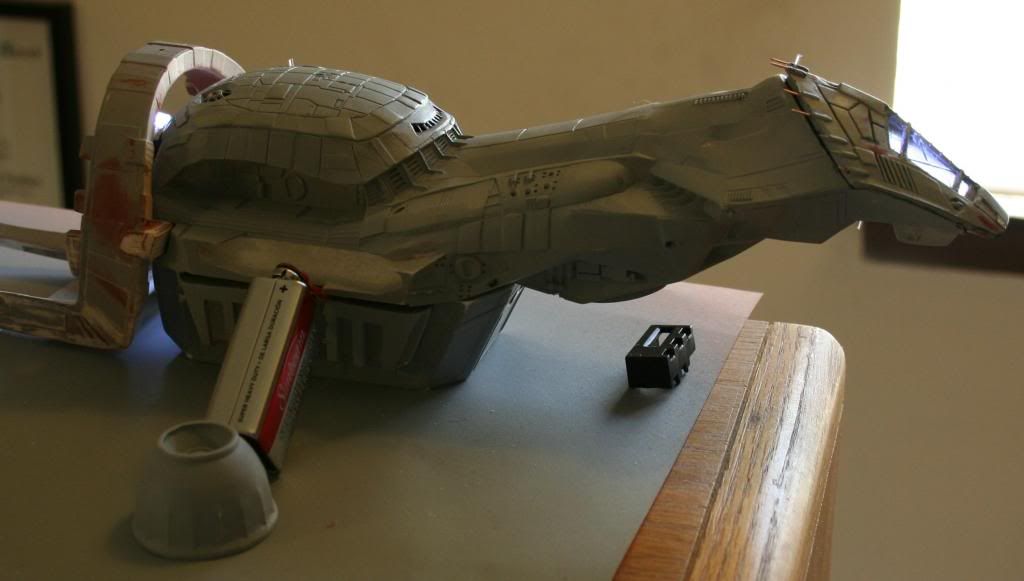
I had an idea on the landing gears that involves magnets as well. Going to get the cages together and clean the feet to test it out.
Well, got a bite on Craigslist for one for about $50. Gonna go check it out. Pawn shops will be closed until after Fat Tuesday.
I zapped the bulb with some Testor's Dullcote and it worked perfectly. No more problems on the back end. Now to clean up the rest of the reactor seams for the two rings and redrill a couple bubble spots for the tube mounts and I can mask and primer the back end of this baby.
I had an idea on the landing gears that involves magnets as well. Going to get the cages together and clean the feet to test it out.
Sigma-LS
Sr Member
Slightly more progress, dremeless edition.
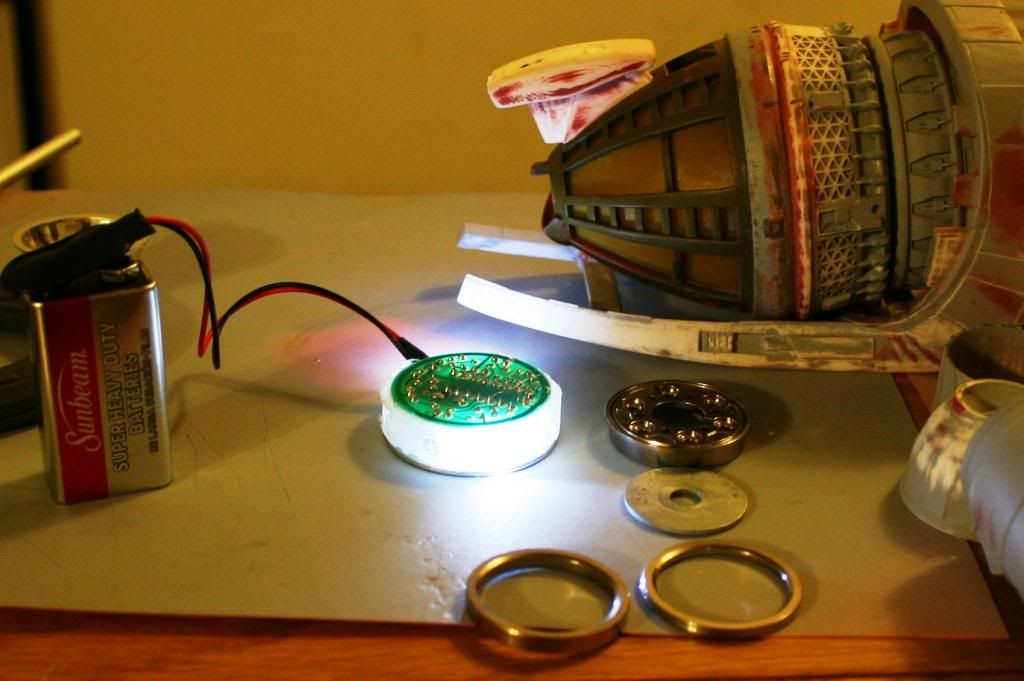
Got my LED chaser beacon in and immediately began to modify it for my needs. Stuffed the LED's further back on the board and cut off extraneous lens area. Then I set the assembly in the grav rotor ring and filled the outer edge with hot glue, placing a washer on top to compress and give a top to it. This created the clear ring and protected the electronics while still giving me access to the program button and the potentiometer to control speed on the board. I wrapped the assembly in 6mm tamiya masking tape and puttied around it to make a distinct sharp band. I partially screwed this up later when the positive lead came undone during light blocking and I had to take part of it apart to resolder. I then did the same hotglue process with a small piece of rectagular tube stock and sliced with a razor blade to create new rectangular lenses for the LED's.
Stock Beacon

The oreo, modded prior to filling,lightblocking, and new lenses.
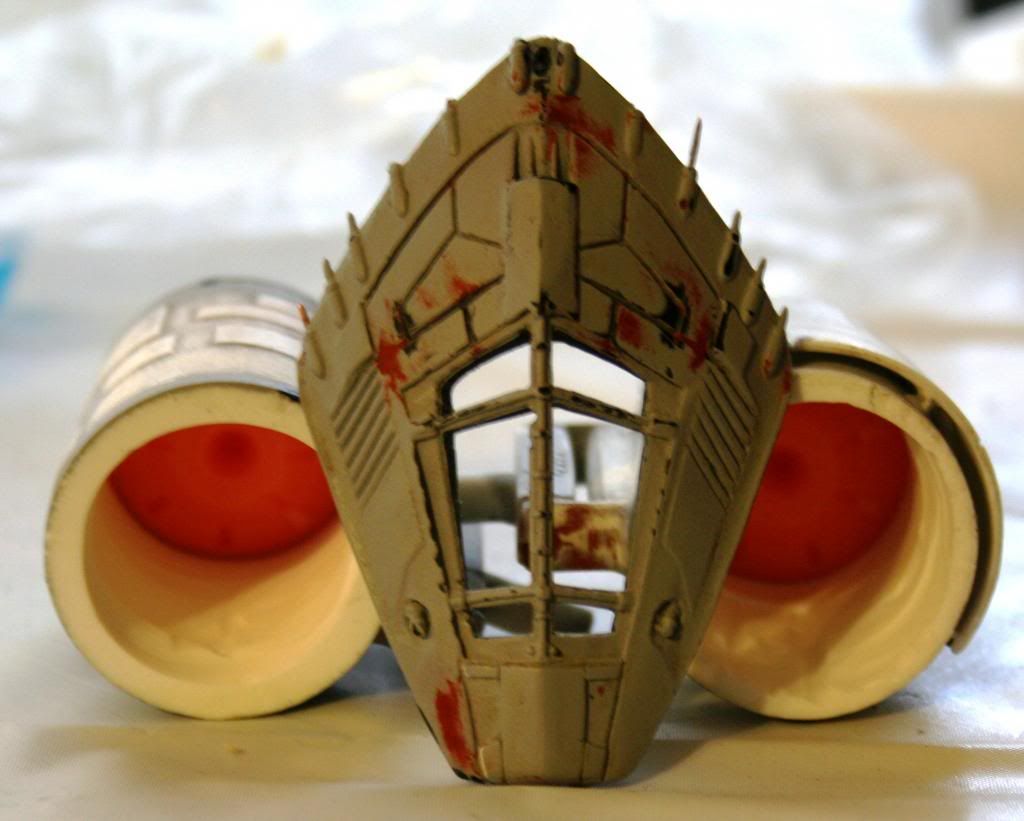
And dry fit of where she sits now, grav rotor light permenantly installed on the old tail mount and takes up the same space. You also see I opened up all the galley windows and lighblocked the fuselage. Will be filling the windows with acrylic next.
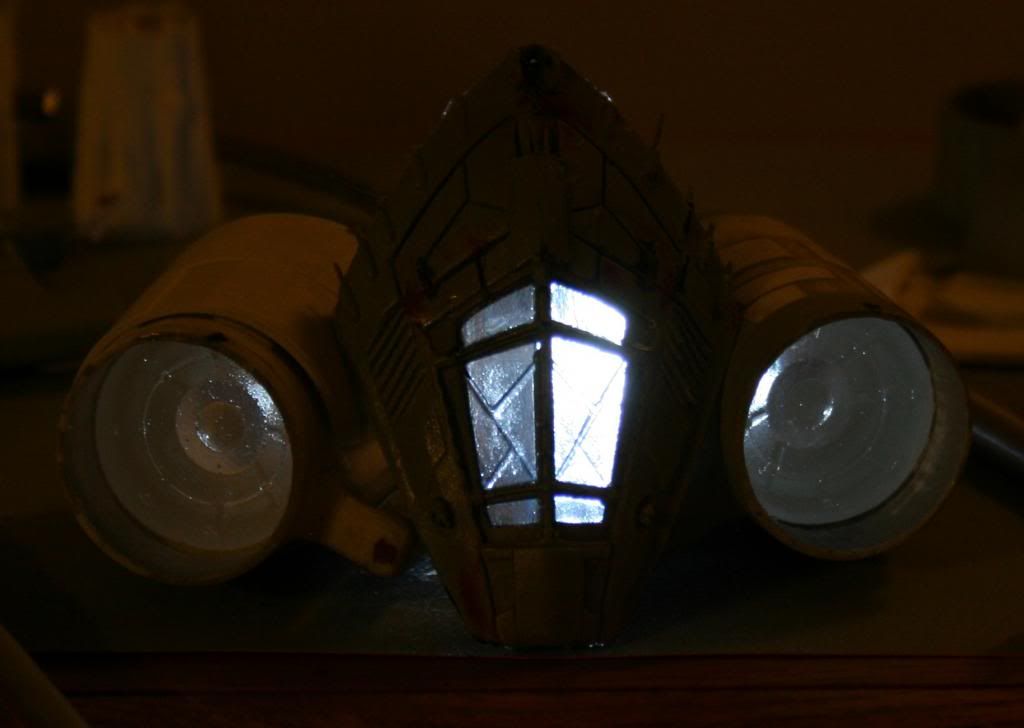
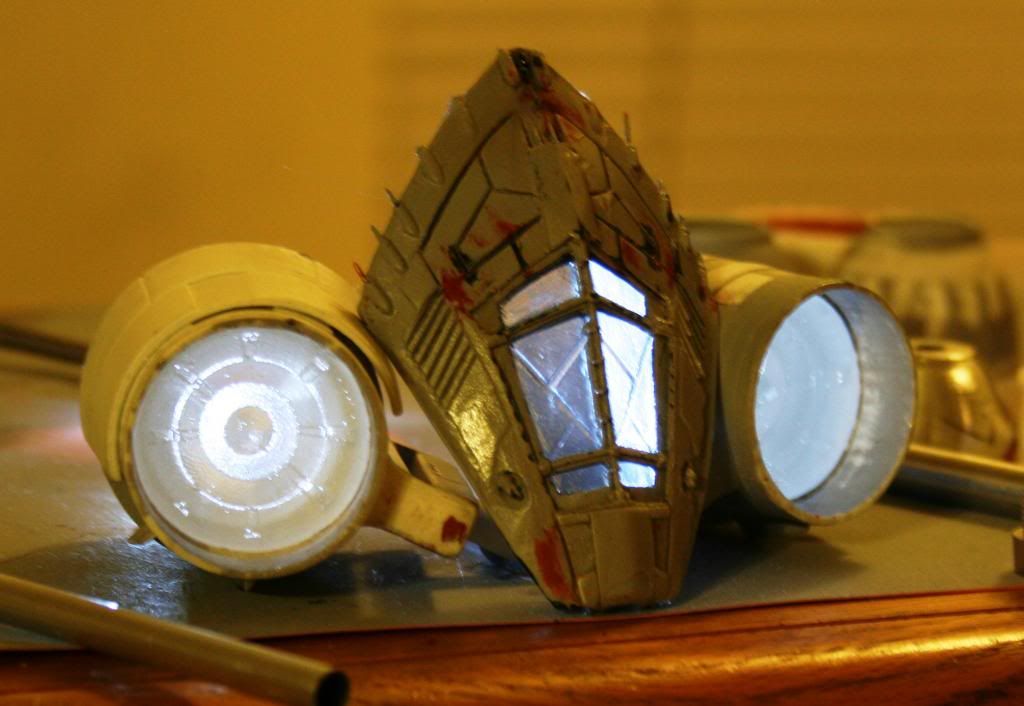
And finally you see the new bulb in regular light, with the other 2 rings attached and lightblocked, with a little more sanding to go before attaching the tubes.
Vid of the rotor lights in action. I timed the entry sequence off Serenity and it has a full rotor revolution about every 2 seconds, faster than most model setups I've seen, I think because it doesn't "feel" like it should be going that fast. I went with what I timed anyhow, I think it works.
 Powered by VideoBam - Free Video Hosting
Got my LED chaser beacon in and immediately began to modify it for my needs. Stuffed the LED's further back on the board and cut off extraneous lens area. Then I set the assembly in the grav rotor ring and filled the outer edge with hot glue, placing a washer on top to compress and give a top to it. This created the clear ring and protected the electronics while still giving me access to the program button and the potentiometer to control speed on the board. I wrapped the assembly in 6mm tamiya masking tape and puttied around it to make a distinct sharp band. I partially screwed this up later when the positive lead came undone during light blocking and I had to take part of it apart to resolder. I then did the same hotglue process with a small piece of rectagular tube stock and sliced with a razor blade to create new rectangular lenses for the LED's.
Stock Beacon
The oreo, modded prior to filling,lightblocking, and new lenses.
And dry fit of where she sits now, grav rotor light permenantly installed on the old tail mount and takes up the same space. You also see I opened up all the galley windows and lighblocked the fuselage. Will be filling the windows with acrylic next.
And finally you see the new bulb in regular light, with the other 2 rings attached and lightblocked, with a little more sanding to go before attaching the tubes.
Vid of the rotor lights in action. I timed the entry sequence off Serenity and it has a full rotor revolution about every 2 seconds, faster than most model setups I've seen, I think because it doesn't "feel" like it should be going that fast. I went with what I timed anyhow, I think it works.
Powered by VideoBam - Free Video HostingSigma-LS
Sr Member
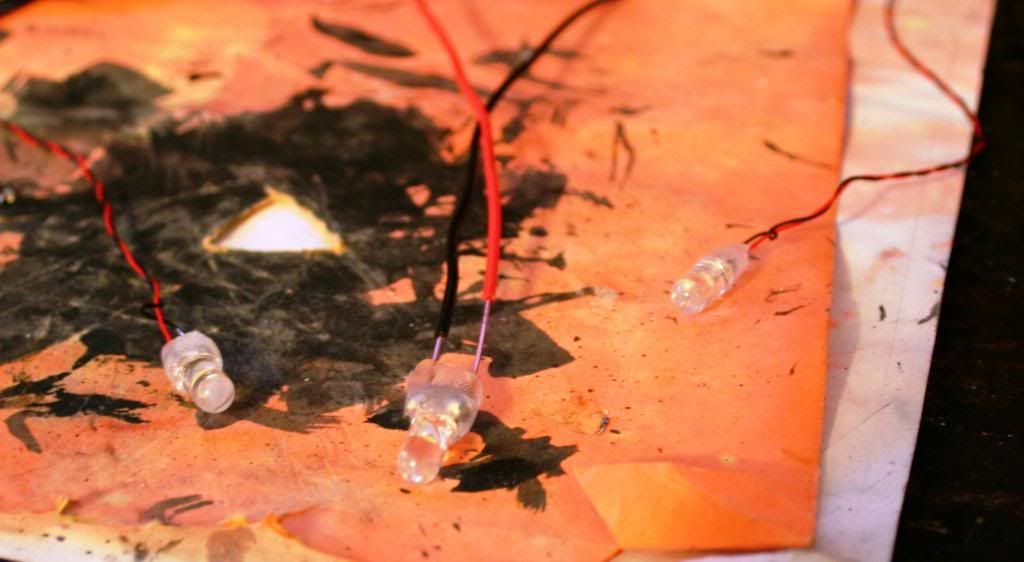
Well, new dremel hasn't come in yet, my acrylic powder came in without the liquid, and I got my new rolls of superfine masking tape in from japan. However, I just got in my spool of 1mm fiber optic so I figured I'd get started on some of that. The stuff in the fighter kit is nice for instruments but is far too fine for beacons.
Screwups, I accidentally snapped a couple of fibers flush when I was trimming them down. Nothing major I guess, just have to bother with masking them now when I could have just trimmed them flush before.
Good stuff. Ripping the tops off some of the old rivets I had laying around gave me the perfect tips to my fiber mount as well as wire organizers. You can stuff exactly the area the diode occupies into the tube, bright and center (that's 5 fibers for 1mm). The LED holder bit bits came out of my junk drawer, but I've got some real LED holders to wrap up the last couple of bundles. Man, they are nice and very bright in transmission. I won't finalize it with shrinktube and stuff until I start final wiring with the cargo hold hollowed out for a little more space.
I gotta say, I love this stuff. I'm really surprised I haven't screwed up more on the lighting.
Still more holes to drill in the body for engine wires and other things. I guess I'm going to scribe the panels in the cargo hold now that I got the tape to help out.
Hope you guys enjoy. I'm probably going overkill on the documentation but hopefully it will help the next guy who makes one of these.
pennausamike
Sr Member
I'm probably going overkill on the documentation but hopefully it will help the next guy
Not possible to go overboard on the "how-to" stuff.
Although the final show-off is nice, for me at least,
the "how I did it" info is the reason for these forums.
Even when I can't or don't choose to do what someone else did,
sometimes their work points me in a direction I hadn't thought of on my own.
Super job; both the build and the tutorial!
Mike
My Firefly/Serenity Collection:
SerenityMovie.net :: View topic - Firefly/Serenity Weapons Collection
Jeez, I'm still using my old Dremel 595 Type 5 that I got about 10 years ago. But...I think it's safe to say I don't use mine nearly as much as most of you'se guys use yours.
They can be rather picky about when they burn out lol. We've had some last years of heavy use and some just give up. This build is looking better and better and i agree, you can never have too much info on how you do something.
Sigma-LS
Sr Member
Thanks for the support guys. I'm glad to be able to get feedback and tips from such a great pool of talent here. I guess I should go ahead and get you guys an update then!
New dremel came in, and was dead on arrival. Luckily I've killed enough of them to know the inner workings like the back of my hand and I found the short in no time flat. After I fixed it, she fired up like new. So I got me a nice model 395 for about $20 with the $5 partial refund for the guys sending me a dead duck.
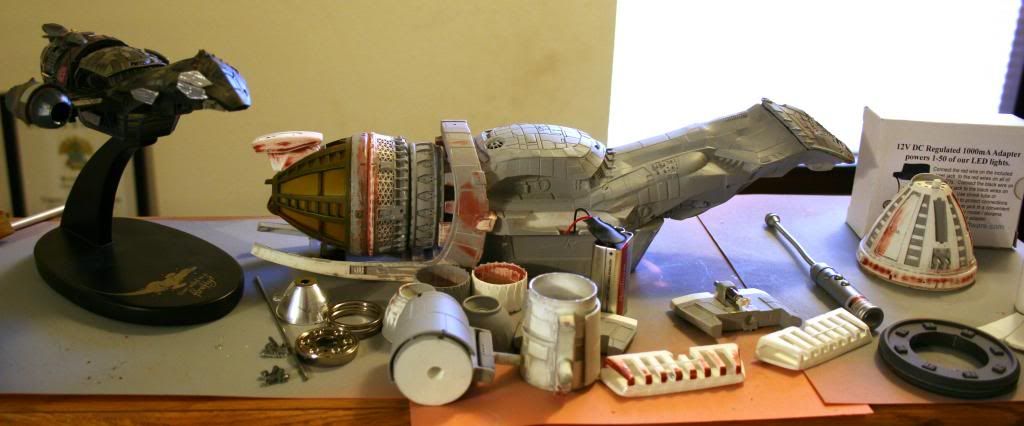
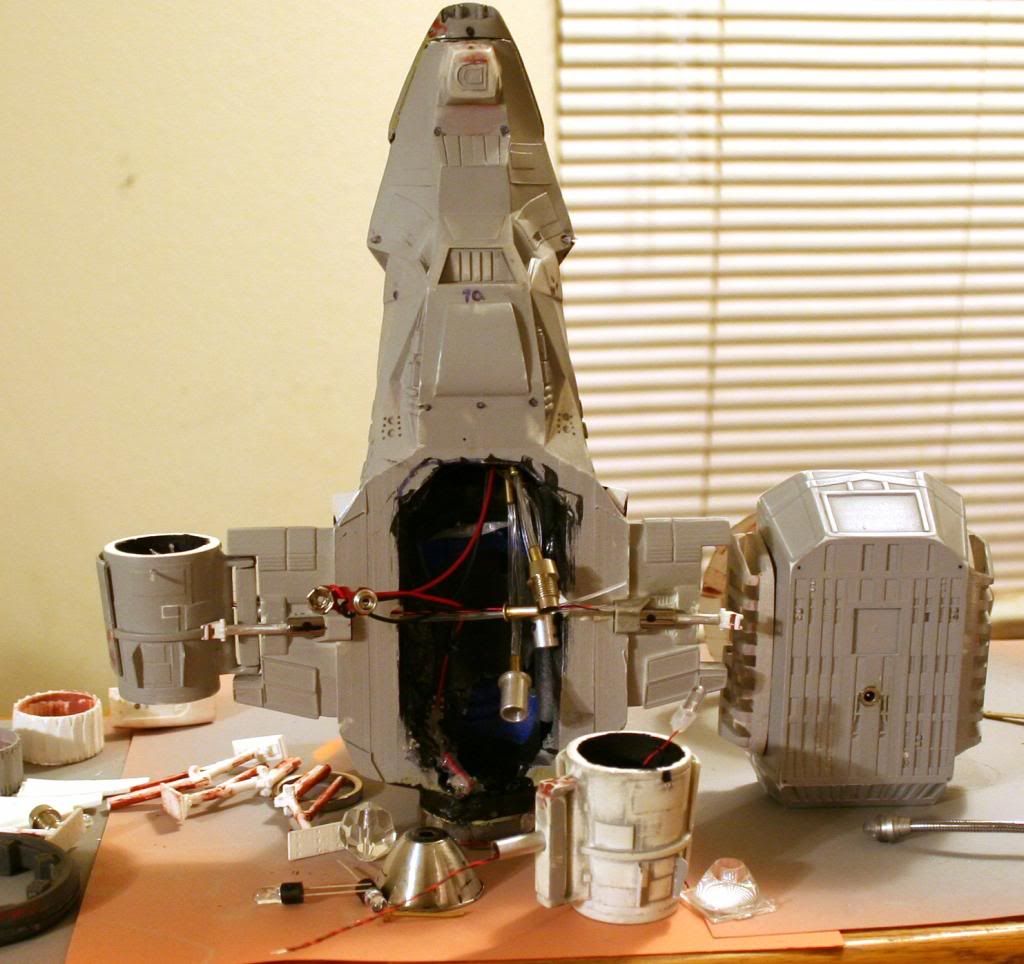
Finished cleaning the cockpit and hollowed out the engines which were solid. Now I got the clear resin casting me new engine bits and a new cockpit. Going to be until tomorrow before I can demold.
And now I'm hollowing out the grav rotor and cargo hold. So much dust today, I've taken 3 showers and have had to sweep my porch twice.
New dremel came in, and was dead on arrival. Luckily I've killed enough of them to know the inner workings like the back of my hand and I found the short in no time flat. After I fixed it, she fired up like new. So I got me a nice model 395 for about $20 with the $5 partial refund for the guys sending me a dead duck.
Finished cleaning the cockpit and hollowed out the engines which were solid. Now I got the clear resin casting me new engine bits and a new cockpit. Going to be until tomorrow before I can demold.
And now I'm hollowing out the grav rotor and cargo hold. So much dust today, I've taken 3 showers and have had to sweep my porch twice.
Sigma-LS
Sr Member
Glad I haven't disappointed yet. Honestly I'm mostly aping what I've seen other folks do in the light department.
Speaking of which, got the final fuselage bundle of fiber optics put together for the head lights. Also put in a micro LED with resistor to light the cockpit itself. The small clearance I had necessitated it and it jacks directly into the 12v dc source so I don't have to worry about compatibility with the Madman card. She's now permanently attached and wired with a new crown of spikes and ready for a little putty before masking and a fresh coat of primer. Did a quick test with the cockpit and grav rotor lights hooked to my 9 volt.
I'm grinning like an idiot right now.
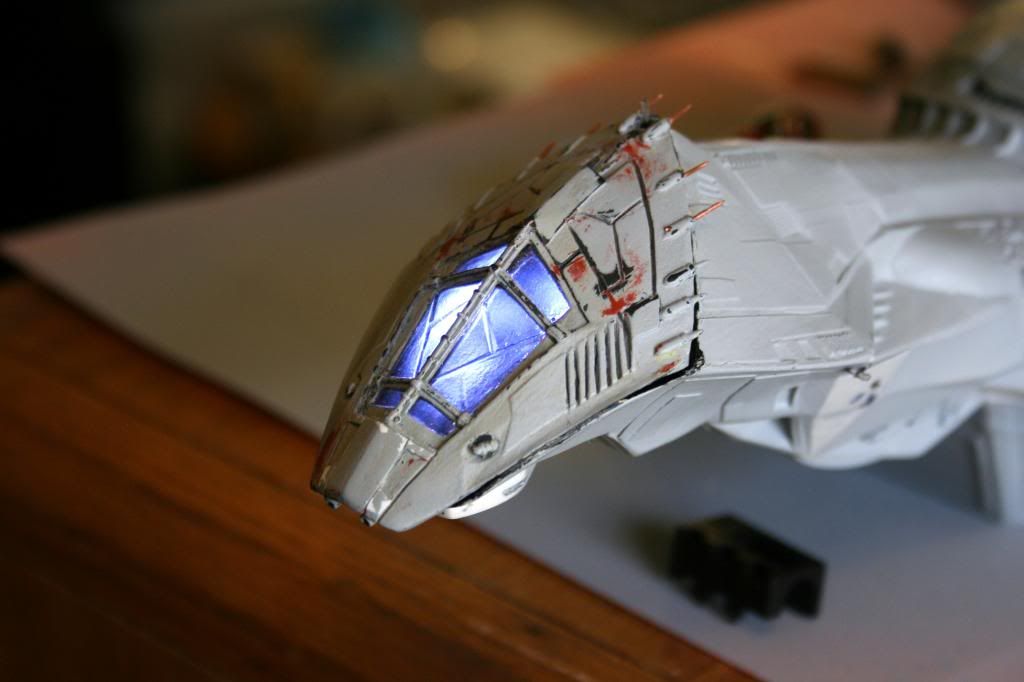
Sigma-LS
Sr Member
It's the neck, has kind of that bird/serpentine quality. Really an odd duck but just the right combination to make her memorable and gorgeous as a design.
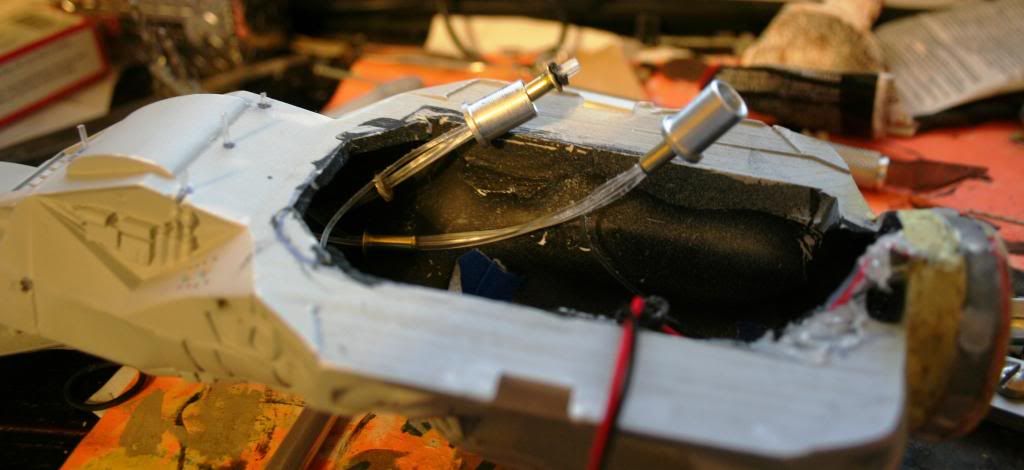
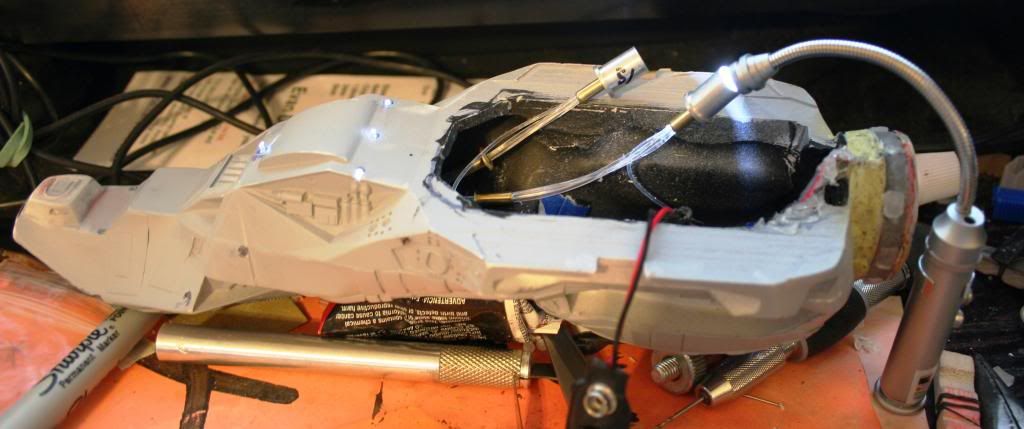
Further lighting update. Got one engine done and off to the second one hopefully tomorrow.
So I started off with finally getting to permanently attach the wings and drill all the way through them into the fuselage cavity to run the fiber optics and the wires for the LED. I needed really small wires to get them to fit.
I found out the Madman lighting instructions were faulty. The engine flicker and running lights ports are switched on the card, but otherwise she fired up as advertised and worked great when testing the LED's I put together. Actual LED's salvaged from some flashlights I cannibalized for an earlier project. The Madman kit doesn't come with enough white lights for what I need, but she'll drive all of them. Hotglue to protect the connections.
I replaced the posts on the engines with tubes (not fun to drill those out with about .5mm clearance on either side) and ran the wires through there. This lets me still keep the engines movable for flight and landing.
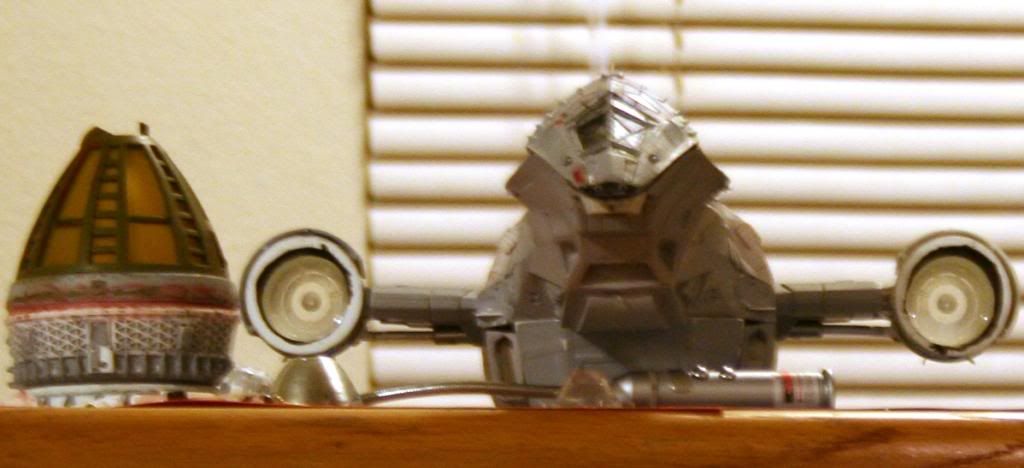
And you can see how it all fits together. More hot glue in the engines to keep everything situated at the right angle.
Further lighting update. Got one engine done and off to the second one hopefully tomorrow.
So I started off with finally getting to permanently attach the wings and drill all the way through them into the fuselage cavity to run the fiber optics and the wires for the LED. I needed really small wires to get them to fit.
I found out the Madman lighting instructions were faulty. The engine flicker and running lights ports are switched on the card, but otherwise she fired up as advertised and worked great when testing the LED's I put together. Actual LED's salvaged from some flashlights I cannibalized for an earlier project. The Madman kit doesn't come with enough white lights for what I need, but she'll drive all of them. Hotglue to protect the connections.
I replaced the posts on the engines with tubes (not fun to drill those out with about .5mm clearance on either side) and ran the wires through there. This lets me still keep the engines movable for flight and landing.
And you can see how it all fits together. More hot glue in the engines to keep everything situated at the right angle.
Sigma-LS
Sr Member
The yellow reactor bits are clear material cut and glued into the bulb, the galley windows will be filled with nail acrylic, and the clear bits of the engines and cockpit are straight casted in Aluminite Clear Cast. That's all the clear bits on the ship outside the fiber optics.
moonlightdrive2
Well-Known Member
Excellent work...thanks for sharing all the details!! Love the design of that ship too !
Sigma-LS
Sr Member
Quick update. Got the engines wrapped up except for a bit of putty work and some joint tightening. Also started to attach the landing gears. the magnets let me have them retracted or deployed without being restricted to one mode. Getting all 4 exactly the same, that's the real trick.
Similar threads
Done / Completed
NERF SCOUT TROOPER BLASTER Conversion Kit by Astyanax & AnubisGuard
- Replies
- 15
- Views
- 2,443
- Replies
- 10
- Views
- 2,856
- Replies
- 104
- Views
- 11,384
- Replies
- 5
- Views
- 1,651
- Replies
- 0
- Views
- 790