Firefly Serenity Resin kit (Shiny) WIP

Hi guys,
Im the one that produced the kit.Im glad o see someone else doing a build up of it . Ive only seem about 3 completed . Great work so far .
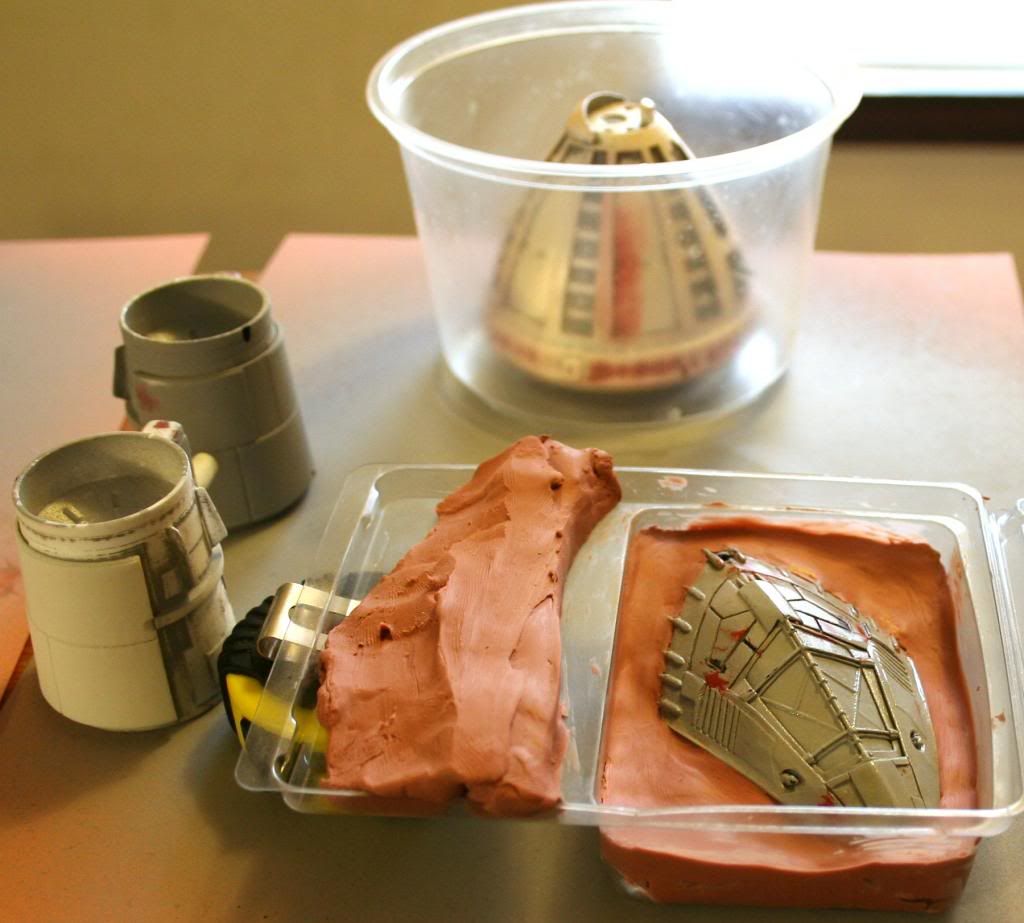
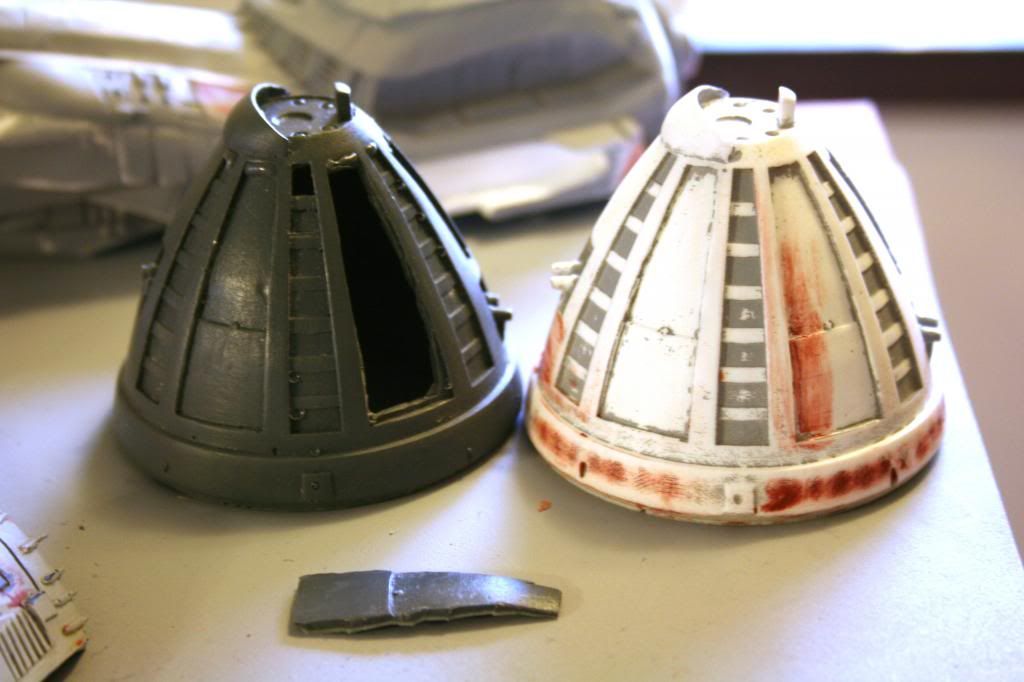
This was my first attempt at making a kit from a 3D mesh and it took me over a year just to get it parted up.
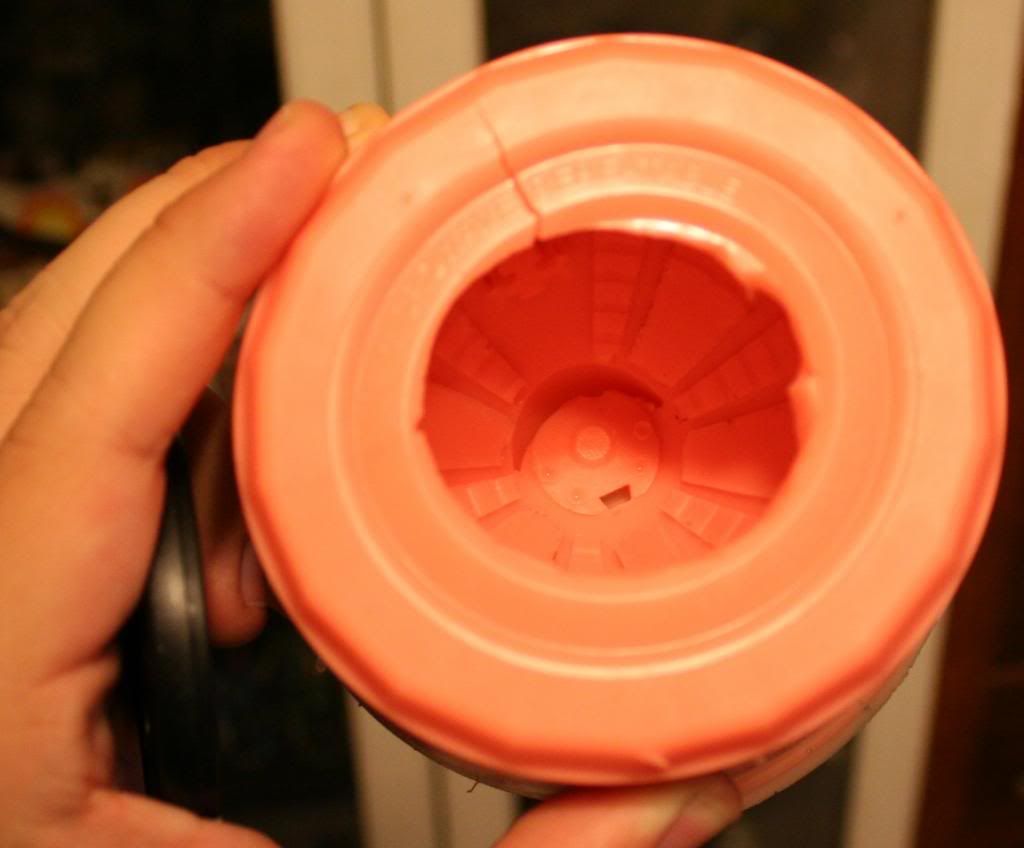
Sorry for the build lines also...my eyes are going and those were missed on the master .
Shes out of production because of a C&D from FOX. Im amazed that it was never produced as a styrene kit by a bigger manufacturer. The movie version from QMX was spectacular but way way to pricy.
Look forward to further installments of this buildup.
Tony
 
Hi guys,
Shes out of production because of a C&D from FOX. Im amazed that it was never produced as a styrene kit by a bigger manufacturer. The movie version from QMX was spectacular but way way to pricy.
Look forward to further installments of this buildup.
Tony

That's a shame. Would have liked to have eventually gotten a kit. I've always loved the look of this ship. Love the fact that you got a C&D from FOX when they were soooo behind the show. :confused Makes no sense to me.

Nice build! Looking forward to more!
Dave
 
She's beautiful so far. Best of luck getting her completed and I look forward to seeing the continued progress and end result!
 
Yeah, she may be a bit of a hassle but she's a gorgeous kit all around. Killer job Tony. Really a shame about the C&D too but that's how you know you made something really great right.:thumbsup

Well, I'm almost done with the engines, I have some 2mm tape on order to guide scribing the panels on the cargo bay so I have to wait until that gets in before I can start final assembly of the landing gear and such.

I had to add some new stints to the left engine cowling to prop it out a bit to match the right, and finished up the accurized bracers.

In the meantime, I'm working on the gravity wheel and the thorax. Might divert off to the shuttles if the piping starts to get to me.

I did realize a neat trick that I assume is an old one. A Q-tip, a little sandpaper, and a little superglue makes a fantastic sanding stick in any grit. You can cut off the tip multiple times as it gets gummed up or worn out as well. Just one of those simple things I can't believe I hadn't realized after all these years of making models. It sure made that second engine a lot easier than the first.

IMG_3310_zpsebc7c97f.jpg


IMG_3334_zps98b91da6.jpg
 
Man the Shiny is such a fine looking model! Even though I have the 1:288 version from Stargazer Models, I'm more than a little jealous!

If you decide to light it, I found that the Jupiter 2 chaser circuit makes for a decent gravity drive in Serenity (managed to squeeze one into my Serenity)
 
Thanks for the words of support guys. I just hope to have a chance to get this gal finished up proper by summertime.

Man the Shiny is such a fine looking model! Even though I have the 1:288 version from Stargazer Models, I'm more than a little jealous!

If you decide to light it, I found that the Jupiter 2 chaser circuit makes for a decent gravity drive in Serenity (managed to squeeze one into my Serenity)

I just found your build thread and finally finished watching all of your build videos and it has really given me some great ideas on how to put this thing together. I can't not light this baby now! Keeping the engine modules mobile is going to be a bit tricky though. I think I can solve that with some steel tubing and run the wires through the center. Hollowing all this stuff out and cracking the nosecones off the engines won't be too fun either.

At least I've got most of my electronics list sorted.

And congrats on your beautiful bird. You put so much effort into it with all the resculpting and everything. Fantastic!
 
3 steps forward, 2 steps back. After taking things back apart, I started to prep pieces for future lighting.

The brushes on my dremel finally gave up the ghost after 3 years of faithful service, so I'm stuck without until a new set arrives. Last thing it did was open up the bottom of the fuselage.

I drilled out the neck by hand then hollowed it out with a round rasp. I used a pin vise to drill the holes for the various beacon lights and strobes. Really I needed the extra control for that anyway over a dremel. I did this for the 2 beacons on the cockpit piece as well.

I prepped a few parts for molding so I could replace certain sections with clear resin. I had a little Rebound 25 laying around so it's what I used even if that's less than ideal. Had my old remington electric razor to help vibrate bubbles loose and all the parts have a solid coating of Ease Release 200. I should be able to demold stuff this evening.

When I get my dremel up and running again, I'll get improvements on the engines done, drill out all the galley lights and fill in with clear resin and start working on cutting out the excess internal ring on the gravity wheel. Always something new to do.

Going to try using the crystal cast aluminite stuff for my clear, haven't tried it before but I hear it's super low viscosity and slow set.

IMG_3603-1_zps7578fd86.jpg


IMG_3615-1_zps021b12fc.jpg


IMG_3572-1_zpsc6f33d77.jpg


IMG_3595-1_zps3a82a2ff.jpg
 
I did the lighting on mine a similar way, though after doing it I wish I would have done fiber optics for most of it rather than putting the mini LED's there, it would have been easier.

Are you going to do anything on the reactor part for the lighting? On mine I just used the dremel on the inside of the reactor piece until the parts that needed lighting were paper thin and then put lights behind them.
 
Yeah, fiber optics are the plan for this gal to get away with fewer LED's for all the strobes and beacons.

I read your thread on RI and saved a bunch of the progress shots, very helpful. I'm amazed you got all the wires into the tail beacon. That part is so thin it's not even funny.

For the reactor, this new mold will let me cast a new thinner back piece in resin, then cut out the lit panels and cast them in clear resin. Less work than hollowing out the original. Similar deal with the engines and cockpit. I should be able to get the galley windows done without a mold.

Speaking of molds. They turned out pretty good, not too many bubbles, and none in problem areas.

IMG_3619_zpsb302b65a.jpg


IMG_3641-1_zps2ea9ebd0.jpg
 
This is might shiny! How I'd love to have one of these to play around with! You're a lucky guy. I shall be watching this quite closely.
 
Thanks. I got the first cast of the new reactor bulb out. This is gonna do nicely. I cut out a couple of windows with a knife while the resin was soft but had to leave the rest to prevent warping while it was still curing. Just gotta wait on those demel parts so I can drill out the rest. In the meantime, I'm just sanding a few parts like the landing gear cage.

IMG_3650_zps45b60403.jpg


IMG_3666_zpsa6a0d558.jpg
 
On the tail light I had drilled a hole and it had actually cut through the sides of the thin piece in the back, but I just filled in around the wire with putty and sanded it smooth, worked pretty well.
 
I wound up with the same problem. Drilling the second hole at an angle to meet the vertical one wasn't that fun either.

Well, Saturday update time.

First of all, got my new dremel brushes in, just look at the nubs that were left. No wonder the old gal shorted on me.

IMG_3676_zps70f312d0.jpg


And with that I was able to start my drilling in earnest.

IMG_3722-1_zps89626b4c.jpg


New bulb is trucking along, just waiting for some glue stuff to cure before adding in the smaller panels. Then I'll wait for that to cure before sanding the back to get rid of those streaks and diffuse the light even more.

IMG_3769-1_zps04511e8f.jpg


IMG_3788-1_zpsc7ef55a4.jpg


Also got a can of Krylon stain glass yellow at hobby lobby on clearance for $2. Go figure, it's exactly what I need. A few coats of this should do nicely. Light coat on a test piece here.

IMG_3801-1_zpsbd34c328.jpg
 
And double post but I got to finish the clear bits and test out how it lights up. First I gave the whole thing a coat of future inside and out to fix that hazing I got from some of the superglue drying in the high humidity down here. Worked great. Now it's just getting it tinted correctly. I used my cheapo snake LED light for my test source.

I think the reflector helps scatter stuff a bit better.

IMG_3824_zps09d50ec3.jpg


And after the first coat of yellow. I think it's going to need 3 altogether.

IMG_3851-1_zpsead1c0c6.jpg
 
Thanks guys, I'm really glad I tinted the resin for easy lightblocking. The body and engines have their own host of issues related to that.

So I have some good and bad news. Apparently the brushes in my dremel were a symptom and not the problem. After only a couple sessions of light-duty work, I realized the dremel was getting hotter than usual for no reason when all I was doing was spinning it up to determine the speed I wanted for the current job. I figured maybe it was the brushes getting seated or something. WRONG! In the middle of hollowing out the cockpit, there's a sudden spike of heat, an electric crackle and it catches on fire in my hand! Other than burning the hell out of my thumb and the soft part of my hand I was fine. My Dremel was not. After I got the tiny fire put out and took the dremel apart to check inside, I saw the brush holders had melted sideways and all the insulation on the speed control stuff in the back was ruined.

So I'm now dremel-ess again. I have a serious love-hate relationship with the 400XPR, so convenient on speed and yet such a piece of junk compared to the old moto-tools and multi-pros.Time to hit up the local pawn shops next week.

In the meantime, I ordered the madman lighting fighter kit, and will fiddle with what I can.

Here's current progress. 3 coats of yellow on the bulb. All looks good, the difference in color is solely due to the amount of light. My only problem is it seems to have made the bulb clearer than previously. You can see through it in normal light. I'll try hitting it with a flat coat after it fully cures and see if that doesn't help out.

And as far as I got on the cockpit. Dropping it when my dremel caught on fire snapped all the back tines so those will have to be replaced like the 2 that already were replaced from previous accidents.

IMG_3879_zpsf9f73bbd.jpg


IMG_3909_zps9c553e7b.jpg


IMG_3920_zps2eb199a8.jpg
 
Back
Top