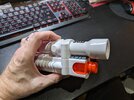
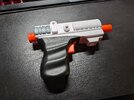
Back in THIS THREAD several RPF'ers came together over the last few years to figure out how best to upgrade the Nerf Scout Trooper Blaster...
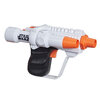
...with 3D printed parts, to get the blaster as close as possible to movie-accurate, and certainly to a very nice idealized state. Astyanax and AnubisGuard are now pleased to offer these as11-piece 12-piece low-cost kits for a limited run!
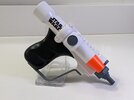
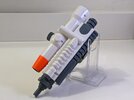
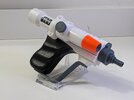
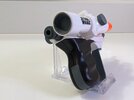
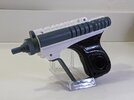
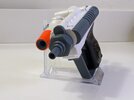
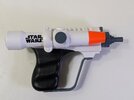
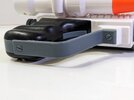
(If you prefer to print your own, the STL files are available in the above thread.)
THE RUN:
The first run will be 12 kits. These will start shipping within a week of payment having been received.
If that run fills quickly, there will probably be a second run of 12, and so forth. After that, ad hoc kit printing (somewhat delayed) may be available.
RUN 1 RESERVATIONS:
You will get one copy of each of these original parts (some are recently upgraded for accuracy or fit!)
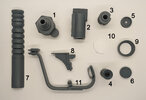
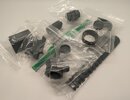
All parts will come individually bagged and shipped in a padded envelope via USPS.
PRICING:
Each kit is available for USD $25, shipping included in the Continental United States. For outside this area, please expect us to add $10 to the entire order.
(Yes, AnubisGuard is collecting a license fee for every kit sold.)
ORDERING (GETTING ON THE LIST):
To order and get on the list, send a Private Message to Astyanax with your desired quantity of kits and your mailing address. This will reserve your place on the list for one week. You'll get a response with a PayPal payment address and total cost for your order. Once payment has been received, your kit will be prepared (or printed ad hoc). Your status will be updated on the list as your kit is prepared and shipped. If payment is not received within a week, your reservation will be removed and someone else will get your slot in the run.
TURNAROUND TIME:
Expect 1-4 weeks from payment to received, depending on the backlog and your location. First come, first served! You'll get a tracking number as soon as it ships.
If you're in the U.S., arrival time is usually 2-7 days after you receive a tracking number. Rest-of-world usually 1-3 weeks. And Australia...well, hard to say.
ABOUT THE RESIN PRINTS:
These are 8K resolution prints, which is a very, very fine resolution. Most resin printers in circulation are 4K, some are 8K, and relatively few are 12K. You will find that the lines are sharper and the detail is finer than most resin-cast kits!
There are a few minor flaws here or there. In addition to very fine layer-lines, there are the occasional micro dimples or pimples or single cross-lines or scuffs. These are normal, caused by the printing process or by support structure that held the model in place while printing. Most of the supports have been placed in areas in areas that will not be seen, so very little filling should be necessary: it all depends on how much of a stickler you want to be.
We will do our very best to get you parts that are have the minimum of these above artifacts. From a quality control standpoint, some parts are indeed failing the check and being reprinted before mailing!
CLEANUP:
A very little bit of filling with a fine glazing putty (like Bondo Spot Putty) and light WET-sanding will take care of pretty much all of your cleanup. It should go quickly. Sand off the support pimples first, and then fill and sand the dimples. Getting your part wet while sanding will help show imperfections you may have missed. A pair of 3X reading glasses when sanding these parts really helps.
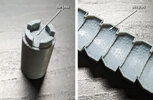
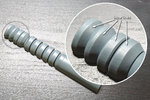
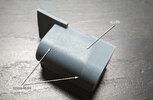
Expect to also sometimes find slightly extra material or softer edges (aka "sagging"); the printer was working against gravity in those zones! Just sand them flat.
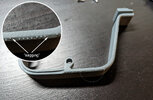
Don't waste your time cleaning up surfaces that will not be seen!
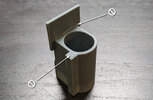
The photos expose the flaws far more than the naked eye does. Layer lines are mostly not visible to the naked eye and will fill with primer, as the layer height of these parts is 0.02mm. That's 1/50th of a millimeter! You won't see them except on some curved surfaces. But try to lightly sand every visible surface, whether you think it needs it or not!
Regarding part FIT, some additional light sanding and/or filling may be necessary to ensure a proper fit as well. We tested the parts extensively, but it's never going to be perfect and there will be very slight variations.
Any perceived "warping" (especially in the side rail) is actually some expected flexing in the part after printing due to temperature shifts and the curing process. It should be minor enough to simply clamp down while gluing. If necessary, you can also dip the part in boiling water to soften the resin enough to flex it back, but do this with care. You shouldn't need to do that.
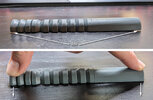
The clear lens is very brittle. Treat it with extra care!
On the Nerf blaster itself, don't forget to clean up the following!
ASSEMBLY NOTES:
You can build this kit with or without the Clear Lens:
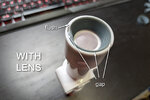
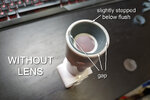
If you're using the clear scope lens, give it a high-gloss clearcoat or dip it in floor wax. That will render it quite clear. Don't worry too much about cleaning up the circular edge of the lens, as that edge will be covered up by the insert. Gently sand off just enough material so that it will drop into the scope.
A finer-consistency primer is recommended (no Rustoleum 2X!), so that you don't lose detail in certain spots.
The actual ROTJ prop is a satin-rubber finish all over. For a more "idealized" approach you might want to consider varied sheens of black. One favorite combination: use gloss black for the whole thing, then mask off the areas you want to keep plastic-looking. Rub some graphite powder into the unmasked surfaces with a cloth or dry paintbrush. Lightly dust or blow off the loose graphite. Finally, satin clearcoat the unmasked areas before removing the masks. Example of the effect you can get:
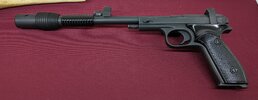
Plastidip will give you texture as well. Lots of options! See THIS THREAD for more ideas!

...with 3D printed parts, to get the blaster as close as possible to movie-accurate, and certainly to a very nice idealized state. Astyanax and AnubisGuard are now pleased to offer these as


(If you prefer to print your own, the STL files are available in the above thread.)
THE RUN:
The first run will be 12 kits. These will start shipping within a week of payment having been received.
If that run fills quickly, there will probably be a second run of 12, and so forth. After that, ad hoc kit printing (somewhat delayed) may be available.
RUN 1 RESERVATIONS:
- Mara Jade's Father (shipped)
- Mara Jade's Father (shipped)
- James Kenobi 1138 (shipped)
- Hecubus114 (shipped)
- chibobber (shipped)
- chibobber (shipped)
- chibobber (shipped)
- The Goon (shipped)
- Firespray (shipped)
- mrwax (shipped)
- mrwax (shipped)
- AnubisGuard (shipped)
You will get one copy of each of these original parts (some are recently upgraded for accuracy or fit!)

- Nozzle v005
- Plunger Base v007
- Plunger End v005
- Scope Insert v002
- Scope Knob Base v002
- Scope Knob Cap v004
- Side Rail v004
- Trigger v003
9. Lens Insert "Open" v004
10. Lens Clear v001
11. Trigger Guard v006
| UPDATE 2/24/2024!!!!! AnubisGuard has added a last-minute part! 12. Rear Rail Logo Cover This fits between the scope and the blaster. It covers the "Star Wars" logo that's already there. No need to sand it off! 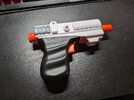 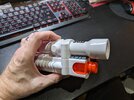 All shipped kits will get this part at no extra charge! |
All parts will come individually bagged and shipped in a padded envelope via USPS.

PRICING:
Each kit is available for USD $25, shipping included in the Continental United States. For outside this area, please expect us to add $10 to the entire order.
(Yes, AnubisGuard is collecting a license fee for every kit sold.)
Please Note: The Nerf Scout Blaster itself is NOT INCLUDED in this kit; just the parts to upgrade it. You will need to acquire your own base blaster.
ORDERING (GETTING ON THE LIST):
To order and get on the list, send a Private Message to Astyanax with your desired quantity of kits and your mailing address. This will reserve your place on the list for one week. You'll get a response with a PayPal payment address and total cost for your order. Once payment has been received, your kit will be prepared (or printed ad hoc). Your status will be updated on the list as your kit is prepared and shipped. If payment is not received within a week, your reservation will be removed and someone else will get your slot in the run.
TURNAROUND TIME:
Expect 1-4 weeks from payment to received, depending on the backlog and your location. First come, first served! You'll get a tracking number as soon as it ships.
If you're in the U.S., arrival time is usually 2-7 days after you receive a tracking number. Rest-of-world usually 1-3 weeks. And Australia...well, hard to say.
ABOUT THE RESIN PRINTS:
These are 8K resolution prints, which is a very, very fine resolution. Most resin printers in circulation are 4K, some are 8K, and relatively few are 12K. You will find that the lines are sharper and the detail is finer than most resin-cast kits!
There are a few minor flaws here or there. In addition to very fine layer-lines, there are the occasional micro dimples or pimples or single cross-lines or scuffs. These are normal, caused by the printing process or by support structure that held the model in place while printing. Most of the supports have been placed in areas in areas that will not be seen, so very little filling should be necessary: it all depends on how much of a stickler you want to be.
The resin is relatively soft; sanding should take seconds on each surface! The entire sanding process and filling process (apart from drying time) should not be more than maybe an hour.
We will do our very best to get you parts that are have the minimum of these above artifacts. From a quality control standpoint, some parts are indeed failing the check and being reprinted before mailing!
CLEANUP:
A very little bit of filling with a fine glazing putty (like Bondo Spot Putty) and light WET-sanding will take care of pretty much all of your cleanup. It should go quickly. Sand off the support pimples first, and then fill and sand the dimples. Getting your part wet while sanding will help show imperfections you may have missed. A pair of 3X reading glasses when sanding these parts really helps.


Expect to also sometimes find slightly extra material or softer edges (aka "sagging"); the printer was working against gravity in those zones! Just sand them flat.

Don't waste your time cleaning up surfaces that will not be seen!

The photos expose the flaws far more than the naked eye does. Layer lines are mostly not visible to the naked eye and will fill with primer, as the layer height of these parts is 0.02mm. That's 1/50th of a millimeter! You won't see them except on some curved surfaces. But try to lightly sand every visible surface, whether you think it needs it or not!
Regarding part FIT, some additional light sanding and/or filling may be necessary to ensure a proper fit as well. We tested the parts extensively, but it's never going to be perfect and there will be very slight variations.
It is not recommended that you sand these parts with anything coarser than 400 grit, or you will find yourself removing too much material too fast! The resin is stiff yet somewhat flexible, and sands almost as easily as wood! It can be brittle in the most finely detailed areas. Don't use a file or dremel, folks! 400-grit sanding twigs are super helpful for tight spaces and will keep you from moving too fast. Enjoy the ZEN of sanding slowly with twigs! It is also recommended that all sanding be done WET, so you can see the immediate effects of your sanding without lots of toxic resin powder in the way.
Any perceived "warping" (especially in the side rail) is actually some expected flexing in the part after printing due to temperature shifts and the curing process. It should be minor enough to simply clamp down while gluing. If necessary, you can also dip the part in boiling water to soften the resin enough to flex it back, but do this with care. You shouldn't need to do that.

The clear lens is very brittle. Treat it with extra care!
On the Nerf blaster itself, don't forget to clean up the following!
- middle seam
- raised manufacturing text
- screw holes
ASSEMBLY NOTES:
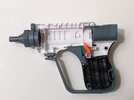
- Install the new parts into the right side first:
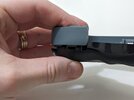
- It is recommended you align and push in the back of the trigger guard before the front:
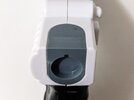
- If you plan to fill and sand, it is recommended you do that before assembling the two-part tail piece:
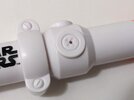
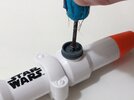
- To install the scope knob, drill out the center of the faux-screw...
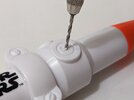
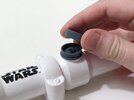
...then screw on the knob base and glue the knob cap on top:
You can build this kit with or without the Clear Lens:


If you're using the clear scope lens, give it a high-gloss clearcoat or dip it in floor wax. That will render it quite clear. Don't worry too much about cleaning up the circular edge of the lens, as that edge will be covered up by the insert. Gently sand off just enough material so that it will drop into the scope.
A finer-consistency primer is recommended (no Rustoleum 2X!), so that you don't lose detail in certain spots.
The actual ROTJ prop is a satin-rubber finish all over. For a more "idealized" approach you might want to consider varied sheens of black. One favorite combination: use gloss black for the whole thing, then mask off the areas you want to keep plastic-looking. Rub some graphite powder into the unmasked surfaces with a cloth or dry paintbrush. Lightly dust or blow off the loose graphite. Finally, satin clearcoat the unmasked areas before removing the masks. Example of the effect you can get:

Plastidip will give you texture as well. Lots of options! See THIS THREAD for more ideas!
Last edited:

