brother tut bar
New Member
every year i get so close to trying to make one of these..... maybe one year:rolleyes, but this is a great build well done
What size dowel are you using for the pull handle and 1/2 on either side of the metal handle? 25mm diameter?
Don't remember specifics, that work was almost a year ago now.
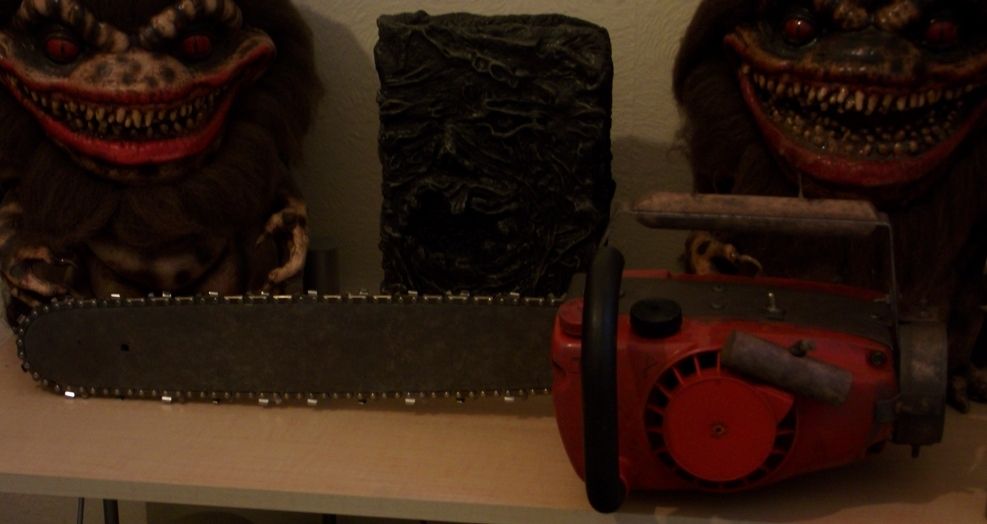
Looking at how the saw turned out though, I'm thinking of doing another after this prototype and improving on a few little hiccups I've had along the way, like the severe importance of measuring where the hell your bolts will be going, especially on the top plate that connects tot he blade mount as the right pilot hole is a bit too far to the right which is making a huge inconvientient difference.
I didn't cut the top of the saw body under my top plate for three reasons. 1. I was running out of time, 2. I'm lazy, 3. I realized the same thing, that it would never be exposed, and even if it did, you would not see the internals of n actual saw like the movie.
Homlrunner - 25mm (1 inch) dowel rod for the handle and pull start.
Yeah, cheers guys. I thought 25mm looked about right, so that's what I used. Now I have the handle all finished (what a pain it was slicing the dowel in half with just a dremel!) and the pull handle added. Just need the T-clamp I ordered to turn up and to dismantle the engine (and paint!).....


OK, finally some pics of my own to show! Fantastic thread BTW - it's been a big help, so THANKS! :thumbsup
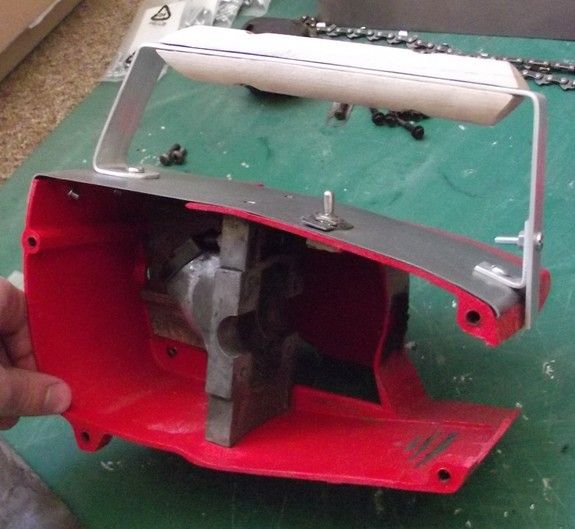
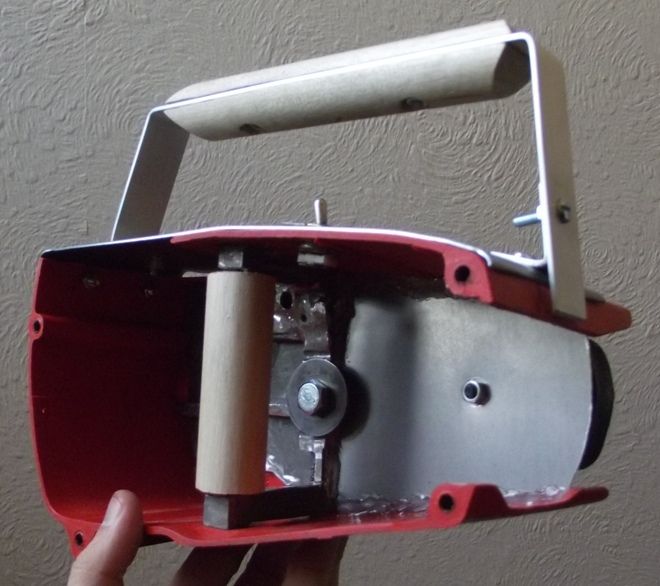
I decided to keep the metal blade mounting section for my saw, so took to dismantling the engine. As this was the one area that I was least sure about (as there's not been any pics of this part uncut posted yet) I took some pics pre-cut.
Using just a screwdriver and a bolt-unscrewer (whatever it's called! :lol) the engine can be taken apart to leave this section:
I then spent AGES (probably 2-3 hours) cutting out the unwanted section. With proper tools (like, a bandsaw) this would not be too hard, but I just had my dremel, a drill and a junior hacksaw. I left the top and bottom sections that the bolts screw into so that the chainsaw bar can be held nice and tightly. I also popped in a hollow metal tube for the inside handle, but having tried it with the chainsaw bar attached (it's heavy!) I think I'll replace this with a thicker wooden dowel for a better grip.
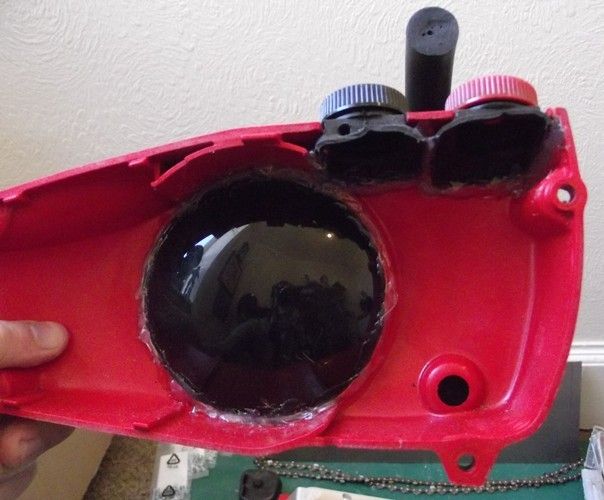
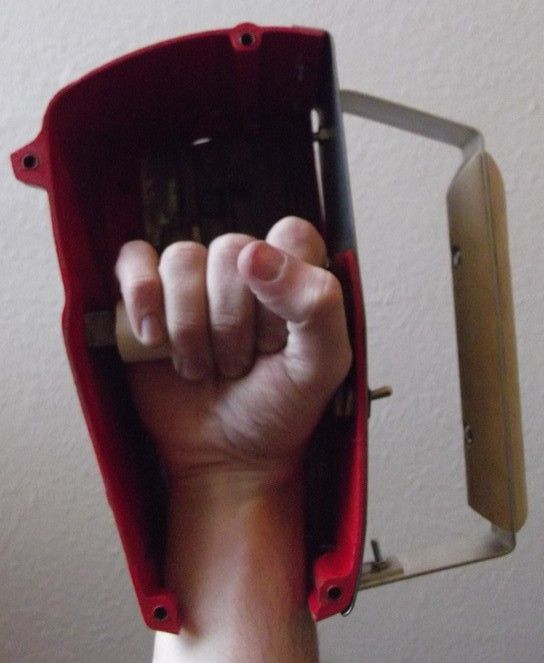
And just to show what I did with the other half - I cut out a circle from a large plastic dome I had and painted it matt black so your hand can't be seen from outside, but the curve of the dome allows the pull-string attachment to rotate freely without rubbing.
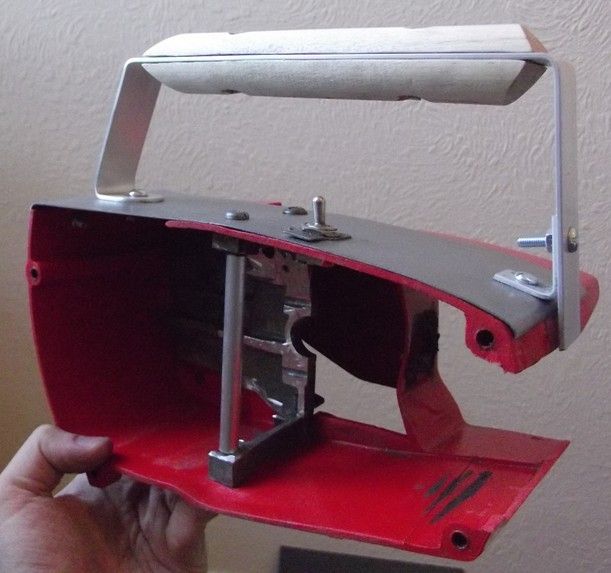
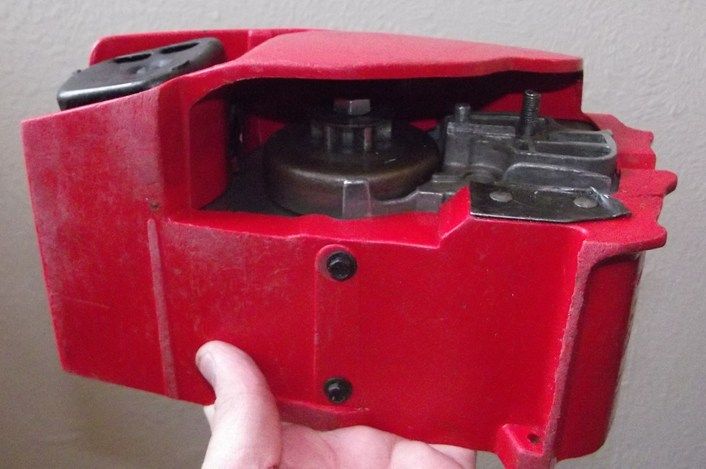
Going to cut some metal into shape to fill the rest of the exposed side next...


Yeah, I was doubtful that it would be possible without some heavy duty tools (like an industrial bandsaw), but with patience, a lot of fiddling about and just those tools, I managed it.
Here's were I'm at just now (not made any progress since my last post):
Looking forward to getting that grill. :thumbsup