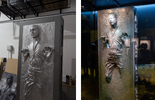
DopamineDoc's Life Size Han Solo in Carbonite build

DopamineDoc

New Member
After building an all metal R2-D2 build, I wasn’t really looking for another project… until I saw some amazing Han Solo in Carbonite replicas. This was one of my favorite Star Wars toys as a kid and I always drooled over the life sized versions. With a little reading I discovered that there were excellent resources available to build one at home (box build kits from Tom Blatt/custom3dstuff.com, HiC casts from Wes Coke, lighting kit from Fettronics, upgrade kit from SirCharles77, etc.). I also noticed many of these appeared more screen accurate than commercial versions at a much lower cost. I pulled the trigger and ordered the initial kit!

The parts have arrived from -Zenix on RPF (Carbonite Build Parts and Kits) This saves a lot of time and effort due to the odd angles/lengths of the box and is absolutely worth the price. It tapers from toe to head, as well as back to front. At this part of my project, I had planned on buying the pieces of Han Solo (head/torso/feet) and creating my own carbonite texture using spackle (you can see two pink lid containers of it in the back left). Much like other steps of the project along the way, I changed plans as I became more interested in maintaining details consistent with the original prop.
PXL_20220424_185822697.jpg


Using wood glue and a brad nailer, we started by putting together the frame of the box and adding side paneling to the interior sides (they give some strength, but importantly this is where the side panels attach). My dad is much more skilled in woodworking than I am so I was happy to get his assistance.

PXL_20220502_181120520.jpg

PXL_20220502_180409858.MP.jpg

PXL_20220504_213456651.jpg


Lots of wood glue, lots of nails, and lots of clamping.

PXL_20220508_023248872.jpg


PXL_20220508_191207401.jpg


I added a layer of thin paneling (the same paneling that was used on the interior sides) in order to add more height to the anterior recessed portion. I love how clean it looks at this point.
PXL_20221006_193439546~2.jpg
 
The paneling was both glued and nailed down, but I added some weight as the glue dried for good adhesion.

PXL_20221006_232909554.jpg


I didn’t get any photos of some steps, including using the router with a round-over bit to tackle the top edges of the box. In these photos you can appreciate the rounded edges both along the front and down the corners. This is when I started using wood bondo to cover the seams.

PXL_20221010_210900631.jpg


PXL_20221011_220046896.jpg


Bondo, sand, bondo, sand, bondo, sand, bondo, sand. It seemed to never end! But I really wanted a clean and smooth finish that looked as solid as possible.
PXL_20221018_203813029.jpg

PXL_20221023_172525216.MP.jpg


Here, I am testing the flatness of the corner. The blade was straight and a quick way to scan for inconsistencies. It looks like some light coming through indicating more leveling was needed. More bondo, more sanding!

PXL_20221025_013107470.MP.jpg


PXL_20221030_164551594(1).jpg


By this point, you can start seeing it coming together. The seams are mostly hidden, and I’m still working on hiding nails.

PXL_20221030_164606492~3.jpg
 
I did this next step a little differently from some other builds I’ve seen. The vacuum formed cavities that go on the top and bottom are made of ABS plastic and I ordered them from Todd at custom3dstuff. I’ve generally seen people attach them to the inside edge of the MDF. After cutting off the lips/edges with my Dremel, I pushed them into the holes until the edges matched up with the outside edge of the box. I had to shave off a couple millimeters of MDF which wasn’t even noticeable. I lathered them with Liquid Nails and then held them with a clamp until they dried. I then sanded the edges/perimeter. This also gave me a little more of a rounded edge without having to use the router at weird angles (something I wasn’t comfortable with).

PXL_20221125_174238075.jpg


Here is a close up of the edge. Not too bad!

PXL_20221125_174132570.jpg


Some edges of the vacuum formed cavity wanted to come up a little bit, so I used tiny tacks/nails to hold it down. I then put – what else? – more bondo to hide everything. I actually added way more bondo than I needed but it was nice covering up the scratches I made. Thankfully the Dremel made short work of it. It seems to be an okay depth when compared to the original prop.
PXL_20221201_222741879.jpg


Here is a photo of the prop for reference.

274290189_10160667187024523_6097366663419843149_n.jpg
 
Now back to the depth of the front recessed portion… As pictured here, when placing the fiberglass mold down, I could see that there was going to be a drop from the frame to the fiberglass. The height of the frame here would be higher than most of the texture in the carbonite mold. If I wanted the edge of the carbonite to be even with the frame, I needed another millimeter or so. Unfortunately, I couldn’t find a cheap material that was this thin.

PXL_20221203_223108993.jpg


On the original prop, it is a smooth transition from the sides of the box to the carbonite texture, as can be seen in this photo of the prop from the Star Wars Identities photos (credit unknown).
316133721_3456867224547964_973964403457381300_n.jpg


After a brief tour of some local hardware stores, I decided to just add a layer of paint/primer to the top until getting the depth I wanted. But first, I had to mask off the edges.


PXL_20221203_232206653.jpg


I put down one layer and let it dry over the next day or so. It still wasn’t quite enough (keep in mind, I’m guessing here. Also, the thickness of the fiberglass is not uniform either). I ended up adding another layer.


PXL_20221204_023648744.jpg


This seemed much better and after a test fit, appeared to be the right height to allow for a smooth transition from frame to fiberglass.

PXL_20221204_153716461.MP.jpg


This seems about right!


PXL_20221206_024548921.jpg
 
As I was working on the box, I took some time to begin prepping the HiC fiberglass mold from Wes Coke. As my interest in details progressed, I abandoned the idea of creating my own carbonite texture with a material such as spackle. Instead, I ordered the full front panel of the HiC. This preserves the carbonite details from the original prop. When it arrives, it is in 4 parts cut into equal lengths for ease of shipping. It usually requires some flattening. This is pretty easily achievable with a heat gun and some weights. I would carefully heat it up, put down some weights, let it cool, and repeat. I got pretty good results doing it this way. At least I got some use out of the tub of spackle I bought! The telescope counterweights were also super helpful.

PXL_20221108_123301522.jpg


The details on this thing are incredible! Here, you can see where I began to “stitch” it together. I used fiberglass resin. It was looking pretty good but then I started getting an idea for another project that I could do down the road. Also, I felt like it was going to take longer than I wanted to clean up the lines to my satisfaction. I’ll be able to do this but I’ve been anxious to get my garage space back.


PXL_20221206_030044752.jpg


I reached back out to Wes Coke and ordered another full panel – this time all one piece. Shipping is quite high due to the size of the box! You can see on the left I tried some paint sampling. Now that I have an extra I can test out paints/modifications.

325766866_558437132860527_4285793578197831775_n.jpg


Look at those details.


PXL_20230108_174324675_2.jpg
 
Around this time, I started working on the hero panel. I bought the Fettronics kit which is pretty impressive. I’m very grateful someone out there has made this! After thinking it over, and considering the amount of attention I’ve been putting in other details, I decided to swap portions of this kit for components even more closely matching the original prop. I reached out SirCharles77 who put together an upgrade for the Fettronics kit.

This kit came with the circuit board and pieces that match what was used on the original prop. For the color, I used Humbrol #15 blue on the left darker portion. On the lighter blue, I mixed the Humbrol with standard blue craft paint to get the shade I liked. The black line in the middle was my landmark to know where the board was blocked by the Volvo panel. Charles’s kit was excellent and I really enjoyed this part of the project.

PXL_20230105_174932454.jpg

PXL_20230105_180642781.jpg


The next part went pretty quickly. SirCharles77’s kit that included a small square washer that allowed for easy attachment of the knobs through the panel. I glued down the pieces with E6000 (I had plenty left over from my R2-D2 build).

PXL_20230123_014059325.jpg


My progress up to this point. I used the light caps from SirCharles77. The handles are sized to go into small holes that are already on the Volvo panels. I did have to drill out the holes to make them slightly larger. Handles and upgraded knobs came from Todd Blatt at custom3dstuff. At this time, I haven’t added the digital readouts or the t-levers. These originally came from an Uher mixer. I have ordered these and they’re currently on the way from Europe.

PXL_20230126_033847016.jpg

PXL_20230127_044158824_2.jpg


This useful piece is from the SirCharles upgrade kit. It goes behind the green light/acrylic section of the hero panel and helps diffuse the light across the pane. I painted the inside chrome thinking it would help disperse light. At this point, I haven’t tested to see how well the light will be diffused across the acrylic and I think it was a mistake. I ended up going back to an all white interior later.


PXL_20230122_023151755~2.jpg
 
The weather was good today and there was work to be done. Prior to this, I had glued down the fiberglass mold to the box using industrial strength Liquid Nails. In my anxiety over getting it right, I didn’t get a chance to take pics. What you missed is me putting down the mold, checking the position multiple times, and then using a pencil to draw a line across the fiberglass to the frame so I could easily realign it after applying glue. Once I put the glue down I was running around trying to make sure it was in a good position before it dried. By this point, the glue had dried and the mold was one with the box.

PXL_20230128_175257074.jpg


When looking at pics of the original prop (primarily from the Star Wars Identities collection and the photos that came from Loanstar/Germany) I had noticed that there were essentially two parts to the carbonite. There was the part that has all the characteristic lines/bumps/swirls etc. that takes up the majority of the front. The other part is the outer edge of carbonite that meets with the frame. This part is smooth and at the same level of the frame. I wanted to do my best to preserve this detail so I first mapped the texture and compared the major landmarks with my own. The mold from Wes Coke is so good that this was an easy task.

Here, you can see where I took a pic of my mold and comparing it with the prop, outlined some areas I wanted to clean up a bit. I did this with the entire perimeter.

Upper Right Quadrant Markup.png


In this picture, you can see where I used pencil to mark off the portion that should be cleaned up a bit for a seamless transition with the frame. You can still see a line I drew from the frame to the mold that I used as a marker/alignment when gluing it down. I used my Dremel and a 120 grit rotary sanding tool to remove portions that I ultimately will fill back in with fiberglass resin. This rotary tool allowed me to contour lines around the fiberglass and maintain good vertical transitions from flat fiberglass to texture.

PXL_20230128_180016202.jpg

PXL_20230128_195121203.jpg


Here is a quick pic of some portions of the panel removed/thinned. They just needed to be lower than the frame so I could fill them in/level it later. These are still “work in progress” pics and this gets further cleaned up later.

PXL_20230128_221026526.jpg


Will definitely have to clean this up.

PXL_20230128_225126592_2.jpg
 

Attachments

  • PXL_20230202_030445454.jpg
    PXL_20230202_030445454.jpg
    1.7 MB · Views: 55
In preparation for filling in the newly created gaps, I taped off the border. I’d like to avoid more sanding to remove fiberglass if I can help it.

PXL_20230201_203444008.jpg


I wanted to make sure there wasn’t anything else that needed to be cleaned up prior to pouring the fiberglass. One thing that I had noticed is the carbonite above Han’s head had a straighter edge. This was separated from the border by a smooth stretch of carbonite. You can see what I mean at the top of this photo. I realize it is partially due to the angle, but the upper right gap seemed slightly larger than the upper left. I accidentally recreated this with my cutting, although to a larger degree. Wanting to recreate some details from the original prop, I turned to Apoxie sculpt. I had already practiced using this stuff on the other Han panel that I have. It seems to work pretty well and is pretty forgiving, as it takes a while for it to dry so you can undo any mistakes. I learned of this stuff in Todd Blatt’s HIC how-to video.

top bar.png

PXL_20230129_025511567.jpg


You mix the Apoxie sculpt (1:1 ratio) and then mold it as needed. I called upon my childhood skills and made a “snake”. I stretched it along the top portion and then used a flat edge tool to make it more of a straight line. This hardened overnight. This was the first line - I added more later for improved thickness/straightness.

PXL_20230129_023922618.jpg


PXL_20230129_025331398.jpg
 
Another thing I wanted to work on was some of the skin textures. The mold was fantastic but I wanted to make sure I filled in any details that most wouldn’t notice. The pores seen in the nasolabial folds, for example, had been smoothed out and I wanted to recreate them.
facemouth.png


I used silver silly putty to practice creating textures. I found that fruit peels came pretty close to the texture I was going for. I wanted to be careful though, so as to not introduce acidic chemicals into the project. I ultimately did clean the outside of an orange and use this with some Sculpty clay to tidy up the face.

PXL_20230114_003114812.jpg

PXL_20230114_002709740~2.jpg

PXL_20230119_022114673.jpg


In addition to cleaning up the teeth, there were also lip textures, top and bottom, that I wanted to capture. I found that using monofilament could create textures mimicking prints in skin (lips, hands). That is floss in the picture by the silly putty. It was one of several items I tried.

PXL_20230118_125359468.jpg


In this pic you can see the texture on the lips that I recreated.

PXL_20230119_032759844.jpg


I also cleaned up details on the teeth and a couple other spots on the face/head.

PXL_20230119_030330699.jpg
 
For doing touch-ups (here I covered a small nail that I put down to keep the mold down) pushing the bristles of a paintbrush into epoxy or clay blended it in well. Also visible here is a small gap around the edge of the whole mold that will be filled in later. That is a bit of dried Liquid Nails that got squeezed out when I attached the mold to the box.

PXL_20230120_023335081.jpg


Here is a work-in-progress image of his right hand. I wanted to make sure palm prints were evident as they are on the prop. The pic on the left is from the Loanstar photo collection. I used two different size monofilaments here (one of which was a plastic broom bristle to create that thicker/deeper wrinkle near the thumb). Initially I tried taking a very thin slice of clay and pushing my own palm into it to create more natural looking lines. I had difficulty then securing this to the prop because it was so distorted by the time it was in secured. I ended up being satisfied with the monofilament trick although this took some practice making it look natural. I’m still cleaning up details of the fingers here. You can see there are already nice details present before I did any tweaking.

Screenshot_20230129-141415.png


Here is a work in progress pic.
PXL_20230129_212823825.jpg
 
Back to the panels briefly – I was able to get some machined parts from Bigturc on the RPF forums that go to the second hero panel. The parts look just like the movie! These little black screws/pips are sooo small. I was nervous about losing them. I actually dropped one but was fortunately able to find it. I superglued them in from underneath so they shouldn’t go anywhere and the superglue isn’t visible from the business side.

PXL_20230122_023527168_2 (1).jpg

PXL_20230122_024204629.jpg


And, back to the mold – the frame is taped off and I’m still scanning the edges to find other areas that need to be sanded down to complete my “smooth transition” look. Here, I used a carpenter’s square to slide around the edges feeling for bumps that create textures not present in the original prop. Hopefully, I’ve approximated the height of the recessed region well enough such that the first bump is where it is supposed to be. I found several areas around the perimeter that required further sanding. I’m still primarily using the round rotary sander bit on my Dremel that I posted above. In some places I used a round cutting blade but that was minimal. Every time I think I’m done I scan and find another place that needs to be tweaked.
PXL_20230201_134445917.jpg

PXL_20230202_030437475.jpg


At this point, I’m thinking, “Oh, no. I hope I know what I’m doing.”

PXL_20230201_203444008.jpg


Like at the top, I use Apoxie sculpt on the bottom of the mold to create a small divide between the frame and the rougher portion of the carbonite. In all these stops I tried to recreate small details that are also seen in the props.

PXL_20230202_030503746.jpg


Revisiting the right hand to clean up some details. I’m using a tungsten grinding/carving bit here and grinding out the fiberglass that was between the fingers that isn’t on the original prop. Doing so opened some holes into the hollow portions, but no worries. Here is a series of photos showing progression of the hand.
PXL_20230202_023153612.jpg


Work in progress...


PXL_20230208_044805471_2.jpg

PXL_20230208_130142136.jpg
 
THE COLORS

I spent an unhealthy amount of hours trying to decide on the paint scheme I wanted. Since there is no confirmation on what colors were used, many people say to just use what you like. I couldn’t decide whether I wanted to paint it how it looks in the movies (which is greatly dependent on lighting), the color that is a best guess of what was actually used, or just what I thought looked best. I bought lots of different paints and tried multiple combinations (spraying on MDF using white primer, black primer, no primer, etc).

I was curious about what color was actually used for the movie prop and got lost on the internet exploring popular paints used in the late 1970’s in the US and UK. From my R2D2 build, I had heard that the propmakers had used colors from vehicles. I also knew they used components from cars on this HiC prop (the side panels are from a 343 Volvo) and other props. I researched different colors used on Volvos in the late 70’s and found this:
1979 Volvo Paint Charts Acme 1.jpg

1979 Volvo Paint Charts DuPont.jpg


It looks like Mystic Silver was a commonly used silver paint on Volvos in the late 70’s. I decided to order a can which came from a specialty paint dealer. When it arrived I gave a test spray on my extra HiC (Han’s right shoulder).


PXL_20230105_191247208.jpg

273897021_10161504565322588_6567093500817735686_n.jpg


281962764_10161671802262588_45477314345246741_n.jpg


It is bright in some lighting, but I thought it looked pretty good! It also seemed pretty close to the pics of the original. It also seems to react to lighting the same way:

PXL_20230130_224014733_2.jpg

315753402_3456868357881184_868083373458232777_n.jpg
 
Back to the box...Time to pour the fiberglass resin… It feels funny that I’ve cut and grinded away fiberglass just to replace it with more fiberglass, but I think doing it this way will integrate the mold into the box more like the original prop. I did not get many photos of this process as I was masked, goggled, and gloved. I mixed the fiberglass resin and hardener in small batches. I used cheap plastic measuring cups with spouts for easy mixing and pouring. I also had a bunch of small paintbrushes and scrapers for spreading. I worked to fill in all the spaces that I previously cut away, while trying to keep the fiberglass resin level with the edges of the frame.

PXL_20230207_022353894.jpg

PXL_20230206_021551428.jpg


I pulled up the tape so it wouldn’t attach to the frame as the fiberglass hardened.

PXL_20230206_033828135.jpg


Checking the outcome the next morning, things are looking okay. Some of the edges are spot on. You can see in these two pics the fiberglass is flush with the frame (the picture with the ruler is a bit of an optical illusion because the clear fiberglass is showing imperfections underneath, including a line that looks like a gap in the surface). I’ve gone through and sanded to clean it up. In many spots you can’t even feel a bump when
running your finger between the frame and fiberglass. Look at that clean edge of the carbonite by the ruler!

PXL_20230206_214452158_2.jpg

PXL_20230207_014329419_2.jpg
 
There were some other places that needed to be touched up. In some spots the fiberglass settled below the layer of the frame and there were slight dips of about 1-2mm. These were small but noticeable if you ran your finger along it. The next evening I went through and filled these in with another tiny batch of fiberglass. I put tape back down which allowed me to mark off these areas/other places that needed to be cleaned.

PXL_20230207_021528456.jpg

PXL_20230207_021622949.jpg


Checking the progress the next morning, everything was filled in. Many spots were actually too filled in and the fiberglass was slightly raised above the frame this time. But, this was nothing a little elbow grease and 80 grit sandpaper couldn’t handle. After knocking it down with 80 grit I dropped to a finer grit to smooth it out.

PXL_20230208_025245621.jpg


This black line is underneath the fiberglass and was the result of the underlying panel having a smaller perimeter than the frame. It doesn’t affect the seam between the fiberglass/frame but you can still see it when looking through. Here is an up close pic so you can see what I mean.

Screenshot_20230208-014755 (1).png
 
I managed to get off work early on a nice day. The forecast was rain for days, so I wanted to take advantage of being ready to paint and having good weather. My plan was to prime it and paint it an hour later after the primer had set. Here you can see the primer applied (Kilz shellac based, white) and box painted (Glidden Phantom Hue).

PXL_20230208_205310477.jpg

PXL_20230208_214959536.jpg

PXL_20230209_212157949.jpg


PXL_20230209_224741859.jpg


Although disappointing, it wasn’t a huge surprise that once the primer hit, lots of blemishes were revealed. I abandoned plans to apply the paint and instead went to work making repairs (filling tiny pits, rounding up edges of the fiberglass, etc). By the time I was ready to paint again, it was 80% humidity outside.

Here is a quick pic of the revealed issues being fixed.

PXL_20230210_014952839.jpg
 
I was really itching to paint, so I set up both a dehumidifier and a heater in the garage. After a few hours, the humidity in the garage was around 60% and I decided it was time. I didn’t want to rush it but also couldn’t deny that the conditions were ideal and there likely wouldn’t be another chance for a couple weeks. The next part went quick – I grabbed the paint and went to work.

It ended up being a little brighter than I expected, but the more I look at it the more I like it. The frame looks dark but is brighter when the light is better. I rubbed newspaper all across it which really toned down the brightness and shifted it more towards a silvery-grey appearance.

PXL_20230212_021743247.jpg

comparesssdfdsf.png
 

Attachments

  • Compare montage.png
    Compare montage.png
    7.9 MB · Views: 68
Here is another example of the even transition from frame to carbonite. You can also see what I mean about needing to blur the line at the color change. On the original prop, it almost looks like a silver coat of paint was sprayed on top of the border at some point. I don’t know if I trust myself enough to do a thin layer of paint like this. Again, I’m super happy with my version.

You have to rotate the image in your head just a bit, but you can see the similarities with the original. Some of these lines I had to touch up with epoxy.
Screenshot 2023-02-18 233306.png


My hand details I added came through okay!! The palmar creases match up. I did have to leave some extra fiberglass between a couple fingers in order to maintain the integrity of the hand. This was much easier than trying to find a way to reattach the fingers.

Screenshot 2023-02-18 233425.png
 
I worked on the panels, which didn't take too long. It was a bit tedious and I found some discrepancies when comparing various panel pics I had come across.
PXL_20230216_045524906.jpg

PXL_20230219_021431058.jpg


Here is the Hero Panel with original Uher mixer t-levers. I was pretty happy with the diffusion of the green light. I used an old trick I figured out with my R2D2 built - Glad Press'n Seal. This stuff is a cheap way to diffuse light and works very well! I shoved some in between the acrylic and the diffuser box from SirCharles77's kit.

PXL_20230217_051857349.jpg


I also wanted to "dirty up" the hole thing a la Adam Savage in his video featuring Todd Blatt. I used Streaks n Tips brown hairspray and let loose on the sides/panels.

PXL_20230217_050529023.jpg
 
I don't really consider this project finished yet. I'm still debating a different shade for the box. I'm going to experiment with different glosses on the current color, but so far they seem to make it darker and I'd prefer a lighter touch. I also may gloss over the front panel.

I'm in the process of building the pedestal for it to display on and will have those details soon.
 
Bravo sir! I don't think I've ever seen anyone obsess as much over a HIC before. Your dedication to details definitely pays off. Adam Savage recently worked on his HIC and I wouldn't be surprised if he chimes-in on your thread!
 

Your message may be considered spam for the following reasons:

If you wish to reply despite these issues, check the box below before replying.
Be aware that malicious compliance may result in more severe penalties.
Back
Top