Hello, I'm a new member but I've been a long time lurker on this forum and really enjoy learning from all the great posts. I started building models as a teen in the '70s and I still have what was the crown jewel of my collection back in the day, the original (inaccurate) MPC release of the Millennium Falcon.
So, I was a backer for the Tomy Enterprise and was disappointed with the news about the seams and plugs, as were other folks. When I got it, those issues were not as glaring, but I found a different problem.
There is slight play where the nacelle struts join the underside of the nacelles. It's worse on the port side that I've attached stills of, but the video clip of the starboard nacelle shows the issue best.
It seemed to me the issue is related to the panel on the outside face of the strut that is visibly seated flush at the bottom, yet not at the top.
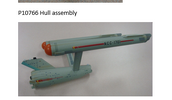
I sent this info to Tomy and requested a set of 6 screw hole plugs so I could pry them out to access the screws and tighten them. Without engaging me on that idea, the CSR simply offered a replacement hull assembly (last photo from them).
I pushed back, offering to fix the one I have if they send me the plugs to save them from having to replace the entire assembly and save it for somebody with a more serious issue like lights being out, but they insisted replacing the whole hull section was their only solution. I asked if they could send it now, but they said they have to receive mine back first. I'm hesitant because other than the nacelle issue, the plugs are all reasonably flush, and the seams are as tight as I've seen looking at photos of ships others have posted.
I agreed to their offer and plan to box up mine and ship it, but I'm worried I might exchange could have different issues such as plugs pushed in too far or not fully inserted, larger gaps in the seams that split the pennant stripe on the sides of the nacelles.
I could still try to fix the problem and try not to damage them or chip the paint around them, and I don't know for certain if my idea will work, but it could be less trouble than the whole exchange process.
Thoughts?
Thanks for reading my ridiculously long first post, btw.
")