"Did you find any droids?" by Bandai

Jaitea

Master Member
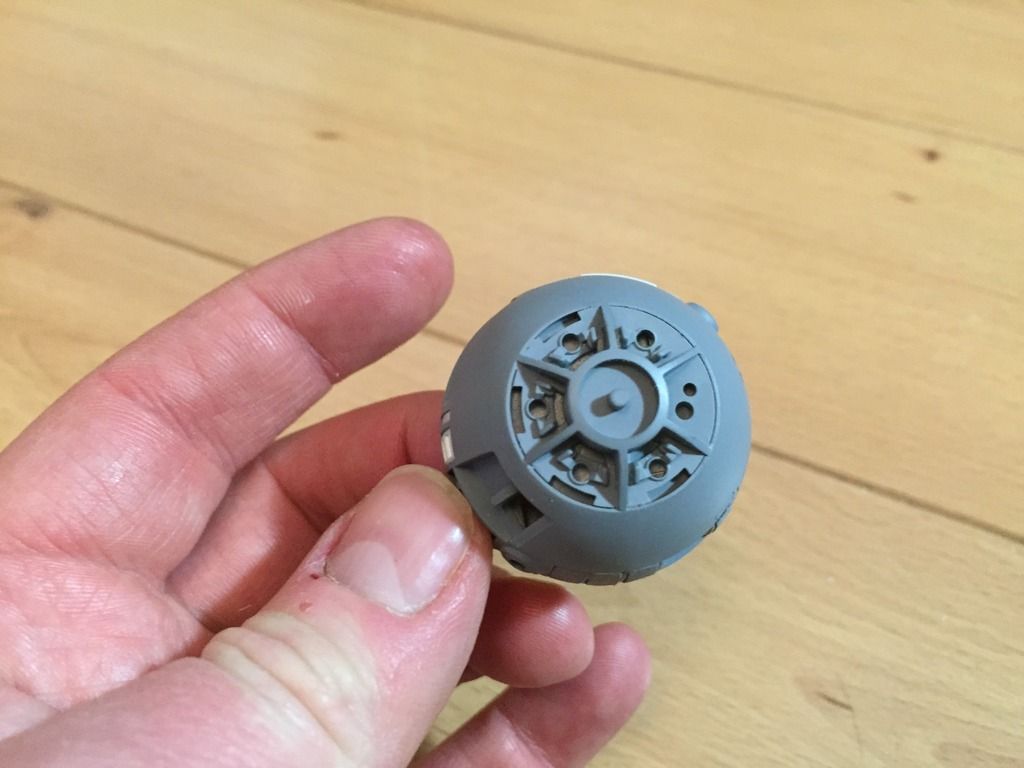
The Bandai R2-D2 is a lovely kit let down by his head,....theres a big join that runs down the middle of it & the metallic plastic is very toy like,.....so my aim is to build up the head differently to the instructions,....to light the various sections & make him LESS toylike;


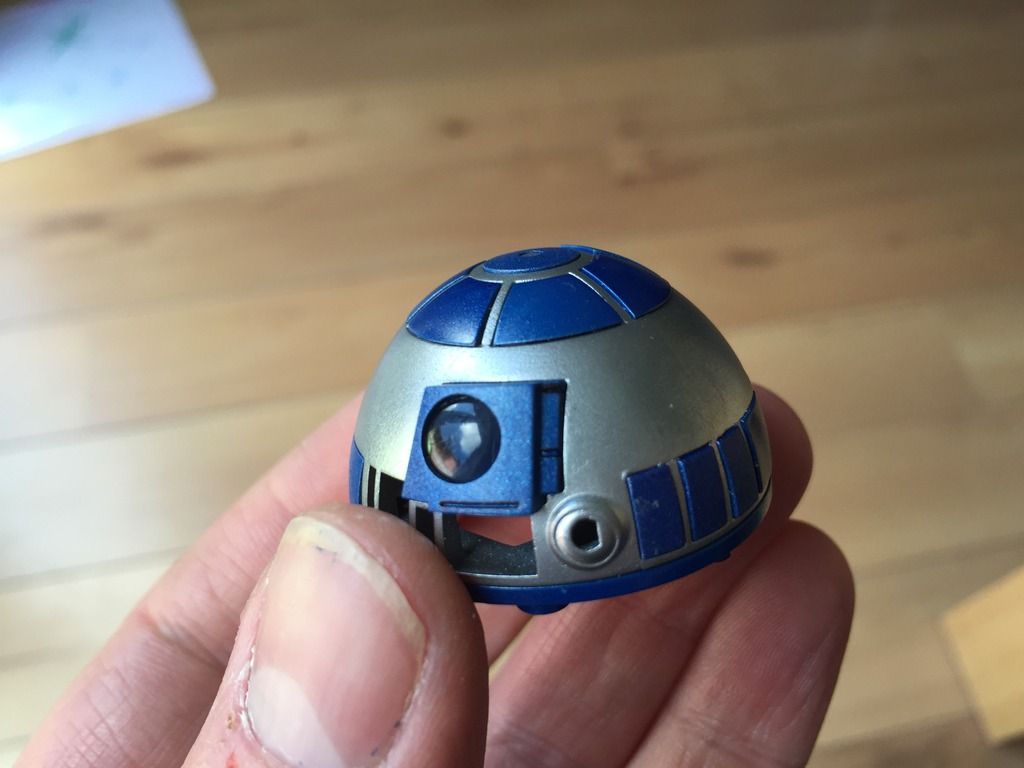
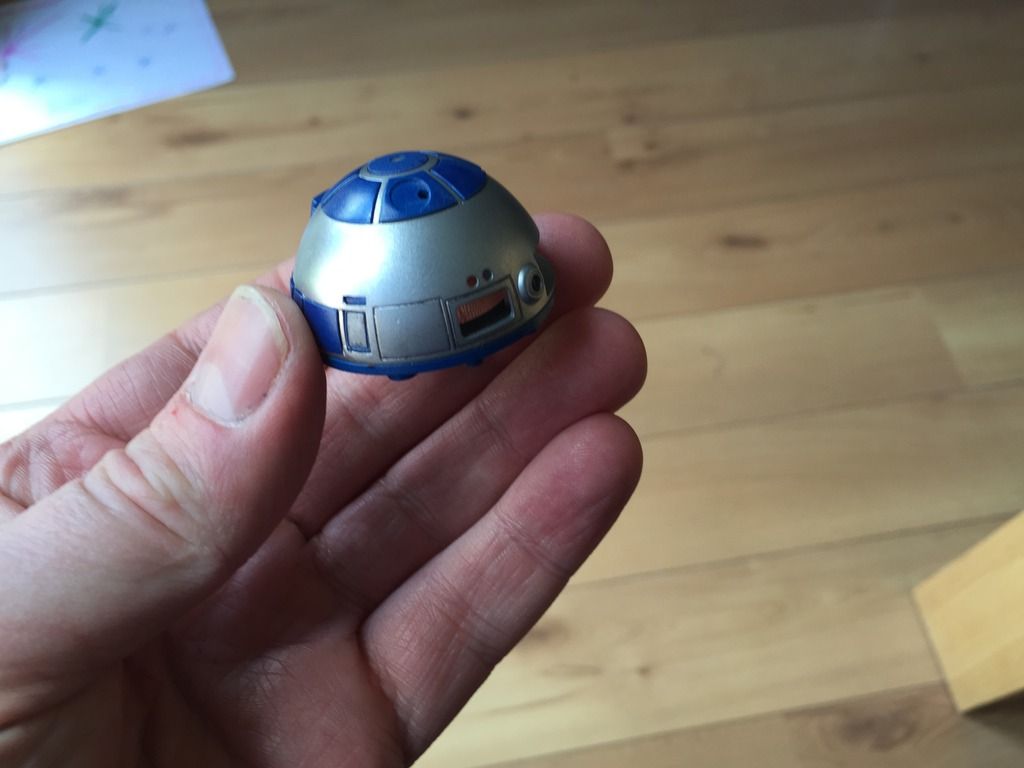
Head assembled to allow the blue sections to be attached later, The seam filled & sanded then primed:


IMG_1834.jpg


Then painted with aluminium,.....then airbrushed with Mr Colour buff-able aluminium, the blue parts were sprayed with Citroen Poseidon Blue,.....the net found that some R2 builders recommended that colour


IMG_1845.jpg

IMG_1846.jpg


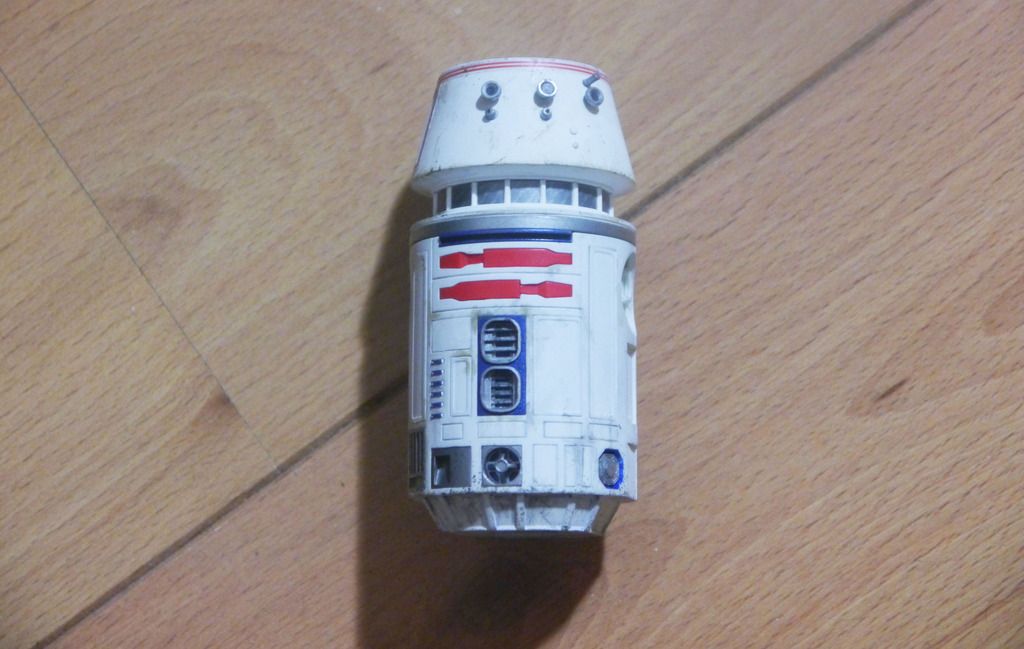
The R5 body, sprayed with white primer,..panel lines drawn in with fine sharpy:
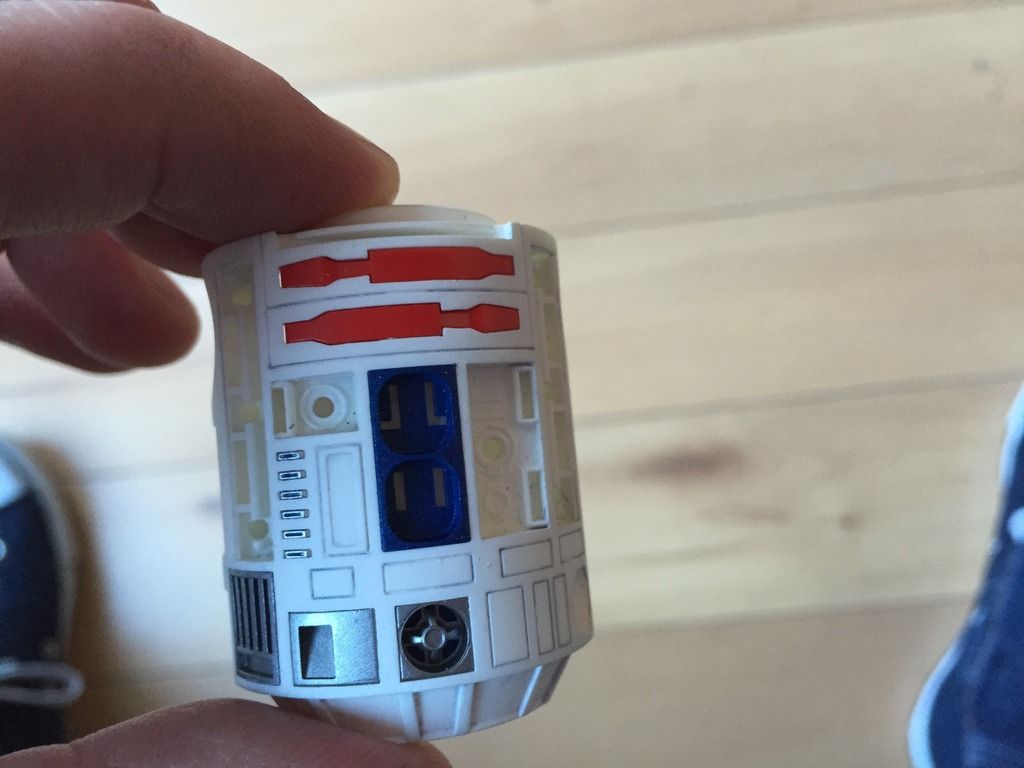

IMG_1851.jpg


R5:
R5.jpg


& his mate:
r2%20amp%20r5.jpg


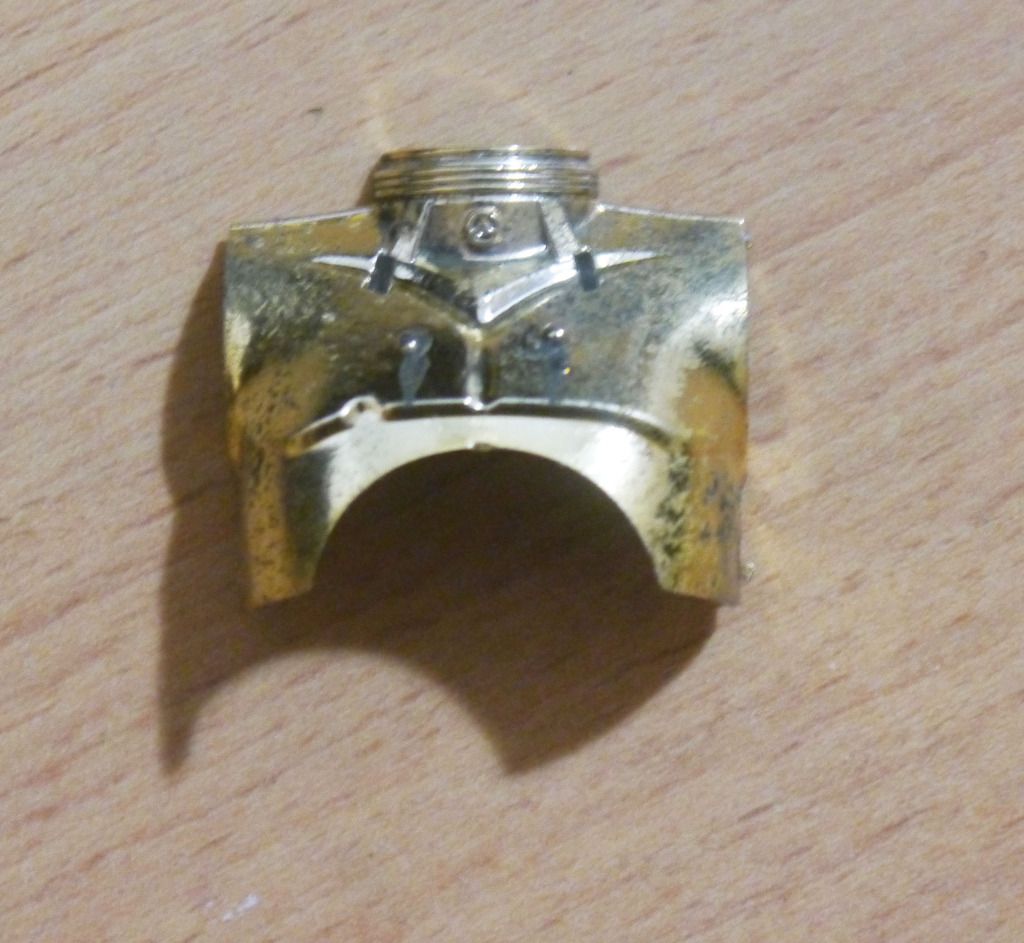
I want to do the 3PO weathered like he was in Star Wars .....(ANH).....so I experimented on the spare chest,....you get 2 with the kit,.....dented & undented


I blasted the part with hairspray,...them dabbed on some PVA glue to take away the shine of the Gold/Chrome,...then weathered on top of that with sponge


spare%203po.jpg


Thanks for looking
John
 
Very nice work. Looking forward to see more. It seems a shame that Bandai dropped the ball, so to speak, on R2's dome by not making it a single chrome piece.
 
Great work.

I picked up the R2/R5 set and was really impressed for the price, but also a little let down with R2's dome.

I'm a complete novice (come here to lurk and look at the amazing work you guys do), but I'm really interested in what you used to fill the seam line on the dome with. Luckily, I haven't build R2 yet, planning on painting the dome, so I'm very interested in giving the seam line a fix.

Thanks,
Jim
 
Thanks guys,....I haven't done any more to these but I have some pics taken earlier in the build,....jimmer,.....Ijust glued the halves together and used mumbrol model filler paste


IMG_1846_1.jpg


I did a mould & cast of these areas,...with an LED behind it should be OK


IMG_1841.jpg


IMG_1840.jpg


I cast this one also,....worried about carving the areas out on the original piece


IMG_1836.jpg


Thanks for looking


J
 
Excellent work on the dome. Glad I held off on assembling my R2 now. I'm gonna practice with filler on a couple of junker models I have, then tackle my R2 dome as well.

Great idea with casting the pieces as well.
 
I think you'll really enjoy them, Neil. I'm sure you are well aware, but use caution cutting the parts from the sprue. Some are very small and easily damaged. I'm a bit of a novice, but luckily watched a youtube tutorial before starting my build. Best idea is cut the parts free leaving extra plastic, then sand down the excess with very fine sandpaper (again, I'm sure you are well aware).

Also, there is one black transparent piece in the kit (R2's eyepiece) that is extremely easy to damage. I've seen several people online who damaged theirs getting it loose, so take extra care.
 
I love how Bandai did their astromech droids. I think they're excellent kits. I wish they'd reissue the R2 kit with a 3-piece "seamless" construction, and all the doors molded closed: Front half, back half, and dome. All the little hatches are difficult to sit flush, but not exactly flush. The seam on R2's head really wrecks the look if you don't fill and paint it. Giving the option of everything molded closed would give a new modeler a better-looking finished product. That's really my only problem with that kit and it's pretty minor.
I also wish they'd molded his claw closed, so you could model R2 holding something. Has anyone modified it?
 
Hey guys,.....I did a 'One Day Build' with the 3PO model...& video'd it,....so after I edit it I'll post a link here

Only bit of working out was the cable running down through him coming out his foot

View attachment 1327742View attachment 1327743View attachment 1327744View attachment 1327745View attachment 1327746View attachment 1327747View attachment 1327748View attachment 1327749View attachment 1327750View attachment 1327751View attachment 1327752View attachment 1327753View attachment 1327754View attachment 1327755

Next,....the R2 & R5 gets finished

John

Love the weathering on this build John, really nice. How are you finding the nub placing when it comes to being out of sight on this kit? What I mean is when I built Phasma, inevitably the chrome suffered from the nub placement and there were multiple visible parts where the plastic showed. Just wondering if that's the same with C3P0
 
Love the weathering on this build John, really nice. How are you finding the nub placing when it comes to being out of sight on this kit? What I mean is when I built Phasma, inevitably the chrome suffered from the nub placement and there were multiple visible parts where the plastic showed. Just wondering if that's the same with C3P0

Hi r0ver, most nub placements were on the inside of parts, but there were a few visible on the back of his legs, I just touched him up with a bit of silver or gold paint & because he was weathered, the nub marks disappeared

Maybe I missed it, but what paint did you use for C-3PO
The finish looks perfect with that weathering!

Thanks Analyzer

I used a high gloss gold car spray decanted into a plastic shot glass for touch ups on the actuators on his arms etc,...Mr Hobby silver for the same,...Hycote car Primer to prime his waist part, & cheap oils & turps to weather


Wow! That Threepio weathering is bang-on perfect!

Thank you Zuiun.....and done at a break neck speed,...(well for me...I usually take ages)

John
 
This thread is more than 3 years old.

Your message may be considered spam for the following reasons:

  1. This thread hasn't been active in some time. A new post in this thread might not contribute constructively to this discussion after so long.
If you wish to reply despite these issues, check the box below before replying.
Be aware that malicious compliance may result in more severe penalties.
Back
Top