DEC ANH Hero Blaster Kit Builds

Re: Simplified, cheaper DEC ANH Hero Blaster Kit parts (posted with permission fr...

...for those without a ghetto lathe...: )
you can use the Underdog method. Shoe Shine buff.

Clamp or have someone hold one end against a table and use a strip of sandpaper and buff!
You don't have to try to get it completely round. Just soften the edges and it will look great.

Also can simply use a large foam sanding block or sandpaper and grip and twist..
 
Re: Simplified, cheaper DEC ANH Hero Blaster Kit parts (posted with permission fr...

Wanted to mention, not sure how many of you have access to one, but one idea for when you need tools that are beyond expense. You might want to try Hackerspaces.
I'm planning on visiting one local to me, they've got a excellent lathe. Here's a link to a listing of them Makerspace | Directory

Cheers
 
Re: Simplified, cheaper DEC ANH Hero Blaster Kit parts (posted with permission fr...

How is everyone's weathering coming along for parts other than the FH and Scope? I've been using Pewter Black on the scope mount and grill and I feel like this could take years to get the dark finish I want. Thoughts?
 
Re: Simplified, cheaper DEC ANH Hero Blaster Kit parts (posted with permission fr...

Alright, decide to use a satin black paint for the scope mount set up and the grill. I started using Birchwood Gun Blue on the Denix and although it'll take a long time with many different coats and steel wool I am feeling pretty good about it.

is the gun blue permanent? Seems like it comes off pretty easy with the steel wool. I was planning on putting this barricade stuff on it but I want something that's going to make this thing last. My blaster is not going in a case. She'll be on the coffee table to be held so the weathering will need to be durable.
 
Re: Simplified, cheaper DEC ANH Hero Blaster Kit parts (posted with permission fr...

I got a machined FH, so no Super Blue there. I blued all of the cast parts; the scope came out looking the best, even without a makeshift lathe. Still working on the grille.

I then painted all the parts (while disassembled) with flat black spray enamel, about two coats. Reassembled and weathered with 0000 steel wool and a sanding block. Minor weathering on everything except the FH, which only had spots of paint remaining in the grooves and a few patches/worn spots elsewhere. Paid special attention to the brass scope rings.

I ordered Aluminum Black, but I think I'm going to return it unopened. I'm really happy with how it looks now.

Has anyone had really good luck with attaching the barrel and FH non-permanently? I filed a groove for the thumbscrew which holds it reasonably tightly, but I had to put a tiny spot of JB Weld at the bottom of the groove. Hoping it holds but can be unscrewed if I want to disassemble it.
 
Re: Simplified, cheaper DEC ANH Hero Blaster Kit parts (posted with permission fr...

filing a groove in the barrel is probably the best way, if the JB weld doesn't hold you can use the blue removable thread lock,
but what you have should be fine
 
Re: Simplified, cheaper DEC ANH Hero Blaster Kit parts (posted with permission fr...

BTW - the rest of the flash hiders are shipping tomorrow, everybody is doing an awesome job!
Thanks for the run guys! now what's next?.............
 
Re: Simplified, cheaper DEC ANH Hero Blaster Kit parts (posted with permission fr...

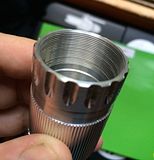
I got my aluminum flashider today woo hoo! It's amazing how much lighter it is than the cast one, but honestly the casting is so good on mine that you really can't tell which is which by eye (unless you look for the internal threading on the more accurate aluminum version. Strong work as always DEC!!!!

So far I've sanded and blue'd/aluminum black'ed all the parts and have started assembly. The only thing left to do is finish the flashider and the sight greeble and attach them. I've oiled the metal and am really torn about weathering it any more. I think I'm gonna leave the finish only slightly beat up and wax it to protect it (for now anyways).
Now on to a few build pics. (clicky)

Looks great! You blued all these parts? How'd you get them so dark? I'm struggling with getting my finish so dark...
 
Re: Simplified, cheaper DEC ANH Hero Blaster Kit parts (posted with permission fr...

BTW - the rest of the flash hiders are shipping tomorrow, everybody is doing an awesome job!
Thanks for the run guys! now what's next?.............


Ummmm I NEED a new steel bull barrel and I think we ALL NEED a run of super accurate ESB parts with replica cast m19 scopes. Cast brass.

Ohhhh yeah. Let's do it!!!!!

or GREEDO KILLERS.

Or leia blasters


or ....
 
Re: Simplified, cheaper DEC ANH Hero Blaster Kit parts (posted with permission fr...

Thanks goldenry007! Basically, I sanded and steel wooled all the parts first, then I heated up each piece w/ a heat gun. Next came the 1st coat of superblue or aluminum black respectively, applied w/ a soft rag. Rise w/cold water, dry, heat again, steel wool, and reapply. I must have done this at least 6-7 times per part. After the final steel wool ( very light pressure), I coated everything in WD-40, left them in a plastic bag overnight, then wiped it all down w/ a dry microfiber cloth, and finally applied a light coat of 3in1 oil.

I gently knocked down the finish on the edges to give everything a slightly worn look - I couldn't bring myself to really beat it up. I figure it'll weather naturally at this point. I do plan on using some neutral shoe polish as a final protectant once she's all buttoned up.

The brass scope rings were painted over w/ 1coat of semigloss black enamel after soaking them in ammonia for a bit to make them seem aged. One pass w/ a scotch brite pad weathered the paint off nicely. I painted the scope knob w/ a metallic gold/brass paint before 1coat of the black enamel as well, then the scotchbrite pad. Voilá!

One note of caution-the cast parts can be pretty soft so be carefull not to dull the edges or you'll lose detail. Hope this helps
 
Last edited:
Re: Simplified, cheaper DEC ANH Hero Blaster Kit parts (posted with permission fr...

Ummmm I NEED a new steel bull barrel and I think we ALL NEED a run of super accurate ESB parts with replica cast m19 scopes. Cast brass.

Ohhhh yeah. Let's do it!!!!!

or GREEDO KILLERS.

Or leia blasters


or ....

Yes to all, I'd love love a GK scope and mount and I'm sure I have a spot for Leia's blaster.
'
 
Re: Simplified, cheaper DEC ANH Hero Blaster Kit parts (posted with permission fr...

Thanks goldenry007! Basically, I sanded and steel wooled all the parts first, then I heated up each piece w/ a heat gun. Next came the 1st coat of superblue or aluminum black respectively, applied w/ a soft rag. Rise w/cold water, dry, heat again, steel wool, and reapply. I must have done this at least 6-7 times per part. After the final steel wool ( very light pressure), I coated everything in WD-40, left them in a plastic bag overnight, then wiped it all down w/ a dry microfiber cloth, and finally applied a light coat of 3in1 oil.

I gently knocked down the finish on the edges to give everything a slightly worn look - I couldn't bring myself to really beat it up. I figure it'll weather naturally at this point. I do plan on using some neutral shoe polish as a final protectant once she's all buttoned up.

The brass scope rings were painted over w/ 1coat of semigloss black enamel after soaking them in ammonia for a bit to make them seem aged. One pass w/ a scotch brite pad weathered the paint off nicely. I painted the scope knob w/ a metallic gold/brass paint before 1coat of the black enamel as well, then the scotchbrite pad. Voilá!

One note of caution-the cast parts can be pretty soft so be carefull not to dull the edges or you'll lose detail. Hope this helps

Thanks for the tips! I've been coating with Alum Black and Super Blue then using steel wool. I've probably done this about 20 times each and I think I'm finally reached the finish I want but there seems to be a slight reddish color which I'm assuming is rust. Not sure what to do about that except for use more steel wool. But tomorrow I'll check out applying heat.

What does the 3-in-1 oil do? Im trying to figure out a good sealant to use. I don't want to re-weather this thing in a year if you know what I mean
 
Re: Simplified, cheaper DEC ANH Hero Blaster Kit parts (posted with permission fr...

In news today, both my aluminum flash hider AND my second MGC both came in today! The flash hider is NICE. It's a lot lighter than I expected, and like the cast zamak version, the inside needs to be de-burred of all the excess chattel material. I'm still considering whether or not to ghetto-lathe them out. My MGC was in better shape than I was expecting, but the hammer mechanism wasn't operational. With a little extra effort, and a LOT of explicatives later, I finally managed to get it working. Today was a success for me! :D
 
Re: Simplified, cheaper DEC ANH Hero Blaster Kit parts (posted with permission fr...

I keep meaning to move over into 1 of my build threads but I figure if I've got questions then this is probably the best place to ask

After a week or so of filing & drilling & wet sanding I finally had a little go at bluing

flash hider, scope & scope mount cast parts took the super blue really well (might have overdone the FH but can rub it back a bit)

the bull barrel came up really blue/black (didn't realise how violent the reaction with the Alu Black was)

over did the thumb wheels a bit & they got a bit caked up but got them looking ok in the end

weirdly the one thing I'm struggling with is the one thing I've done before, bluing the Denix

Doesn't seem to want to take the Alu Black maybe I'm buffing too much between coats as I try to even out the finish?

at the moment it's still almost like a darkened silver rather than black

I remember the last one I did I didn't buff between coats & it was very mottled but evened out with oiling

is it possible that I've got the Denix too smooth? It's almost like the Alu black is just sitting on the surface in spots

Ive been heating the metal but I don't know if I need to rough it up a bit?

also not sure if I'm leaving it on long enough before rinsing

oh well, guess I keep trying, I'd like to keep it all blued rather than painted
 

Attachments

  • image.jpg
    image.jpg
    645.9 KB · Views: 280
  • image.jpg
    image.jpg
    609.1 KB · Views: 228
Re: Simplified, cheaper DEC ANH Hero Blaster Kit parts (posted with permission fr...

I keep meaning to move over into 1 of my build threads but I figure if I've got questions then this is probably the best place to ask

After a week or so of filing & drilling & wet sanding I finally had a little go at bluing

flash hider, scope & scope mount cast parts took the super blue really well (might have overdone the FH but can rub it back a bit)

the bull barrel came up really blue/black (didn't realise how violent the reaction with the Alu Black was)

over did the thumb wheels a bit & they got a bit caked up but got them looking ok in the end

weirdly the one thing I'm struggling with is the one thing I've done before, bluing the Denix

Doesn't seem to want to take the Alu Black maybe I'm buffing too much between coats as I try to even out the finish?

at the moment it's still almost like a darkened silver rather than black

I remember the last one I did I didn't buff between coats & it was very mottled but evened out with oiling

is it possible that I've got the Denix too smooth? It's almost like the Alu black is just sitting on the surface in spots

Ive been heating the metal but I don't know if I need to rough it up a bit?

also not sure if I'm leaving it on long enough before rinsing

oh well, guess I keep trying, I'd like to keep it all blued rather than painted

beautiful! Blown away by how dark you got the parts with the bluing. I'm having the same issue with my Denix to get it dark... but I haven't even started on the scope, fh or barrel. PS: Love the Knolled picture! ABK
 
Re: Simplified, cheaper DEC ANH Hero Blaster Kit parts (posted with permission fr...

yeah I'd say the metal being too polished makes it harder to get the chemical in the pores.

Try soaking that puppy in a big ol zip lock with AL black. swish it around..

Instead of buffing with steel wool... use a shop rag to apply MORE AL Black afterwards, and see if that will take the crust and crap away and keep it dark.

I got a question for you regarding the Barricade stuff. I'm putting it on all the parts after I've blued them. I was just wondering if I'm going to need to reapply the barricade every once in a while as people hold it and stuff or is a one time coat good? If so I need to figure out a good sealant or something that'll keep this bad boy durable.
 
Re: Simplified, cheaper DEC ANH Hero Blaster Kit parts (posted with permission fr...

I keep meaning to move over into 1 of my build threads but I figure if I've got questions then this is probably the best place to ask

After a week or so of filing & drilling & wet sanding I finally had a little go at bluing

flash hider, scope & scope mount cast parts took the super blue really well (might have overdone the FH but can rub it back a bit)

the bull barrel came up really blue/black (didn't realise how violent the reaction with the Alu Black was)

over did the thumb wheels a bit & they got a bit caked up but got them looking ok in the end

weirdly the one thing I'm struggling with is the one thing I've done before, bluing the Denix

Doesn't seem to want to take the Alu Black maybe I'm buffing too much between coats as I try to even out the finish?

at the moment it's still almost like a darkened silver rather than black

I remember the last one I did I didn't buff between coats & it was very mottled but evened out with oiling

is it possible that I've got the Denix too smooth? It's almost like the Alu black is just sitting on the surface in spots

Ive been heating the metal but I don't know if I need to rough it up a bit?

also not sure if I'm leaving it on long enough before rinsing

oh well, guess I keep trying, I'd like to keep it all blued rather than painted

For bluing a Denix, the pre-polishing shouldn't be too perfect. I used some 500 grit sandpaper that was stapled taught to a woodblock to do the wet finish sanding before bluing. I also tried applying the Aluminum black with a paper towel instead of using steel wool, which worked just fine. I only needed two applications to get my desired finish, buffing with canola oil in between each application, though the oil will need to be removed before it is given more bluing. Strangely enough, I also tried mixing in a little blue paint in with the Aluminum Black solution prior to bluing. It bubbled a lot and smelled bad, but perhaps that helped somehow? :confused
 
Re: Simplified, cheaper DEC ANH Hero Blaster Kit parts (posted with permission fr...

Thanks for the advice folks

I guess there's a different approach for each metal involved here

i had all the cast parts & Alu parts sanded to a fine finish & they worked great but not so for my gleaming denix

Ive just (lightly) attacked the denix with some dry 400 grit paper to rough up the surface a bit

Will try some more coats & sitting in a bag tonight

keep worrying the mystery disk sticker will float off though
 
Back
Top