Limited Run Darth Maul TPM screen accurate lightsaber prop

For those with girly hands...

Tie the fishing line around a pencil. Then through the o ring.. then around the pencil.. little trick I learned in prison..

IMG_9380.jpg


O ring in picture is a 3d printed test print for another project. And used only as a example
 
I actually used one of my jewlers screwdrivers, that I use on my watches. I was very careful & didn't scratch anything, & all worked great. But I woulda used the fishing string/pencil/o-ring/prison trick thingie.... had I thought of it.
 
A word of warning to everyone, try to not let an o-ring slip into a groove you don't want it in. They're pretty hard to get out!

I didn’t have a hard time? I rolled it out with my fingers no tools required

This isn’t me trying to sound cocky, I just find it surprising that it was hard to get out. Because mine moved very easily
 
I had to re-size my rod. Man, that just sounds naughty :lol: Anyhoo, I took off about 3 more threads. Now everything fits snug.
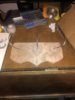
20190506_133638.jpg


So far today, I sized a new watch & re-sized my lightsaber :)

Another masterpiece from Dan is now done-ish. I'm probably gonna weather the ends a little later. For now, however, I'm just enjoying it together.
 
This is an insane price for a nearly finished replica. I agree with a previous statement about the red button color, seems like it should be a bit brighter, maybe slightly metallic.
 
Got mine today, super fast shipping and I absolutely love the saber! Will post pics tomorrow once I've assembled it but I like it so much I asked Dan about ordering a half-hilt today and I will be making a battle-damaged post-TPM version!
 
I didn’t have a hard time? I rolled it out with my fingers no tools required

This isn’t me trying to sound cocky, I just find it surprising that it was hard to get out. Because mine moved very easily

The particular groove mine slipped into was deep enough that my apparently silky smooth and baby soft thumbs couldn't get enough grip on it to roll it out. I got it with the help of a small screwdriver and one nearly unnoticeable scratch on the hilt. Weathering!
 
Just got back from vacation yesterday and my kit was waiting for me! Took about an hour to read through the latest posts and watch Halliwax’s videos before I started on my build. Many, many thanks to everyone that posted up their own builds and tips/suggestions for making the build easier. My build was SUPER easy because of everyone’s willingness to share what they had learned.
I used the rubber washer between the two saber halves, ribbon to get the o-rings into place and a couple wraps of blue tape on the emitter shafts ends and super glued the washers together to get the washers to fit nice and snug.

I decided to paint my smaller washers edges with a bit of flat black from a small rattle can I had lying around in the garage. I was trying to come up with a way to paint just the edges quickly and easily when I remembered that I had the threaded rod and the 2 nuts still from Halliwax’s build tips. So, I quickly loaded the specific washers on the end of the rod, secured them on both ends with the nuts and did a quick shot of black on the edges. It worked great and it kept the paint off of the flat surfaces so that I could super glue them together easier.
A12202F4-CC02-4F6E-B49D-9D30EC0EC48A.jpeg

9D8B2187-9F62-4842-B9B1-ECB7796637FE.jpeg

Since I hadn’t seen anything close mentioned on the thread I thought I’d post it, to kind of give back a little of what I got from all of you. Hopefully it will help someone with their own build.
In the end the saber came together beautifully and with no problems!!
 

Your message may be considered spam for the following reasons:

If you wish to reply despite these issues, check the box below before replying.
Be aware that malicious compliance may result in more severe penalties.
Back
Top