Boba Debt
Master Member
I often see new members post threads asking for advice on custom sabers, so I thought it would be a good idea to create a thread for everyone to show off their custom designs.
I hope it will inspire new builder to think outside of the box and if you post below it would be most beneficial to include a brief description of the parts and construction process.
I'll go first:
--------------------------------------------------------------------------------
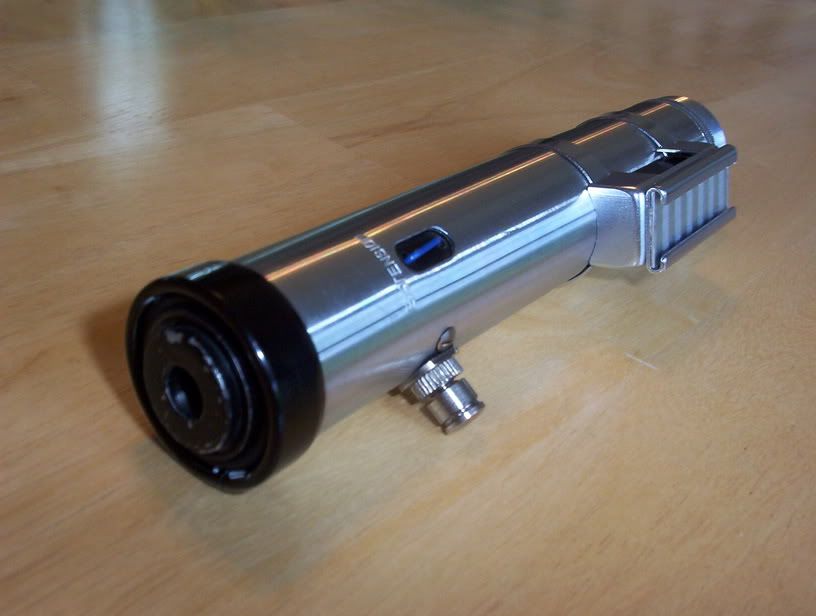
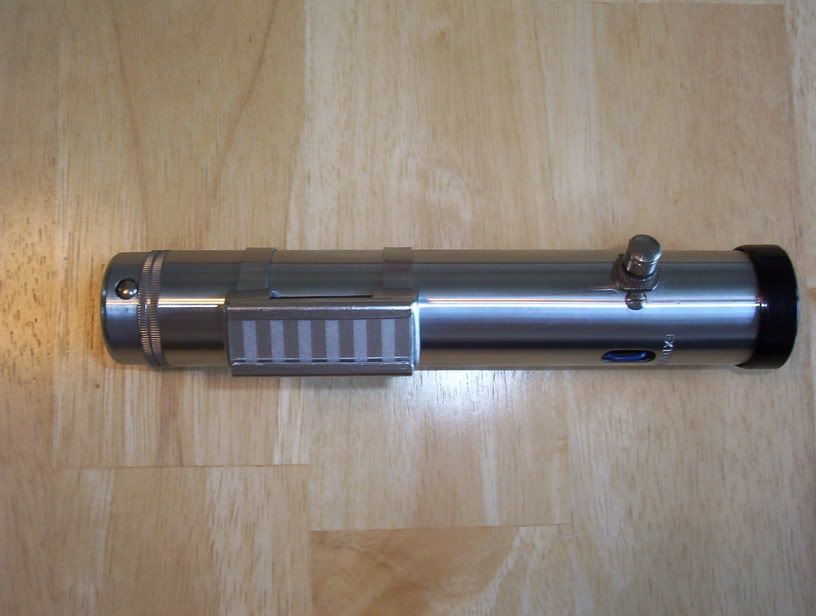
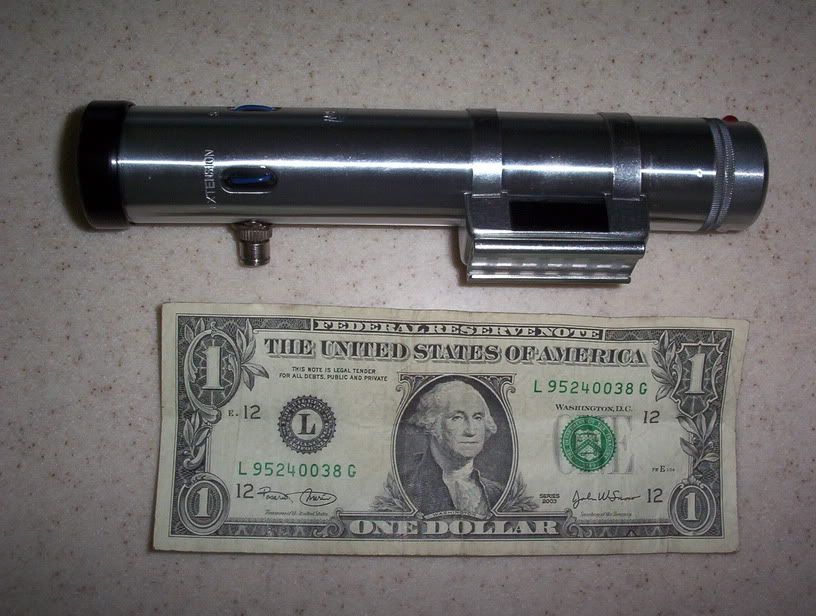
This is my 1st custom Light Saber, it is a Jedi design
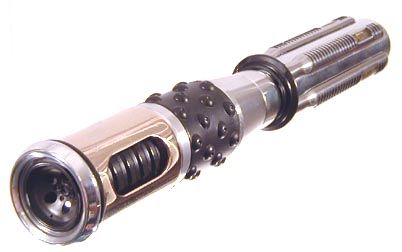
I decided to use a combination of found parts and my machining skills to make this saber. I stumbled across a gear shift knob and knew it could be made into nice saber. The end product is far from what I first envisioned.
I used aluminum for most of the body and bronze for the vented emitter sleeve. The lathe work is simple, I wanted the focus on the found details.
The grips were Gillette Sensor Razors. I cut them in half and filled them with resin. If you look at the area where the logo was held in place you will see the clear amber color of the resin. I consider these to be activation sensors. They are mounted to a machined aluminum core.
Just in front of the grips you can see a disc which is from the Visible V-8 model. If the wrong person attempts to active my saber this will ensure that it is the last thing they pick up with that hand.
The next section is the gear shift knob. The bumpy foregrip can be rotated to adjust blade strength.
The emitter is 100% machined. I did not use blueprints or a drawing I just went at it.
The emitter disc is a Lamborghini wheel, I got the idea from Yoda.
It's all held together with a threaded rod and was a pretty easy saber to make
--------------------------------------------------------------------------------
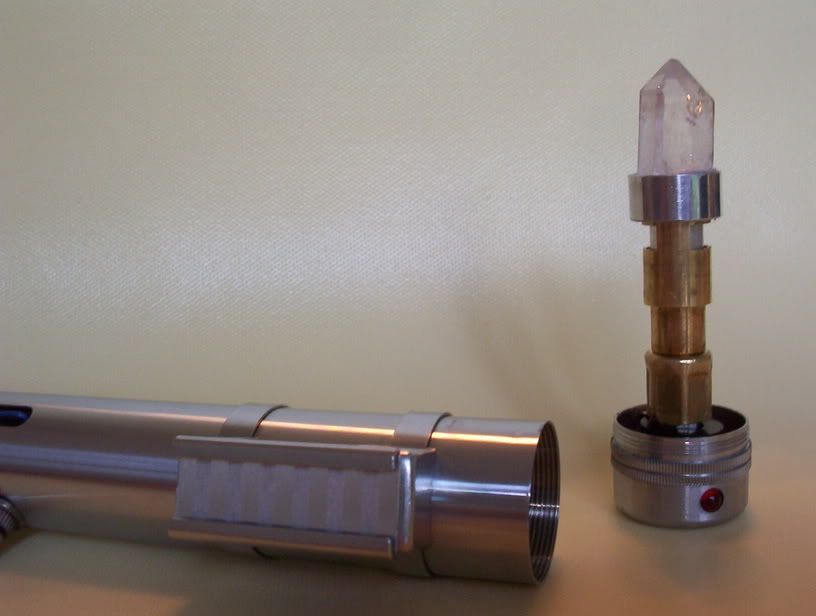
This is my 2nd Saber, it is a Sith Design.
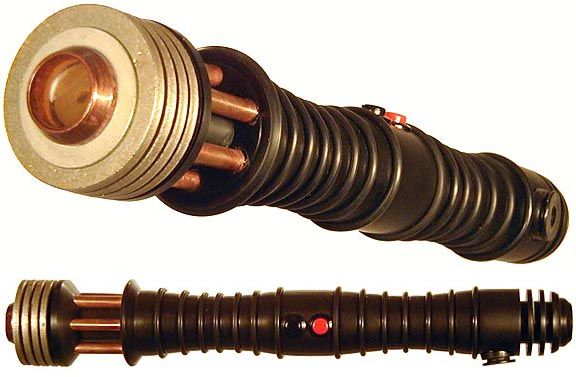
Once again I used a combination of found parts and my machining skills to make this saber, only this time I had a plan and stuck to it.
Most of the body is machined Delrin. I used a wood lather instead of a metal lathe to give it an organic feel.
Then I added various size o-rings, a Covertec knob and 2 Radio Shack Buttons to the body.
I used 1/4" diameter copper tubing for the emitter power feeds a combination of washers for the emitter.
A flared copper fitting aligns and secures them to a delrin stem.
I sold it to a fellow RPFer and I hope they still enjoy it as much as I did.
--------------------------------------------------------------------------------
This is what I consider to be my final custom Saber. It is my favorite saber and I doubt I will ever top it.
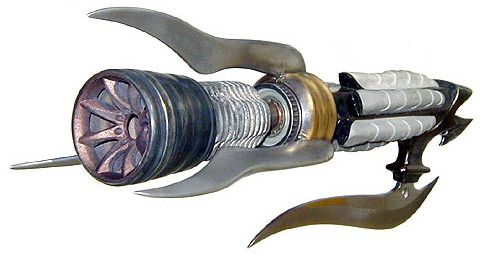
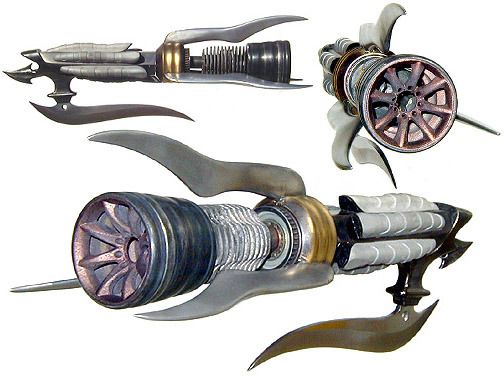
It is an ancient Sith Saber and is meant to be wielded with one hand. IMO the design is very menacing and even if the owner forgot to install the batteries he could still beat his opponent to death in no time at all and it wouldn't be pretty.
I entered it in one of Luukes Annual Saber Contests and I think I placed first that year.
It was a complicated and expensive saber to build so I will explain the construction in phases.
The handle is made from a Gil Hibben "Scorpio Knife" Knuckle Guard and 5 Toothbrush Handles. Everything it mounted to a piece of weather brass hex stock.
The pointed "Tail" of the Knuckle Guard is threaded into the hex stock and it is what secures it to the back of the handle. I had to hand file the hex stock to match the curvature of the Knuckle Guard, it was very labor intensive.
I used CA glue to mount the cut down toothbrush handles, which are rubber so it has a very heavy but comfortable feel.

The mid section is made from a machined brass Ribbed Section, a Gas Powered RC Differential Pulley and 2 Gas Powered RC Engine Heatsinks.
I heavily weathered all of the parts and used a file to gently radius the back heat sink. it's all held in place with a threaded rod.

The Emitter Power feeds are Aluminum Shrimp Deveiners. I had 3 grooves machined in the Brass Ribbed Section and attached the deveiners with brass screws. I removed the heads so they look like pins.

The Emitter is made from a Gas Powered RC Tire Rim and a machined aluminum Housing, it threads into the rod to hold the entire saber together.

--------------------------------------------------------------------------------
--------------------------------------------------------------------------------
Building a custom saber can be very rewarding but if you lack the skills or tools there is nothing wrong wit commissioning an artist to build one for you")
If you have a custom design please take a few minutes to post a picture and brief description below.
I hope it will inspire new builder to think outside of the box and if you post below it would be most beneficial to include a brief description of the parts and construction process.
I'll go first:
--------------------------------------------------------------------------------
This is my 1st custom Light Saber, it is a Jedi design

I decided to use a combination of found parts and my machining skills to make this saber. I stumbled across a gear shift knob and knew it could be made into nice saber. The end product is far from what I first envisioned.
I used aluminum for most of the body and bronze for the vented emitter sleeve. The lathe work is simple, I wanted the focus on the found details.
The grips were Gillette Sensor Razors. I cut them in half and filled them with resin. If you look at the area where the logo was held in place you will see the clear amber color of the resin. I consider these to be activation sensors. They are mounted to a machined aluminum core.
Just in front of the grips you can see a disc which is from the Visible V-8 model. If the wrong person attempts to active my saber this will ensure that it is the last thing they pick up with that hand.
The next section is the gear shift knob. The bumpy foregrip can be rotated to adjust blade strength.
The emitter is 100% machined. I did not use blueprints or a drawing I just went at it.
The emitter disc is a Lamborghini wheel, I got the idea from Yoda.
It's all held together with a threaded rod and was a pretty easy saber to make
--------------------------------------------------------------------------------
This is my 2nd Saber, it is a Sith Design.

Once again I used a combination of found parts and my machining skills to make this saber, only this time I had a plan and stuck to it.
Most of the body is machined Delrin. I used a wood lather instead of a metal lathe to give it an organic feel.
Then I added various size o-rings, a Covertec knob and 2 Radio Shack Buttons to the body.
I used 1/4" diameter copper tubing for the emitter power feeds a combination of washers for the emitter.
A flared copper fitting aligns and secures them to a delrin stem.
I sold it to a fellow RPFer and I hope they still enjoy it as much as I did.
--------------------------------------------------------------------------------
This is what I consider to be my final custom Saber. It is my favorite saber and I doubt I will ever top it.


It is an ancient Sith Saber and is meant to be wielded with one hand. IMO the design is very menacing and even if the owner forgot to install the batteries he could still beat his opponent to death in no time at all and it wouldn't be pretty.
I entered it in one of Luukes Annual Saber Contests and I think I placed first that year.
It was a complicated and expensive saber to build so I will explain the construction in phases.
The handle is made from a Gil Hibben "Scorpio Knife" Knuckle Guard and 5 Toothbrush Handles. Everything it mounted to a piece of weather brass hex stock.
The pointed "Tail" of the Knuckle Guard is threaded into the hex stock and it is what secures it to the back of the handle. I had to hand file the hex stock to match the curvature of the Knuckle Guard, it was very labor intensive.
I used CA glue to mount the cut down toothbrush handles, which are rubber so it has a very heavy but comfortable feel.
The mid section is made from a machined brass Ribbed Section, a Gas Powered RC Differential Pulley and 2 Gas Powered RC Engine Heatsinks.
I heavily weathered all of the parts and used a file to gently radius the back heat sink. it's all held in place with a threaded rod.
The Emitter Power feeds are Aluminum Shrimp Deveiners. I had 3 grooves machined in the Brass Ribbed Section and attached the deveiners with brass screws. I removed the heads so they look like pins.
The Emitter is made from a Gas Powered RC Tire Rim and a machined aluminum Housing, it threads into the rod to hold the entire saber together.
--------------------------------------------------------------------------------
--------------------------------------------------------------------------------
Building a custom saber can be very rewarding but if you lack the skills or tools there is nothing wrong wit commissioning an artist to build one for you
If you have a custom design please take a few minutes to post a picture and brief description below.
Last edited: