E Nigma
New Member
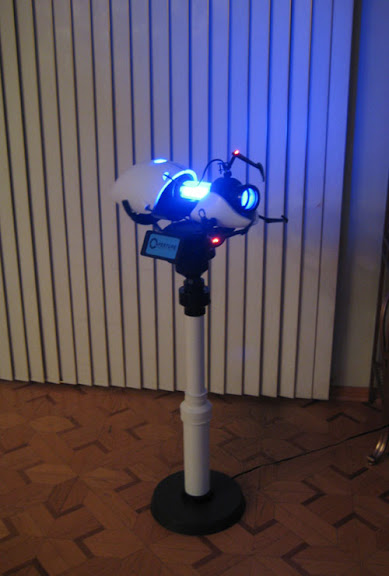
Back when I bought the replica Portal Gun from Neca Toys, I immediately began plans to make a full sized working stand for it, based on the in game model. I was having trouble finding all the needed parts, especially the arms and the screen area. Luckily Neca came to my rescue again and announced the official Portal Gun Stand.
Using their stand as a starting point (which out of the box is pretty lackluster) I went back to the drawing board with my original plans to turn this into a full sized stand, complete with a working rotating motor.
CLICK HERE to see the Video of the base rotating!
Here is a breakdown of how I made it (and how I modified the official stand to do what I wanted.)
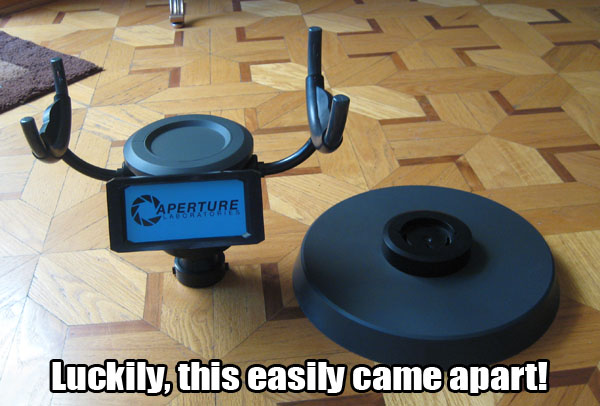
Out of the box stand. A modest starting point - let's make it better!

I hoped the top detached from the base cleanly, and sure enough it did!
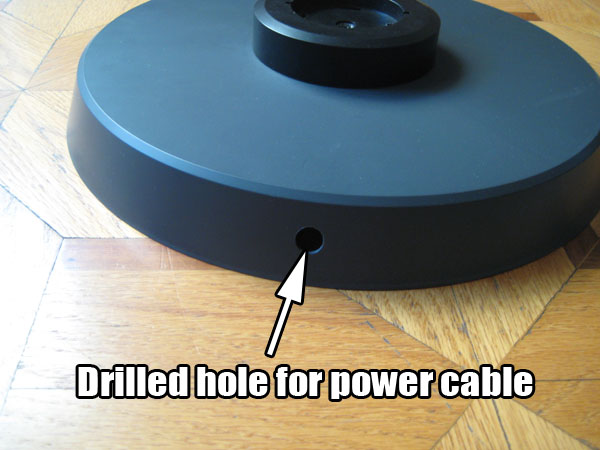
I drilled a hole in the base for the power cable to go through.
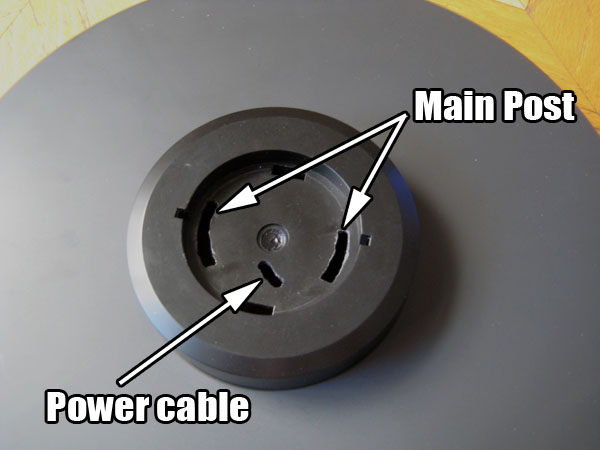
I then dremeled some grooves in the top inside of the base for the power cable and the notches on the main post to go into.
The main post which is 2" PVC pipe.
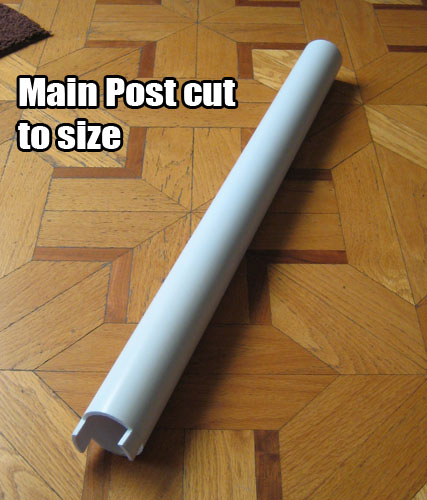
I cut the joints into the pipe so it would fit into the base.

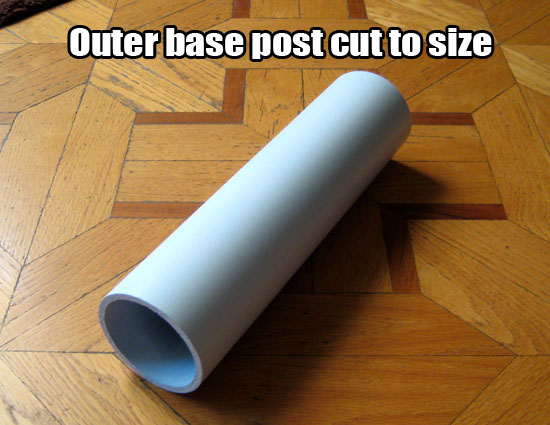
The post is wider at the bottom and tapers into the top, so I used a 3" PVC pipe here. I could only find black pipe in this size, so I had to spray paint it white to match.
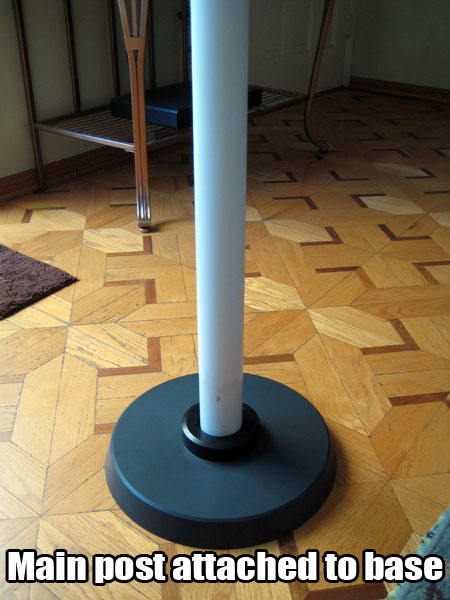
Once I connected the main post to the base, I used Gorilla Glue to secure it. This worked out perfectly because it ended up creating stalactite looking drips on the underside which expanded as it dried, which secured the post and prevents it from coming out of the holes.
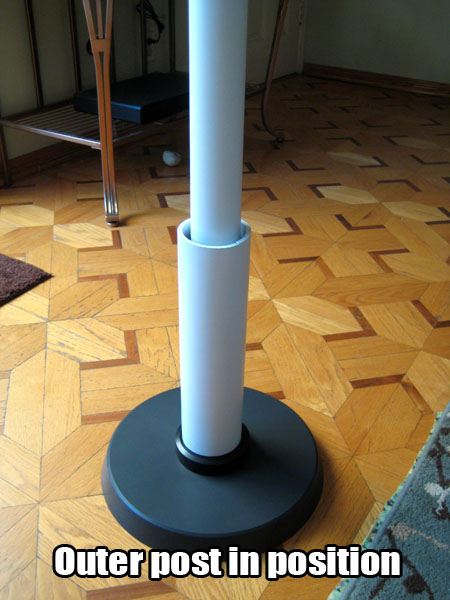
I placed the outer post right on top of the smaller one, and secured it with a 3" to 2" plumber's fitting (not pictured.)
I have had this rotating motor for years now, knowing one day I would be able to use it for something. It originally came from a jeweler's display stand, with a large plexiglass platform and base. I broke off all of the plexiglass and heavily modified the housing for my needs.

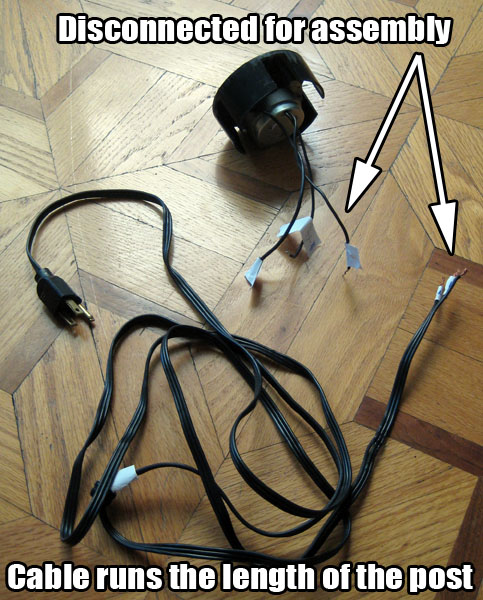
I disconnected the wires so that I could run it through the base and up the post.
Underside of the motor housing is another PVC fitting. (this is upside down from how I used it.)

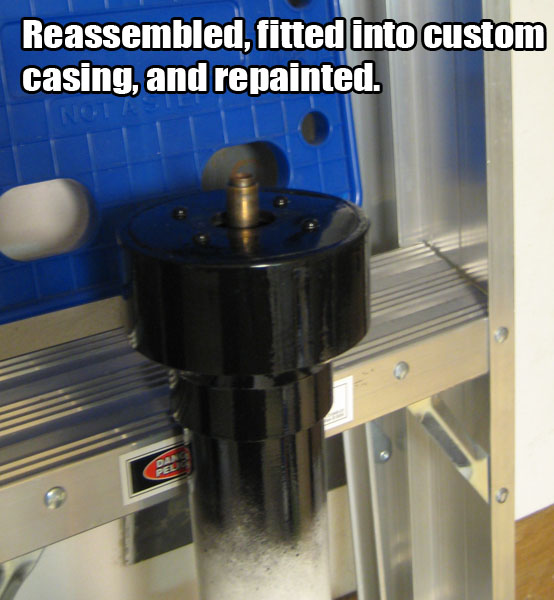
A picture of the completed motor and housing - the top part sits inside the PVC fitting which had been hollowed out even more to fit. It was secured with Gorilla Glue and repainted.
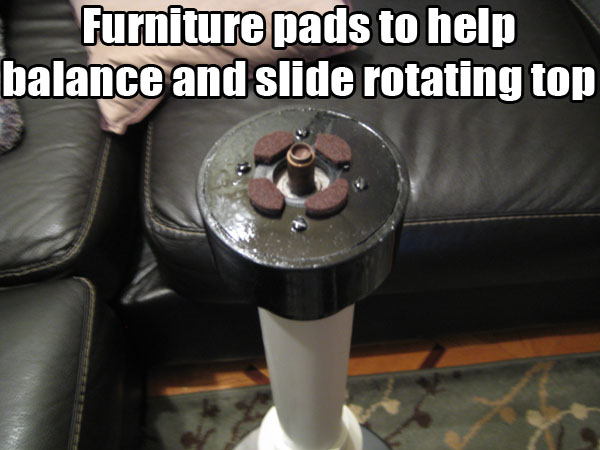
To help balance and slide the top part, I cut some furniture slider pads and applied it to the top of the motor base. It's sloppy, but you can't see it once the top is attached.
In order to connect the top part to the motor base, I used a plastic hollow tube I had laying around. Once I drilled a hole large enough, I glued it inside the top part, making sure to keep it as level as possible, so it wouldn't wobble when it rotated. Once this dried I would flip it over and do the same to the post on the motor, again, keeping it level.

This was the trickiest part of the project - one, because it needed to be so precise, and two, because if anything went wrong it could potentially ruin the entire project - and ruin pieces I don't have any way of replacing! Luckily it all went perfectly, and couldn't have turned out any better!
Thanks for looking, comments and questions are welcome!
Using their stand as a starting point (which out of the box is pretty lackluster) I went back to the drawing board with my original plans to turn this into a full sized stand, complete with a working rotating motor.
CLICK HERE to see the Video of the base rotating!
Here is a breakdown of how I made it (and how I modified the official stand to do what I wanted.)
Out of the box stand. A modest starting point - let's make it better!
I hoped the top detached from the base cleanly, and sure enough it did!
I drilled a hole in the base for the power cable to go through.
I then dremeled some grooves in the top inside of the base for the power cable and the notches on the main post to go into.
The main post which is 2" PVC pipe.
I cut the joints into the pipe so it would fit into the base.
The post is wider at the bottom and tapers into the top, so I used a 3" PVC pipe here. I could only find black pipe in this size, so I had to spray paint it white to match.
Once I connected the main post to the base, I used Gorilla Glue to secure it. This worked out perfectly because it ended up creating stalactite looking drips on the underside which expanded as it dried, which secured the post and prevents it from coming out of the holes.
I placed the outer post right on top of the smaller one, and secured it with a 3" to 2" plumber's fitting (not pictured.)
I have had this rotating motor for years now, knowing one day I would be able to use it for something. It originally came from a jeweler's display stand, with a large plexiglass platform and base. I broke off all of the plexiglass and heavily modified the housing for my needs.
I disconnected the wires so that I could run it through the base and up the post.
Underside of the motor housing is another PVC fitting. (this is upside down from how I used it.)
A picture of the completed motor and housing - the top part sits inside the PVC fitting which had been hollowed out even more to fit. It was secured with Gorilla Glue and repainted.
To help balance and slide the top part, I cut some furniture slider pads and applied it to the top of the motor base. It's sloppy, but you can't see it once the top is attached.
In order to connect the top part to the motor base, I used a plastic hollow tube I had laying around. Once I drilled a hole large enough, I glued it inside the top part, making sure to keep it as level as possible, so it wouldn't wobble when it rotated. Once this dried I would flip it over and do the same to the post on the motor, again, keeping it level.
This was the trickiest part of the project - one, because it needed to be so precise, and two, because if anything went wrong it could potentially ruin the entire project - and ruin pieces I don't have any way of replacing! Luckily it all went perfectly, and couldn't have turned out any better!
Thanks for looking, comments and questions are welcome!
Last edited:
")