custom cardboard R6 droid...scratch build.

Johnny Darko

Active Member
hey all,
this is my first post, so welcome to my custom R6 build.
I've always loved the R6 models, they are a little more aesthetically pleasing to my eyes, plus everyone seems to make R2 D2...yawn!
my build is using cardboard & bits n pieces of household items that I tend to gather in mass(much to the horror of my wife when she opens the wardrobe doors lol) having a pretty much zero budget, I tend to craft with card as its easy to work with & more to the point...FREE!
I will try & stick to the R6 design as much as is humanly possible, but as it is for my own personal enjoyment & will be adorning the house only, I'm not too worried if some small details are overlooked, I will be adding my own spin with a custom dark paint job(designs still floating around my manic brain!)
anyway, I shall quit my endless drivel & show you what I have...ooer!


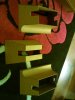
well it all starts with the basic R series body framework, I managed to find the most amazing, sturdy cardboard ever! thank you CANON... can you send me more please lol.
DSC_0279.jpg DSC_0001.jpg DSC_0002.jpg

ok just trying to work out how to put pictures in & put them where I want them! I have no idea why they are on their sides?...blah! I'm not very computer literate... my 8 year old points & laughs! grr!
well that's the frame & the start of the skirt, added a very thick tube to help maintain strength & for legs to be attached later; it seems weird but I've only recently obtained a hot glue gun...best birthday present ever! a big thank you to my very understanding wife, I really don't know how I managed without one!?

next to skin the little devil! where did I put all of those pizza boxes?
DSC_0038.jpg DSC_0039-1.jpg
I shall add a second skin & work out if I'm gonna just paper mache this project or add bondo too...hmm? not sure how heavy that would make the whole thing?...thoughts anyone?
more pics soon, leaving it here for now, family & work come first.
thank you for taking time to look, any hints & tips welcome.

 
had my crafting head on & decided to crack on with middle leg & foot.
having to work the bank holiday weekend...but decided to stay up while the creative juices were flowing!
DSC_0057.jpg DSC_0058.jpg
many layers of cardboard later & I'm quite pleased.
its great being able to get so many detailed pics from the interweb at the touch of a button, I remember the times before it existed & had to do actual leg work to find information & the rare picture here n there, isn't technology wonderful!
DSC_0059.jpg DSC_0061.jpg
started the foot, judged the size by eye alone, i think it looks OK? can't wait to get the outer legs underway, although it will take a lot of layers to reach the right thickness, but will be nice to test fit the legs & have the little rascal on his feet!
 
thanks murderink, it should start to take shape & resemble something more droid like over the next few weeks.
I like your biker scout helmet pep, very cool!...ARF056.jpg this will be my next project.
 
evening all,
so I decided that I didn't like the skirt piece...it wasn't the right shape.
built a tray to house the center leg, will attach new skirt to this also, so the whole piece can be removed to act as an access panel. DSC_0087.jpg DSC_0089.jpg DSC_0090.jpg
made a start on the outer legs.........so with much cutting, cardboard & glue gun sticks aplenty, ive begun to build up the bulk, damn these droids have some serious kankles! still a few more layers to go, gotta get looking for a new supply of boxes!
DSC_0069.jpg
well...time for a cuppa, then crack on with more of the same while the wife watches the monstrosity that is EastEnders...blah!
 
not much progress today, this is what I have so far, still a long way to go...but beginning to take shape
DSC_0096.jpgthe first picture to actually upload the right way...Hazaar!

got a lot of paper mache to do(I use wallpaper paste...works well) in need of some tips to get the finish nice & smooth if possible? instead of the crazy paving effect, I've read about paper mache being sanded down...does this work? I feel the whole thing will be pretty damn heavy if I use bondo, shall have to think it over...
 

Attachments

  • DSC_0092-1.jpg
    DSC_0092-1.jpg
    620.7 KB · Views: 176
just a quick update...still here & still working on my R6, although the pace of the build has slowed! work & family life leave me with just a few hours in the evenings...plus I've just found out that my wife & i shall be expecting our 2nd child around December!!... exciting stuff!

here's a pic of my progress, although as you can see...hard to work on a cramped table, especially when the local wildlife drops in for a nap on my tools!
DSC_0104.jpg IMG_20140510_194122.jpg I'm quite pleased at the way its looking, legs a little chunky maybe? but its a build to enjoy...its not out to win any prizes.
colour scheme still undecided as of yet...but i have a way to go before that point, but did find this pic & love how different it looks to the run of the mill white/clean droids
jun11-01 165mod.jpg definitely a possibility!
well thanks for checking in, any comments/hints welcome.
 
Fantastic! I love the use of cardboard, I look forward to seeing how this comes out.
 
back again after a much needed short break with the family, now refreshed & eager to carry on with R6 23...should i give it a name yet?

i got to work on re-doing the skirt, it just didn't look right, so i combined it with foot tray as a removable access panel, i like it now...looks much better!
DSC_0088.jpg which now looks like this>DSC_0124.jpg

next job was to bulk out the outer legs...I had been putting it off, as it was very time consuming & repetitive.
but i decided to go a different route than layering the card & to be honest I wish I'd thought of doing it this way in the first place...doh! never mind, you live & you learn!
DSC_0015.jpg DSC_0016.jpg DSC_0010.jpg DSC_0021.jpg really pleased with the way these are progressing, its surprising how many hours of work have gone into them.
I managed to find the perfect bits from a touch clean bottle, took the pump dispenser apart to find an ideal shoulder hub & leg details
DSC_0018.jpg DSC_0019.jpg p-r2-d2-side-view-at-fan-expo-2011.pngI'm so glad I look at every piece of rubbish & decide that if its an interesting shape or design, it will probably come in handy at some point, so the moral is...never throw anything away!
well that's all for now folks, thanks for your time & feedback, hope you are enjoying the build? more progress soon...I WANT MY DROID ALREADY!! lol.
 
evening all, just a very quick update.
been a very busy week at work, they don't actually like you to have a life! so have had very little time for crafting...grr!
its mostly been little fidly bits on the legs in order to get them ready for paper mache. so before i get that started i couldn't resist seeing the legs in position, its the first time my R6 has been on its feet under its own weight & I have to say it did it splendidly!
DSC_0032.jpg DSC_0030-1.jpg
I normally use wallpaper paste for paper mache, but have been reading about PVA glue & water...does this make for a sturdier, smoother finish?
 
I haven't worked with PVA (in the context of prop building), but keep in mind it *is* simply white glue. It usually dries with some elasticity (which is why the foam builders use it), That means sanding may not be possible. Surreal Studios (check out his builds!) uses spackling paste/joint compound on his pep builds. It's sandable and shape-able. The drawback is that it *will* crack or chip if handled roughly or dinged. You might try experimenting with a small shaped piece of cardboard (foot?). Put the coating on, sand it, prime it and paint it. Then see how much stress it can handle. Yeah, time lost in all that prep - but better a few hours on a small piece than weeks on the whole thing, just to find out it doesn't hold up. :)

Amazing, inspiring build - subscribed!
 
Back
Top