DalekNim
Active Member
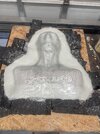
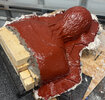
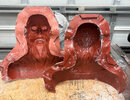
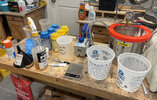
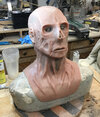
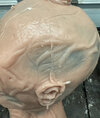
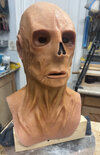
Things are moving along nicely ... I added registration keys then began the process for making the first half of the fiberglass mold.
- Sealed the clay wall with 2 coats of a gloss clear coat
- sprayed a couple of costs of mold release over everything
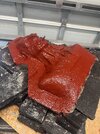
- first coat of gel coat - Smooth-On ExpoACoat Red
- some EpoxACast 650 to fill in the mouth, nose and eye sockets
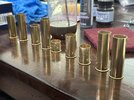
- added some panel door nails to reinforce the mouth
- second round of EpoxACoat Red gel coat
- some free form habitat black around the eyes, eyes, nose to round them out to make fiberglassing easier
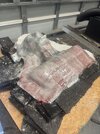
- several layers of EpoxAmite 100 resin and 6oz fiberglass cloth
- a layer of free form air over the flange to stiffen it
- final layers of fiberglass cloth and EpoxAmitec100 resin
- done
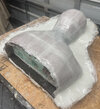
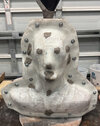
Tomorrow I'll clean out the Wed clay and repeat the process for the back half of the mold.. I won't need to do any reinforcing* with ApoxACast 650 or adding panel nails since the back of the head is pretty simple
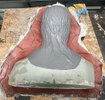
- Sealed the clay wall with 2 coats of a gloss clear coat
- sprayed a couple of costs of mold release over everything
- first coat of gel coat - Smooth-On ExpoACoat Red
- some EpoxACast 650 to fill in the mouth, nose and eye sockets
- added some panel door nails to reinforce the mouth
- second round of EpoxACoat Red gel coat
- some free form habitat black around the eyes, eyes, nose to round them out to make fiberglassing easier
- several layers of EpoxAmite 100 resin and 6oz fiberglass cloth
- a layer of free form air over the flange to stiffen it
- final layers of fiberglass cloth and EpoxAmitec100 resin
- done
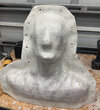
Tomorrow I'll clean out the Wed clay and repeat the process for the back half of the mold.. I won't need to do any reinforcing* with ApoxACast 650 or adding panel nails since the back of the head is pretty simple