***COMPLETED**** Pcoz's Hasbro Hero Star Wars X-Wing Conversion

Re: Pcoz's Hasbro Hero Star Wars X-Wing Conversion

sculpty isn't an air-dry clay. it is polymer based and requires baking to harden. I would recommend either of these:
mulliput .JPGmW6GQ3jgbYa1hc1CHzjQ08g.jpg
You can also use JB Weld if you want. It is a paste when mixed and can simulate melted metal or organic components well.
b8f372e2-5a81-4845-a706-fe5781e7b983_400.jpg
Be sure to research each of these carefully before you choose what to use. All three are a little different in there consistency, curing time and finish.
 
Re: Pcoz's Hasbro Hero Star Wars X-Wing Conversion

sculpty isn't an air-dry clay. it is polymer based and requires baking to harden. I would recommend either of these:
View attachment 656938View attachment 656939
You can also use JB Weld if you want. It is a paste when mixed and can simulate melted metal or organic components well.
View attachment 656940
Be sure to research each of these carefully before you choose what to use. All three are a little different in there consistency, curing time and finish.


That's it....Apoxie SCULPT. I was thinking sculpty. Thank you very much. I would probably go with the Milliput or Apoxie. Looking to use it for applications such as filling in inside corners of 90 degree styrene joints to round them out.

Actually, what I was working on when I needed it was the Airfix Hurricane MKII that I was scratch building for the droid strip on this x-wing. Styrene is great but a lot of work to sand and get that smooth rounded edge. Especially in such a small scale.

Anyway, thanks for the advise !

More too come on the x-wing build soon. Cockpit is done and I obviously just scratch built 80% of the droid strip.
 
Last edited:
Re: Pcoz's Hasbro Hero Star Wars X-Wing Conversion

This sounds a little strange but I've found the following product to be an excellent sculpting compound for many years:

http://www.joecoombs.com/index.php?main_page=product_info&cPath=23_638&products_id=1583

Joe Coombs is a taxidermy supply house. The All Game epoxy compound has an extremely fine grain and excellent adhesion. Pretty economical as well (they used to sell in a 2- quart kit but looks like it has changed... don't know how it compares to Apoxie Sculpt in cost since the AS is sold in 'pound' kits vice pint tubs like the All Game... But it beats Milliput both in price and performance.

Ah, another source shows the 2-pint kit is actually three pounds. It is actually made by the Cir-Cut Corporation out of Philidelphia, so you can order direct from them if Joe's connection to a 'dead animal' industry isn't agreeable, though I must say they have great customer service!

R/ Robert
 
Re: Pcoz's Hasbro Hero Star Wars X-Wing Conversion

Thanks Robert ! Leave it to you to find such a product, lol If it works, I don't care if it's genital reconstructive putty, I'll try it ! (for modeling......:lol)
 
Re: Pcoz's Hasbro Hero Star Wars X-Wing Conversion

Hello fellow RPF'rs !

Back with a small update...

I apologize for the bouncing around from one thing to the other....kind of all over the place, but here we go.


Putting the finishing touches on the cockpit so I can assemble the fuselage and move closer to start painting the exterior.


20160730_154103_001.jpg 20160730_154117.jpg 20160730_154142.jpg 20160730_154818.jpg


Test fit all the pieces, painted, and ready to run fiber optics.


20160730_161557.jpg 20160730_165915.jpg 20160730_165929.jpg 20160730_170202.jpg


20160730_170459.jpg

So I tried a few different ways of building my cockpit screens and decided on this.... I took some clear Plexiglas and brushed on some black air brush paint. Thick enough, just to black out the "screens" Then I scratched the lines from the back to create the positive. I used some translucent plastic tabs from filing folders to make the green color show through.

20160731_092827.jpg 20160731_092937.jpg 20160731_093258.jpg 20160731_093537.jpg

Running the fiber optics into some tight spaces !


20160731_105015.jpg 20160731_122600.jpg 20160731_124237.jpg

Worked on some more cockpit detail. Added the hydraulics and finished running all of the optics.

20160801_211112.jpg 20160801_211509.jpg 20160801_220210.jpg 20160801_211858_001.jpg

Thanks for all the advise and comments !

My next 2 updates will be:

1. Completing the Luke figure

2. Rebuilding the droid strip (that you guys guilted me into doing....but you were 1000% right)

Thanks for looking !
 
Re: Pcoz's Hasbro Hero Star Wars X-Wing Conversion

Oh, yeah.....#3 started the base....

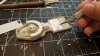
....and purchased some more goodies !


So, I wanted to get a head start on the base so I could figure out how to wire everything. I used some standard 1x3 and framed a base about 15" x 24". I used a 2x4 to support the full weight of the X-wing. Drilled the angle I wanted into the 2x4 to accept the aluminum tubing. At the intersection, I drilled all the way through the 2x4 and the aluminum and used a brass rod to act a pin to prevent it from sliding out.

20160803_190435.jpg 20160803_192358.jpg 20160803_193815.jpg 20160803_200118.jpg

I then loosely assembled the wings and the fuselage to see if the angle needed to be adjusted at all. Here are my TEST photos below. It's exactly what I was shooting for....angled up and to the left a little as if in a turn to fly upwards. The Luke figure will also have his head turned to the left as apposed to the standard "face forward"


20160803_201432.jpg 20160803_201441.jpg 20160803_201456.jpg 20160803_201559.jpg

back to the garage for a bit of trimming with a scrap piece of 1/4" black Luan chalk board

Right now, I'm planning on the death star surface, but I'm not 100% committed. It would definitely be out of scale with the X-Wing, I just haven't decided if I'm OK with that yet. Open to suggestions / ideas on that one !

20160804_175306.jpg 20160804_190120.jpg

Oh, and I thought I'd share some of my recent purchases for this build and future builds...

Here are flashing LED's that you can control the alternating rate and the flash rate. They aren't cheap, but in my opinion, completely worth it since the cockpit lights will now have many different flash rates and therefore more realistic in my opinion.

They were purchased here in the model lighting section: http://shop.fiberopticproducts.com/index.php?route=product/category&path=135_157

Here are there LED options:


They should give me a discount for this plug ! :lol

20160807_082754.jpg

I also purchased the Chopper II... Not so much for this but for future projects. It is awesome....as I'm still learning the tools of the trade.

20160807_082807.jpg

Then I decided to completely avoid any batteries in this model. I found this 120v to 12v power adapter. I will install this inside the base and run the cord out of the back with an ON/OFF switch.

found that here: https://www.amazon.com/gp/product/B00JRX360W/ref=oh_aui_detailpage_o02_s00?ie=UTF8&psc=1

Also, since my LED flashers are 9v, I had to grab one of these: https://www.amazon.com/gp/product/B00CXKD49Y/ref=oh_aui_detailpage_o01_s00?ie=UTF8&psc=1


20160807_082851.jpg

And lastly, Another order of Plastruct....The best deal I can find is dickblick.com. order enough to get free shipping, then search for an online discount code. I can't find it any cheaper that that.

20160807_083017.jpg

Anyway, thanks for looking.

Luke Figure next !
 
Re: Pcoz's Hasbro Hero Star Wars X-Wing Conversion

Ok, I'm on a roll.....or is it a slide ?

So my approach with the Luke Figure (formerly Mr Biggs) is:

Glue him into the position in the cockpit pose

Sculpt the joints out and touch up the scale (action figure to normal human proportion) The neck area is the worst part.

Repaint


Glued and joints covered, let dry, carved, sanded and painted with some Modge Podge Hard Coat to smooth.

20160801_215306.jpg 20160805_132358.jpg 20160807_062945.jpg 20160807_091501.jpg

Primed and painted base white, added the mic to the helmet, and painted suit orange again. (not sure why some photos keep displaying upside down)

20160807_093647.jpg 20160807_102249.jpg 20160807_102806.jpg 20160807_131814.jpg

Added the parts of the suit back on and hoses. weathered a little.

20160807_132819.jpg 20160807_141357.jpg 20160807_153955.jpg 20160807_154016.jpg

Fashioned the throttle and fixed to his kung fu grip.

20160807_154305.jpg 20160811_191727.jpg 20160811_200643.jpg 20160812_111037.jpg

Well, that's about it for now....

Thanks for checking it out !
 
Last edited:
Re: Pcoz's Hasbro Hero Star Wars X-Wing Conversion

Nice work on the figure. What is the filler you used first, before the Modge Podge?
 
Re: Pcoz's Hasbro Hero Star Wars X-Wing Conversion

Nice work on the figure. What is the filler you used first, before the Modge Podge?

Thanks Rats !

I just used Creative Paperclay because I had a bunch laying around. I've built a few Mcfarlane sized sports figures from scratch with it and love the stuff. It air drys, doesn't shrink, carvable, sandable, paintable, etc. The only issue is it doesn't play so nice with plastic so much and it's a little gritty. That's why I sealed it in with the MP.

I'm sure the Milliput and Apoxie Sculpt that Cadeus recommended to me above would work much better. Even the All Game Epoxy Compound that Robert showed me in this thread.....

Thanks
 
Re: Pcoz's Hasbro Hero Star Wars X-Wing Conversion

Hello, posting up a quick update on the droid strip.

Well I have to thank Automaton, Hammer3246 and Jkirkon for making me rebuild the droid strip....I honestly don't know what I was thinking. I mean, it's the very top of the x-wing and while maybe not the focal point, it's the most accessible for viewing. So it begs to be something other than the cheap flat molding from Hasbro...


Started with RD. Filled seams and sanded and removed his dome.

20160810_204453.jpg 20160811_181940.jpg 20160813_074805.jpg

Cut out the existing droid strip and the rest is pretty self explanatory...I'll let the pictures do the talking.

20160818_153107.jpg 20160818_154941.jpg 20160818_185224.jpg 20160818_192134.jpg


20160818_193042.jpg 20160818_194326.jpg 20160818_203810.jpg 20160820_150117.jpg


20160820_151529.jpg 20160820_152246.jpg 20160820_153012.jpg 20160820_160709.jpg


20160820_160839.jpg 20160820_162600.jpg 20160820_165849.jpg 20160820_171931.jpg


20160821_074236.jpg 20160821_074920.jpg 20160821_081058.jpg

Using some of the original parts, but adding to them in some areas and them completely rebuilding in others.

Finished droid strip next....

Thanks for looking


Pcoz
 

Attachments

  • 20160820_194127.jpg
    20160820_194127.jpg
    162.6 KB · Views: 266
  • 20160821_080300_001.jpg
    20160821_080300_001.jpg
    167.6 KB · Views: 279
Re: Pcoz's Hasbro Hero Star Wars X-Wing Conversion

I don't know what I had to do with 'twisting your arm' to rebuild that droid strip, but if it looks anything like the rest of your work, it will be amazing.

Carry on, my friend!
 
Re: Pcoz's Hasbro Hero Star Wars X-Wing Conversion

The most excellent and detailed work!!...a true inspiration......but you do know you've practically scratch built the whole thing;)....maybe toss out the fuselage also???....kidding...or am I??:lol
 
Last edited:
Re: Pcoz's Hasbro Hero Star Wars X-Wing Conversion

I don't know what I had to do with 'twisting your arm' to rebuild that droid strip, but if it looks anything like the rest of your work, it will be amazing.

Carry on, my friend!

Yeah, you and a few others....It needed to be done ! Thanks !
 
Re: Pcoz's Hasbro Hero Star Wars X-Wing Conversion

The most excellent and detailed work!!...a true inspiration......but you do know you've practically scratch built the whole thing;)....maybe toss out the fuselage also???....kidding...or am I??:lol


Ha ha....yeah, it's 80-85% scratch built at this point ! The problem is that once you get into a project like this, you keep finding areas you can't live with and are compelled to correct them. Since I'm pretty much new to model building or scratch building, it's been a learning experience I can take to my next project and improve my skills.

I'm really thinking of scratch building a snow speeder next in the same scale as this X-Wing.

Thanks for riding along with me Yaris ! Almost done !
 
Re: Pcoz's Hasbro Hero Star Wars X-Wing Conversion

****Super small update*****

Forgot to post a little more prep work on my wings

Interior wiring, assembly, and LED testing


Soldered wiring and taped. Tested connections and assembled. Inserted the PVC end glued engines in place with 2 part epoxy.

20160812_175319.jpg 20160812_175826.jpg 20160812_180258.jpg

Painting the inside of the engines...and did a little pre-shading on the cannons and butt plate while I had the black loaded in my airbrush.

20160812_184450_004.jpg 20160812_185306.jpg 20160812_185325.jpg 20160812_190150.jpg 20160812_190200.jpg 20160812_191740.jpg

Ok, all the wings are ready to be painted.

Once I'm done wiring the LED's, I can assemble the fuselage and paint them all at once.

Thanks for looking !

Pcoz
 
Re: Pcoz's Hasbro Hero Star Wars X-Wing Conversion

You're doing a bang up job on this. Looking forward to seeing it finished.
 
Re: Pcoz's Hasbro Hero Star Wars X-Wing Conversion

You're doing a bang up job on this. Looking forward to seeing it finished.


Thanks for following along Hammer. I'm wiring all the LED's and running the fiber optics.....It's unreal how many wires and strands I have running through this thing in such a small space. I'm hoping to have it together by tomorrow.
 
Back
Top