Yeah, I saw some yoga mats at target the other day that looked close.
You are using an out of date browser. It may not display this or other websites correctly.
You should upgrade or use an alternative browser.
You should upgrade or use an alternative browser.
Colonial marine helmet build-Now functional
- Thread starter Canobi
- Start date
I have my eye on a dark green yoga mat, it had the right pattern, and its 2.5mm thick which seems about right as well.
Couldn't find any that were the same colour as the ref pics I have though (I'm assuming they are the Dutch ones)., so I'm going for the closest to the green in the camo colours I've chosen so it ties in to the paint scheme.
Couldn't find any that were the same colour as the ref pics I have though (I'm assuming they are the Dutch ones)., so I'm going for the closest to the green in the camo colours I've chosen so it ties in to the paint scheme.
Hi guys
Progress has been in fits and starts the last few days. I concentrated on the painting in good wheather, and other details when too damp/wet/cold to spray.
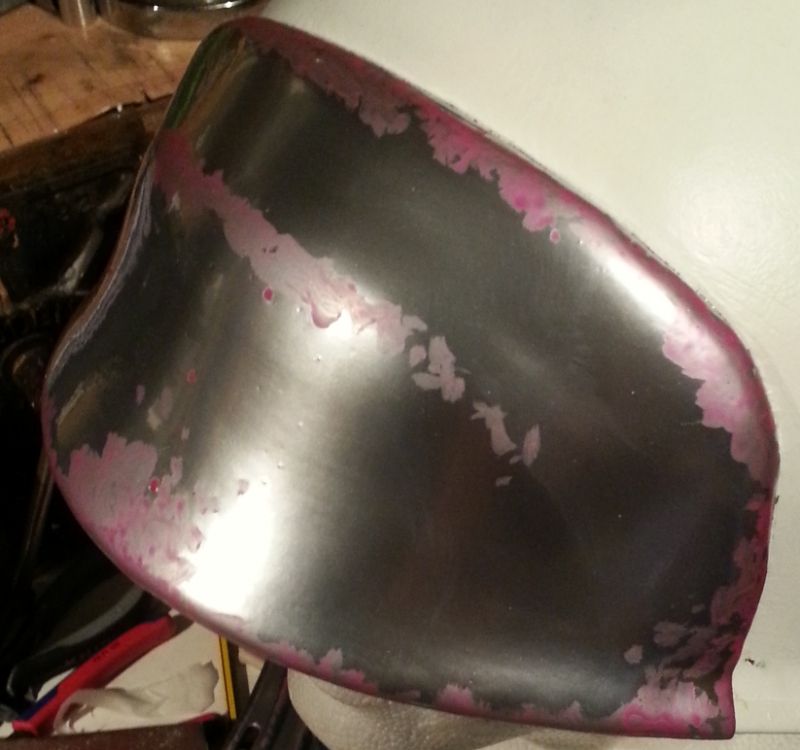
Lobster plates are chromed and ready for their camo
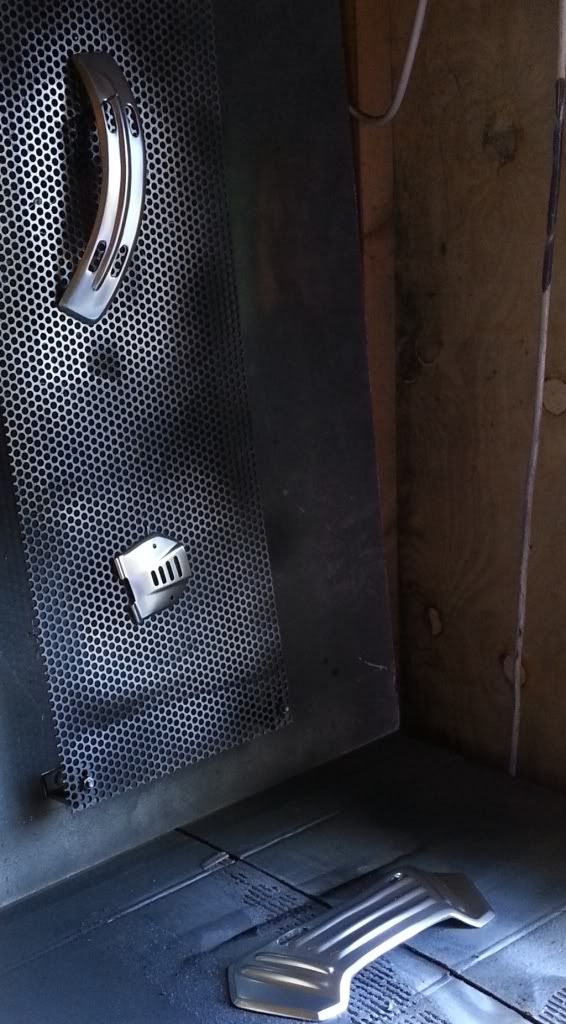
I also re-chromed the helmet after I made the mistake of putting a clear coat on it. The chrome lost its sheen intantly when the top coat went on, it was incredibly smooth and shiney on the surface, but lost it's all reflective qualities. It did however come out much better over the top coat than it did over the gloss black. I think it would have been better still if the top coat was over the black first, then chrome, but at least this way if any chrome from the top layer gets rubbed off, all you'll see is more chrome underneath :thumbsup
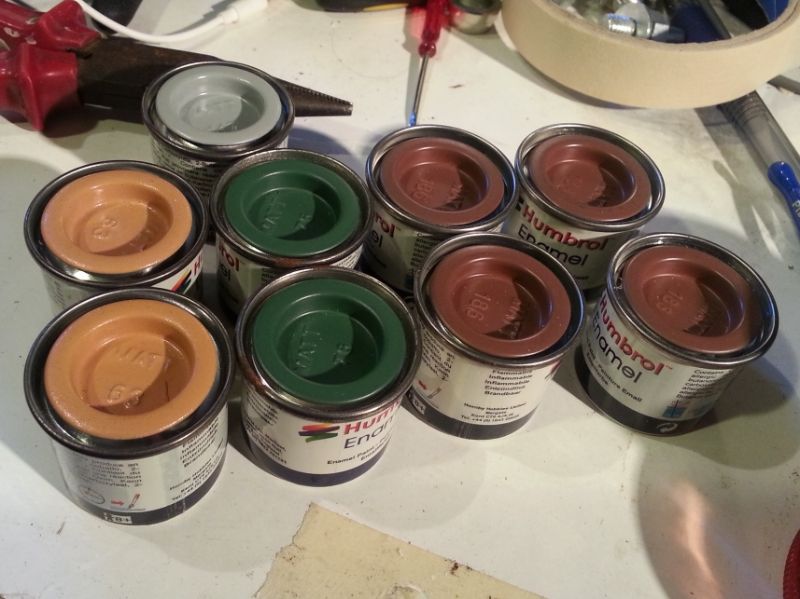
I've primarily used Frost's helmet as my referance so might as well replicate what I can. Not having any BB, it's time to use what skills I have to get as close as I can. I figure id use olive drab and a brown wash to achieve this, but ran into a...a...well a plethora of differnt shades of olive drab, theres me thinking it was a universal colour that was the same from whichever brand it came from:facepalm
I narrowed it down the four shades that I thought would get me the closest base colour
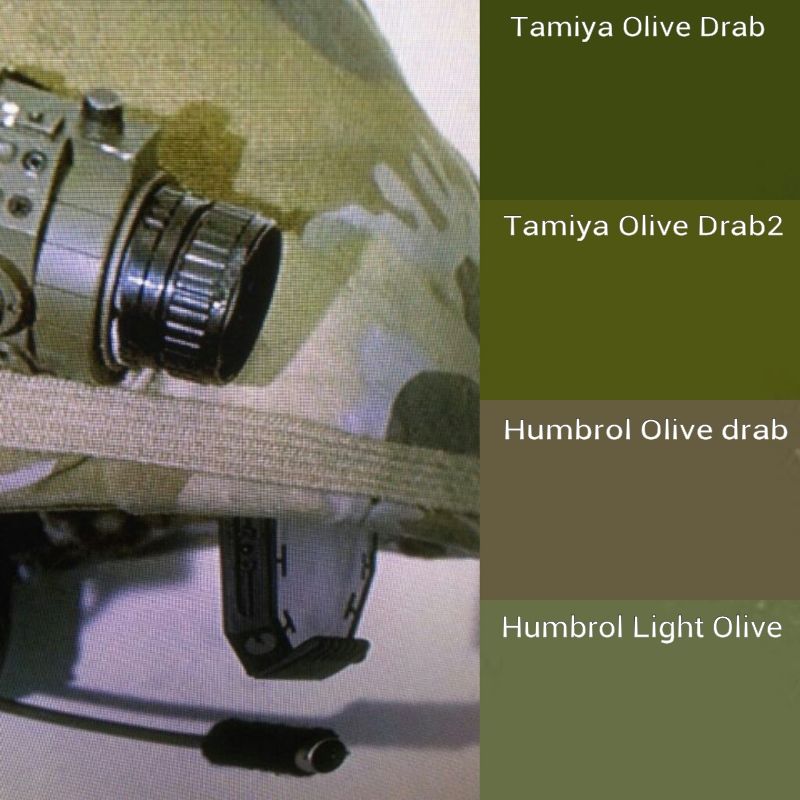
I'll be experimenting with these four over the next few days, catch you then")
Progress has been in fits and starts the last few days. I concentrated on the painting in good wheather, and other details when too damp/wet/cold to spray.
Lobster plates are chromed and ready for their camo
I also re-chromed the helmet after I made the mistake of putting a clear coat on it. The chrome lost its sheen intantly when the top coat went on, it was incredibly smooth and shiney on the surface, but lost it's all reflective qualities. It did however come out much better over the top coat than it did over the gloss black. I think it would have been better still if the top coat was over the black first, then chrome, but at least this way if any chrome from the top layer gets rubbed off, all you'll see is more chrome underneath :thumbsup
I've primarily used Frost's helmet as my referance so might as well replicate what I can. Not having any BB, it's time to use what skills I have to get as close as I can. I figure id use olive drab and a brown wash to achieve this, but ran into a...a...well a plethora of differnt shades of olive drab, theres me thinking it was a universal colour that was the same from whichever brand it came from:facepalm
I narrowed it down the four shades that I thought would get me the closest base colour
I'll be experimenting with these four over the next few days, catch you then
Nice progress! Keep it up!
Nice progress! Keep it up!
Thanks nick, still pluggin away
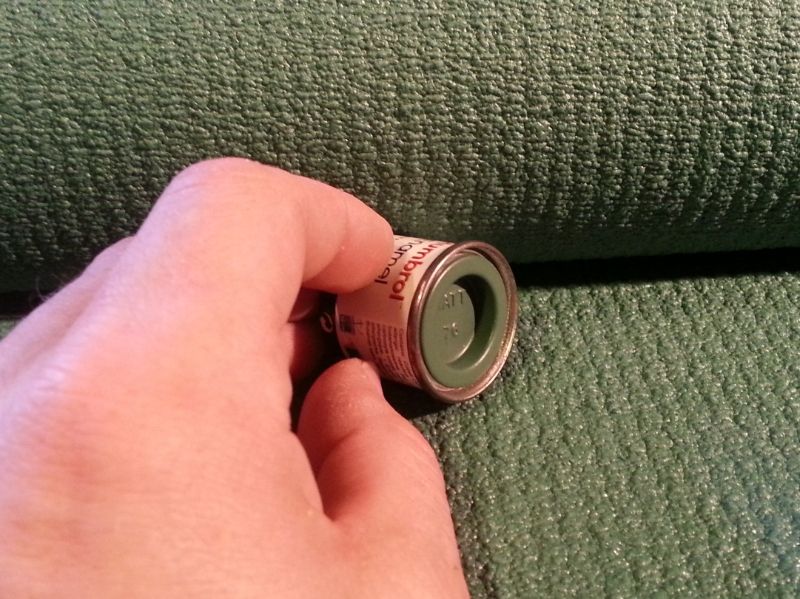
I forgot to mention that I managed to get the dark green yoga mat, and it arrived yesterday. It's a great colour, should look the part once its done
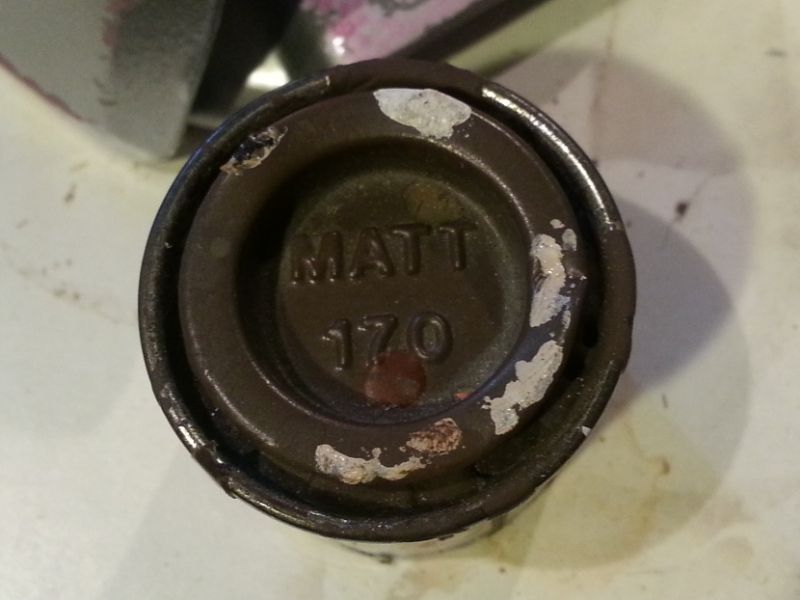
No sign of the washes yet though, really want to start experimenting.I will say that the Timaya paint lids are a very good representation of the colour in the tin, so I now know they are pretty reliable when looking for something specific. The Humbrol lids are not so accurate, still good coloures, though darker (which in this case should be favorable to the washes I've chosen).
I feel the tighter drabs to be closer bases to start from. For the lighter of the two I'll be using a touch of the brown wash, for darker, a thinned black/brown wash. Hopefully in different light conditions, the washes will be more/less obvious thereby appearing greener/browner depending in which they are viewed.
More on that when they arrive in the post.
Hi guys
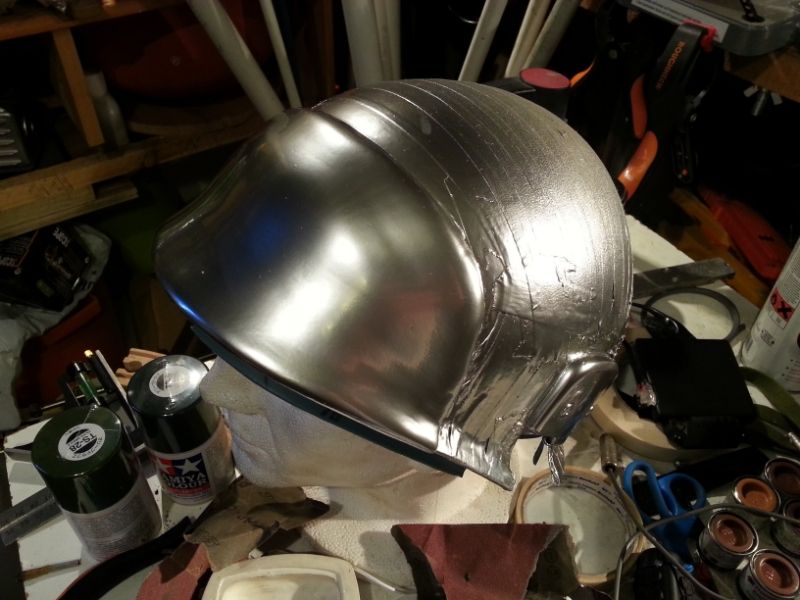
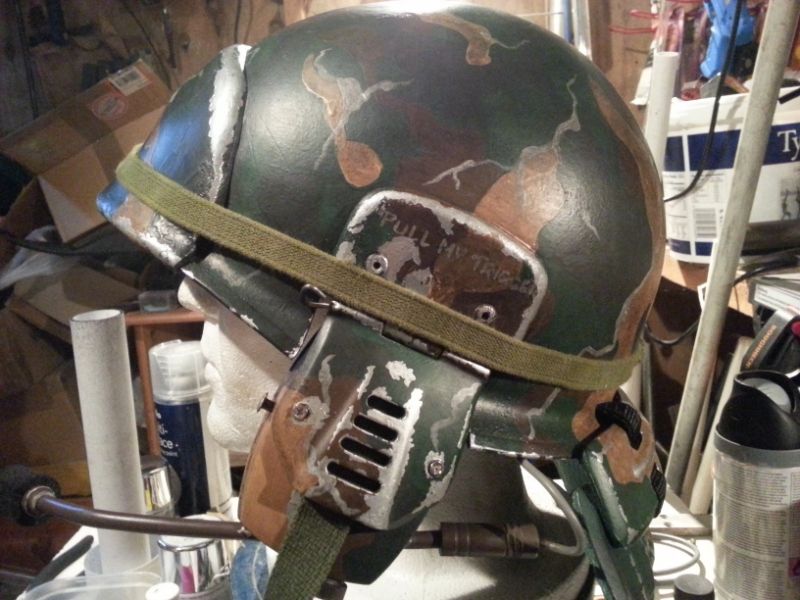
Well, I'm almost ready to paint everything and assemble, just laying down the chips n scratches with my latex
Last look at the helmet before she's all camoed up
Just waiting for the last of my paint colours to arrive (91 black/green)
...and here's a shot of the yoga mat, I included the humbrol #76 to show how close in colour it will be to the paint scheme
Also in the post today was the brown wash. I've painted the discarded resin part that would go at the back of the mic boom arm with Timaya olive drab2 to start with, then two light washes
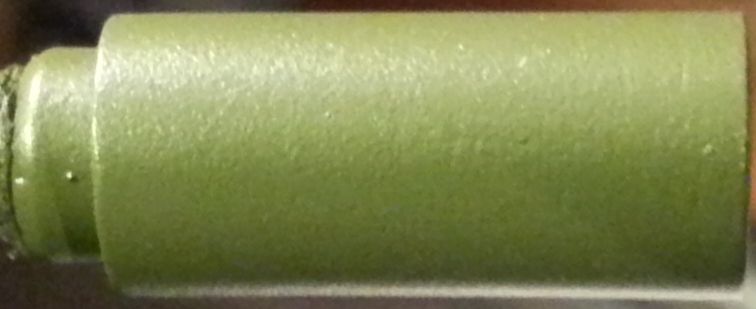
It was still a little too green in most lighting, so gave it one slightly more generous coat, and I'm pretty pleased with the result (picture taken indoors under strip light)
Daylight pics tomorrow after work :thumbsup, then I'm testing out the humbrol light olive on something
Well, I'm almost ready to paint everything and assemble, just laying down the chips n scratches with my latex
Last look at the helmet before she's all camoed up
Just waiting for the last of my paint colours to arrive (91 black/green)
...and here's a shot of the yoga mat, I included the humbrol #76 to show how close in colour it will be to the paint scheme
Also in the post today was the brown wash. I've painted the discarded resin part that would go at the back of the mic boom arm with Timaya olive drab2 to start with, then two light washes
It was still a little too green in most lighting, so gave it one slightly more generous coat, and I'm pretty pleased with the result (picture taken indoors under strip light)
Daylight pics tomorrow after work :thumbsup, then I'm testing out the humbrol light olive on something
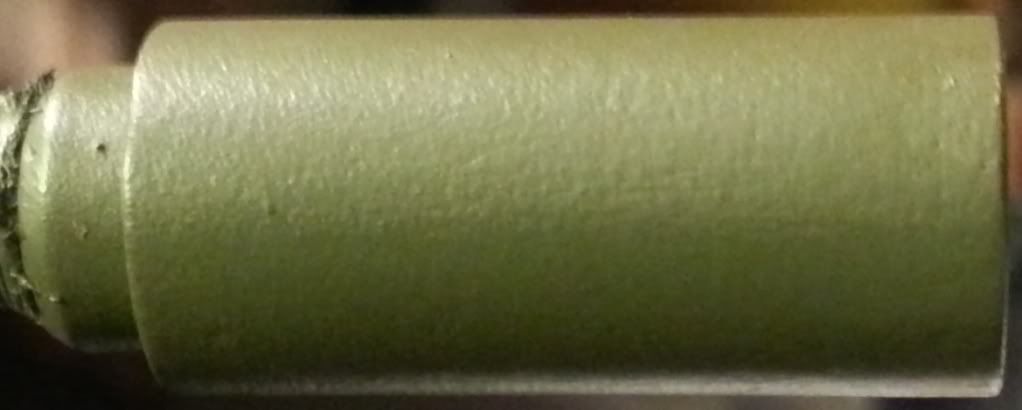
I made a composit pic of all the stages for better comparison (all pics taken in the same lighting conditions)

Its still a little green, but I think adding another layer of brown wash will make it too dark, which assentially makes it a fail, though it is a cool colour that I will save for later reference.
Next up is the Humbrol light olive/brown wash combo, though happily this little colour matching project has become more out of curiosity than necessity as I have been very generously donated a tin of original brown bess (thank you so so much nick-a-tron) Once I have it, I'll be able keep going to see how close I can get using different techniques. Would be very handy knowing how to mix a batch up at any time, or which paints/washes combo works best :thumbsup
I finally have all the camo colours in, though only one of two tins has arrived, but I can make a good start on painting the camo now, the last tin should show up next week
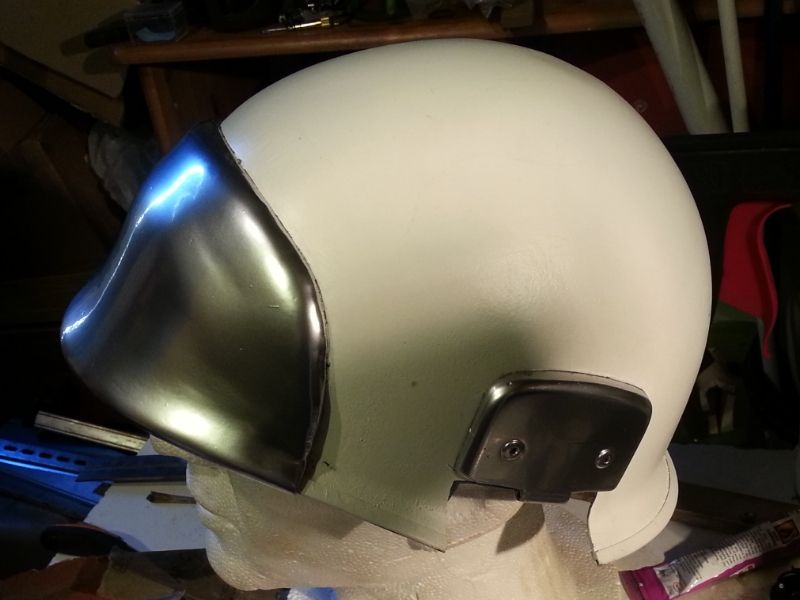
...and one last helmet detail sorted; replacement chin strap. The one that came with this helmet is blue, not sure if I missed that when I was looking at the pics/details, or if it wasn't mentioned/shown. Picked this one up on the bay for $20 (inc shipping), just need to bash it up a bit (might bury it for a day or two as well) as its new, I just missed out on a couple of well weathered ones, but at least its the right colour.
Its still a little green, but I think adding another layer of brown wash will make it too dark, which assentially makes it a fail, though it is a cool colour that I will save for later reference.
Next up is the Humbrol light olive/brown wash combo, though happily this little colour matching project has become more out of curiosity than necessity as I have been very generously donated a tin of original brown bess (thank you so so much nick-a-tron)
Once I have it, I'll be able keep going to see how close I can get using different techniques. Would be very handy knowing how to mix a batch up at any time, or which paints/washes combo works best :thumbsupI finally have all the camo colours in, though only one of two tins has arrived, but I can make a good start on painting the camo now, the last tin should show up next week
...and one last helmet detail sorted; replacement chin strap. The one that came with this helmet is blue, not sure if I missed that when I was looking at the pics/details, or if it wasn't mentioned/shown. Picked this one up on the bay for $20 (inc shipping), just need to bash it up a bit (might bury it for a day or two as well) as its new, I just missed out on a couple of well weathered ones, but at least its the right colour.
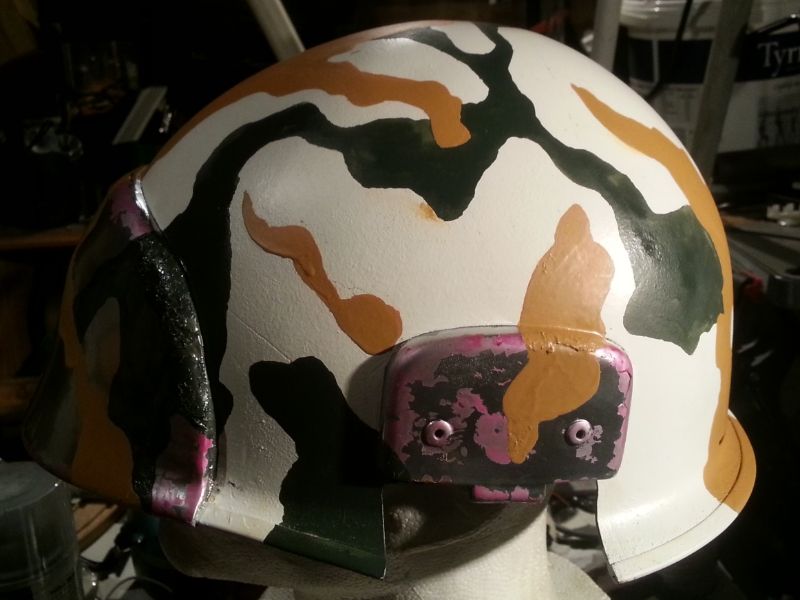
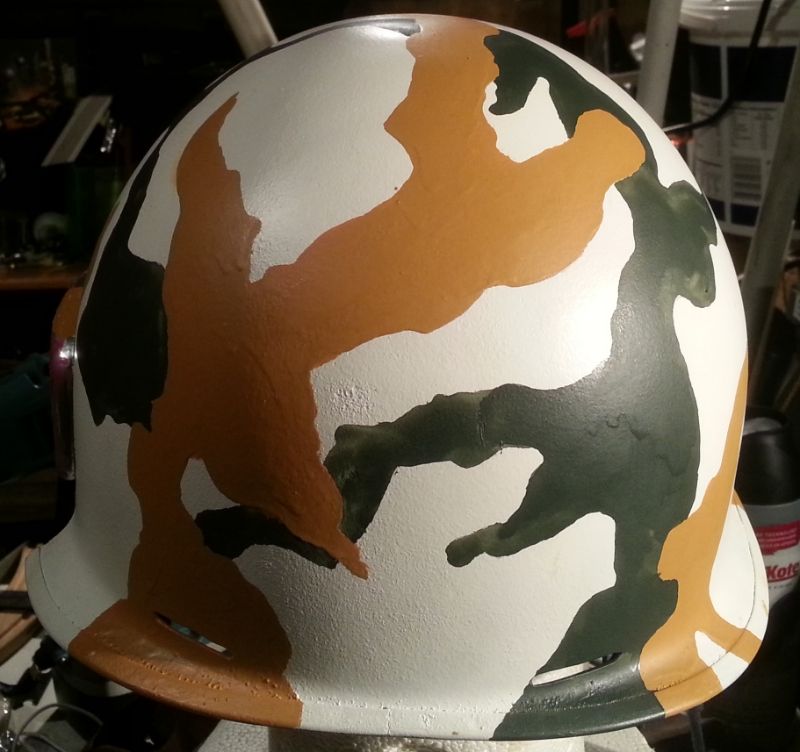
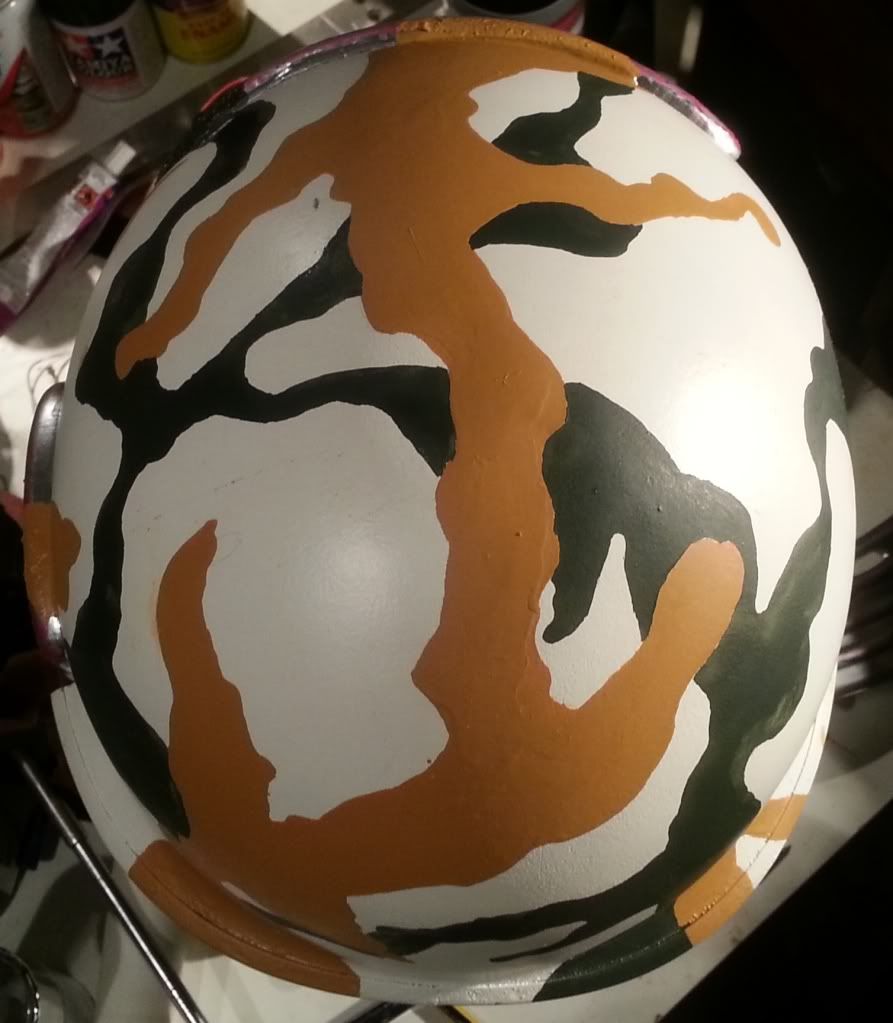
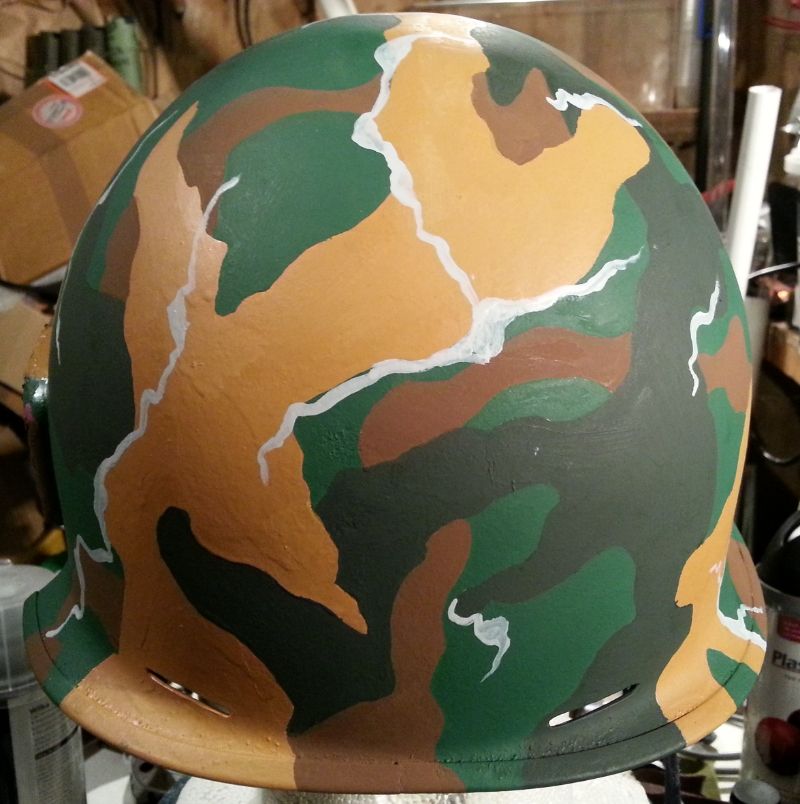
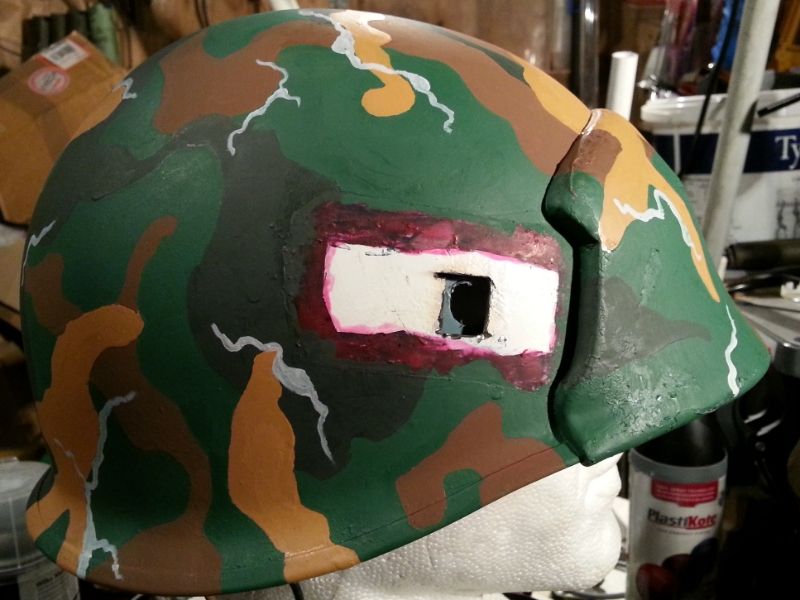
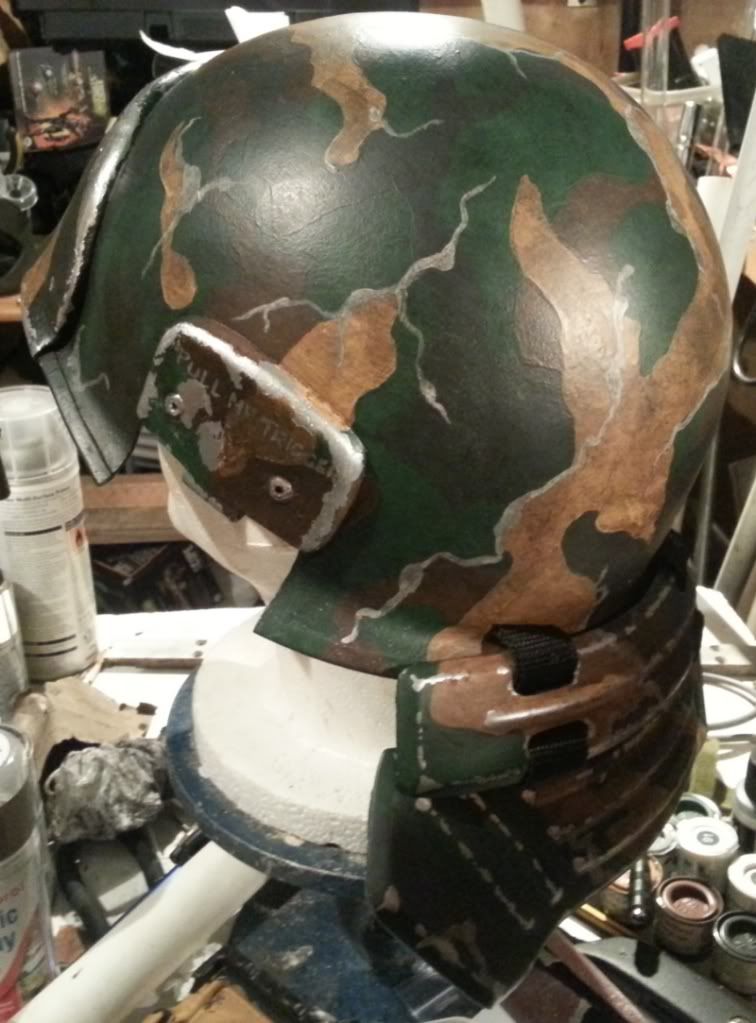
Here we go then.....
I carefully scored around the helm cam and removed any paint from the glue contact area, this will help make a surer bond.
I then applied the latex chips n wear, and covered the glue area for later removal
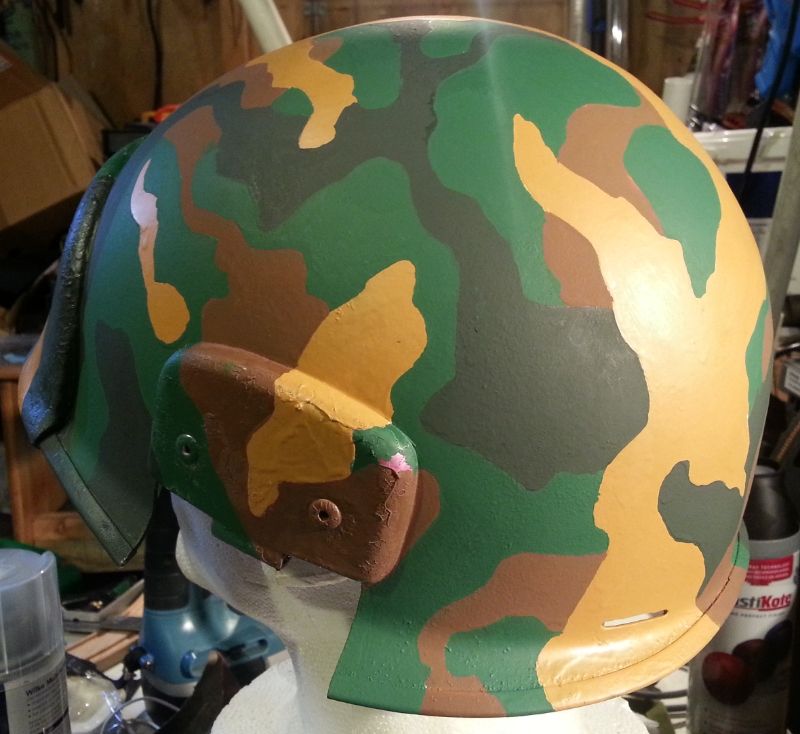
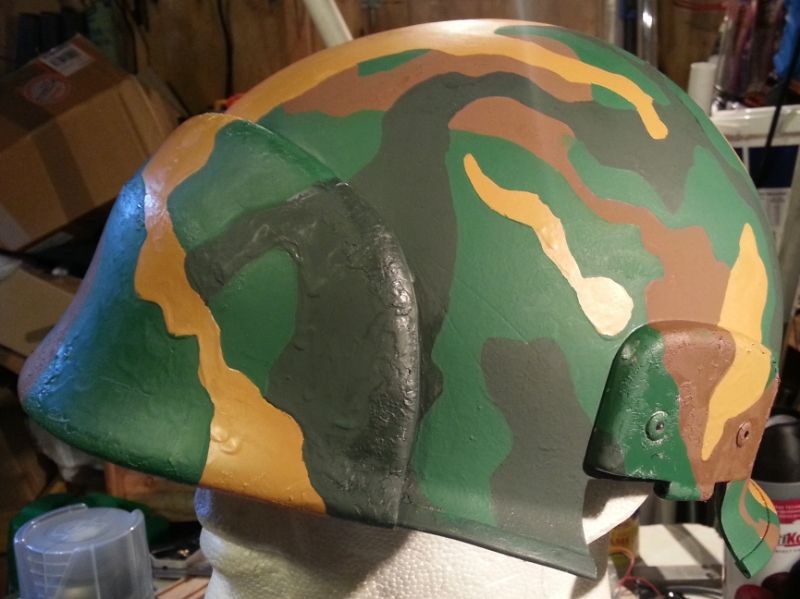
And finally, a first pass with one of the camo colours
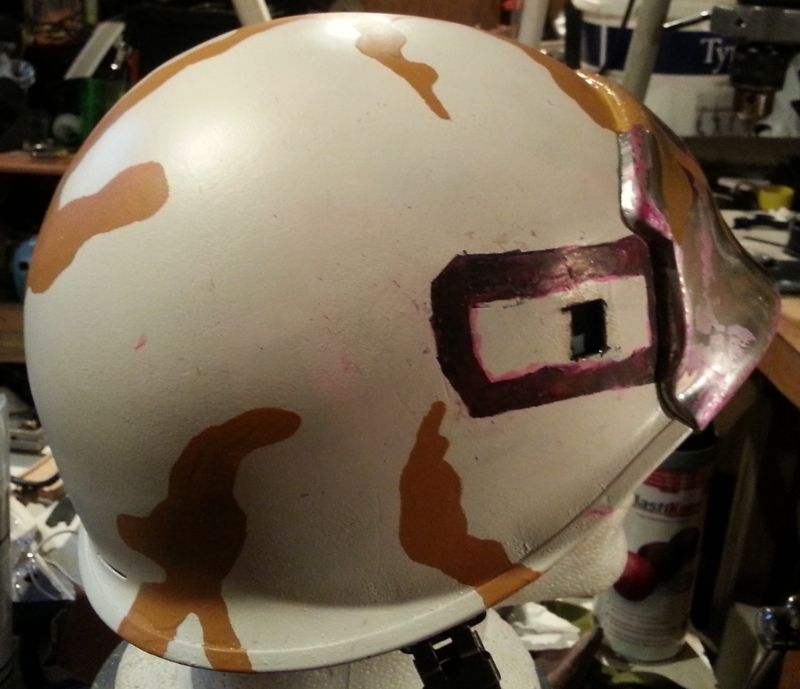
Second pass is done, just waiting for that to dry enough to pencil on where the next colour is going to go.
More later
I carefully scored around the helm cam and removed any paint from the glue contact area, this will help make a surer bond.
I then applied the latex chips n wear, and covered the glue area for later removal
And finally, a first pass with one of the camo colours
Second pass is done, just waiting for that to dry enough to pencil on where the next colour is going to go.
More later
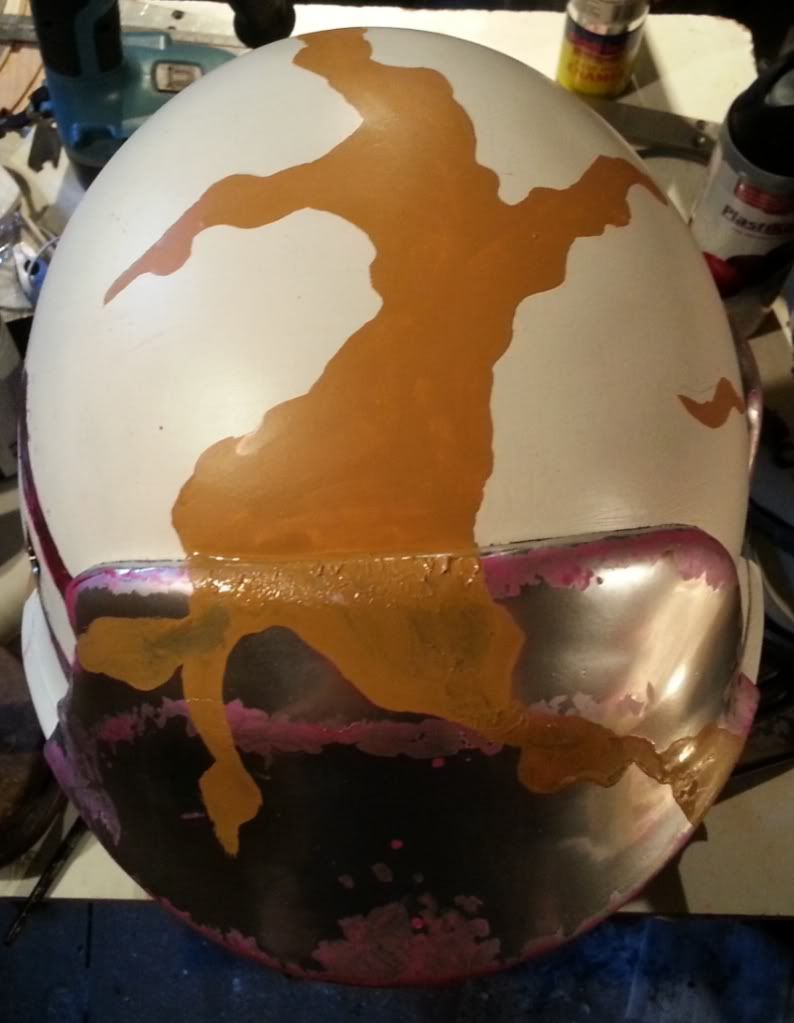
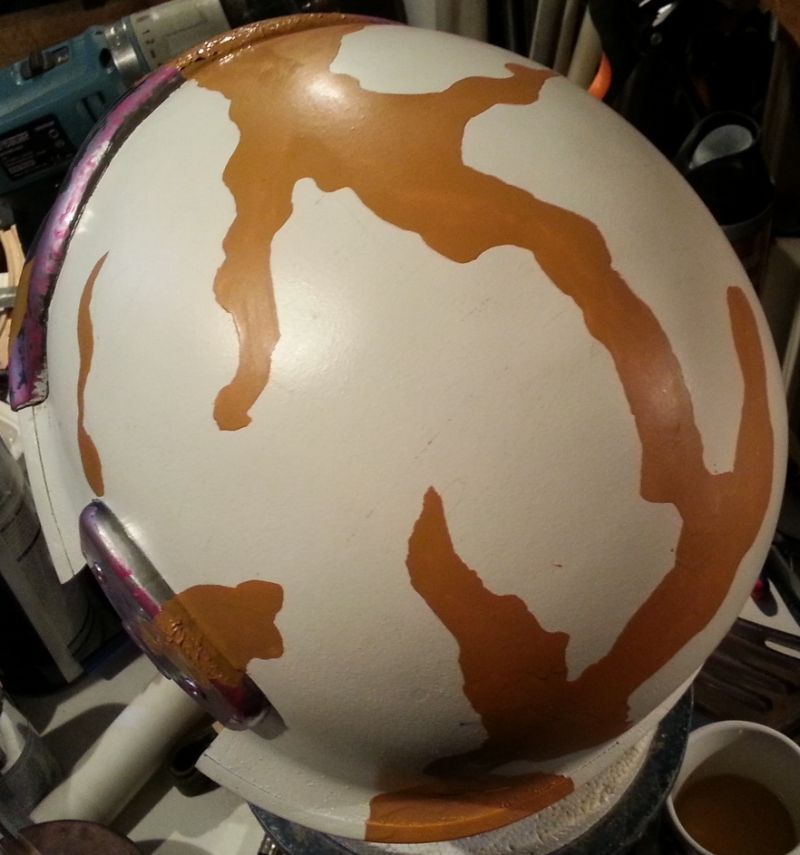
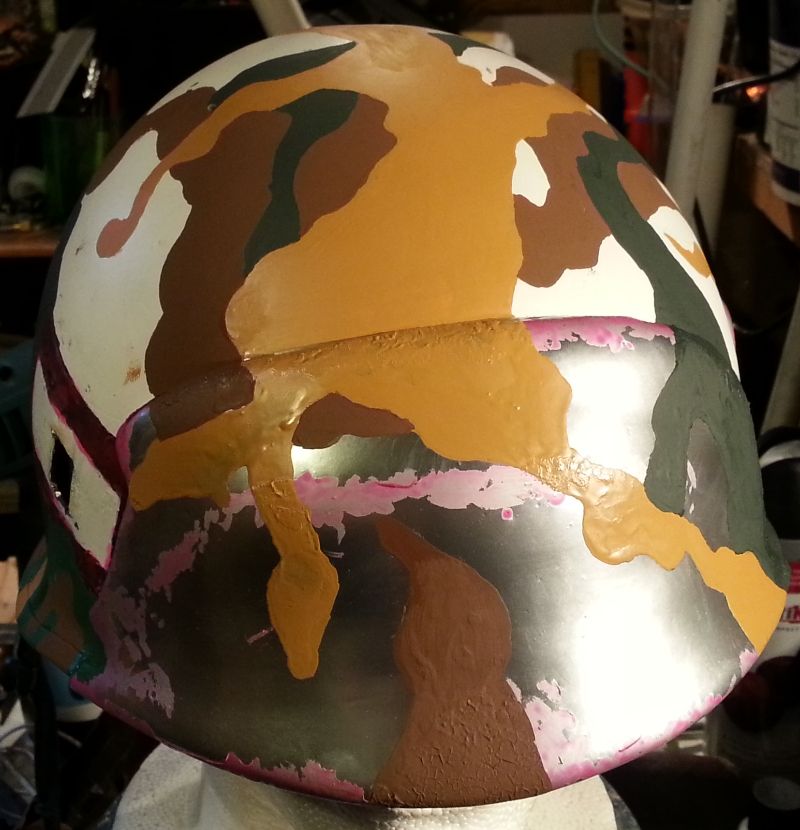
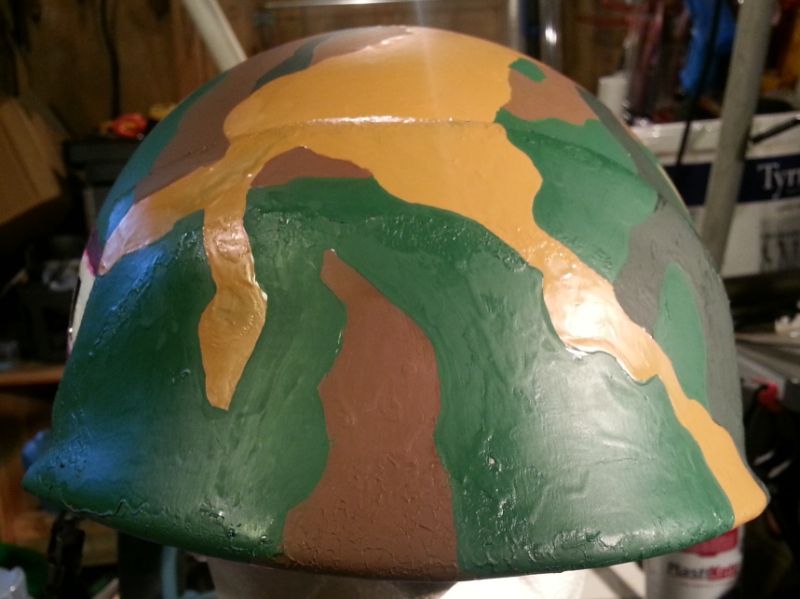
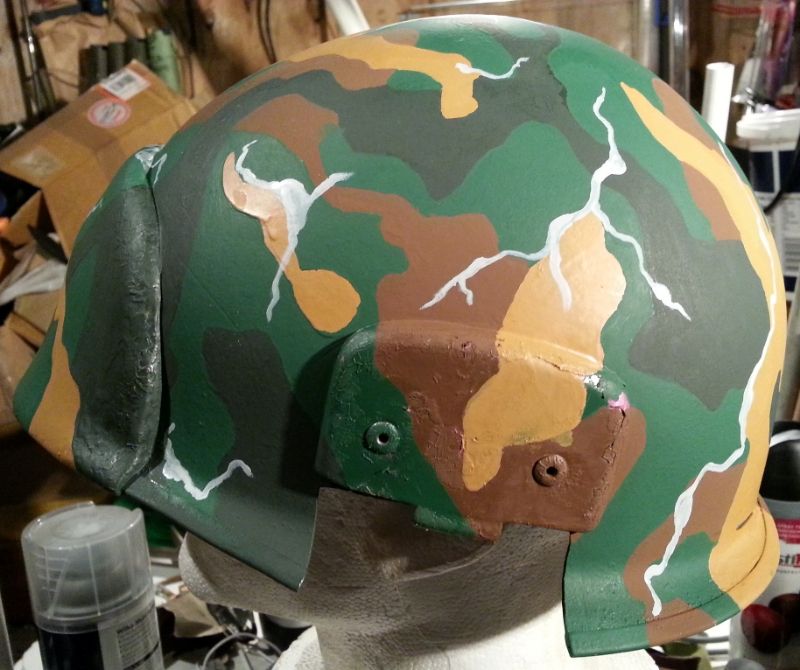
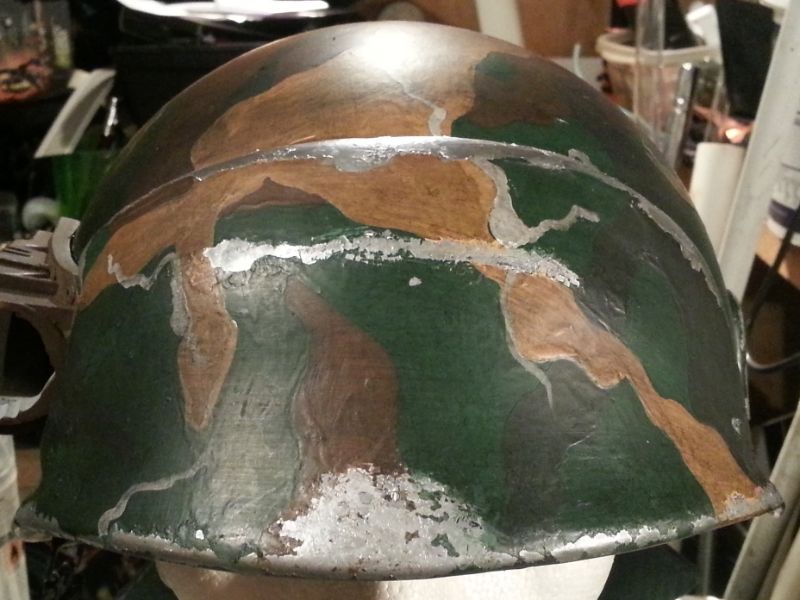
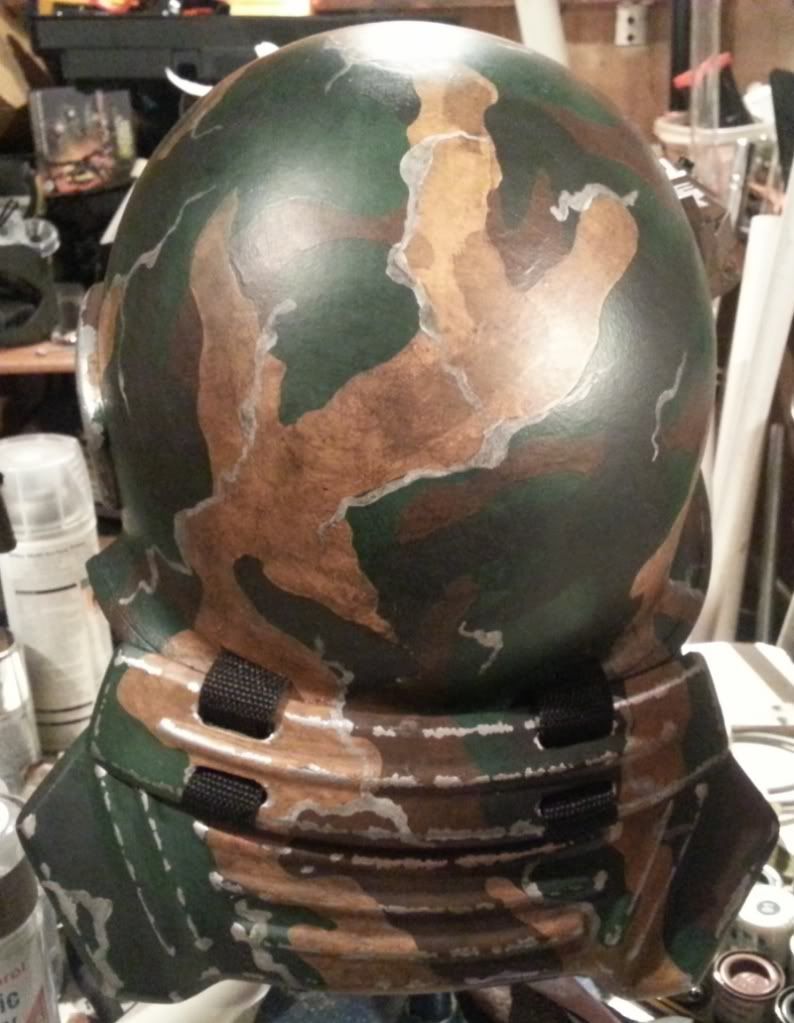
First pass for the second colour, though I noticed that it's a little thinner than the tan which has caused the chrome underneath to run a little :/
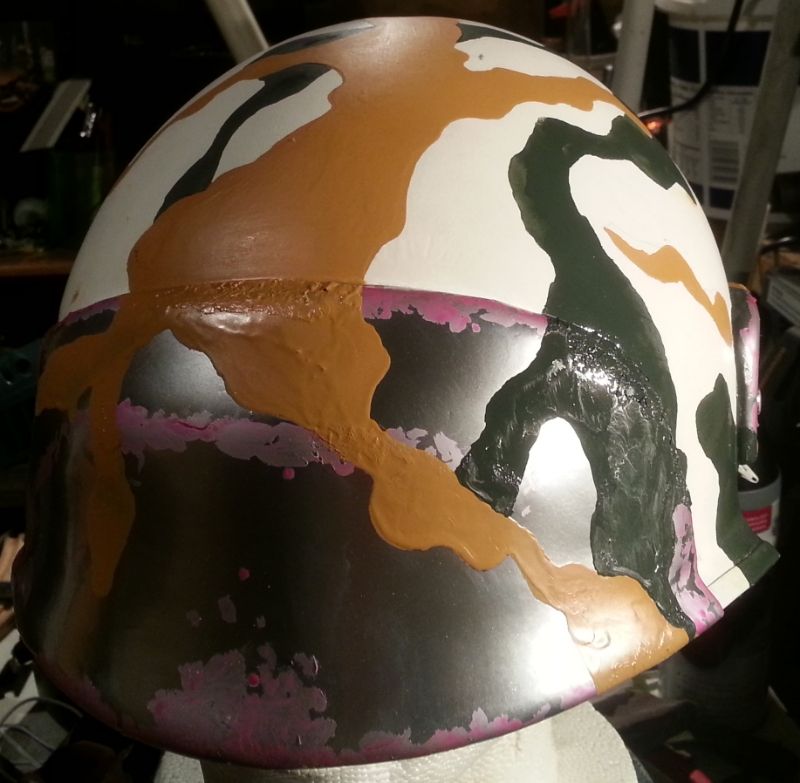
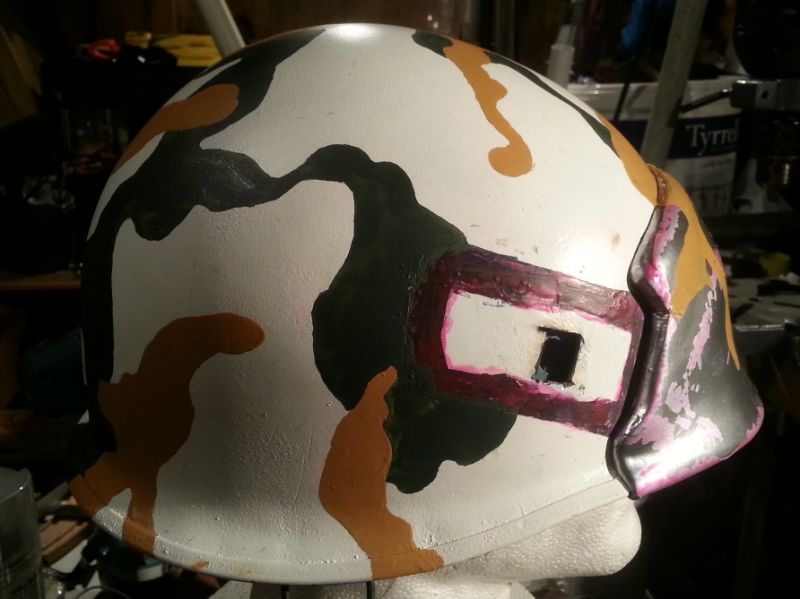
Needs a little tweek in one place as it turned out to look like I missed a spot Other than that, I think it's coming together nicely
Needs a little tweek in one place as it turned out to look like I missed a spot
Other than that, I think it's coming together nicely I'm a happy chappy, look what the postman brought me earlier today
Massive thanks to nick-a-tron for this most generous of donations, can't wait till I get home tonight so o can paint the helm cam and boom mic.
More progress made on the camo too, but wont bore you with all the inbetween steps (though I am documenting it).
Massive thanks to nick-a-tron for this most generous of donations, can't wait till I get home tonight so o can paint the helm cam and boom mic.
More progress made on the camo too, but wont bore you with all the inbetween steps (though I am documenting it).
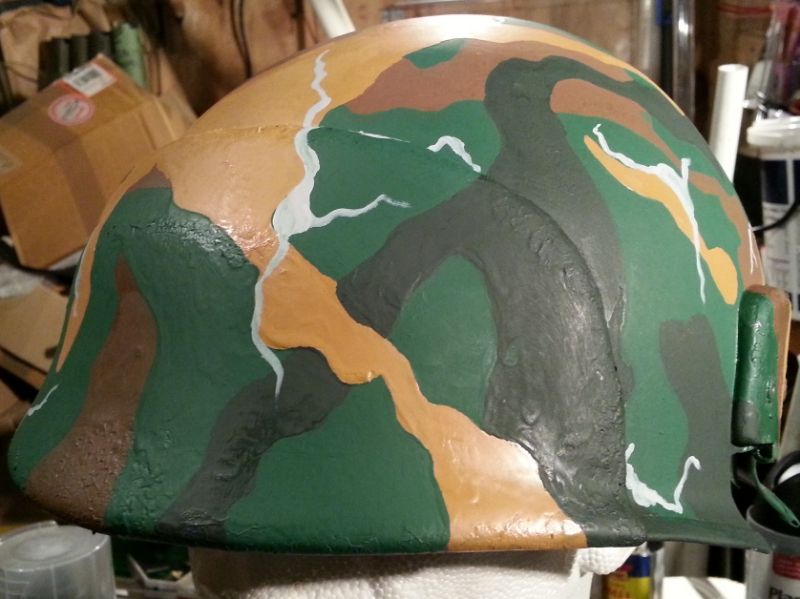
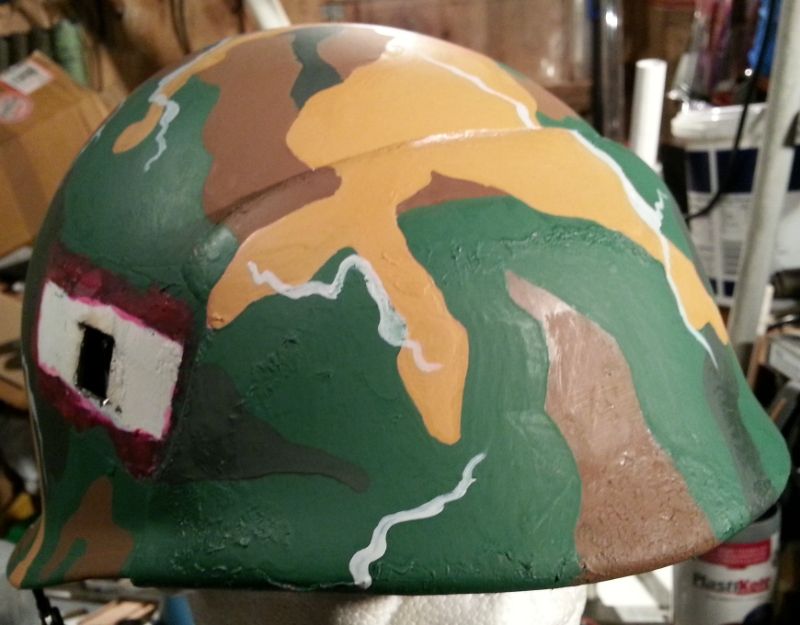
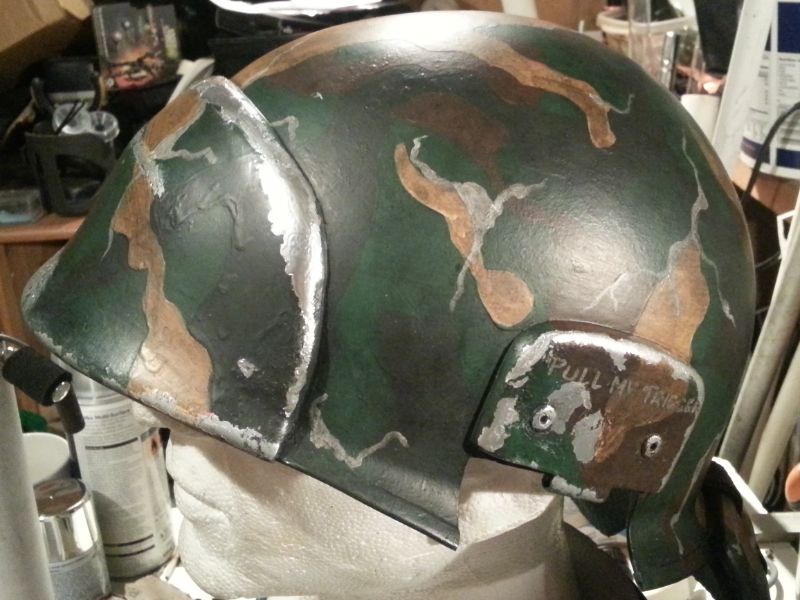
Nearly there at last. It just neads a touch up here and there to hide the mess my clumsy fingers left behind and the final wash and latex removal left for the helmet
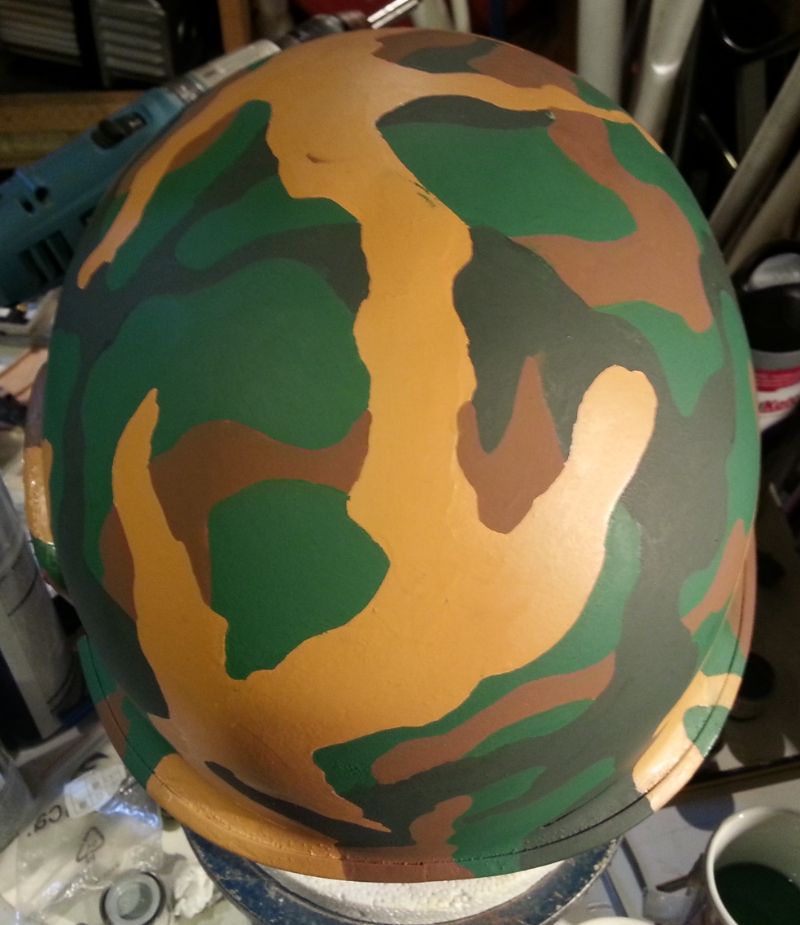

I think I have a workround for painting the other chromed pieces, will test the theory out tonight.
and the final wash and latex removal left for the helmet
I think I have a workround for painting the other chromed pieces, will test the theory out tonight.
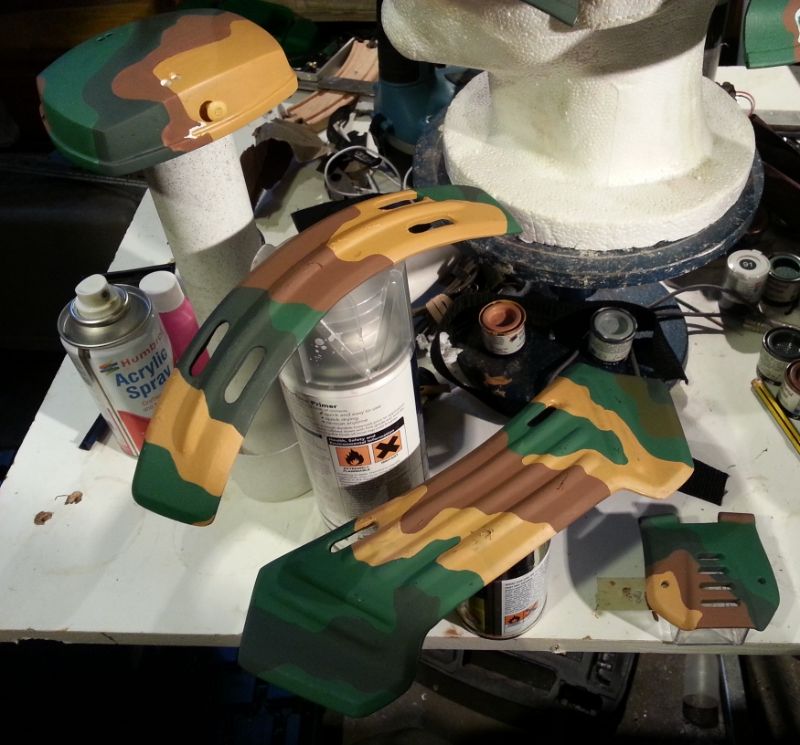
Hi guys
Here's last night's progress

Sprayed the lobster plates too. Went over the chrome fine this time, so should be decent to paint over. Only trouble is, its removed all the latex so I've lost all the paint chiping effect from it. Might well do the chromed topcoat trick on them and re apply the latex, but thicker this time as I think the paint thinneris reacting with the latex which is making it curl and shrink.
Here's last night's progress
Sprayed the lobster plates too. Went over the chrome fine this time, so should be decent to paint over. Only trouble is, its removed all the latex so I've lost all the paint chiping effect from it. Might well do the chromed topcoat trick on them and re apply the latex, but thicker this time as I think the paint thinneris reacting with the latex which is making it curl and shrink.

Hi guys
Been ploughing ahead the last few days and have nearly finished.
Gave everything a black wash or two and removed the latex. I then gave everything a few coats of matt clear acrylic top coat and got started on the final assembly

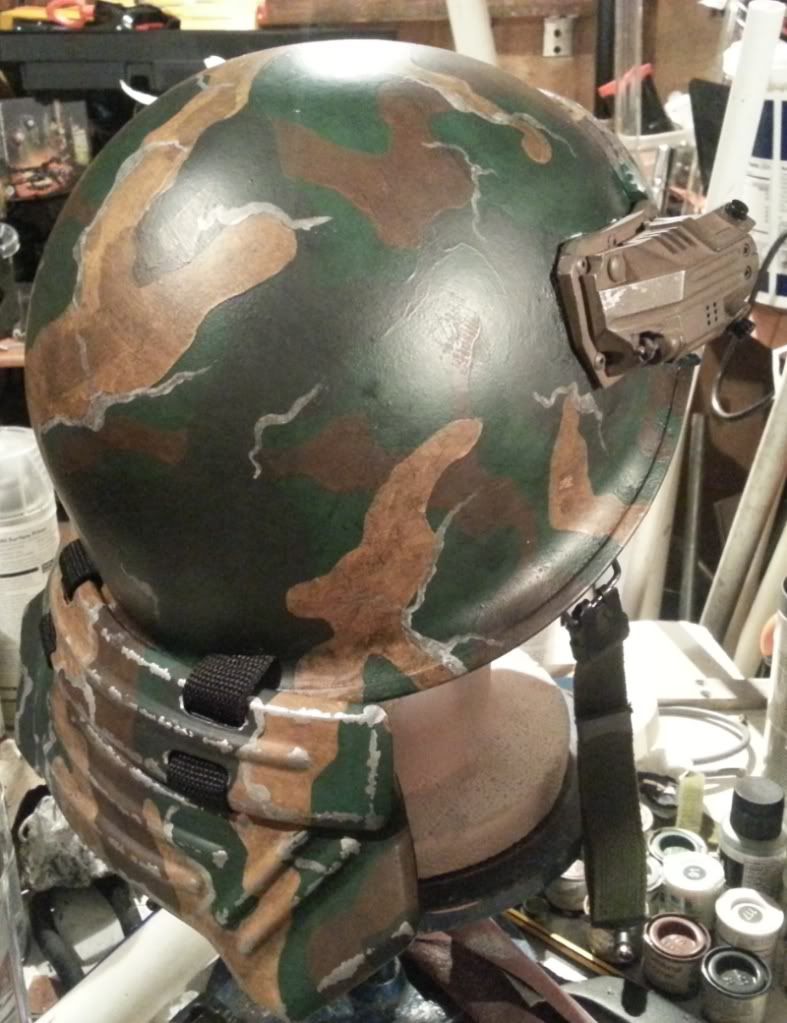
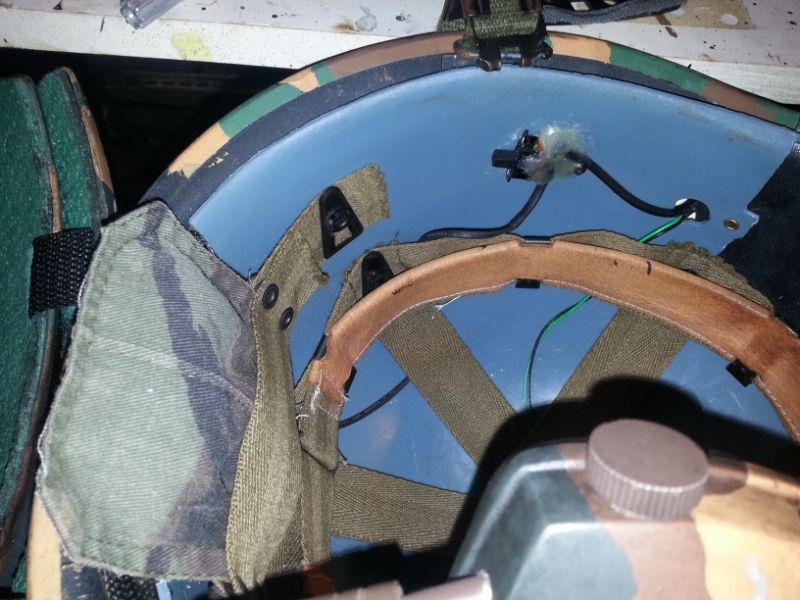
I then swapped the chin straps to the green ones and fixed the earpiece on
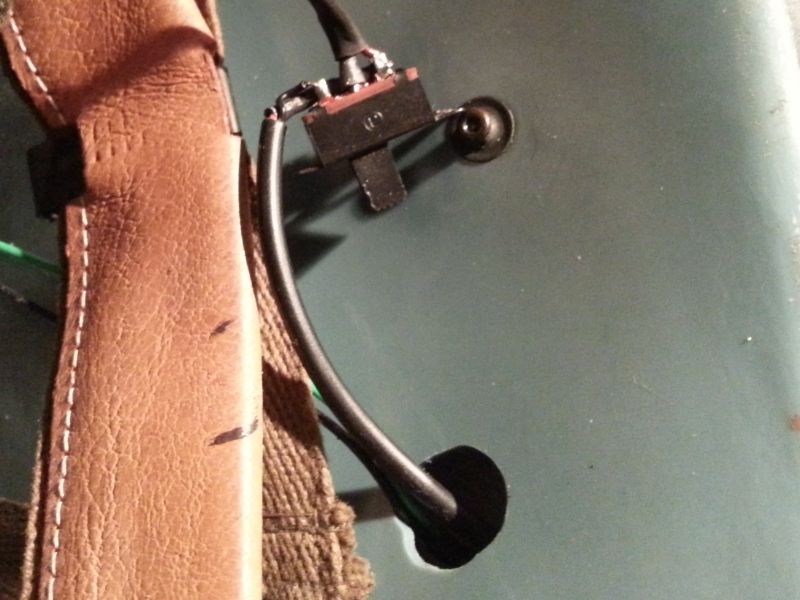
...and added a switch for the helm cam
Busy busy, more to come.....
Been ploughing ahead the last few days and have nearly finished.
Gave everything a black wash or two and removed the latex. I then gave everything a few coats of matt clear acrylic top coat and got started on the final assembly
I then swapped the chin straps to the green ones and fixed the earpiece on
...and added a switch for the helm cam
Busy busy, more to come.....
It's crazy how much that wash does to the final look. Great job!
Did you try to replicate any certian marine helmet camo pattern in particular or did you just go for the general style?
Did you try to replicate any certian marine helmet camo pattern in particular or did you just go for the general style?
This is an absolutely amazing helmet.
Thank you very much fly4v, I suddenly feel like I just graduated with that comment
It's crazy how much that wash does to the final look. Great job!
Did you try to replicate any certian marine helmet camo pattern in particular or did you just go for the general style?
Thanks nick, I just winged the camo and wash.
The camo I think is influanced by the frog and leaf style of patterning as I was using frosts helmet as my guide. The wash was a little more hit and miss as I've never used any on such a large scale before, though it didnt take long to get to grips with :thumbsup
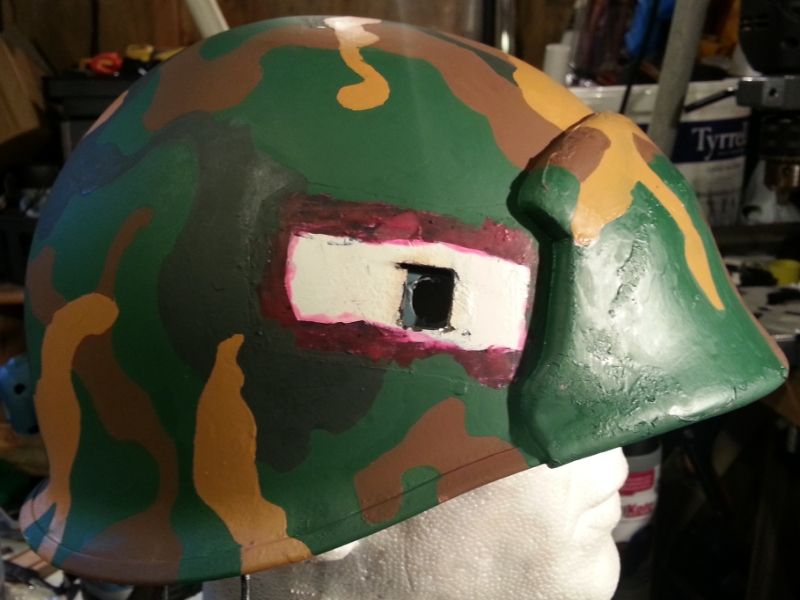
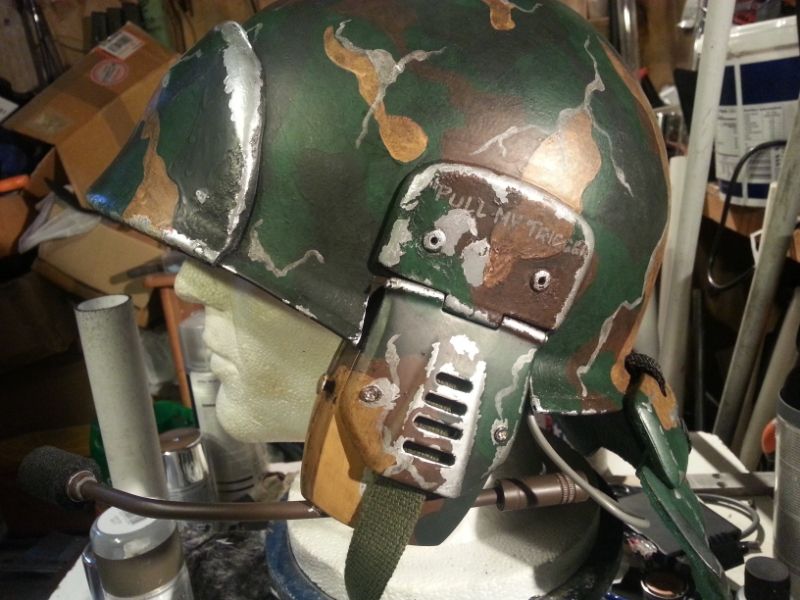
Here's today's progress:
Finished up the helm cam wiring, and made a little pouch for the 9v battery to go in
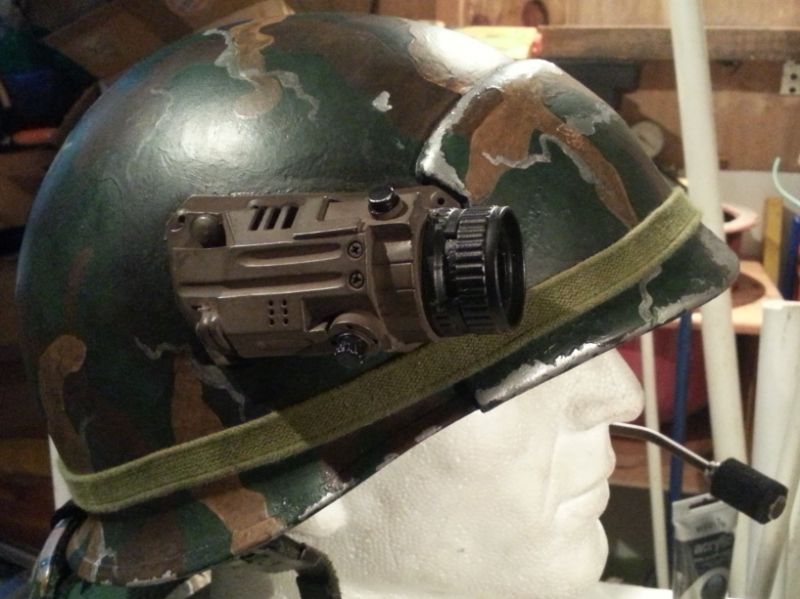
Then I attempted to line up and and fix on the helm cam lens, though things went a bit easier once I removed the bit of tape protecting the real lens :facepalm
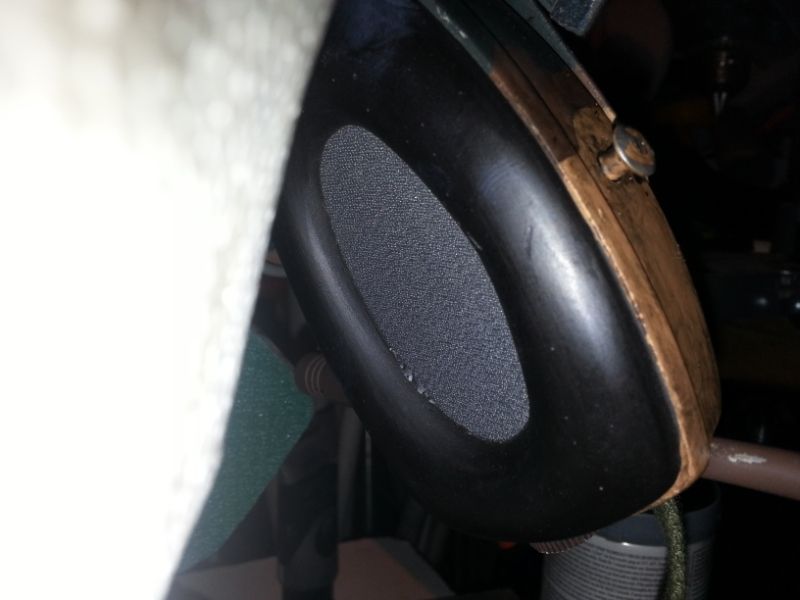
I also finished up the earpiece by gluing on the last greeblie, lining (taken from my dead PC speakers) and rubber part
Just mixing up a batch of two ton epoxy for the IR sensor, and once that in, this helmet is finished :thumbsup
Finished up the helm cam wiring, and made a little pouch for the 9v battery to go in
Then I attempted to line up and and fix on the helm cam lens, though things went a bit easier once I removed the bit of tape protecting the real lens :facepalm
I also finished up the earpiece by gluing on the last greeblie, lining (taken from my dead PC speakers) and rubber part
Just mixing up a batch of two ton epoxy for the IR sensor, and once that in, this helmet is finished :thumbsup
Last edited:
Similar threads
- Replies
- 27
- Views
- 1,722