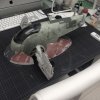
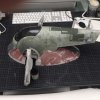
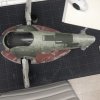
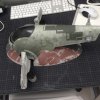
CAPTAINCOX Slave 1 Hasbro Mod "FINISHED"

Re: CAPTAINCOX Slave 1 Hasbro Mod

Making great progress, Cap't! Appreciate you sharing your 'journey'; you are certainly setting the bar high! Seeing your work, I must wonder how the ILM crew did the chipping effects on the original.

Aside, while slowly working up the 'replacement wings' templates, I have found that Hasbro made a lot of simplifications on the toy parts (proportions are generally fair, but the wing details are a real 'scrambled egg'.) Checking out mktodd's Fine Molds build, I was intrigued to see that some of the same 'shape' issues appear in that kit as well. Indeed, it appears that Hasbro based a lot of the toy details on the FM kit! (This may have already been noted by others...)

If so, then I must see what evaluations of the FM kit say about it's fidelity & see if Hasbro has other areas needing correction because of the design reference of the FM kit.

In any case, back to the regular awesome program!

Regards, Robert
 
Re: CAPTAINCOX Slave 1 Hasbro Mod

The paint job is great! That bird is looking more and more like the original. Keep up the great work!
 
Re: CAPTAINCOX Slave 1 Hasbro Mod

Hi Guys

Almost done painting the "Front/Upper" side.

IMG_3539.jpgIMG_3540.jpgIMG_3541.jpgIMG_3538.jpg

Cant wait to start weathering with Oils and Pastels, but next up, painting the Back side...

Cheers Guys.
 
Re: CAPTAINCOX Slave 1 Hasbro Mod

Hi Guys

Got a question...As the Canopy is pretty dark, what would be the best way to make a new one in "Clear Plastic"?. Vacform, Mold...or? Does someone have a "Simple" way to do it?
I guess I could in theory make a home made Vacform rig...but it would for sure involve some work, I might also ask at work in the Modelwokshop if I could use the one they have there.
But it would mean that I have to do a cast of the Hasbro one as a Master I guess...thoughts.

Cheers Guys.
 
Re: CAPTAINCOX Slave 1 Hasbro Mod

Capt'n, because the original part is a perfect fit, making a new one molded over the original (as a male mold) would give you a slightly oversized canopy which might or might not be able to be fettled to fit (which would mess up your nice paint job...) So, you'd need to make a female mold by creating a cavity casting from the original part so you could 'pull' a canopy into the mold, giving the same outer dimensions as the original.

For some reason, vacuforming is seen as some kind of arcane art. In reality, the hobbyist can use vacuforming easily simply because it is so low tech. (As I've said before, I once made a vac forming 'table' using some window screen, duct tape, some coat hanger wire and a sturdy cardboard shoebox. I used MDF to make a frame to hold the plastic sheet (secured with thumbtacks), which I heated in the kitchen over - supported by a couple of bricks. The household vacuum cleaner provided the 'suction' via a hole cut into the side of the shoe box, gasketed using masking tape.

Very "Rube Goldberg", but it worked a champ (it even had a form of 'suction relief' when the box 'sucked in' once the plastic sheet was 'fixed' and set the table seal.) I'd made it in a hurry but found it held up well enough for repeat usage. Still have it in fact...

Making a female mold is a bit more involved than just doing a 'drape' form, but taking the original canopy, giving a pretty good polish to it & a coat of a compatible release agent before making a cast of reinforced plaster or similar. The trick is providing for some way for the air to be evacuated. I have heard some have scratched up the mold surface with fine 'Scothbrite' pads or fine steel wool so those micro-grooves allow the air to be sucked out of the inner portion of the mold, under the plastic. Being so tiny, however, the plastic will not show the scratches once molded, or do so minimally such that a polish will 'fix' it. This is probably only true with the low tech vac formers using a vacuum cleaner for suction. Machines capable of greater vacuum might be able to 'replicate' the scuffed surface, but not the typical shop vac.

Hope this helps.

R/ Robert
 
Re: CAPTAINCOX Slave 1 Hasbro Mod

Cheers rbeach84!

I think I will finish the build and then start a small canopy project. I am pondering if I should build my own Vacform machine or...If I find the time I will ask in the modelshop at work tomorrow if I can use theirs, then I only need to do to a female mold and buy the Plastic. It's a bit of a gamble as if I fup the Original I will have to look for a new one on eBay :p but I think doing it the way you said should be pretty risk free. I Vacformed stuff back in Design School but that was eons ago. Will for sure give it a go but will as I said finish the build first.
 
Re: CAPTAINCOX Slave 1 Hasbro Mod

That's an idea. I'm still working up the wing templates (took a side track into Rebel's Ghost land...):
View attachment extract.pdf
View attachment extract2.pdf

Here's all I've gotten for the Slave 1 wing so far:
wing draft.jpg

The measurements are in inches to fit with the Hasbro Slave 1. The difficulty is (of course) that the toy's wing has many flaws when compared to the original ILM model, both in detail & in general. Although my drawing doesn't seem like much, it has involved a lot of iterative 'tweaking'.

Onward!

R/ Robert
 
Last edited:
Re: CAPTAINCOX Slave 1 Hasbro Mod

Hi Guys

That's an idea. I'm still working up the wing templates (took a side track into Rebel's Ghost land...):
View attachment 652340
View attachment 652341

Here's all I've gotten for the Slave 1 wing so far:
View attachment 652342

The measurements are in inches to fit with the Hasbro Slave 1. The difficulty is (of course) that the toy's wing has many flaws when compared to the original ILM model, both in detail & in general. Although my drawing doesn't seem like much, it has involved a lot of iterative 'tweaking'.

Onward!

R/ Robert

Your Ghost Plans looks very promising indeed!.
I will stick to the Hasbro "Pancake" wings for this build...I am to far down the line and I really want to finish the build before I go on Holiday in two weeks :p

Got a small update on the Paint Job

IMG_3568.jpgIMG_3562.jpgIMG_3569.jpgIMG_3571.jpg
Started to weather the model using Oils and doing some Chipping with acrylic paint. The Engine side is also getting there. Will also do some "Modulation washes" on the Lower Skirt.

Next up I will give all the Parts a good Layer of Alclad Clear Cote, I applied a layer of Future Clear before starting with the Oils as Washes and Olis Flow better when the surface is Gloss/Semi Gloss. So now the Model has a sorta patchy sheen, but the Matt Cote will fix that.

Next up pastels, that will again make the Detail and Surface modulation pop.

Cheers Guys.
 
Last edited:
Re: CAPTAINCOX Slave 1 Hasbro Mod

Hi Guys

Almost done :)

Painted and weatherd the Cockpit...a tad heavy on that rust but the Slave is an old Bird right.
IMG_3583.jpgIMG_3584.jpg


Body and Wings Semi Assembled and weathered with Oils and Pastells. I finally coated the whole model with a Mix of Future and Tamiya X-21 Flat Base (70%/30%) that Ratio makes the model SUPER Matt but if you mix to much of the X-21 the coat tends to go milky and can really Fupp the Paint Job.
IMG_3591.jpgIMG_3589.jpgIMG_3588.jpgIMG_3587.jpgIMG_3593.jpg


Also Weathered the back using the same method with Oils and Pastells.
IMG_3592.jpg

Left to do: Led's and Display Stand...Will take some better pics using a proper Camera when done, for these pics I just used my ol iPhone :p

Cheers Guys.
 
Re: CAPTAINCOX Slave 1 Hasbro Mod

Looking fantastic, Capt'n! But - who is the guy in the chair in the background? Did you get yourself 3D printed?

(Aside: Hasbro really incorporated a lot of cool texture & detail in the toy's surfaces. I was considering making a mold for kitbashing material, it is so nice...)

Regards. Robert
 
Re: CAPTAINCOX Slave 1 Hasbro Mod

Cheers man!

:) that's a 1/6 scale Steve Jobs Figure, being a designer I have to be a Mac/Apple fan right, only trying to live up to the expectations :p

image.jpeg

I see now that he really needs a good dusting...He's been collecting modeling dust since over a year :p
I bought it from a sculptor/modeler in Japan, no idea if he still does them, at the time I thought it was a cool thing to have and he sits next to my iMac so perfect for a nerd like me :)
 
Re: CAPTAINCOX Slave 1 Hasbro Mod

He, he, I thought it was a 3D print of you and you look remarkably like Steve Jobs!
Beautiful paint job on the Slave, echt toll, it looks so much like a studio scale model now, so far from its origins as a toy. :thumbsup :thumbsup
 
Re: CAPTAINCOX Slave 1 Hasbro Mod

Hi Guys

Small update...

Started to assemble...well everything...

IMG_3596.jpgIMG_3600.JPGIMG_3581.JPG
Connected all the LED's using Socket Terminal Stips and "Aluminium Tape" to prevent light leaks. I also built a Display base. A wooden frame that I cladded with Styrene as then you don't have to sand it that much and you will get a clean surface that don't really require any bondo to make it look smooth and clean, I finished the Display base off with some Satin Black aerosol from the local Hardware store. On top of the Display base I will mount a Acrylic glass plate painted Black from the back and screw it down with four Allen Bolts with spacers (Will post pics of that later).

IMG_3603.jpgIMG_3607.jpgIMG_3604.JPGIMG_3603.JPGIMG_3611.jpg
Some pics of the Cockpit and Engines all lit up using Warm White LED's for the Engines and Red LED's for the Cockpit. Sorry for the pic quality, it was pretty dark outside when I shot these and using my ol iPhone (again) the quality is not that good. Will shoot new pics with a better Camera when completely done.


He, he, I thought it was a 3D print of you and you look remarkably like Steve Jobs!
Beautiful paint job on the Slave, echt toll, it looks so much like a studio scale model now, so far from its origins as a toy. :thumbsup :thumbsup
Cheers man, and I am not that bald yet...maybe in a couple of years...god forbid :( :p.


Cheers Guys.
 
Last edited:
Re: CAPTAINCOX Slave 1 Hasbro Mod

Hi Guys

Finally finished the Slave :)

Did a small Vid sorta Ken Burns Style...couse it was fun :p
Some pics that I hope are better then my ol iPhone ;)

DSC_0977.jpgView attachment DSC_0983.jpgDSC_0988.jpgDSC_0990.jpgDSC_0991.jpgDSC_0994.jpgView attachment DSC_0997.jpgView attachment DSC_0964.jpgView attachment DSC_0953.jpgView attachment DSC_0949.jpgView attachment DSC_0946.jpgView attachment DSC_0967.jpgDSC_1002.jpg

I think its the closest I can make a Hasbro Slave 1 Toy look like a Studio Model. Ist not 100% of course, some Panel lines are not perfect and some of the proportions are a bit off but no matter. I am pretty happy with the final result and it looks really cool standing next to my other Models and Star Wars Toys :p

Cheers to all of you guys for the Pointers and Parts Spotting.


Cheers Guys
 
Last edited by a moderator:
Capt'n that looks fine! Out of curiosity, what is the main proportional issue with the Hasbro toy in your estimation?

R/ Robert
 

Your message may be considered spam for the following reasons:

If you wish to reply despite these issues, check the box below before replying.
Be aware that malicious compliance may result in more severe penalties.
Back
Top