Building The Death Star - PRODUCTION

Yep, the light proofing will be tough. Stop by a neon shop and see if they can show you some black out. Stuff works good and now comes in a spray I believe.

Laffo.

The hardest part is the lip of the dish where it stands proud of the surface. There are the small detail pieces that ring the dish, and those black out ok, but getting paint in between the detail pieces is a pain in the ass.

I'm using silver Liquitex acrylic paint from a tube - nice and viscous. But I think the black will actually work better, and I need to find a brush suited just right for the task.

Dish009.jpg


Dish008.jpg
 
Last edited:
Rob,
Could you use some black rubber caulk to seal the dish from the inside. I remember you talking about this when I was over. I think this issue needs to be dealt with from the inside.


Brad
 
Rob,
Could you use some black rubber caulk to seal the dish from the inside. I remember you talking about this when I was over. I think this issue needs to be dealt with from the inside.


Brad

I do have some light leaks that will likely need to be (carefully) approached from the inside, yes...
 
I think CF lamps would be the best light source. The 100w equivalent uses
26w and produces little heat. And they last longer, so fewer changes.

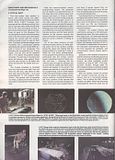
Multi pass photography was used quite a bit even for Star Wars, this article
from American Cinematographer mentions multi light passes on the Death Star.


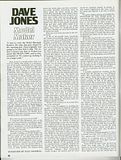
But this Cinefantastic interview with Dave Jones says that the Death Star was shot
in one pass, because of the small size of the lights.
 
My sign guy - I have a 50 foot 60 year old neon Marquee that requires so much work I trade a neon guy Shop Space and a place to park his trailer for keeping it running - told me any Neon Shop will give you enough Black Out for your project. Just take in a little Glass jar for them to pour it into. He said the can he has, he's had since he went out on his own 15 years ago. It looks like a tar bucket.

It comes in Grey as well.
http://www.theneonstore.com/s-65-block-out-paint.aspx

Laffo.
 
I think CF lamps would be the best light source. The 100w equivalent uses
26w and produces little heat. And they last longer, so fewer changes.

Multi pass photography was used quite a bit even for Star Wars, this article
from American Cinematographer mentions multi light passes on the Death Star.


But this Cinefantastic interview with Dave Jones says that the Death Star was shot
in one pass, because of the small size of the lights.

Pretty fascinating stuff!

Reconciling information is an interesting task; Jones suggests the globe was "about" three and a half feet in diameter, when all other sources state three.

On the other hand, he confirms something I'd theorized after seeing the model in person; that they extended the original paint job after McQuarrie was "finished" with it.
 
Rob???? Don't tell me your ADD set in again and you're working on another project? Did you ever redo the line scribe rig? Do you need me to come back down there so we can not work on anything? ;)
Brad
 
Rob???? Don't tell me your ADD set in again and you're working on another project? Did you ever redo the line scribe rig? Do you need me to come back down there so we can not work on anything? ;)
Brad

Hey man my balls are still sore from that date with a stripper which I failed to score - quit bustin' 'em more! Gee, I've had folks over lots of times not to work on anything and no one's complained before! ;)

Seriously - ADD...? Maybe. Yes, no, not really. Am working on one or two other things at the moment, but the main reason I'm slowing down is I am STILL light proofing the g-damn thing, and unless I rig an elaborate curtain set-up, I can only do that at night; just about the time I'm ready to plant my ass in front of the 62-inch with a beer in hand.

I did fabricate the "spinners" (plastic plates at both poles) to attach a new, off-set (aligned directly with the poles) guide. Been a bit hesitant to do so, knowing I gotta get it perfectly perpindicular to the equator.

Gimme a buzz over the weekend if you have time, Brad - we'll shoot the ****!
 
Sounds good man. Since I only have one nut I have bust others who have them both! ;)

PM me you cell # again. I was an idiot and erased all my PM's

Brad
 
STILL light-proofing... :angry

Here's the challenge. The detail pieces create gap at the apex of their cross section that light just floods out of, and is really hard to get paint in there to block, without just really mucking up everything...

Here's a cross-section diagram of what I'm talking about.

Light001.jpg


The hardest part is the lip of the dish where it stands proud of the surface. There are the small detail pieces that ring the dish, and those black out ok, but getting paint in between the detail pieces is a pain in the ass.

Dish009.jpg


Dish008.jpg
 
Last edited by a moderator:
there is some plumbing putty. Brand name Oatey (I think) it comes in a small tube. Its a 2 part putty with the catalyst in the middle wrapped around the 2nd stage putty.

Cut off a piece, kneed it with your hands and then you can shape it to whatever form you need. Once it dries you can sand, drill, paint, do whatever to it you want.

Might be something worth looking into?
 
Can you not paint it from the back side (inside the ball) in that area? I wouldn't try and paint in those nooks on the outside. Like you said, good time for a muck-up. I would use some thick heavy paint on the inside of the sphere.
 
Last edited:
This doesn't come from nearly the amount of observation and research that you have done, but are you sure the lip is that thick? I was surprised it sat that much above the surface when I saw your dish in place. Not that I know better, just that it was surprising.
 
This doesn't come from nearly the amount of observation and research that you have done, but are you sure the lip is that thick? I was surprised it sat that much above the surface when I saw your dish in place. Not that I know better, just that it was surprising.

Pretty sure...

DS0002.jpg
 
Jay, yes, at casual glance, and in nearly any shot in the movie, it doesn't appear to have much or any lip at all. But as Brad pointed out (and you acknowledged) when you study it closely, its pretty apparent.
 
Just had a stroke of brilliance (I think)...

As mentioned, I have the north and south pole "spinners" (plastic mounting plates for the line guide) attached.

I've been squeamish about commiting to gluing the actual guide (long, skinny plastic strip) to the spinners, as it has to be mounted perfectly perpendicular to the equator, and terminate perfectly at both poles.

I have a heavy, steel t-square, but that is nearly impossible to use up against a compound-curved surface.

So...

I thought, why not cut an "L", perfectly 90-degree piece of styrene to use as my "guide for my guide"...?

Cut the "L" out of flexible styrene, line up the horizontal edge with the equateor, affix it with something robust but temporary (lots of masking tape?), then align my marking guide with the vertical edge and on up to the pole.

Make sense? Think it'd work?
 
Last edited:
Something like this, where the "L" is flexible styrene that can wrap around the curvature of the dome.

Guide001.jpg
 
Last edited by a moderator:
Back
Top