This is my first actual "build" thread! Two years ago I decided to make my gaming group something special for Christmas and took my first dip into the world of sculpting, molding, casting, and finishing. I learned more than I can say from reading threads here so I thought I'd share some of the photos I remembered to take along the way. (This post will be split into multiple posts)
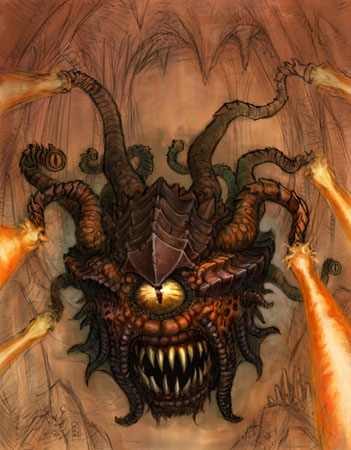
I ended up making Beholders for everyone in my group. A Beholder is a classic monster that consists of a floating head with one large eye and a giant mouth. Protruding from his 'body' are several tentacles with eyes attached to them, each able to attack independently...very nasty stuff. They are seen in games such as Dungeons & Dragons and EverQuest (the original at least.) Here's one of the images I based my sculpt off of. I ended up incorporating elements from several different Beholder types in the final sculpt

In total, I made 5 casts of my original sculpt which I gave out to my group. The following year I'm proud to say that I pulled out my old molds and made another 2 castings, one for myself and one for the Child's Play Charity where it was included in their 2011 Charity Auction.
Everytime I read a build thread, I love it when the OP includes what materials they used throughout the process, so here's what I can remember of mine (again, this was 2010)
Basic details:
-Beholders were sculpted in Super Sculpey, in multiple pieces (head, jaw, 'armor-plate' for top of head, tentacles)
-Molds were made with Oomoo 30 (Smooth-on)
-Beholders were cast in Smooth Cast 300 or 325 (have to look)
-Teeth were made from Sculpey III Translucent clay and glued in place
-Used acrylics for finishing painting
-Bondo was used to fill in gaps between pieces
Without further ado...
Full Gallery with full-res images (large): Beholder - Imgur
I started with a ball of aluminum foil, which was then wrapped in a thin sheet of clay

I started sculpting the jaw attached to the main body, but eventually removed and cast it separately as I wasn't sure how easily I would be able to mold it. I was afraid of there being a big undercut, but realise now I could have gotten away with it if I planned a bit better. Live and learn!

Sadly I can't find the images of me actually doing the bulk of the sculpting. Here's the main head after adding all of the detailing. I made some texture stamps for the head by sculpting the textures I was going for into several pieces of clay, adding a handle, then baking them off. These were then rolled across the piece to give the base texture, then I refined from there, adding ridges, potholes, etc. The obvious holes in the piece are where the tentacles will sit eventually

Here's all of the sculpted pieces together, getting ready to cast them. After casting, they were assembled with epoxy, mainly, and joints filled with Bondo

Close-up of the tentacles (albeit a bit blurry)

I ended up making Beholders for everyone in my group. A Beholder is a classic monster that consists of a floating head with one large eye and a giant mouth. Protruding from his 'body' are several tentacles with eyes attached to them, each able to attack independently...very nasty stuff. They are seen in games such as Dungeons & Dragons and EverQuest (the original at least.) Here's one of the images I based my sculpt off of. I ended up incorporating elements from several different Beholder types in the final sculpt

In total, I made 5 casts of my original sculpt which I gave out to my group. The following year I'm proud to say that I pulled out my old molds and made another 2 castings, one for myself and one for the Child's Play Charity where it was included in their 2011 Charity Auction.
Everytime I read a build thread, I love it when the OP includes what materials they used throughout the process, so here's what I can remember of mine (again, this was 2010)
Basic details:
-Beholders were sculpted in Super Sculpey, in multiple pieces (head, jaw, 'armor-plate' for top of head, tentacles)
-Molds were made with Oomoo 30 (Smooth-on)
-Beholders were cast in Smooth Cast 300 or 325 (have to look)
-Teeth were made from Sculpey III Translucent clay and glued in place
-Used acrylics for finishing painting
-Bondo was used to fill in gaps between pieces
Without further ado...
Full Gallery with full-res images (large): Beholder - Imgur
I started with a ball of aluminum foil, which was then wrapped in a thin sheet of clay

I started sculpting the jaw attached to the main body, but eventually removed and cast it separately as I wasn't sure how easily I would be able to mold it. I was afraid of there being a big undercut, but realise now I could have gotten away with it if I planned a bit better. Live and learn!

Sadly I can't find the images of me actually doing the bulk of the sculpting. Here's the main head after adding all of the detailing. I made some texture stamps for the head by sculpting the textures I was going for into several pieces of clay, adding a handle, then baking them off. These were then rolled across the piece to give the base texture, then I refined from there, adding ridges, potholes, etc. The obvious holes in the piece are where the tentacles will sit eventually

Here's all of the sculpted pieces together, getting ready to cast them. After casting, they were assembled with epoxy, mainly, and joints filled with Bondo

Close-up of the tentacles (albeit a bit blurry)


