You are using an out of date browser. It may not display this or other websites correctly.
You should upgrade or use an alternative browser.
You should upgrade or use an alternative browser.
Battlestar Galactica 2003 scratch build
- Thread starter gt350pony66
- Start date
gt350pony66
Master Member
Definitely, I don’t know what I was thinkingSeeing it here I think that is the right choice
OH that is sweet...Even with black primer it looks right. Besides that it will give some contrast to the cool white of the larger fiber of the spotlights
Keep it up.
I never used fiber, do you scrap it from other stuff or buy I bulk?
gt350pony66
Master Member
If you’re gonna use a lot buy rolls of it, it’s not expensive. I get all my LEDs, fiber optic and resistors from lighthouseleds.comOH that is sweet...
Keep it up.
I never used fiber, do you scrap it from other stuff or buy I bulk?
gt350pony66
Master Member
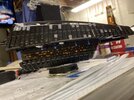
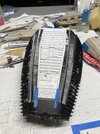
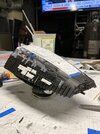
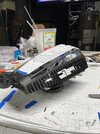
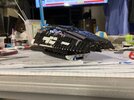
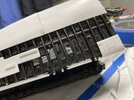
Except for the top, the head is assembled and lit
Attachments
gt350pony66
Master Member

stevielewis
Sr Member
It's really coming along nice. ")
gt350pony66
Master Member
Thanks Stevie, it’s way more work than I thought it would be. It’ll be a while before I attempt something like this againIt's really coming along nice.
gt350pony66
Master Member
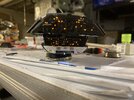
Thanks brother! I just hope it turns out like I hope, and the one’s behind each gun turret on the upper head. 1mm fiber for spotlights. It worked pretty good on the imperial walkers to illuminate the legs so I’m hoping it’ll work on this tooLove the lighting in the trench area
gt350pony66
Master Member
gt350pony66
Master Member
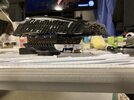
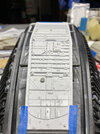
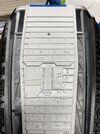
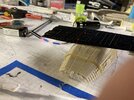
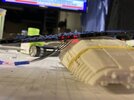
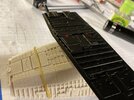
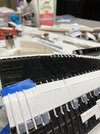
I’ve pretty much finished with the Mohawk panel though I haven’t glued it down yet. Need to check over everything inside before I stick it down and lose easy access. I stuck the side armor plates back on and have to redo the curved ones at the rear. Once the head is buttoned up I will start on the starboard flight pod supports and then the pod itself, leaving the port pod loose as a guide. Also, this weekend I plan to begin reviewing and experimenting with various paint processes. Id hate for all this to get fracked up because I fracked up the paint job
Attachments
Axlotl
Master Member
A little late to the party, I know, but what I would do is make all the interior lights warm (yellow), and exterior lights cool (white). It'll give a nice contrast, and help sell the illusion of scale.
It's really coming along great, man.
I'm really enjoying watching this build.
It's really coming along great, man.
I'm really enjoying watching this build.
gt350pony66
Master Member
Hey buddy it’s great to hear from you! That’s exactly the plan, great minds think a like and thank you! This has been a monumental task for me, but if I can pull this off hell I can scratch build anything LOLA little late to the party, I know, but what I would do is make all the interior lights warm (yellow), and exterior lights cool (white). It'll give a nice contrast, and help sell the illusion of scale.
It's really coming along great, man.
I'm really enjoying watching this build.
gt350pony66
Master Member
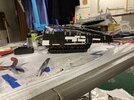
I think before I button up the top of the gator I’m going to remove that long plate towards the rear and stick a couple 1mm FO underneath it for some ambient light…and I don’t care who doesn’t like it lol
gt350pony66
Master Member
gt350pony66
Master Member
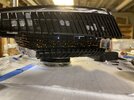
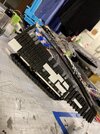
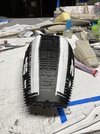
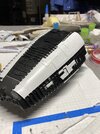
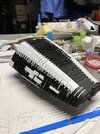
Kinda seems weird that I’m finally finishing up the head, it sat on the other side of the bench for nearly 3 months
Attachments
gt350pony66
Master Member
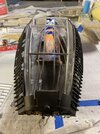
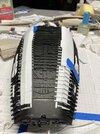
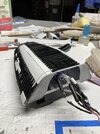
Getting the head buttoned up. There was some miscalculation of rib positions but once the armor plating is on you won’t see it
Attachments
-
 B2FA80AA-8704-411E-AEEB-E9FF0539472B.jpeg1.5 MB · Views: 98
 -
 2FDF1840-547E-4552-BF18-DB14954D7BC5.jpeg1.7 MB · Views: 106
 -
 9C2A927C-D9D8-4466-A8A7-F1DC610AC6FD.jpeg3 MB · Views: 99
 -
 BD13C4EA-C19D-4117-B9B9-7D23FCDEAA47.jpeg1.4 MB · Views: 96
 -
 BDE6BAE2-CEB1-41D9-BDF1-4B2F97A5FA8B.jpeg1.6 MB · Views: 93
 -
 2A365BBA-ED86-4664-859D-85A6AA11707D.jpeg1.5 MB · Views: 94
gt350pony66
Master Member

gt350pony66
Master Member
Scratch building is INCREDIBLY TIME CONSUMING!!!
Similar threads
- Replies
- 0
- Views
- 211
- Replies
- 4
- Views
- 835
- Replies
- 13
- Views
- 1,549
- Replies
- 10
- Views
- 1,942