Battle Damaged Rick and Morty Portal Gun

Friko

Well-Known Member
Hello,
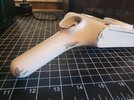
So, a few years back my friend gave me a 3rd printed Portal Gun with some electronics so it can light up and have audio. The 3rd print was un-finished, which is half the fun. I think it has sat around long enough...
While I appreciate the simplicity (extreme simplicity) of the cartoon Portal Gun, it certainly does lack something when translated into a physical prop. I have a problem where I can't have anything nice and clean and want to see what it would look like if it went through absolute hell. Considering Rick, albeit a genius, is also a very flawed alcoholic it's likely he would run out of luck. I wanted this Portal Gun to resemble the worst possible misadventure.
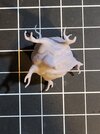
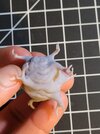
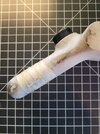
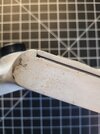
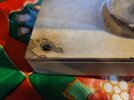
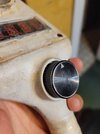
I really enjoy doing battle damage painting and started with that. I knew that it was going to be dangerous painting a white prop and it would be easy to go overboard. So, I said screw it and went heavy on it.
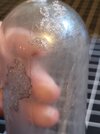
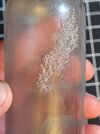
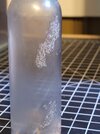
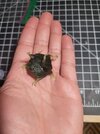
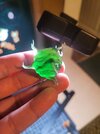
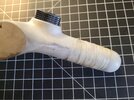
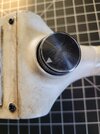
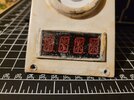
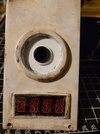
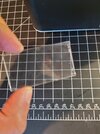
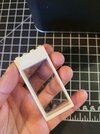
Here are some shots of what I have so far.
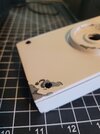
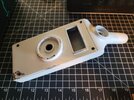
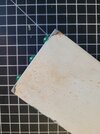
I 3rd printed a edge or lip or whatever to put around the display just to break up the long straight shape on top.
 

Attachments

  • 20220115_134727.jpg
    20220115_134727.jpg
    1.2 MB · Views: 127
  • 20220115_134738.jpg
    20220115_134738.jpg
    3.1 MB · Views: 145
  • 20220115_134714.jpg
    20220115_134714.jpg
    3.5 MB · Views: 119
  • 20220112_103044.jpg
    20220112_103044.jpg
    2.5 MB · Views: 118
I continued to add damage and distress to the paint job. I am considering adding some brilliant color later on, maybe some sort of vibrant alien blood spatter...idk
I attached the knob temporarily and scratched that up a bit too.
The handle is my least favorite part of this prop so I decided to add some mild texture to it. I wrapped it and kept it white so it didn't stand out more than it should.
 

Attachments

  • 20220118_111052.jpg
    20220118_111052.jpg
    1.4 MB · Views: 98
  • 20220118_110926.jpg
    20220118_110926.jpg
    1.4 MB · Views: 110
  • 20220118_111036.jpg
    20220118_111036.jpg
    3.1 MB · Views: 106
  • 20220118_110935.jpg
    20220118_110935.jpg
    1.6 MB · Views: 101
  • 20220118_111025.jpg
    20220118_111025.jpg
    1.2 MB · Views: 103
  • 20220115_162847.jpg
    20220115_162847.jpg
    3.7 MB · Views: 107
I've been working on the display, which is also just temporarily installed. I don't like that it's just bare and vulnerable. I was initially hoping to apply a red film over the display. However, this proved annoying to do if not impossible with the effort I wanted to apply to it. I tried using UV resin as a means of adhesion, but I quickly found out that the red film blocked out the UV light to cure it. So, then I tried clear nail polish, which I have used as an adhesive in other projects. Another failure.
However, my niece, unknowingly donated a Lego window piece that would be perfect for this part. With a bit of trimming it was a decent fit. I foolishly attempted to adhere the red film to it with 1st the UV resin, then the nail polish. Both failures again, however, upon removing the nail polish attempt it left a nasty texture that works perfectly for the look I'm going. So, happy accident on my end.
I'm calling the display finished at this point.
 

Attachments

  • 20220116_175620.jpg
    20220116_175620.jpg
    3.5 MB · Views: 105
  • 20220116_175614.jpg
    20220116_175614.jpg
    1.6 MB · Views: 115
  • 20220116_104621.jpg
    20220116_104621.jpg
    1.5 MB · Views: 129
  • 20220116_202254.jpg
    20220116_202254.jpg
    1.2 MB · Views: 96
  • 20220116_104606.jpg
    20220116_104606.jpg
    1.5 MB · Views: 104
I found some tubes that fit perfectly. They are from a kids test tube science kit thing, nice durable plastic. I can't recall what I used to remove the measurements from the inside of the tube. It was probably Naptha before it got banned in Ca.
I believe the hardest part will be the little green energy ganglion thing inside the tube. I made a quick and dirty model in Blender and did a test print. It fits in pretty snug. And by that I mean, i had to snap off some of the tips to squeeze it in. I ordered some translucent green resin to print the final piece.
 

Attachments

  • 20220120_203947.jpg
    20220120_203947.jpg
    1.7 MB · Views: 90
  • 20220120_204022.jpg
    20220120_204022.jpg
    1.1 MB · Views: 90
  • 20220120_204015.jpg
    20220120_204015.jpg
    1 MB · Views: 83
  • 20220120_204050.jpg
    20220120_204050.jpg
    997.9 KB · Views: 99
I wanted to add some texture to the tube part. I wish I could crack it and maintain it's integrity. But since I am not sure how to go about that I thought I'd try a technique that I've been meaning to test out for a long time now. If you put superglue on plastic and hit it with a small spray of water it will kind of blister and flake. It creates a really nice and nasty texture. I did a few tests on one of the tubes I had. I'm cutting down the final one and will add this texture to it when I decide where to place it.
 

Attachments

  • 20220121_175801.jpg
    20220121_175801.jpg
    941.9 KB · Views: 89
  • 20220121_175655.jpg
    20220121_175655.jpg
    956.8 KB · Views: 96
  • 20220121_175748.jpg
    20220121_175748.jpg
    1 MB · Views: 91
  • 20220121_175723.jpg
    20220121_175723.jpg
    990 KB · Views: 102
So, the translucent green resin came in and I printed 2 tests tonight. Unfortunately it's pretty dark in the center. It takes a considerably bright light to illuminate it. I'm concerned the single led will not be bright enough. Still have to work on the final tube. I'm tempted to fill it with some fluid or perhaps fill it solid with clear resin. I'll have to do some tests to see how the light reacts with it.
 

Attachments

  • 20220126_215307.jpg
    20220126_215307.jpg
    1.8 MB · Views: 106
  • 20220126_215326.jpg
    20220126_215326.jpg
    1.1 MB · Views: 96
  • 20220126_215256.jpg
    20220126_215256.jpg
    1.5 MB · Views: 96

Your message may be considered spam for the following reasons:

If you wish to reply despite these issues, check the box below before replying.
Be aware that malicious compliance may result in more severe penalties.
Back
Top