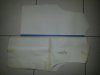
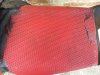
What will you do for the grey in between the crevaces?
You are using an out of date browser. It may not display this or other websites correctly.
You should upgrade or use an alternative browser.
You should upgrade or use an alternative browser.
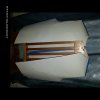
Back To The Future Part 2. 2015 Jacket WIP
- Thread starter cavx
- Start date
Does this help?
cavx
Master Member
What will you do for the grey in between the crevaces?
Awesome. Thanks for that. By the look of my sample and these images, I would need to turn the sample 90 degrees.
As for the dark parts, I can run a layer of red first, let that set then go over it with grey.
LorduDesign
Sr Member
Nice! 
cavx
Master Member
Nice!
Yes that is what I said when I saw the full sheet had been cut in two for me
VilleLeskinen
Sr Member
Looking forward to more progress! :thumbsup
cavx
Master Member
Man, I just got really lucky and found a 2' x 4' sheet of this stuff for $12. I have to call up my local casting supply place and figure out which silicone I need to buy to pull this off.
My sheets are 4' x 4' and the original sheet was 8' x 4'. Do you have enough in the right direction? It appears that there is a certain way this needs to be rotated. I also have a vacuum chamber to degass the silicone.
The screen used jacket used latex, not silicone. The reason I am using silicone is because I think that in 2015, there are better materials available now then there were in back 1989 and I do think that just because it was done one way does now make it the way it should be done now. Having used both, I prefer the silicone.
Eevn though I did wall my tests, free forming and self leveling makes this stuff to be about 2mm, so slightly under 1/8th of an inch. You can get really clean lines cutting it with scissors.
Looking forward to more progress! :thumbsup
I will be able to update my progress soon with cloth impregnated rubber. Rubber alone can tear, so here is hoping the cloth prevents that and makes it strong.
cavx
Master Member
Just picked up 2m of "Shapeform" K685 which is a stiffener for sewing between layers of fabric. This should work well as it is strong, yet still has an open weave. The silicone should bite into this nicely.
I would run test #3 on this right now except it is well into the 30s right now and they stuff will kick before I even finish the degas. I will have to wait until tonight when it is cooler.
I would run test #3 on this right now except it is well into the 30s right now and they stuff will kick before I even finish the degas. I will have to wait until tonight when it is cooler.
cavx
Master Member
Test #3 is up and running now.
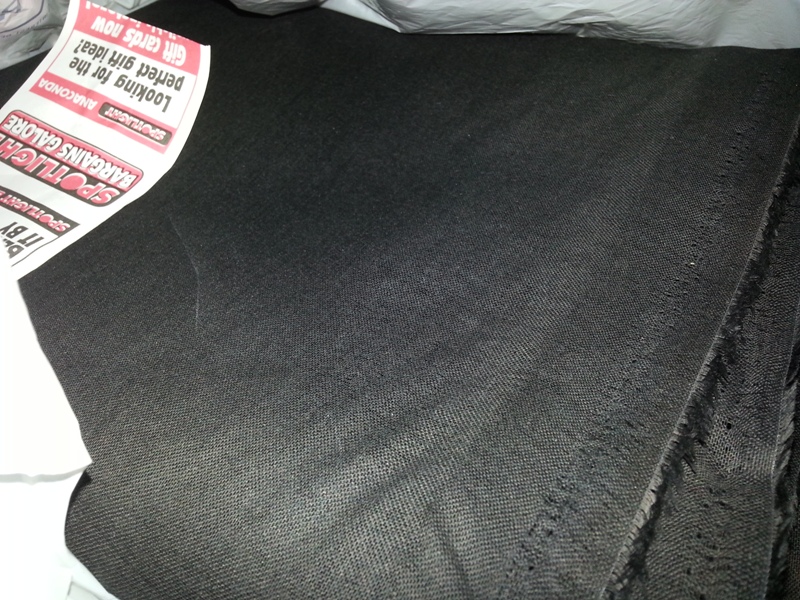
The black cloth.
Whilst waiting for the temp to drop a bit, I made a new pattern. You can see the first version is longer and has a much larger arm hole. This was done because the PVC mat I was using is not very flexible and I had to do that in order to prevent it cutting into me. The silicone is much more flexible and softer so all the issue with the PVC won't be of concern this time round.
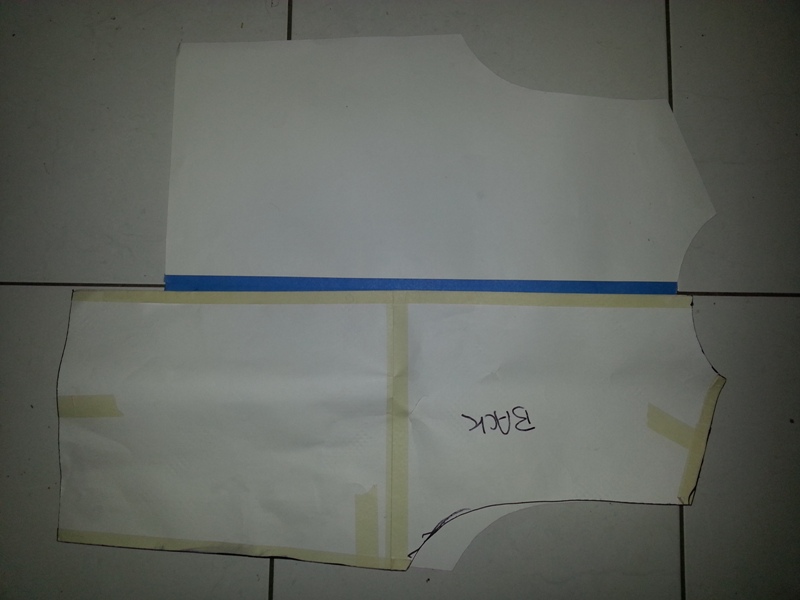

I also now have more chest area so I can have correct sized pockets and have them in the correct place.
Test #3

I am doing this in two lots. On the right I poured some rubber first, then laid the cloth and then poured more rubber. On the left I have laid the cloth first and poured the rubber hoping it will soak through and give me a pattern. I will know in a few hours which method and which does not.
The black cloth.
Whilst waiting for the temp to drop a bit, I made a new pattern. You can see the first version is longer and has a much larger arm hole. This was done because the PVC mat I was using is not very flexible and I had to do that in order to prevent it cutting into me. The silicone is much more flexible and softer so all the issue with the PVC won't be of concern this time round.
I also now have more chest area so I can have correct sized pockets and have them in the correct place.
Test #3
I am doing this in two lots. On the right I poured some rubber first, then laid the cloth and then poured more rubber. On the left I have laid the cloth first and poured the rubber hoping it will soak through and give me a pattern. I will know in a few hours which method and which does not.
Attachments

cavx
Master Member
What will you do for the grey in between the crevaces?
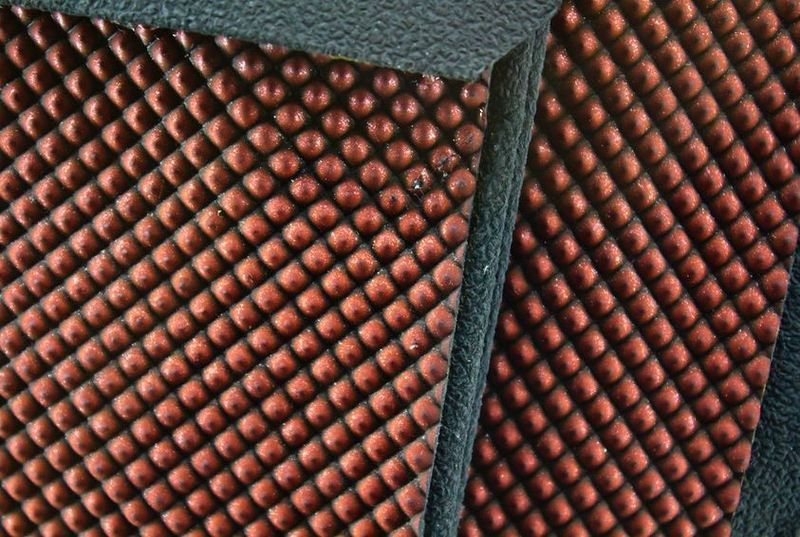
Check this out!
Notice the centre of these sample now has black between the bulbs. It seems that either method above works though I would pro and
And a close up.
This is showing real promise. Lets see tomorrow if I can not make this work on a larger scale.
There actually a few real positives that came out of this -
1. The rubber bonds to the cloth.
2. The black shows through the rubber replicating the look of the screen used jacket.
3. The areas around the pattern are smooth rubber impregnated meaning I can do the bellow sleeves as well with rubber as soon as I source a dark grey pigment.
4. The whole thing is still very flexible, yet much stronger thanks to the cloth.
Attachments
Last edited:
cavx
Master Member
Not 100% yet. I think I need to layer and screed silicone into the bubbles and let them set first. Then layer the cloth and a more silicone (probably black). The idea of impregnating cloth into the silicone is great. The sheets are strong and flexible.

This project is going to need a heap of silicone. Way more than I initially thought.
This project is going to need a heap of silicone. Way more than I initially thought.
Attachments
cavx
Master Member
Great, i love the progress of this .
Thanks
What is your take on the actual colour? I say red, but a darker red where I will probably have to mix black into the red. Some are saying closer to maroon. His tee-shirt is maroon.Contec
Master Member
Thanks
Color is not my good side, I'm a little colorblind so especially Red colors and shades of colors ****s it up for me... So i am not any good help,
But i think it should be a little darker red, I believe the jacket is supposed to be a future version of the a Varsity Jacket

cavx
Master Member
Color is not my good side, I'm a little colorblind so especially Red colors and shades of colors ****s it up for me... So i am not any good help,
But i think it should be a little darker red, I believe the jacket is supposed to be a future version of the a Varsity Jacket
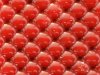
That was my take on this too. I watched the future scene again tonight and even imported a screen cap into Paint to sample the RGB levels. R is close to 128 which kind of makes it look darkish red and not the crimson look of red at 255.
In this test, I dropped the level of red to 191 (255 x 0.75) and it looks better, so I think mixing 3 parts red to 1 part black should be pretty good.
Attachments
cavx
Master Member
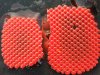
I ended up buying a full 8' x 4' sheet of Y12 Light diffuser a few weeks back and today I made my molds for my future 2015 jacket.

I had made a new pattern based on the fact that the silicone I will be using is much more flexible than the PVC pyramid mat I had been using.
So once I worked out which way to lay it down, I traced my paper pattern onto the back of the light diffuser and cut it out. I then used Weldon#3 to fuse the pattern pieces to some 3mm Perspex I had in my stash.
What this will allow me to do is lay down the first layer in red and use a squeegee to remove the excess, but also know where my edges are. I then let that cure.
Once dry, I then lay black cloth over the red and pour black silicone down to form a bond between the cured silicone, the cloth and the new silicone. Because silicone only sticks to itself, I should be able to pull up the parts by the excess cloth and this should lift out as a now "molded sheet". The sheets should nice clean edges due to the mold.
I also made a "pockets" mold as well.
Stay tuned for more.
Attachments
Last edited:
VilleLeskinen
Sr Member
That looks really good! :thumbsup
cavx
Master Member
That looks really good! :thumbsup
Thanks. I am curious to know how this works out as well. I probably won't get any silicone until mid next week. I have the cloth already and chose a much stronger version than the stuff i did my initial experiments on. That stuff ripped quite easily and the silicone tore with it. This new cloth is a polyester cotton, and very tough. I could not rip it in store.
Similar threads
- Replies
- 34
- Views
- 2,224
- Replies
- 13
- Views
- 2,918
- Replies
- 10
- Views
- 1,584
- Replies
- 5
- Views
- 827