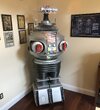
B9 Robot from Lost In Space

animator

Sr Member
This is a project I have wanted to do for over a decade, well really since the early 1970's. I am making some parts, 3D printing some and buying others... this will take a while and there are lots of new skills I will need to learn along the way. My goal is a reasonably animatronic full-scale robot, close to accurate, but slightly idealized.

The B9 Builders Club is an amazing resource, and the club members have been very helpful with suggestions and details. Here is this thread's title video...

 
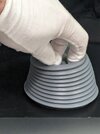
I made a few slight design changes to how the arm bellows connects with the torso, then printed this master I will mold to cast silicone arms. I'm going to try and figure out a way to do a glove mold but may end up with a three-part epoxy/ fiberglass mold.

ArmBellowsMaster.jpg
 
I again slightly tweaked the design, this time of the Brain Cup. I had always loved the Jupiter's Fusion Core lights, so I added that sort of detail to the brain cup. I also distressed the paint slightly and added heat color to the ends of the finger lights where the bulbs will go. This is 3D printed from a model I built on a Bambu P1S with PAHT_CF filament. The finger light will move up and down like the original robot. This was also my first experience with Allclad 2 paint which has been its own expensive learning curve.

I know a lot of people strive for exactly recreating a prop as it existed, but I want a robot that is how I imaged him when I was watching on the small crappy TV we had in the 1970's.

PXL_20240619_232316189.jpg


PXL_20240619_225452901.jpg
PXL_20240619_225550909.jpg
 
It's an ambitious project, but you're well on your way it seems. I couldn't handle the build and acquired from a B9 club member. Be sure to get the audio files of robot dialogue which really makes the robot come alive! Best of luck!
 

Attachments

  • IMG_6365.jpeg
    IMG_6365.jpeg
    1.3 MB · Views: 27
Looks great! I like having the blueprint hanging behind him, too! I may never get mine that far done.
 
I've been 3D printing little tools to help make things easier.

The rods for the finger lights are 1/4 inch brass tubing. I printed this jig to help drill the connection hole in the correct position.

FIngerRodJig.jpg


I also printed a rack with handy tabs to spin each item for holding the finger rods while I was painting them.

FIngerRods_Stand.jpg

FIngerRods.jpg
 
The rubber arms and neck bellows were my favorite parts of the robot when I was a kid. I was fascinated by the way they moved. I am paying special attention to these and am trying to produce them myself.

I started with the neck bellows. I created a model in 3D based on the B9 Club specifications and printed a master. I molded the master in silicone to create a glove mold so I wouldn't have a seam, then I printed a couple different cores until I got a decent part thickness. These are cast in Ecoflex 00-45 Near Clear silicone and have embedded power mesh so there isn't a risk of the thin silicone tearing. I also created 3D printed inner ribs to help hold the shape (although it doesn't really need them) and a mounting plate to hold them in place on the robot. I cast them in various shades for the different versions of the robots by season and I lightly paint them with metallic flake just because I think it has a bit of a 60's vib and goes well with the other robot parts.
PXL_20240420_012936315.jpg

PXL_20240420_013944871.jpg

PXL_20240313_232236679.jpg


I am also making some special ones to eventually be able to decorate the robot for the holidays. This is the evergreen Christmas bellows. Might add lighting try and do candy cane red and white striped arms to pair with this.
PXL_20241004_011551918.jpg
 

Attachments

  • PXL_20240313_232221328.jpg
    PXL_20240313_232221328.jpg
    1.5 MB · Views: 6
I purchased a fiberglass V2 torso.

TorsoFtA.jpg


It came with some damage and the areas where sections were put together tend to not have been backed by anything and the gelcoat cracks and fails, so it is requiring a lot of fixing. I had open and fill the entire lower ring with fiberglass bondo. I have also reinforced the seams on the interior with additional fiberglass.

PXL_20240629_001144491.jpg


TorsoBkA.jpg


FIlledLowerRing.jpg


It's really lucky there are people producing these rare parts. I could never have built this myself. The quality issues has been a difficult challenge for me though, as I don't have experience fixing fiberglass.
 
I purchased B9's bubble as well. Again, such a specialized rare part! Thankfully someone still produces in limited runs. I am terrified of scratching or breaking this! I purchased a special container to store it in while I build the robot.

Bubble.jpg
 
I'm new to this whole fiberglass thing, but this is a tool tip for cutting the arm holes. I purchased a cheap hole saw on Amazon that made quick work of a potentially difficult cut. Here is a video showing the process.

 
Back
Top