Arkham Knight by Burt

Burt

New Member
Hi there!

I wanted to start my Arkham Knight Build thread.

Goals: I want a more comfortable costume compared to some of my previous costumes, yet also be close to game accurate with some custom variation.
I want something I can easily wear to a convention solo, move around, sit, handle my phone/money/keys and not be hindered by a costume. We will see how well I can accomplish this :)

Game accuracy is a goal, but with a twist. I don't particularly like the color variation of the in game images. People think you're some kind of Captain America (because of the white 'A' on the chest). I'll keep the blue, grays and blacks, but throwing out the red and possibly white. I want a more 'stealth' look to this character.

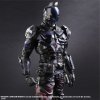
oLpOunf.png xsNFwTk.jpg

First, I'm starting with the helmet.

BIm3hO2.png

This is a game rip of the Arkham knight model that I found in a facebook group I'm in. This is originally what drew me in to the character. I love this helmet design.
I spent several days editing this file for 3D printing. It was really difficult to fix, but I was able to accomplish it relatively well.

I've shared this model on Thingiverse if you'd like one yourself: http://www.thingiverse.com/thing:1773465
Its scaled for an exact 22" head. If you've got big ears or your head is even a smidge larger, you'll want to resize this. This fits my head like a glove.

DzTVEgp.jpg

I'm printing the last piece now, it has a few hours left, then the real work begins!
 
pV9iimm.jpg

The first step to finishing a 3D printed prop is to fill the seams with Apoxie sculpt. In the case with this print, there was a pretty big gap between the gray eyes and the top black part. I need to fill that with Apoxie Sculpt, as well as fill every seam and gap. Apoxie sculpt also doubles as being epoxy, so its strengthens the bond between each piece.


owOzLLF.jpg

Once the Apoxie Sculpt dries, then I spray on a pretty thick layer of filler primer. I want to fill in print lines and give it a really good coat to sand back.

MoQLe38.jpg YsJJxPk.jpg

Then sand. I use a low grit sand paper to really knock back what I put on.

5xL6qXr.jpg 0gYhF0A.jpg
 
Last edited:
Looks great man! How is your visibility in this?


Thank you so much! Vision isn't too bad! I was worried with the lights it would really hinder it, but it just tints vision a bit blue is all.

EvBCAR9.jpg

Here's a pic from inside. My camera kept trying to focus on the netting, but as you can see, vision is pretty good. its not blurry at all, thats just my camera.

All I did was cut out a piece of clear acrylic, and stick a blue LED on the top corners with hot glue. Then used some fishnet leggings that I cut to hide my eyes even more.


I still need to figure out power for a fan. I have a 5v fan but Im not sure how to wire it to last for a couple of hours. I'm trying to keep it small and lightweight.
 
Hello again!

I was up late and wanted to play around with a test fit.

j1QmYbZ.jpg vad9lRF.jpg

This is just the helmet, belts, and basic chest without armor added (Shoulders, Center Chest, and back piece). This is just some basic motorcycle armor, Halloween bullet belt, and a few other knick knacks I had. (The wrists are real short on this since I use this for my halo armor too. I cut off the ends so I can fit it in my gauntlets, this will work perfect for the Arkham Knight gauntlets too.)


I had the idea of doing a 'Knightmare Arkham Knight'. I have a cool leather duster I found at a thrift store and thought it would work well.

0f3QQje.jpg FFGhc53.jpg GFcD7l1.jpg 4LAJcaG.jpg

I really like this look. Paired with a few more things this would be a really neat extra costume. The gun is a freshly printed Hawkmoon from Destiny, I plan to have one of these, and a Last Word on my belt hidden under the coat, just for looks (and ridiculousness! they are massive guns haha!). I plan to do the true Arkham Knight guns too, but these are my placeholders for now hehe.
 
Last edited:
Back with a small update!

w1PHcd5.jpg

The gun is printed and turned out great. Now to finish it. Shouldn't take but a few days, if that. Really clean print so there isn't' too much to do :D

NW2tWme.jpg

Chest is also printed. I had to edit this quite a bit to get the proportions right for me.

ugvQvn5.jpg

On the right side you can see these ripples. I'm very lucky this print didn't fail. Both sides of this are way too thin, and I should have made them thicker (second time trying to print these). Luckily I had a trick up my sleeve and my printers still could print this super thin, tall print. (put a dab of super glue on the edge of the raft and the print. Makes it stick if there's a high chance of your nozzle knocking a print over.. IE prints too tall and too thin!)

Luckily this is also a super easy fix and I'm not worried! Just glad its printed and fits!

4bqJCaG.jpg

Shoulders are printed as well, very easy print and they look awesome. Another easy piece to finish.

PtblHxr.jpg

My pal Bucky here is modeling for me. He's a bit bigger than me, but he still does a good job. Proportions are right on.

Gauntlets are being printed as I type this.


-------------------------------------------------------

This utility belt is on the way

And I finally chose a pair of pants, here on amazon
They look really good, but they are a bit big on me (they are mens unfortunately.) I plan to get them altered to fit me better. But the pattern is stellar for what I'm aiming for.


Thanks for checking this out guys! I hope everything is going awesome for you all and that your Halloween costumes are going swell!
 
This thread is more than 7 years old.

Your message may be considered spam for the following reasons:

  1. This thread hasn't been active in some time. A new post in this thread might not contribute constructively to this discussion after so long.
If you wish to reply despite these issues, check the box below before replying.
Be aware that malicious compliance may result in more severe penalties.
Back
Top