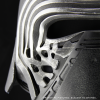
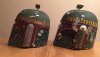
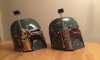
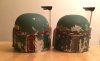
You know, the more I think about it, the more I don't think it's going to even be necessary to fiberglass around the holes of the cheek areas. I might drizzle some resin or something behind them to give them a bit more rigidity, but I'm not going to sweat it.Matt, perhaps trim the sign material from the inside as close as your comfort level to the lip of the original material, clearing out space for you to open the cheek holes? Does the area around the cheeks require structural backing of fiberglass for structure or something? I'm new at reenforcing helmets (I'm an EVA foam guy) so I'm not sure.
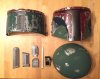
Now I think I'll go mix up some bondo, fill in the preexisting holes on the right cheek, sand smooth, draw out where the new holes should be, then dremel away. :cool