grantedwards40
New Member
Anvos is looking to be a great armor choice the problem with me is that I need the $$$
Word to the wise for those assembling Anovos Armor:
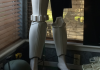
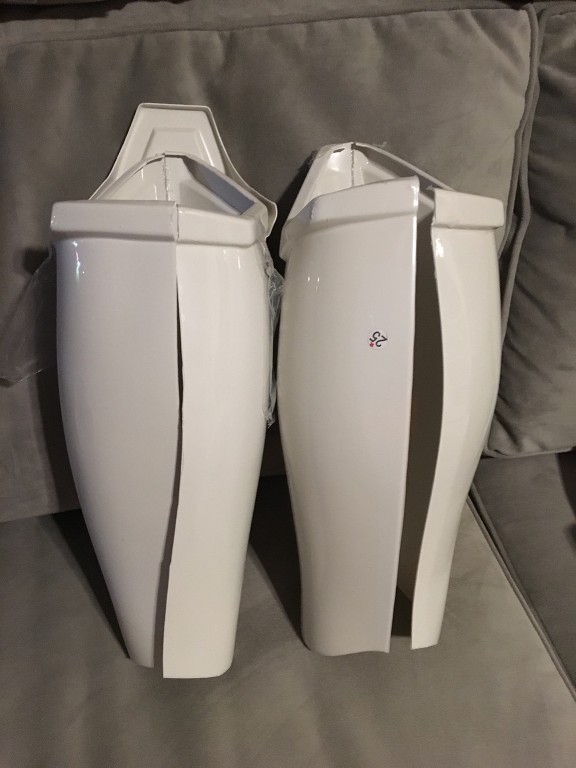
Anovos screwed up the instructions (or the part labeling, it's not clear which) for the shin armor.
The numbers they have listed in the instructions as pairing together are NOT correct, resulting in two outside pieces and two inside pieces going together, rather than matched outside and inside pieces. The result is a large disparity in the left and right pieces, once assembled, along these lines:
http://imagizer.imageshack.us/v2/1024x768q90/921/Fl706y.jpg
The fix is to simply swap two halves, then the size disparity between the two legs is much more normal (and the sniper knee fits better, too).
Confirmed by senior 501st armorers here: http://www.whitearmor.net/forum/topic/35086-ukswraths-anovos-tk-build/?p=469243


 t
tPart 19 has two cut lines on one side. Did you use the one that makes the forearm smaller?
This is the link for accurate brow and s trim, brow should be 1.5 cm or 15mm http://www.sealsdirect.co.uk/listDepartments.asp?intSiteAreaId=1
I got in my recommended utility knife that the instructions said you should use, but the plastic is so tough, that is clearly not going to cut it. literally. I wasthinking of dremel...but even on low speed i'm afraid of that...anything else?