Aliens Shoulder Lamp - Found Part and 3d Print

dproc

Active Member
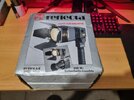
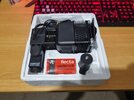
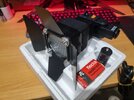
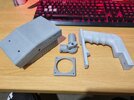
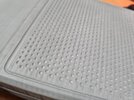
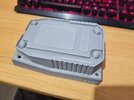
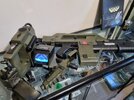
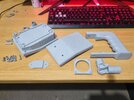
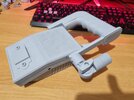
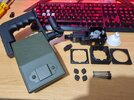
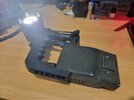
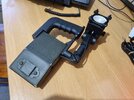
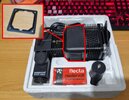
Inspired to add to my Aliens paraphernalia. Whilst researching I lucked upon a near new Reflecta 3002 light. I never find 'found parts' (added difficulty in Australia) so was thrilled to find the real McCoy! No chance of any of the other real parts so ill 3D print those as I go. Even my entry FDM does a great job on the details, I think. Work in progress but coming along nicely. Just thrilled about the Reflecta. Will follow up later.
 

Attachments

  • 20231224_211839.jpg
    20231224_211839.jpg
    181.8 KB · Views: 311
  • 20231224_211919.jpg
    20231224_211919.jpg
    174.4 KB · Views: 205
  • 20231224_212022.jpg
    20231224_212022.jpg
    178.7 KB · Views: 191
  • 20231224_212154.jpg
    20231224_212154.jpg
    153.3 KB · Views: 168
  • 20231224_212233.jpg
    20231224_212233.jpg
    134.4 KB · Views: 170
  • 20231224_213846.jpg
    20231224_213846.jpg
    138.4 KB · Views: 198
  • 20231202_185654.jpg
    20231202_185654.jpg
    177.9 KB · Views: 235
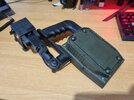
Update... Made the aluminium mounting clip and cut the extra heat vent panel from the back of old bulb housing as you are supposed to do. I'm making a better bulb holder. Undercoated and painted the main parts. Test fit now and will then wire up and weather shortly.
 

Attachments

  • Untitled-1.jpg
    Untitled-1.jpg
    1.6 MB · Views: 171
  • 20231225_161454.jpg
    20231225_161454.jpg
    399.5 KB · Views: 113
  • 20231225_161928.jpg
    20231225_161928.jpg
    402 KB · Views: 118
  • 20231226_184746.jpg
    20231226_184746.jpg
    444.1 KB · Views: 136
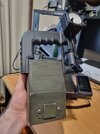
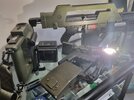
and done!... Did the wiring. I made the blue / brown wires just exposed too. As per an original one. Working with a found item was a real mini insight into the mind of the original builders. Something I hadn't had before and was a real joy! I could just imagine chopping these things up and banging them out for production. Plus 80's stuff was built like a tank! I forgot how it was actually meant to last. I made an 8x AA battery holder (who has these laying around?) and screwed it all together. Did some weathering to match my other Aliens stuff and all done!
 

Attachments

  • a.jpg
    a.jpg
    105.9 KB · Views: 137
  • b.jpg
    b.jpg
    419.2 KB · Views: 118
  • c.jpg
    c.jpg
    401.9 KB · Views: 133
  • d.jpg
    d.jpg
    388.5 KB · Views: 138
  • e.jpg
    e.jpg
    431.5 KB · Views: 122
I spent way more than I should on the lamp or I would investigate these :) Bookmarked however! I've been looking for other items too... there should be a thread for always available items. Other than junkyard and project runs. Though there is some legality of it being a "shop" I gather? I'm just bad at searching through forums.
 
From memory, these are like sub $20 bits, but yup, fully understand re "budget overruns" :D

Re parts list, yes, that would be great, but it would suffer for stale/dead links over time.
 
Update... Made the aluminium mounting clip and cut the extra heat vent panel from the back of old bulb housing as you are supposed to do. I'm making a better bulb holder. Undercoated and painted the main parts. Test fit now and will then wire up and weather shortly.
Great project and I'm doing the same. I've got the shoulder lamp kit from Chef's Creations and a real Reflecta 3002. Could you expand on what this means: "cut the extra heat vent panel from the back of old bulb housing as you are supposed to do". Couldn't quite figure it out. Thanks !
 
Great project and I'm doing the same. I've got the shoulder lamp kit from Chef's Creations and a real Reflecta 3002. Could you expand on what this means: "cut the extra heat vent panel from the back of old bulb housing as you are supposed to do". Couldn't quite figure it out. Thanks !
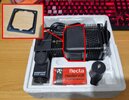
Glad you are having fun! It's a fun build. Reference the photo... the extra panel (in the red box) is cut from the back of the black metal box part (other red outline). I used a hacksaw to rough cut it off, then tin snips to trim closer and then carefully filed rough edges. Its tricky so go slow so as to not bend it or cut off too much. Scribing a line around it can help. Cheers!
 

Attachments

  • Untitled-1.jpg
    Untitled-1.jpg
    1.6 MB · Views: 28
Glad you are having fun! It's a fun build. Reference the photo... the extra panel (in the red box) is cut from the back of the black metal box part (other red outline). I used a hacksaw to rough cut it off, then tin snips to trim closer and then carefully filed rough edges. Its tricky so go slow so as to not bend it or cut off too much. Scribing a line around it can help. Cheers!
Thanks very much for that. Got it !
 
Back
Top