I cut down a 2-liter soda bottle to use as a testbed for water-curing resin prints. According to my research, you should be able to more efficiently cure your resin prints with water. I cut the curing time down by about 34% and the parts seemed to cure just fine:

You are using an out of date browser. It may not display this or other websites correctly.
You should upgrade or use an alternative browser.
You should upgrade or use an alternative browser.
Adventures in 3D printing (Large scale IG-11 with lights, tips and tricks)
- Thread starter skahtul
- Start date
Now that I have two saber hilts, it's time to paint!

Here I am putting down a black gloss coat before throwing on some AK duralumin paint. The metallics from AK have worked really well for me. They seem to hold up over time and might be replacing the Alclad paints I normally use.

Here I am putting down a black gloss coat before throwing on some AK duralumin paint. The metallics from AK have worked really well for me. They seem to hold up over time and might be replacing the Alclad paints I normally use.
teslabe
Sr Member
I've not heard of "water-curing" resin, can you describe it and where you get it from, thanks.I cut down a 2-liter soda bottle to use as a testbed for water-curing resin prints. According to my research, you should be able to more efficiently cure your resin prints with water. I cut the curing time down by about 34% and the parts seemed to cure just fine:
View attachment 1534507
teslabe
Sr Member
these turned out great, nice paint and finish.....I have reviewed a lot of different images for Legolas's fighting knives. I have seen everything from a wood grain to ivory white, however as I am making him a set of sabers I decided to just do my own thing
View attachment 1534510
View attachment 1534511
View attachment 1534512
")
I've not heard of "water-curing" resin, can you describe it and where you get it from, thanks.
Well, it's not really a special resin, it should work with any type. What I am really describing is that the curing process is aided by submerging the print into water. It's something that I came across when I started using the higher strength resins from Siraya Tech. They normally take 15 or so minutes to fully cure. If you submerge the part in water and then UV cure it, it's supposed to be much more efficient.
I am not sure if it really helps but I can say that it works and it does take less time. Also, because some of the tougher resins take so long to cure, they can get warm. I normally cure it for about 5 minutes at a time as the full 15 minutes in the curing station does heat the print up a bit.
In some of my research, I have read that curing the print in water might help to ensure the print is 100% cured which helps cut down the chances of having your print feel sticky from not being fully cured.
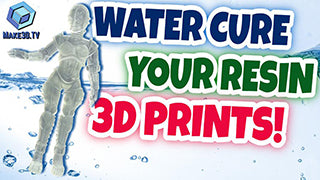
Water Curing: It's the Best Way to Cure Your Resin 3D Prints
Information about post-curing 3D resin prints in water.
Okay, I am back on the IG-11 build. Everything is primed and has a base coat of black primer a layer of gloss from Alclad. I am not doing a full chrome paint job here so I am not looking for a mirror finish. I have always thought IG was more of a steel color, so that is what I am going with. I will give some parts a dusting of chrome to brighten it up in some areas.


I order these small ball bearings from Amazon, they are great for dropping into your paint to help the mixing process.

I order these small ball bearings from Amazon, they are great for dropping into your paint to help the mixing process.
This project was on hold for a while since I just can't seem to figure out how to power the LED in his head for the fiber optics. I tried a bunch of different ways to make it self-contained and while 2 AAA's would fit, I could not find or make a holder small enough to fit through the neck. I had also thought about snaking the wires down his back and one of his legs and then just putting it all in the base.
At the end of the day, I had ordered these mini Dean's connectors so I am just going to hide the connector in the back, and then when I want to power him up, I can plug it into a normal battery holder.
I like lighting up models but honestly, after I take a few pictures I hardly actually turn the lights on. Over the years I have thought about making some kind of rig to control all the lights on my kits so that when they are in the display cabinets or shelves, I can centrally turn on the lights all at once. Maybe someday.
For this paint job, I decided to try something I saw John Simmons use when he painted his razor crest. Instead of just one overall metallic paint, I used three. I started with Stainless Steel, then hit a few spots with Polished Aluminum, and finally, I put down a few layers of chrome in select areas. I really like the tonal differences, especially for this kind of build.

Also, even though this kit has been fun and it suffers from some inaccuracies, to say the least, I just can't get past how bad the legs are... So, I need to come up with a new name for it
Also, even though this kit has been fun and it suffers from some inaccuracies, to say the least, I just can't get past how bad the legs are... So, I need to come up with a new name for it
beautiful...but can he ride a speeder bike to rescue the cutest star wars character ever?
beautiful...but can he ride a speeder bike to rescue the cutest star wars character ever?
I built that one a while ago

Last edited:
Quick question for any of you out there working with chrome or metallic paints. One of my favorite paints that seems to really hold up to handling (i.e. fingerprints) is AK Interactive's line of Extreme Metal's, specifically Durlliam. I am not a huge fan of chrome paints as they can be really finicky about surface prep and handling. I also spray a lot of Alcald and have I have always had pretty good luck and it's my other go-to.
I also have a really hard time with Gloss Black paint, I just can't stand it... Even out of a spray can my skills are just not up to the task of getting a really nice even coat, it almost always comes out 'blotchy'.
This is why, as in the IG I am building here I went with a flat black primer and then did the gloss coat over the top. You do not end up with that mirror black shine, but it's good enough for most metal paint jobs.
Now, I do get better results out of a spray can but I also find that many gloss paints take forever, like a week plus to really become fully cured. The reason I ask is that the paint is coming off the saber after very light handling. Now, it's not a big deal at all and this thing still needs a weathering pass and really the paint coming off is adding some character so I am not going to 'fix' it. I only ask as I have a few Razer Crest builds in the works and I am really trying to dial in my metallic paints.
The basecoat for the saber was Tamiya primer and then Tamiya Black (rattle can) followed by the AK Xtreme Metal.
My current theory is that the two paints are just not compatible but open to any other thoughts, thanks!!
As a side note, the process I used on my IG with the black primer followed by the gloss and then the Alclads is bulletproof, probably the most durable metallic I have put down to date.
I am printing a few test items now just to repeat the process and see what I get.
How long did you let the black cure before doing the silver?
Not as long as I normally would, less than a day. If I remember right, I put down the black in the AM and then put down the metallic later in the evening. I winder if that was really the issue.How long did you let the black cure before doing the silver?
I can understand the frustration about metallic paint. I'm always using Molotow chrome pens. I can dilute it with paint thinner and brush it on the surface. I experimented with a mat black paint + chrome and chrome only: no diff in terms of look.
Good to hear about gloss vs. mat. I am going to try that very thing on a few test prints and see what results I get. Thanks!
The only time I've ever had an issue like this is when I get a little too excited and don't let the base layer of paint cure fully. I'll have to check out those AK paints. Always on the lookout for something new.Not as long as I normally would, less than a day. If I remember right, I put down the black in the AM and then put down the metallic later in the evening. I winder if that was really the issue.
SB
The only time I've ever had an issue like this is when I get a little too excited and don't let the base layer of paint cure fully. I'll have to check out those AK paints. Always on the lookout for something new.
SB
I have some more parts printing now to do some more testing. I also ordered AK's black base coat and its actually a satin instead of a gloss so I am looking forward to that. The satin should be easier to put down than the gloss.
Similar threads
- Replies
- 14
- Views
- 1,492
- Replies
- 4
- Views
- 791