A new Chewie in Germany

So, my new Wookee feet are done. I've followed AS's example more closely this time. So I didn't take another mount/binding for the snowboard boots.
I first glued the boots to the foot with hot glue. Then fill in the gaps.
Then everything was neatly glued with duct tape. The foot also has less weight. About 1 kg less than the previous model. And it's comfortable too. Walking is great too
img_20220808_140344lgff6.jpg

img_20220808_14144966iop.jpg

img_20220808_142951nzczw.jpg

img_20220808_1515369gcor.jpg

img_20220808_1546091bd0j.jpg

img_20220809_105904j6egw.jpg

img_20220809_113940gucgp.jpg

img_20220810_105458amft1.jpg
 
As a small additional idea, I built myself a walking stick. The forest gave me a good one. After a good amount of rasping and grinding, the helmet could be processed. A fallen trooper must serve for it. :) An idea from the forum and based on a scene, I think Clone Wars. Or rebels?
First demolished the helmet a bit and then put it on the skewer. I don't think it turned out that bad.

Sorry troopers. :)

img_20220817_1214124edpb.jpg


img_20220817_123241nzdxa.jpg


img_20220817_1232461qetd.jpg


img_20220817_132442elcix.jpg


img_20220817_120231jhfw5.jpg


img_20220817_120236m4c9g.jpg


img_20220817_1357158ailo.jpg


img_20220817_13572152i74.jpg


img_20220817_13351791d4a.jpg


img_20220817_1335285vfyn.jpg


img_20220817_140635a8ekr.jpg


img_20220817_1409327zcz7.jpg


img_20220817_141054b8ib3.jpg
 
The test showed it. While I was very happy with the direct attached boot version, the WalkTall version is a tad hotter. The connection with the medical supports cannot be beat. So I'll focus on that and continue to build on it.
First I take care of the hair that still needs to be attached. Meanwhile, I wrote to other Wookiee brothers and got me some tips.
I first provided the WalkTall with M5 holes. First I will cut out a PVC plate as the base sole and attach it to the WalkTall with impact sleeves.
I also ordered EVA in 20mm, which I then glue to the bottom as a sole and as the last layer a thin rubber sole - because of the slipping.

img_20220928_143840j9ee1.jpg


img_20220928_143932dses8.jpg


img_20220928_144958r8ciz.jpg


img_20220928_1457283jddj.jpg


img_20220928_1459445pdvu.jpg


img_20220928_1500274yf4n.jpg


img_20221004_132630fnfkr.jpg


img_20221004_132648yxd8f.jpg


img_20221004_132659t0dl8.jpg


img_20221004_134718npeos.jpg


img_20221004_141427aud8f.jpg


img_20221024_140749cdco7.jpg


img_20221024_14222132dzi.jpg


img_20230110_112517o9cum.jpg


img_20230110_1125249qiwn.jpg


img_20230110_1152022temx.jpg


img_20230110_115214wii6z.jpg


img_20230110_115313z4dzg.jpg


img_20230110_1128204we5l.jpg


img_20230110_11283482ir2.jpg
 
The toes, yes, that was such a problem with each of my versions. I have the silicone toes from the first version and can attach them to the new ones - if only I knew how. However, I have another idea. I am currently printing a set of toes which are of course lighter than the silicone ones. We'll see how it looks when they're done.
img_20230110_143610wmi9o.jpg


img_20230111_0842048ie6g.jpg


img_20230111_134855dif6i.jpg


I still don't have the right idea for the shin. I have a few, but none of them have convinced me so far.
 
The new Wookiee feet. Why? Because I just want more stability and security. This variant is very promising and I think these will become my main feet.
I have already connected the WalkTall and the medical splint with screws. The first walking tests with and without boots were very good.
So I've now ordered the next parts.
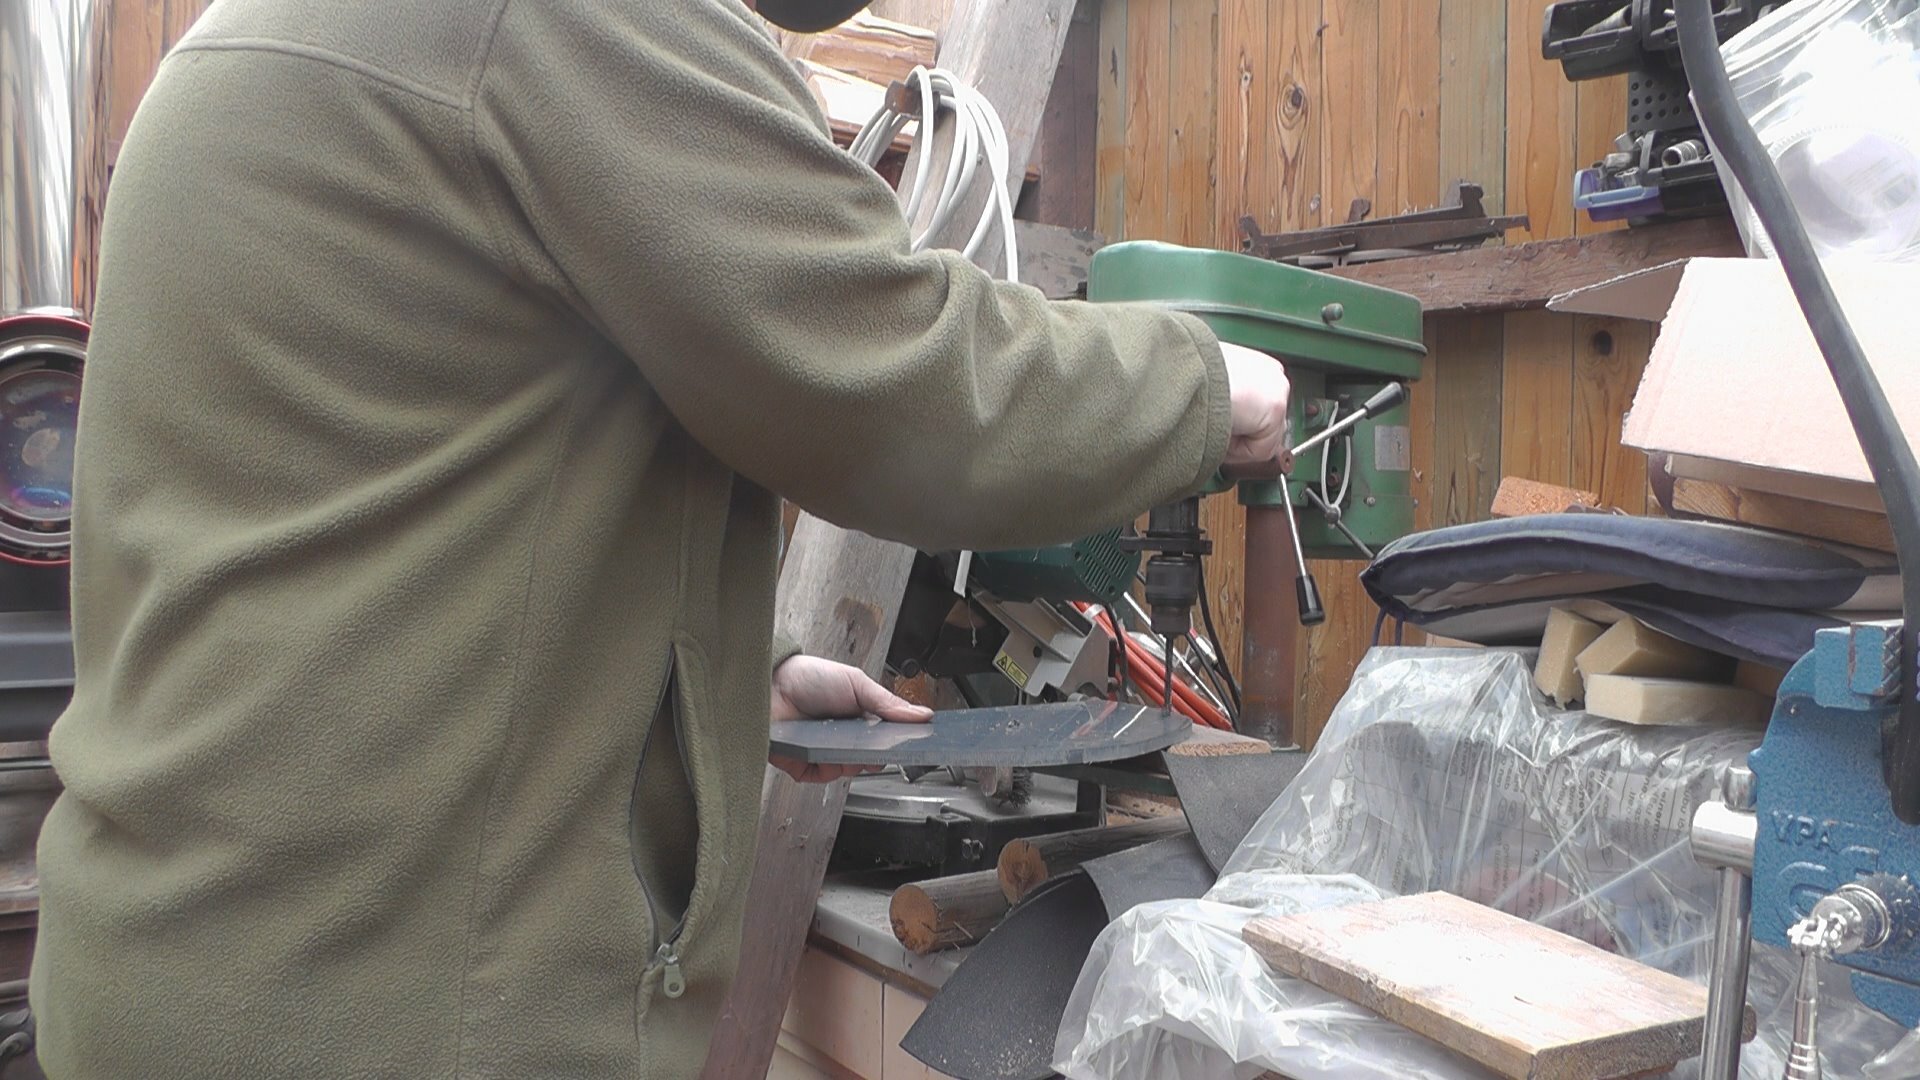
I drilled M5 holes in the edge so that cylinder head screws can go through. Below is a PVC mat which I will attach with impact sleeves.
EVA is used as the sole underneath. This is special for cosplay, etc. Has fixed properties (depends on which one you take) and is easy to process.
Of course, there are also special glues for this. So if everything works out, I'll pack 2 soles with 20mm each underneath. I have to test that, maybe 20mm will be enough. More sole means more smooth gait. However, higher again.
As soon as I have the first layer on I will test it and then decide.
EVA is also used to support the shin. I have an idea how I can attach it, but I have to measure it more precisely first.
Of course I can slowly pick out the Wookiee hair again. Because you have to turn it again.

So, the right toes are printed and I'm really excited about it. Look very chic. The shape is also great, so that not too much has to be cut. At least I hope so.

img_20230111_134850uscbv.jpg


img_20230111_231856cai4i.jpg


img_20230112_083751i3i3w.jpg


img_20230112_12174277i6i.jpg


img_20230112_12193855eaj.jpg


img_20230112_122015edft2.jpg


img_20230112_122022dneap.jpg


img_20230112_122129pnfei.jpg
 
The left toes are also ready, the PVC has arrived and we can start.
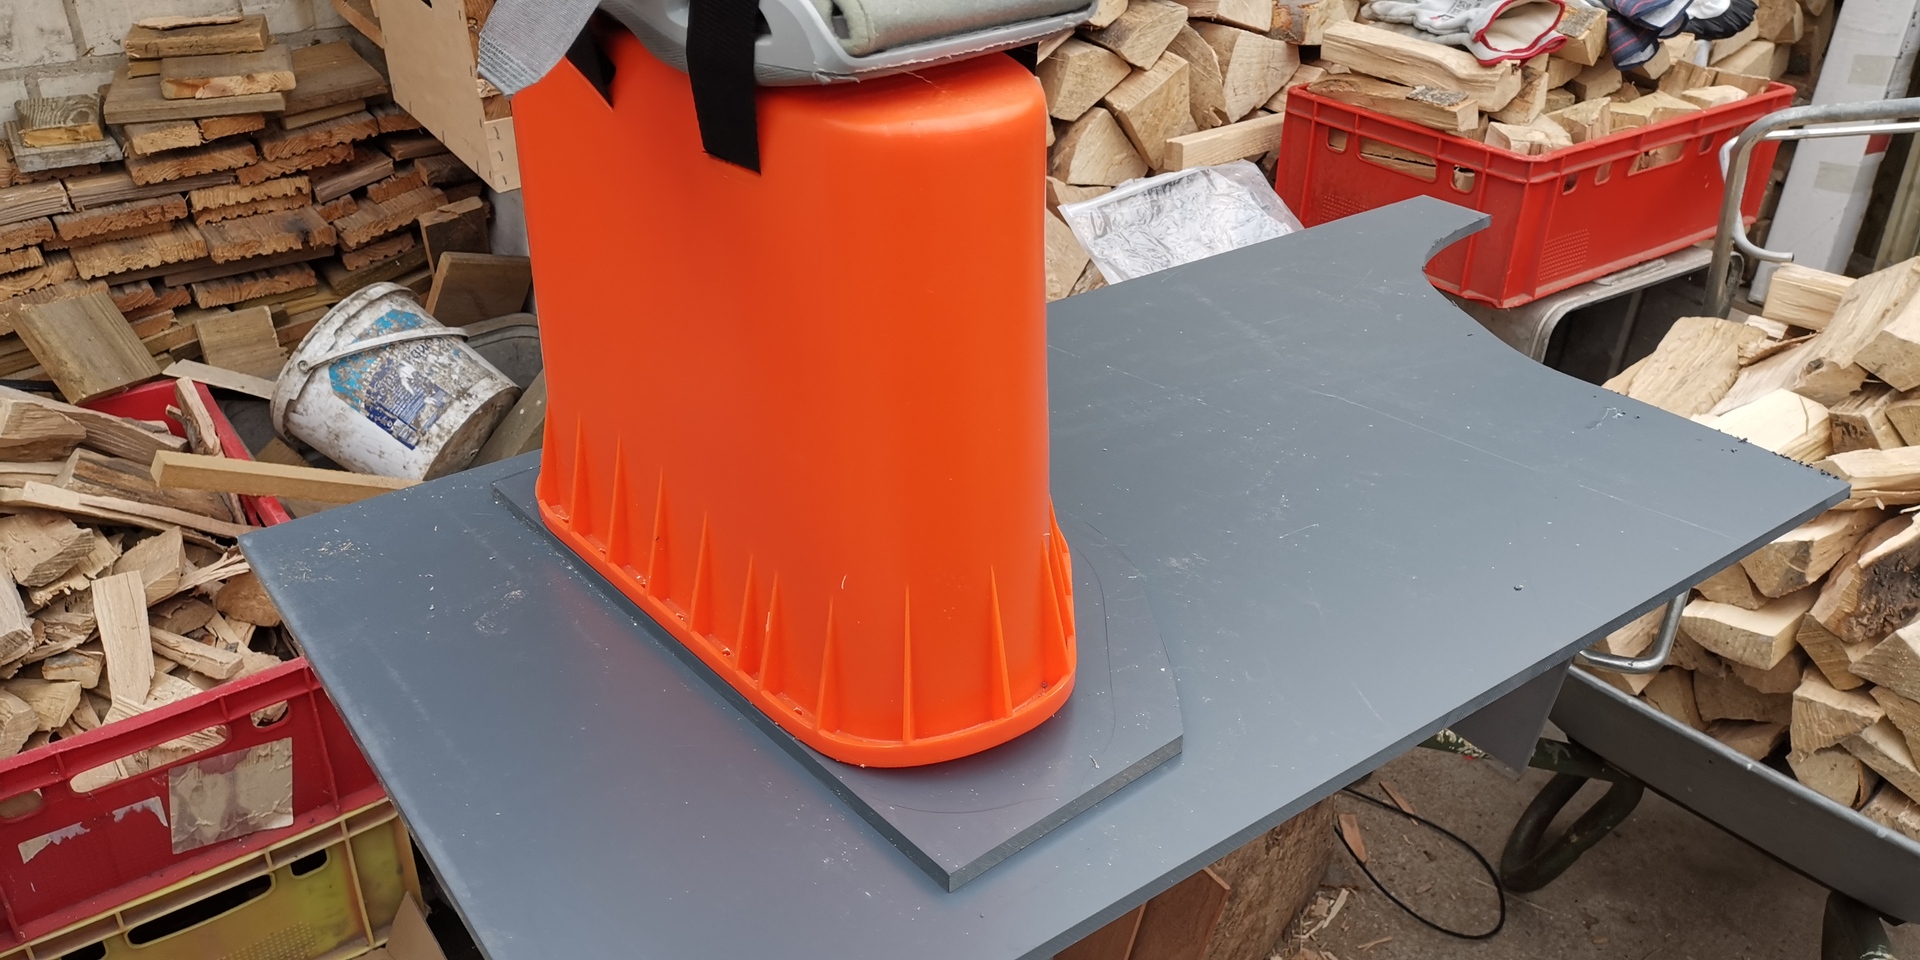
First cut off the sole and mark the holes. Then these holes are slightly enlarged and the M5 drive-in nuts are used. After so much back and forth it finally fits.
Then I used a heat gun to heat the PVC and bend it a bit to fit the WalkTall. As a result, the marked and already drilled holes no longer fit, which is why I have to improvise something.
Then the overhangs are removed with the band saw and the sole is now actually finished.
I was so happy about the low weight of the Wookiee feet, which has now settled.
10mm PVC. That's a lot more weight than I thought. Ok, so it should be stable. Nevertheless, I am considering replacing them with 5mm. But, first I'll finish this one.
And then I have to think about how to attach the toes and in what way. They shouldn't be too high and then float.

00395.mts_snapshot_00vecvg.jpg


img_20230114_155300lqfpz.jpg


img_20230114_15531322e9r.jpg


img_20230117_102746v4dck.jpg


00398.mts_snapshot_00txcca.jpg


00400.mts_snapshot_00w7dor.jpg


00402.mts_snapshot_00x4e6v.jpg


00405.mts_snapshot_00usfpv.jpg


00407.mts_snapshot_00gqeon.jpg


00404.mts_snapshot_001bej3.jpg


00404.mts_snapshot_00csey3.jpg


00406.mts_snapshot_03vjftl.jpg


img_20230117_1130387uiod.jpg


img_20230117_122718v5i0k.jpg


img_20230117_131753rlc61.jpg


img_20230117_131814_1a9ii8.jpg
 
So, the second sole cut out and prepared up to the drive-in nuts. Then I wanted to color the WalkTall. Cover with some cling film and off you go.
First primer and after it was dry with black afterwards.
Did it work out? Of course not.
Well, it's probably not that easy to color a plastic bucket. The paint just peels off with the primer. This is one of those moments again... maybe I should have just used black duct tape. That always works.
My EVA has also arrived and I can now get on with the sole.
I weighed my foot too. So he has a proud 4kg.
00409.mts_snapshot_001te1b.jpg


00409.mts_snapshot_016lcrf.jpg


00409.mts_snapshot_029ii52.jpg


00410.mts_snapshot_00vbffq.jpg


img_20230118_10504501eh7.jpg


00410.mts_snapshot_00tsfsk.jpg


img_20230118_105716gafys.jpg


00411.mts_snapshot_00are9q.jpg


00411.mts_snapshot_00qufri.jpg


img_20230118_1219079iip0.jpg


img_20230118_111125k8ds8.jpg


00415.mts_snapshot_00iyiaf.jpg


00415.mts_snapshot_00jjf5f.jpg


img_20230118_125411l8f59.jpg


img_20230118_125415epesk.jpg


img_20230118_1346017sdez.jpg


img_20230118_134614tui9i.jpg
 
Next screwed the PVC panels together and then cut the EVA to size. The EVA can also be shaped when heated. But now I'm wondering if the drive-in nuts don't take up too much space to glue the EVA to the PVC? It gives way, yes. But, is that enough to create a secure connection?

I sanded and primed everything again. Waited longer this time to let it dry. And then again with black paint over it. It held up this time. I guess I was too hasty the first time.
I cut out another sole - a little longer. I somehow forgot about the toes. And now the same question is again: how to fasten the damn parts???
00418.mts_snapshot_00qtcaf.jpg


img_20230119_120305rpc92.jpg


img_20230119_1154417rc6b.jpg


img_20230119_1217418kdkr.jpg


00418.mts_snapshot_03kldq3.jpg


00419.mts_snapshot_00uqi6l.jpg


img_20230119_123214sadmb.jpg


img_20230119_12325107f3o.jpg


img_20230119_1246001xcou.jpg


pxl_20230124_1044210824c8z.jpg


pxl_20230124_10470329vpcrp.jpg


pxl_20230124_10470740gce47.jpg


pxl_20230124_10471367pueo3.jpg


pxl_20230124_105052913tirs.jpg


pxl_20230124_10514696u3euj.jpg


pxl_20230124_10515317t5epn.jpg


pxl_20230124_10520028tlcn2.jpg
 
Here and there some of the paint still seems to come off, but that doesn't matter.
The toes, how to attach? Thanks to the Facebook group I got some ideas. After some thought, I decided on my first idea. A metal punched tape. This is stable and yet slightly flexible. So I cut out the toes a bit, drilled a hole and used an M4 bolt and locknut to attach the perforated strap to it. The first test is quite promising.
00428.mts_snapshot_00omfut.jpg


00428.mts1_pxl_202301y1ee7.jpg


00428.mts2_pxl_202301i5f95.jpg


00428.mts3_pxl_202301lce52.jpg


00428.mts4_pxl_202301d2ery.jpg


00428.mts5_pxl_2023011kfcq.jpg


00428.mts6_pxl_202301cxfsj.jpg


00428.mts7_pxl_20230140fyi.jpg


00429.mts_snapshot_00h1e0q.jpg


00429.mts_snapshot_00cmimh.jpg


00429.mts_snapshot_015zdgh.jpg


00429.mts_snapshot_02ihfuj.jpg


00429.mts1_pxl_202301r6d5o.jpg


00430.mts_snapshot_0019ehy.jpg


00430.mts_snapshot_007yffp.jpg


00430.mts_snapshot_00rrca3.jpg


00430.mts1_pxl_202301sgirm.jpg


00430.mts2_pxl_202301k9i2t.jpg


00430.mts3_pxl_202301nuflp.jpg
 
00432.mts_snapshot_00lhdzz.jpg


00433.mts_snapshot_00y1cy4.jpg


00433.mts_snapshot_00iii6c.jpg


00433.mts1_pxl_202301vrde3.jpg


00433.mts2_pxl_202301locjn.jpg


00434.mts_snapshot_00bgeh4.jpg


00434.mts1_pxl_202301a3das.jpg


00434.mts2_pxl_202301k2el3.jpg


00434.mts3_pxl_202301l5f00.jpg


00434.mts4_pxl_202301q3isc.jpg


Then I got busy with the EVA. That typical bump on the shin - you know what I mean. I've also found other ideas on the forums and Facebook, and this one appeals to me the most so far. Even if I don't know how best to attach it or how to put it on later.
But with the hair on it doesn't look bad.
00434.mts5_pxl_2023011fd87.jpg


00434.mts6_pxl_202301redse.jpg


00435.mts_snapshot_00zudiv.jpg


00437.mts_snapshot_00i3fse.jpg


pxl_20230125_115324731edd4.jpg


pxl_20230125_11532923k4i4n.jpg


pxl_20230125_11533561k5fl3.jpg


pxl_20230125_11534266acd8v.jpg


pxl_20230125_11534727w7eyg.jpg
 
The shin is really a bit of a challenge. I had seen this solution with EVA on other Wookiees. But somehow I can't do it. Cutting out the EVA is easy, attaching it is something else.
pxl_20230126_10374687zrc5z.jpg


pxl_20230126_10383829oefv4.jpg


pxl_20230126_10385827npi9g.jpg


pxl_20230126_10481859nsiv7.jpg


pxl_20230126_104824275xf4j.jpg


pxl_20230126_10483428o8f6j.jpg


pxl_20230126_10483894tfd2c.jpg


pxl_20230126_10505213p5ewc.jpg


While I'm thinking, I tinker with the toes. metal perforated tape. Stable and yet flexible. A piece at the top to keep the toes on the WalkTall, a longer version at the bottom and once through the entire foot ensures it stays in place. However, it is then no longer possible to unsubscribe. Just break it.
Another Wookiee sent me another idea about the shin. I'll just test that next week.
pxl_20230126_110750748kftj.jpg


pxl_20230126_11075467igc32.jpg


pxl_20230126_11082102i8f03.jpg


pxl_20230126_11140346jocwl.jpg


pxl_20230126_11151153vpfti.jpg


pxl_20230126_11152626didh5.jpg


pxl_20230126_11211643zqeha.jpg


pxl_20230126_1144373980e0t.jpg


pxl_20230126_11451447ujfa9.jpg


pxl_20230126_114748965ufxh.jpg


pxl_20230126_11484325ksi1b.jpg


pxl_20230126_11500501pfesn.jpg
 
The new shape for the toes is ready and the second one is already printing. This time I fiddled around and created a negative form from the file for the toes and printed it out. A nice 65 hours went on it. per piece
I bought liquid foam to then create my toes. If it works as expected.
pxl_20230215_12174052feenz.jpg


pxl_20230215_121759463bdkk.jpg


Meanwhile I took care of the shin. A few tips from the Facebook group were interesting. I had a few options but decided to attach the EVA with screws. And in such a way that you can easily tilt it to put the shoe on better. A strap to fix at the top and that should have been it.
As soon as everything fits, I can take care of the new toes.
pxl_20230215_122139485ve1i.jpg


pxl_20230215_122616664yc64.jpg


pxl_20230215_12274123yeifc.jpg


pxl_20230215_12343897tpfgd.jpg


pxl_20230215_124437275nevb.jpg


pxl_20230215_12451223nmfi0.jpg


pxl_20230215_12464323unf3f.jpg


pxl_20230215_12465194f8c84.jpg


pxl_20230215_12470367i6d5b.jpg


pxl_20230215_12471150vyf84.jpg
 
First real test of the modification on the Wookiee feet today. I only finished one foot - the left one - to see if I had to change anything.
I have to admit, putting on the costume alone is more than exhausting. I can't do it right on my own. The fat belly is also not helpful.
The hardest part is putting on your feet and tightening all the straps with all that damn hair flying around.
But with a little help it worked and I was able to test it. The shin idea works, the bump is gone. And the trouser leg fits well over it, so that's done too. And the hair I already have for my feet also fits with these. So I'm actually done with it.
pxl_20230220_1213369379c4r.jpg


pxl_20230220_12140583iye7v.jpg


pxl_20230220_121413951tfko.jpg


pxl_20230220_12143181wrcm7.jpg


pxl_20230220_12151474ykiyd.jpg


pxl_20230220_12152760yydca.jpg


pxl_20230220_12154098gjd7e.jpg


pxl_20230220_12261705bqcgn.jpg


pxl_20230220_122705547hcjs.jpg


Now come the toes. I measured with water. Almost 2 liters fit into the negative mold. I prepared 2 boards to shoot the mold, each including 2 holes as pressure equalization for the foam. I bought liquid foam and am now preparing everything to pour the mold. If all goes well, I'll have my printed toes in foam, which is a lot lighter and more flexible. The painting comes after that.
pxl_20230219_213226965fdys.jpg


pxl_20230219_21324605qxcdl.jpg


pxl_20230220_11434638xzd2s.jpg


pxl_20230220_11435227zafms.jpg


In any case, I have to think about how I can put the costume on by myself. Because that's how I'm always dependent on someone.
 
14. 22-02-23

An exciting and then disappointing moment.
Yesterday I filled out the form with the flex foam and opened the form today.
pxl_20230221_22535679refp3.jpg


pxl_20230221_22540224bydof.jpg


pxl_20230221_225409357afm9.jpg


pxl_20230222_12520528bxi6o.jpg


pxl_20230222_12522693q9dz9.jpg


One was difficult to get out, but it worked. And the result is also very good.
pxl_20230222_125402938gfrn.jpg


pxl_20230222_12540755kmfhz.jpg


pxl_20230222_130604421rek4.jpg


pxl_20230222_130608983vfns.jpg


Then the second came. Unfortunately it wasn't good. Even though I used plenty of release agent, the mold was so stuck that it eventually broke off. That was the moment to get extremely upset and then almost cry.
I'll have a look at it tomorrow and see if I can connect it to my feet well or not.
pxl_20230222_13011476mbejj.jpg
 
I had tried to color the defective part with acrylic paint. As you can see, with little success. After all, tinting paint was the panacea. Applied generously with a brush, the result is already very good. After drying comes a second coat and that should then fit. Then some black here and there and done.
pxl_20230224_13021896qkc74.jpg

pxl_20230224_13025570cvehz.jpg

pxl_20230224_13030113zeib3.jpg

pxl_20230227_135557348mfqm.jpg


pxl_20230227_14431194ndcde.jpg

pxl_20230227_14444482glfu1.jpg

pxl_20230227_14522845nnee2.jpg

pxl_20230227_14523351cxcnk.jpg


Meanwhile I got the second try of the toes out of shape. You can tell immediately that I used even more of the release agent this time, because the part came out of the mold quite easily. Unfortunately, the strap slipped a bit, but that's bearable.
pxl_20230227_150535874xiuu.jpg

pxl_20230227_15054257stcyy.jpg

pxl_20230227_15054821bmc4p.jpg


Now you can start adjusting. I'm still deciding which is better. The foam is lighter and more flexible.
But if I want to use the printed toes, I have to use a different type of attachment. And simply converting and changing is not possible.
Difficult, difficult.
pxl_20230227_14423761tncpo.jpg

pxl_20230227_14424463icewp.jpg

pxl_20230227_14425088aki7n.jpg

pxl_20230227_14425513zieey.jpg
 
I had tried to color the defective part with acrylic paint. As you can see, with little success. After all, tinting paint was the panacea. Applied generously with a brush, the result is already very good. After drying comes a second coat and that should then fit. Then some black here and there and done.


Meanwhile I got the second try of the toes out of shape. You can tell immediately that I used even more of the release agent this time, because the part came out of the mold quite easily. Unfortunately, the strap slipped a bit, but that's bearable.


Now you can start adjusting. I'm still deciding which is better. The foam is lighter and more flexible.
But if I want to use the printed toes, I have to use a different type of attachment. And simply converting and changing is not possible.
Difficult, difficult.
Hi Dejan,
I'm really looking forward to see your finished feet from the Wookiee project. Maybe at the Maker Faire in Hannover?
 
17. 28-02-23

The second attempt of the foam toes was successful this time. This time I had so much release agent inside that the part almost fell out by itself. The strap slipped a bit, but I was able to fix that.
Then I cut the part and adapted it to the foot.
pxl_20230228_10261144xqejy.jpg


pxl_20230228_10263337qric8.jpg


pxl_20230228_10264332j8i6q.jpg


pxl_20230228_10303867gjfme.jpg


pxl_20230228_10304467i7ea3.jpg


pxl_20230228_10305677oqekc.jpg


pxl_20230228_10434137pifzr.jpg


pxl_20230228_104348300qdps.jpg


pxl_20230228_10435710swea9.jpg


pxl_20230228_104402103sc8s.jpg


Once I was happy with that, it was time to color it.
The first toes have had the first 24 hours and are now getting the second layer. While the second toes are now getting their first coat of paint.

pxl_20230228_10461341vged6.jpg


pxl_20230228_10461787hefgt.jpg


pxl_20230228_10462247q8f7e.jpg


pxl_20230228_105813567zccz.jpg


pxl_20230228_10581870lfeie.jpg


pxl_20230228_10582306k2ckk.jpg


pxl_20230228_11070168jffpi.jpg


pxl_20230228_1153364686fld.jpg


I'm very impressed with it so far and I'm starting to think about the best way to attach it.
I connected the velcro strap to it because I thought it would be a good idea. Now that the time has come, I have my doubts as to whether this is the right way.
 
Today I gave the toes the second coat of paint. These have slightly larger pores than the first. Whether the mixture didn't quite fit or whether there was too much release agent, I can't say. But, with a lot of paint it works.
pxl_20230301_10582462r0ih4.jpg


pxl_20230301_11034330suf17.jpg


After that I took care of my existing Wookiee feet again. I don't know if I'll get my new ones ready in time, which is why I've made my previous ones again. Again, the problem is with the shin. I'll try it with a PVC cloth. It's light and easy to fold. Maybe I just made it too short? It's just below the knee. I liked a walking test with the idea. I can walk well in these feet, although I think the new ones would be better.
Walk as quickly and naturally as some other Wookies, but I can't do it. Maybe because of the height, or maybe I didn't do something right. Anyway, I walk like an "old" Wookiee. :)
pxl_20230301_11065446i0cz9.jpg


pxl_20230301_11085458w6cdv.jpg


pxl_20230301_11143998xkidh.jpg


pxl_20230301_11151224iceg9.jpg


pxl_20230301_1123550803ddn.jpg


pxl_20230301_1124070645dhw.jpg


pxl_20230301_12480942qzfnp.jpg


pxl_20230301_125126066jf3m.jpg
 
New idea. Cut EVA to size and attach with duct tape.
I had to take care of my Wookiee Feet V2 quickly, because a photo shoot with the Star Wars Dinner Hamburg was coming up and I wanted to be done with it. This option also worked great and a small walking test was successful. It can stay that way.
pxl_20230302_12270406ufcdr.jpg


pxl_20230302_12270686gtcnb.jpg


pxl_20230302_12274756c0i4o.jpg


pxl_20230306_125059962cftf.jpg


pxl_20230306_130811890ncu2.jpg


pxl_20230306_130853279cdz2.jpg


pxl_20230306_130900725td2x.jpg


pxl_20230306_130903319ie5w.jpg


pxl_20230306_133309873hfqc.jpg


pxl_20230306_13351461ksdyc.jpg


pxl_20230306_133521953zfzk.jpg


escam-weg-20230306-13ihi0m.jpg


Datei von filehorst.de laden

dscf8447-228f2x.jpg


dscf8671z8ex0.jpg
 
Last edited:
Back
Top