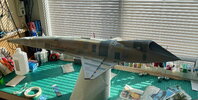
Starting to paint in the panels. I suck at it — but this is a great way to learn. Of course I can't scribe panel lines (in the ultra thin Monokote, ha ha) — but it will just have to be what it is.
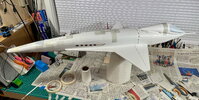
Which it's probably worth conveying again — this wasn't an attempt at making a 100% studio-grade replica. (Studio-scale, yes!) Start from the other end: we're going to make a balsa "plane" — how close to "kit-model" can we get it while still staying more or less true to its balsa pedigree.
I've already cheated by adding a handful of 3D printed bits. But I console myself that they could also have been vacuum formed if I had the setup to do so.


")