SORRY - MY MISTAKE.
Thought this was a generic 1st build thread, not just for Jon. I should have made a new post. Maybe the mods can move or delete this post?
Again, Sorry!
Hello everyone,
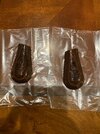
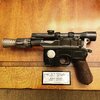
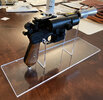
Long time reader and first time post for me. Got a 3D printer for Christmas and decided to build a DL44 (is there really any other good reason for a 3D printer?). Knowing the limitations of PLA plastic I didn't set my sights on anything that in quality would rival a metal built, converted or from scratch. So I decided I would go the route of most realism from a practical side I could come up with. The idea was to create a copy of the function of the original C96 with the movie attachments. The current, first attempt, result is this:
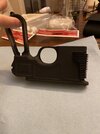
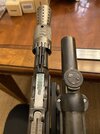
View attachment 1444404 View attachment 1444405
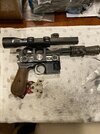
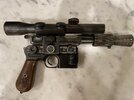
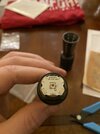
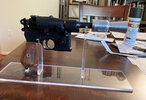
I wanted to make the blaster as close to the real thing in terms of function as I can, so I mimicked the trigger system of the original C96, and made the flash hider removable (it has a screw, after all...), so that you can field strip the blaster like you would a real C96.
View attachment 1444406
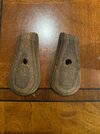
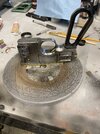
The beauty of the engineering of the original C96 is that it contains only one screw (the one that holds the grips on) and no tension or spring pins that hold parts together. It is truly a marvel of machining for its time (1896). So I created the lock block and trigger mechanism in a very similar way (don't have photos of that yet). Hammer, safety, sear, sear arm, trigger spring and lock lever all come apart without any screws or pins that would need to be punched out (that would be difficult to do in plastic anyway).
The result was that I was able to make a trigger mechanism that functions just like the original (including a functioning safety).
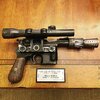
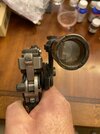
View attachment 1444409
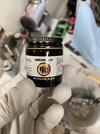
It also come apart just like the original live fire DL44 probably did. Remove the flash hider, cock the hammer and move the lock lever up, pull lock block and slide off the frame towards the back.
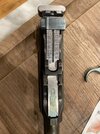
I also made the bolt work just like the original did, with the "firing pin" doubling as the main spring rod. On my DL44 (and a original C96), you take a small screwdriver or pocket knife, push the firing pin in a couple of millimeters and turn it clockwise 45 degrees. Then the pin will slide out the back of the bolt. Next you remove the bolt stop to the right and you can pull the bolt out the back.
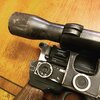
Lastly, the back sight has a spring loaded sight leaf and a movable sight slide with functioning sight button. Which, by the way on the DL44 is difficult to do because the scope is a bit in the way.
I am currently looking to improve the scope. Right now it only has transparent foil as the back and front lens (with the original scope crosshairs of the real scope printed on the back lens), but that doesn't work too well. Maybe I will use glass or acrylic disks, not sure yet.
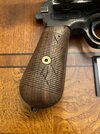
The paint job actually looks better in person than on the pictures. HDR is a bit unforgiving to print lines.
Lastly, I made the scope detachable. Two screws are attached to the frame and the thumbscrews work. So you can remove the scope mount and scope from the side of the blaster.
So this is my first attempt. Quite a few limitations compared to a metal DL44 in terms of finish, but a lot of fun to build and more functional than your average DL44 from Etsy.