1:1 Millennium Falcon Cockpit Replica - Group Build

did you get the tiles made like you said? How are you mounting lights behind them now?

Hi C,

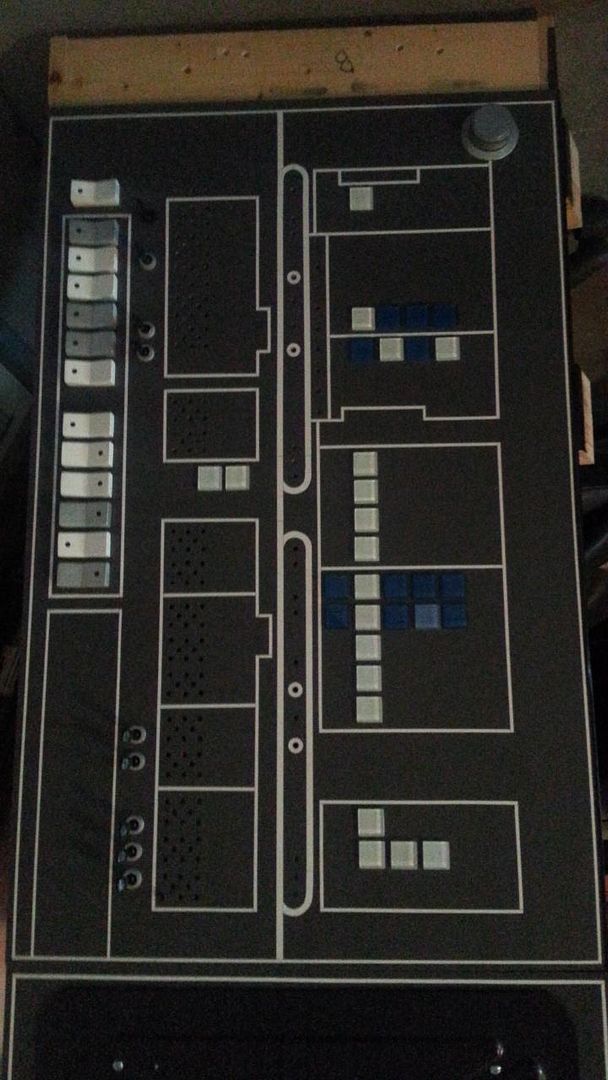
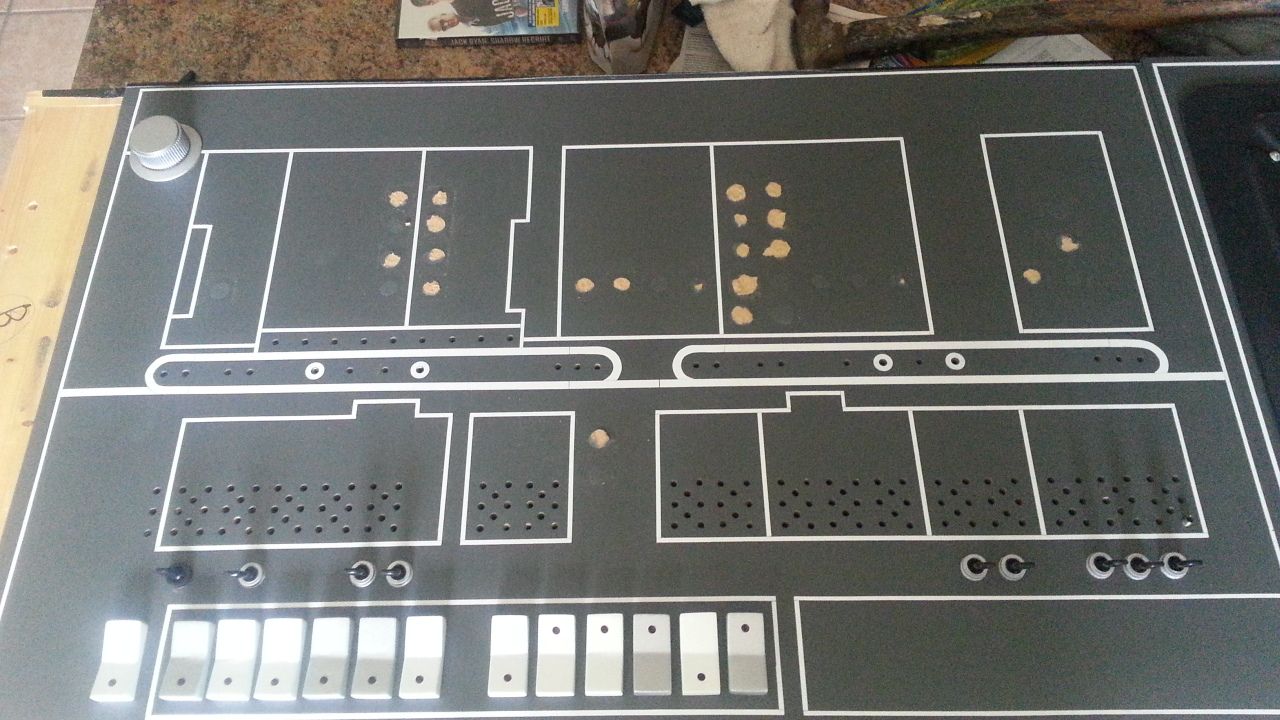
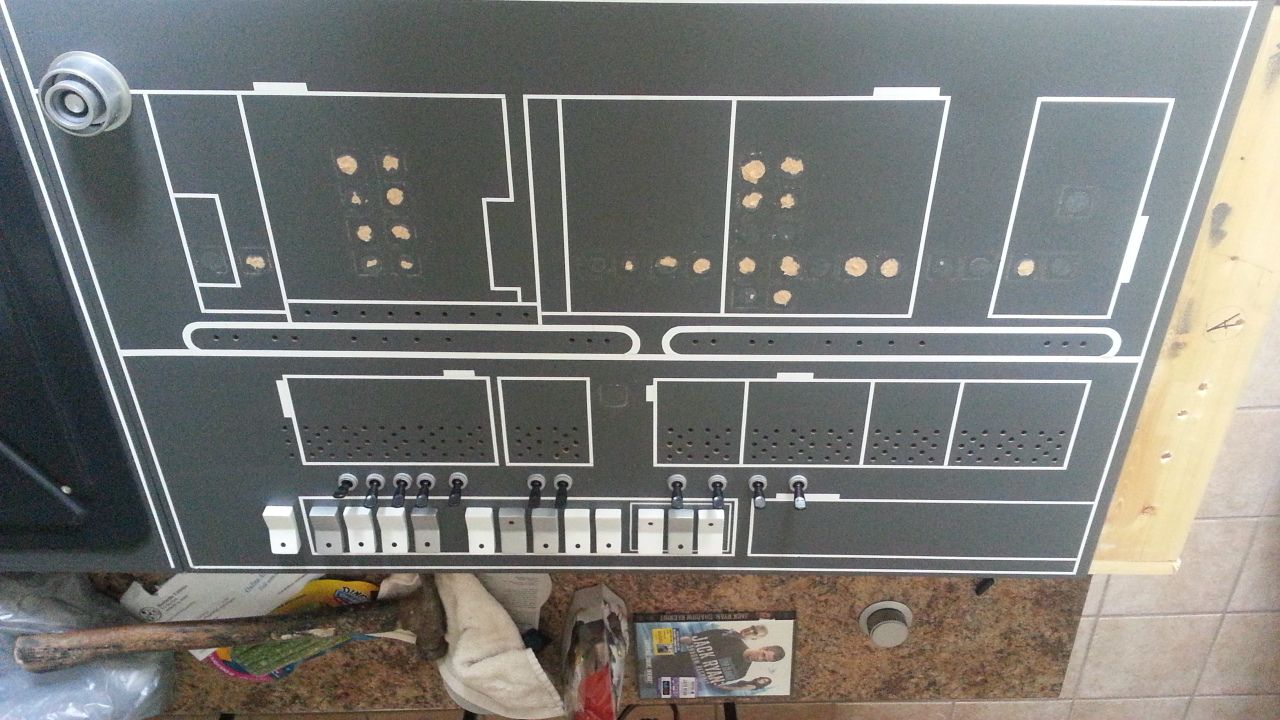
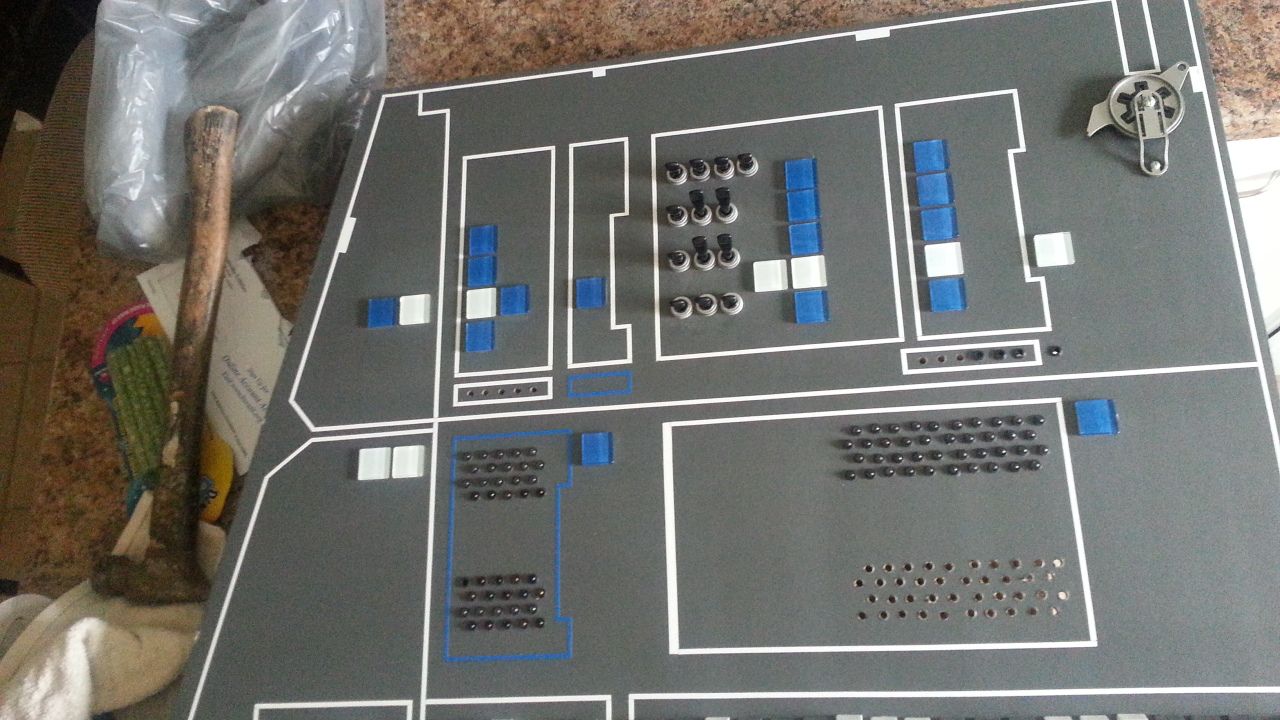
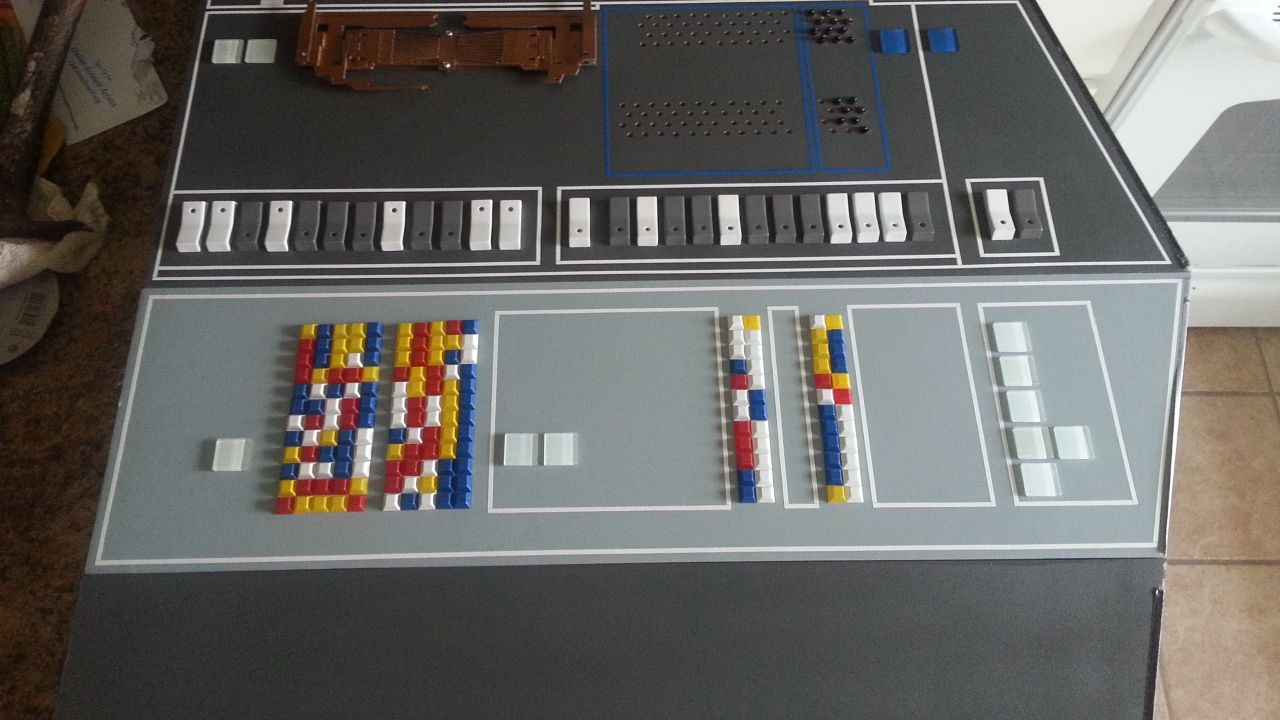
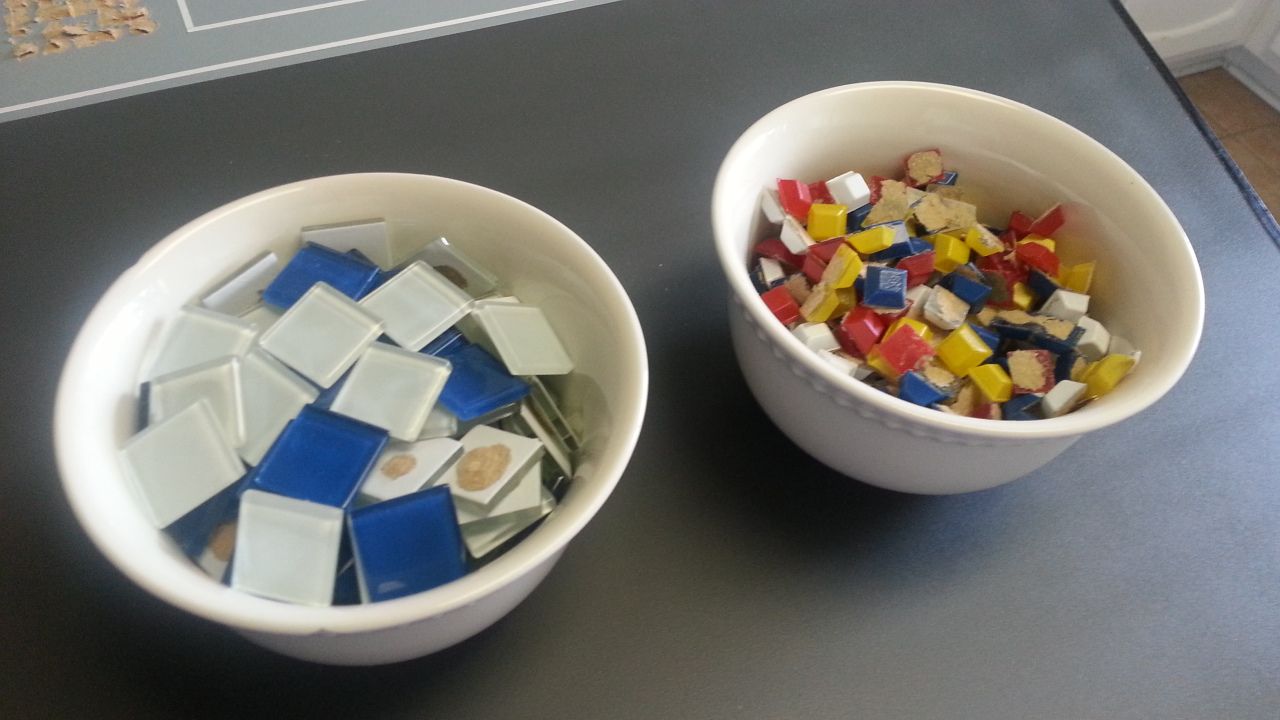
I think I have enough material to laser cut the acrylic tiles. I may have to special order one or two different colors but i think I'm ok. The LEDs are mounted on the backside of the panel using a "bucket" method. Bascially, you cut a tube (PVC is perfect) then laser cut a cap with a hole in the middle for the LED to sit - the cap is adhered directly to one side of the tube/PVC. The bucket is then adhered to the bottom of the panel directly over the hole with the LED cap facing down. Once everything is in place the 1" acrylic tile is adhered to the top of the panel over the opening and the LED backlights the tile... Check out the post from when we worked on the center console

http://www.therpf.com/f79/1-1-mille...-group-build-147319/index190.html#post3240159

Hope this made sense? :)

- - - Updated - - -

Incredible build! Burn sky until you see lines, my friend!

Thank you! I'm hoping to make good time on these panels. I want to leave the sound and lighting guys more than enough time to tackle each panel. Lots of work to do!

- - - Updated - - -

Sweet! It's gonna be great seeing the whole cockpit lit up!

YES IT IS! I can't wait!

- - - Updated - - -

Good stuff being done there in the cockpit! Love those updates (it's like a drug;))

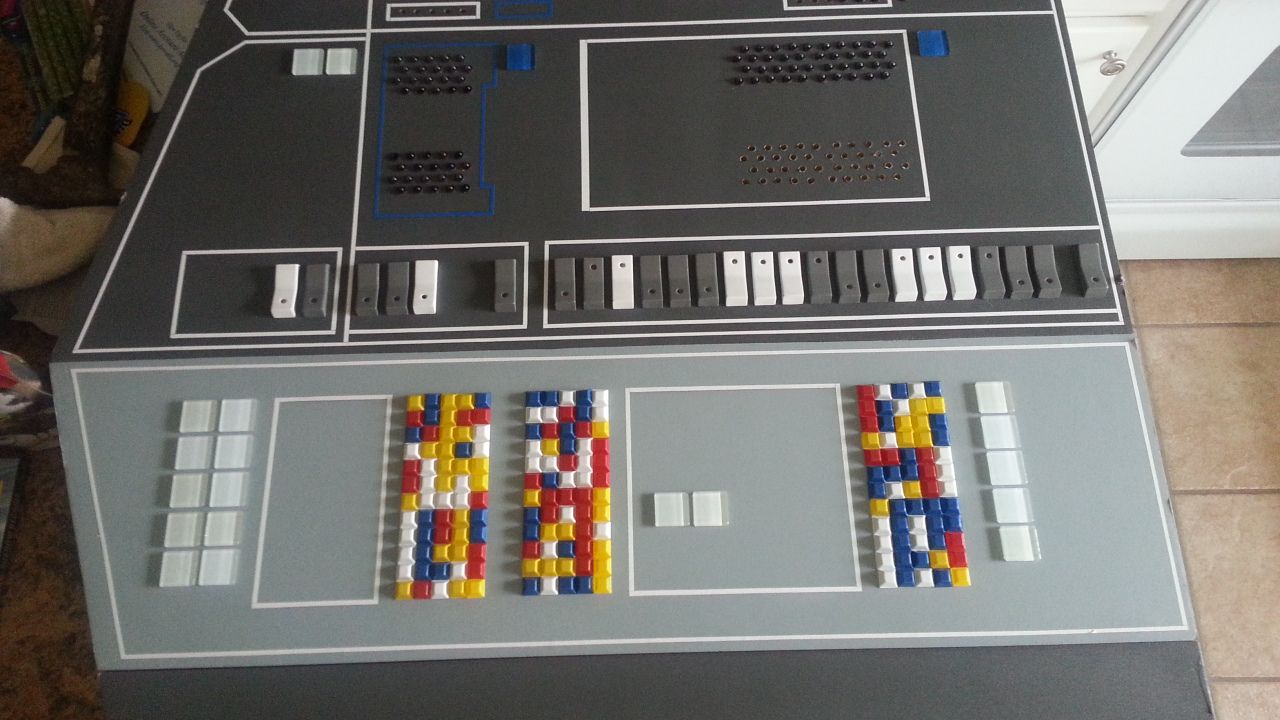
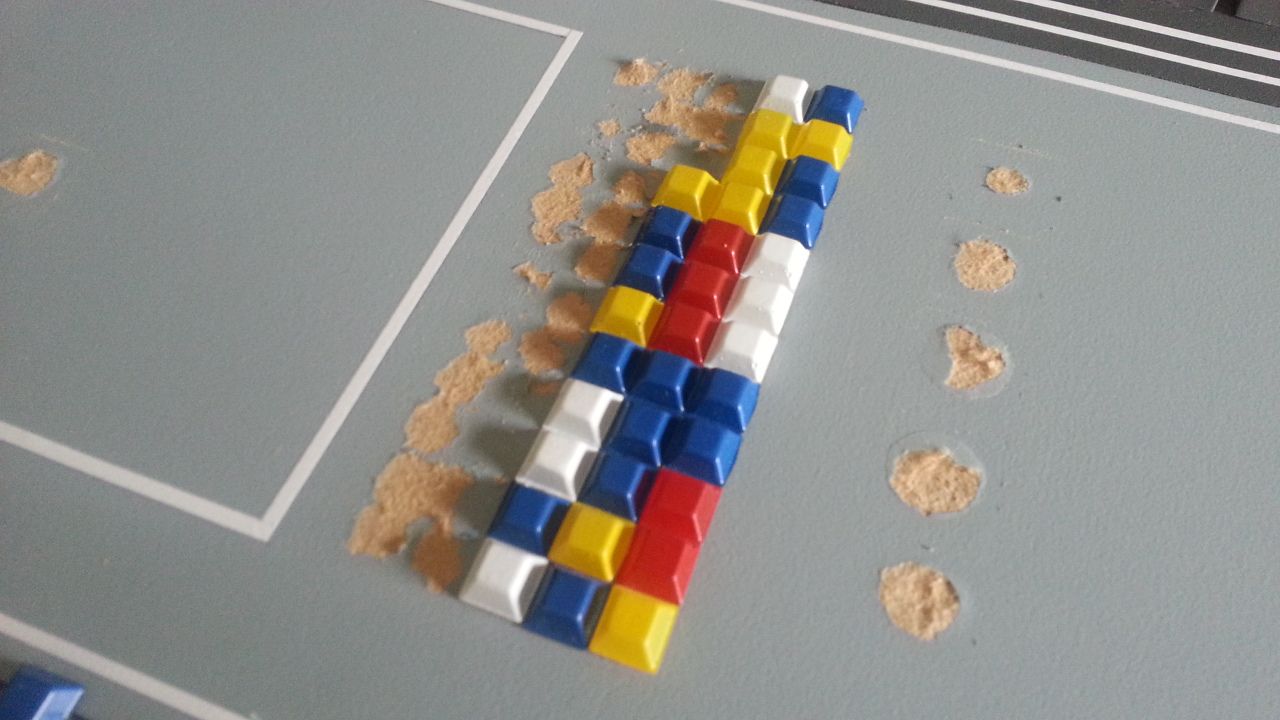
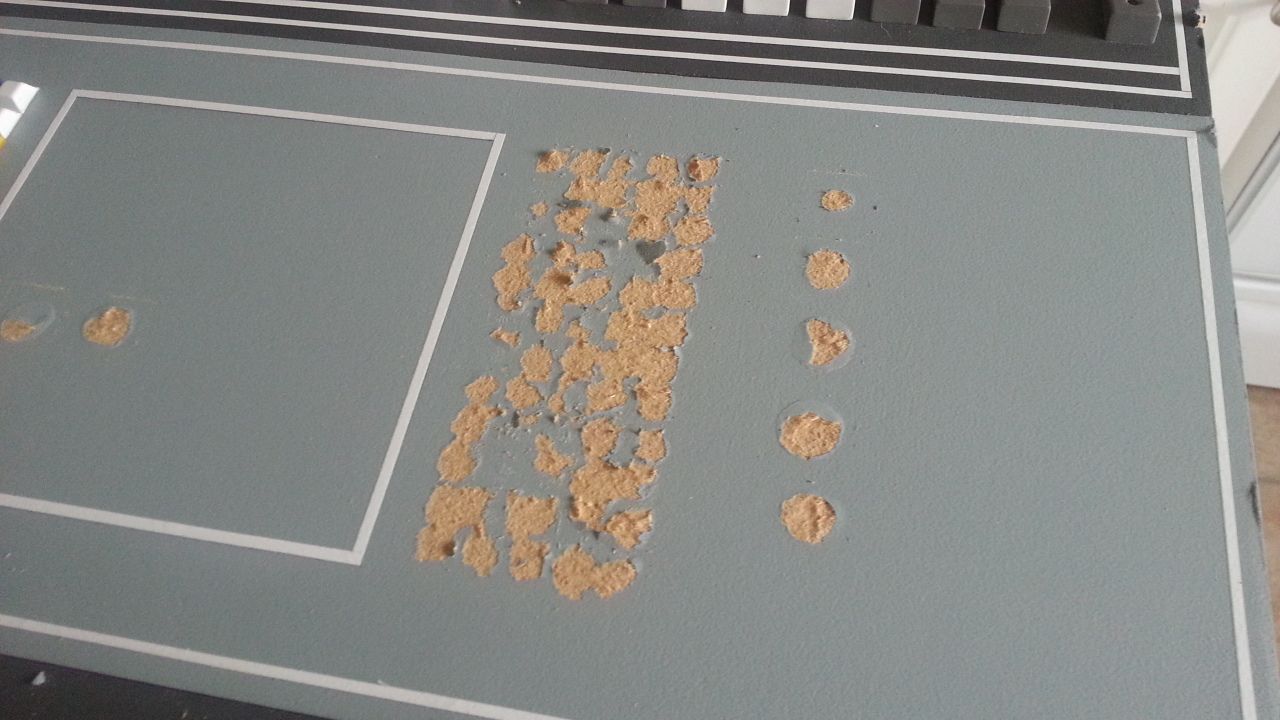
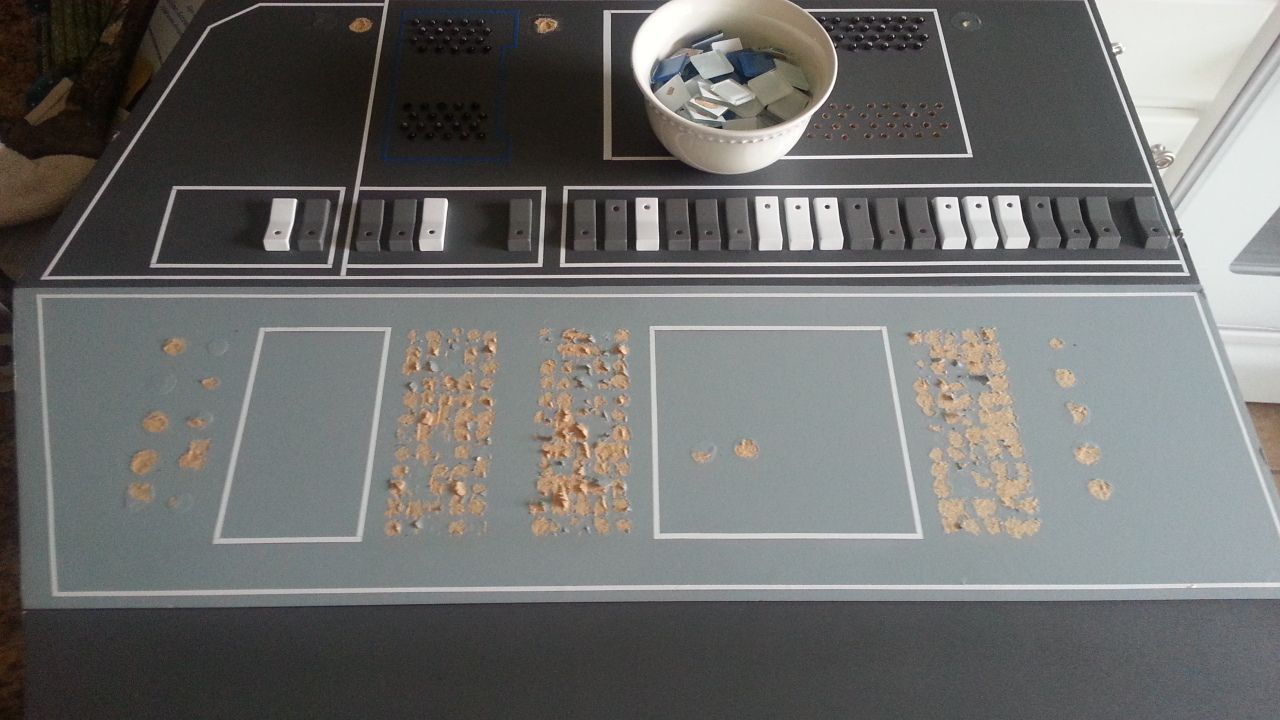
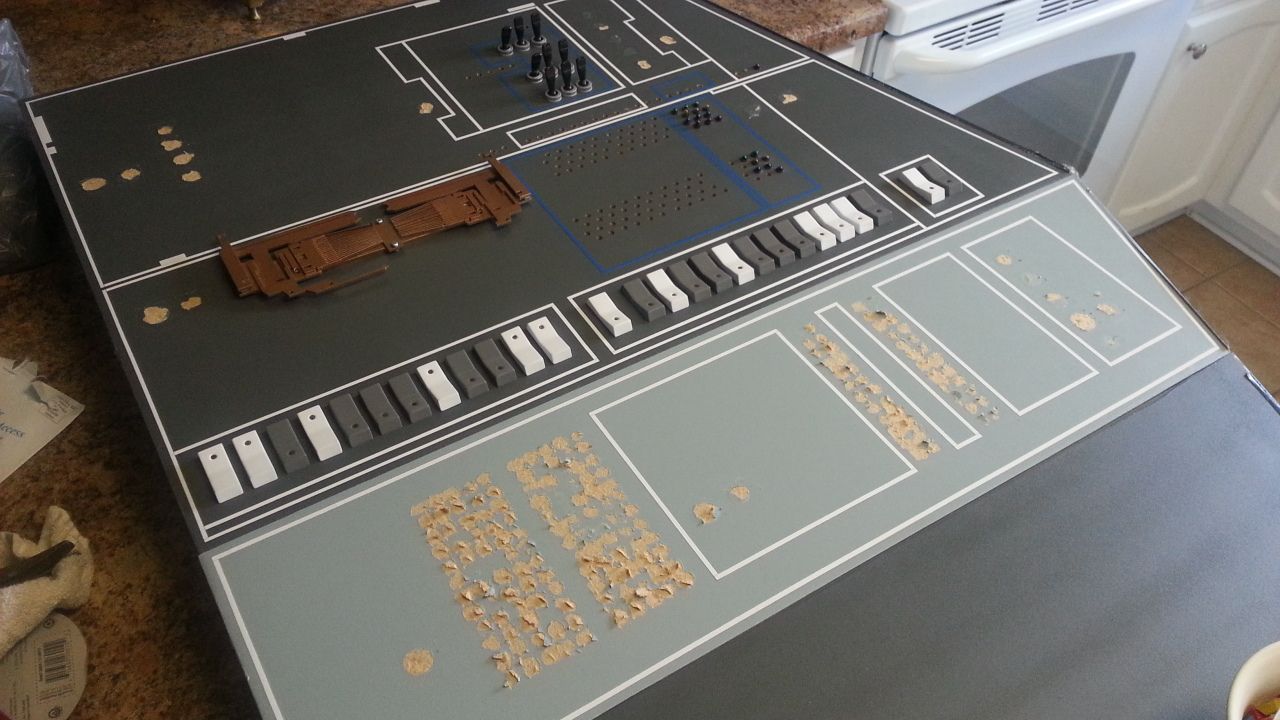
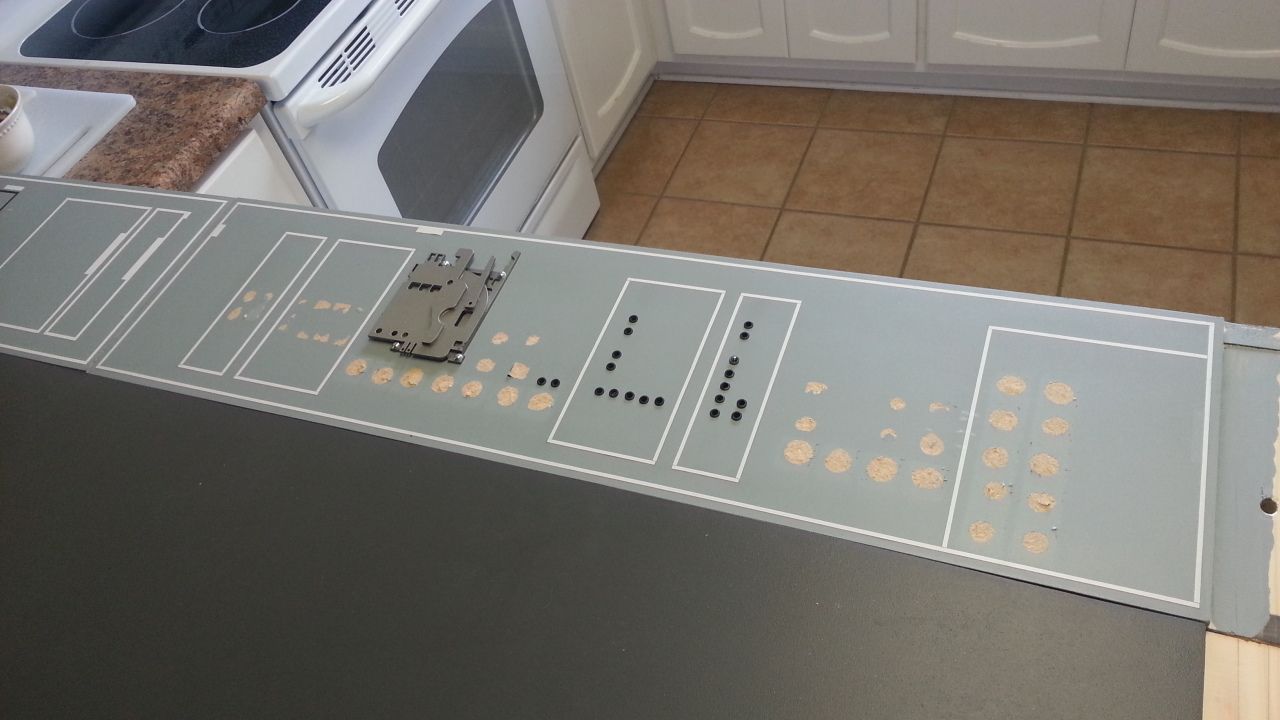
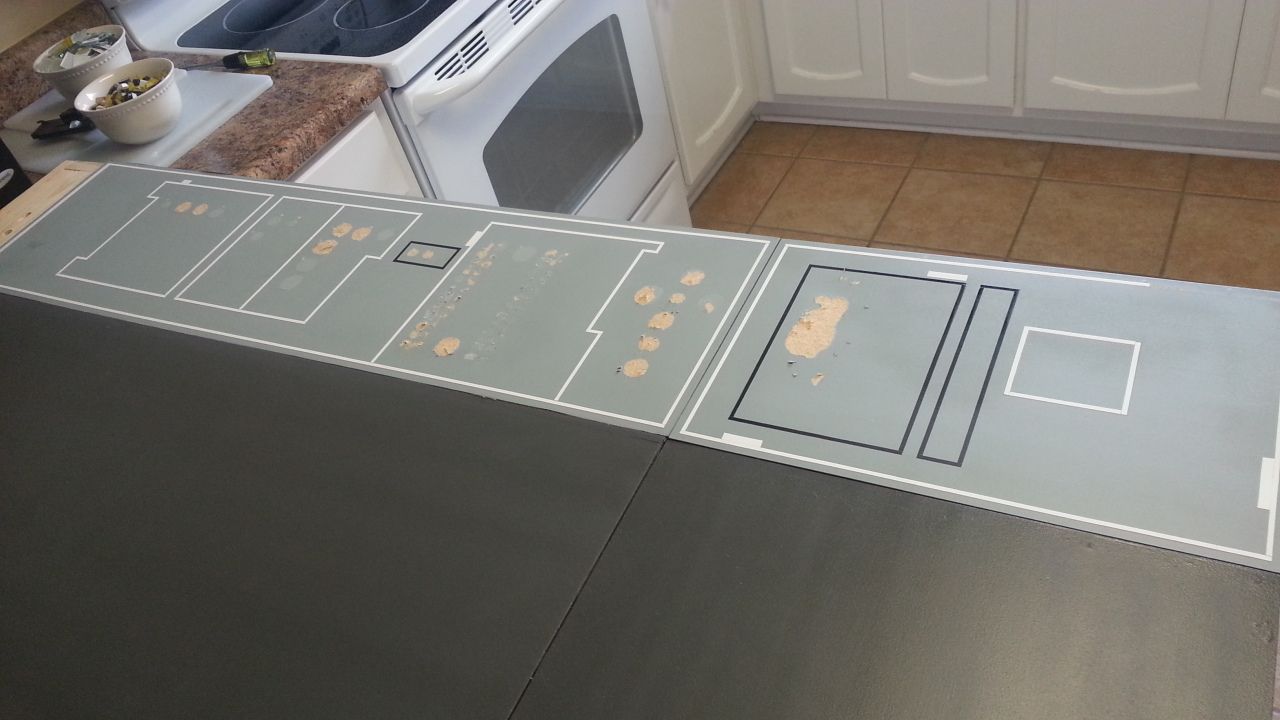
Thank you, my friend. I'm desperately trying to maximize my time. There are no scheduled shows/cons so i am taking the down time to get those tiles removed and holes cut!

Is this where the fun begins? ;)

- - - Updated - - -

This is incredible! Too bad you can't make it to cons near me. The legion would *love* it

Sent from my SPH-L710 using Tapatalk

Hi B,

Thank you so much. We would love to be able to take the cockpit on tour but $$$ and jobs keep us from doing what we love. Where are you located?
 
I have been busy for a while, but I'm looking forward to update this site daily now forward. Great to see what you have done here lately - especially outside with the frontal window and the skin, and all those details on the inside, like the radar scope, just stunning! :)
 
The drilling and the lighting and the bleeping and the flashing, the bleeeeping and the flaaaa... Colour me excited!

Adding to this build is the way to go, the angles are all spot on. Upgrading the panels looks to be easier than I would've thought. Cool Sir!
 
If $10,000 were donated to this build, would they go toward materials, or hiring more crew?

PS. I most definitely do not have $10,000. Just making chit chat.
 
I have been busy for a while, but I'm looking forward to update this site daily now forward. Great to see what you have done here lately - especially outside with the frontal window and the skin, and all those details on the inside, like the radar scope, just stunning! :)

Hey Kev,

Thanks! The front window is only temporary - I'm considering turning the top of the window into a bar top. We're going to call it the "Admiral Ack Bar". The radar scope, also temporary, turned out much better than we expected. Kudo's to Scott for keeping the fresh ideas coming during those late nights...
 
The drilling and the lighting and the bleeping and the flashing, the bleeeeping and the flaaaa... Colour me excited! Adding to this build is the way to go, the angles are all spot on. Upgrading the panels looks to be easier than I would've thought. Cool Sir!

Hey W,

Thanks! :) I've very surpirsed how easy it's been so far popping those tiles off (fingers crossed). I stopped by the lab last night to continue working but there was a class going on and I had forgot a few things at the house. I'm going to try to get all the tiles removed and the holes drilled over the next few weeks. The sooner I get this task finished, the sooner I can hand the panels over to the experts!

We have a few other surprises coming as well. :)
 
If $10,000 were donated to this build, would they go toward materials, or hiring more crew?

PS. I most definitely do not have $10,000. Just making chit chat.

Hey Red,

Any money that is donated would be directed toward more material. But please note, I am by no means soliciting funds. I can only ask for "your" time and expertise - nothing more. This build is a fan based project so all money comes out of our own pockets.

Hope that makes sense? :)

- - - Updated - - -

kickstarter?
:p

Hey Yoda,

Kickstarter, Indiegogo, etc... is all off limits. These are the rules we have to play by. And that's ok. Part of the fun is the journey itself. :)
 
Hi Gang,

Sorry for no "real updates"... I've spent the last few nights working on the 2D files in prep for the CNC. I'm hoping to have a few more panels (blue and white tiles removed) knocked out before the weekend.

Also, I'm working to figure out exactly how I'm going to add the 12" I removed from the original 3D model. My fear is that the weight of the upper panels will put too much stress on the lower panels since they are now moving in even closer toward the center of the platforms. A few behind the scene images I've seen show small supports around those key areas, but since we're planning on skinning the beast, I have to be more clever in my approach... Not to worry... I'll figure it out. :)

Pics Soon

In order to address this issue I would recommend using extruded hollow aluminum profiles. They would be Strong and light supporting bars at the same time.

Regards,
Alberto
 
In order to address this issue I would recommend using extruded hollow aluminum profiles. They would be Strong and light supporting bars at the same time.

Regards,
Alberto

Hi A,

That makes a lot of sense... The front and rear sides of the panels are mounted to the back wall and front nose section. I'm wondering if that will be enough or should I reinforce those areas as well?

hmmmmmmm?
 
Last edited:
Hi A,

That makes a lot of sense... The front and rear sides of the panels are mounted to the back wall and front nose section. I'm wondering if that will be enough or should I reinforce those areas as well?

hmmmmmmm?
It depends on the weight and consequent deformation induced, but using them all over will make sure the entire work would be strong enough for withstanding model frequent transportation.

regards,

Alberto
 
Hi Gang,

Well... deconstruction continues...

Before...
20140611_155953_zpse0d5645e.jpg


After...
20140611_160630_zps6a68b33b.jpg


20140611_161441_zpsbfa07624.jpg


20140611_161711_zps9c4461ed.jpg


20140611_161731_zpsbb601cca.jpg


20140611_162027_zps80ce059a.jpg


20140611_162410_zpsa6e62a2a.jpg


20140611_163539_zpsb46a0289.jpg


20140611_163702_zps29a34aee.jpg


20140611_164643_zpseb5884d8.jpg


20140611_164758_zpsec9d7f6a.jpg


I'm going to completely strip the lighter color panels. They are not as complex as the others. So... I'll add filler, repaint, stripe and then cut the holes for the LEDs (we've got something planned that we hope will look VERY cool)
20140611_164910_zps78e887b1.jpg


20140611_165953_zpsb4c90043.jpg


20140611_170714_zps31d69b12.jpg


The bowls are getting full...
20140611_164652_zps6e1994d3.jpg


More to Follow!
 
Last edited:
So sad. :cry

All that hard work, gone. But the payoff for the new lights will be worth the pain and effort.
Soldier On!!
 
So sad. :cry

All that hard work, gone. But the payoff for the new lights will be worth the pain and effort.
Soldier On!!

Hi P,

It was tough... the center console was worse. But seeing how the console turned out, this is going to be a lot of fun! I only have a few more panels to go before the drilling begins. I have a few hundred more of the 5mm LED holes to drill as well. Whew...
 
You can't make this stuff up... Star Wars Episode 7 News: Harrison Ford Injured His Ankle While Filming Star Wars: Episode 7 at Pinewood.

EDIT: This link says the door "fell on him", and that it was hydraulic. Wonder if it was the curved door to the ramp, or the ramp itself... Ouch... Harrison Ford airlifted to hospital - hellomagazine.com

OH MAN... I can only imagine the pain. OUCH!

- - - Updated - - -

Yep, all that work, but in the end, it'll rock big time (in my lifetime;))

There are still LOTS of holes to drill. This should be a productive weekend. I hope to get a lot done.
 
Back
Top