WIP first Iron Man Mark III (plastic-coated) foam build: Getting a bit pic heavy

Re: WIP first Iron Man foam build+knowledge share

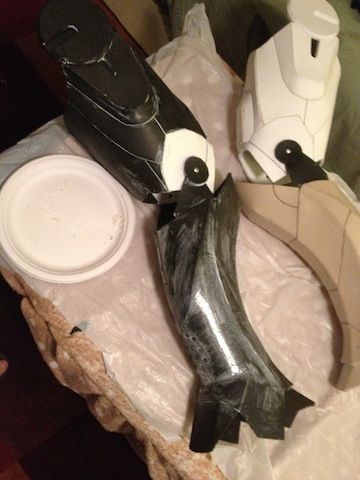
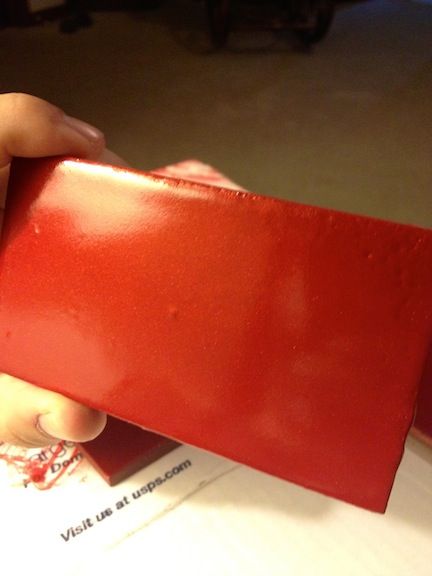
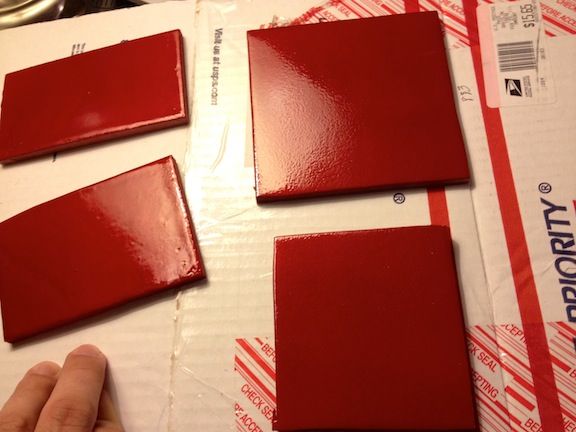
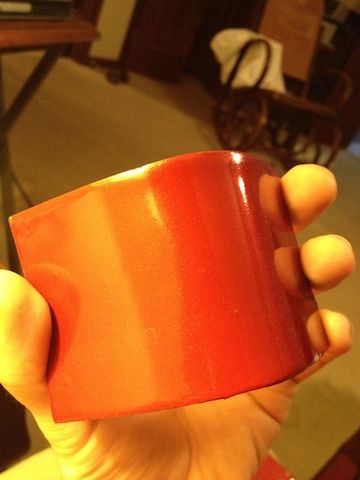
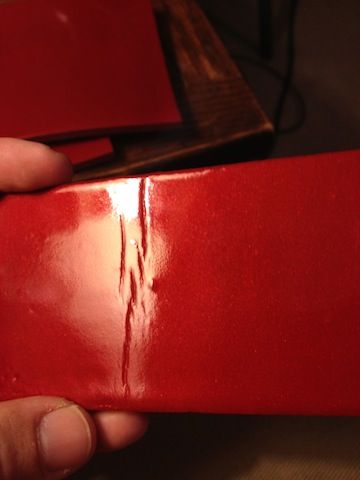
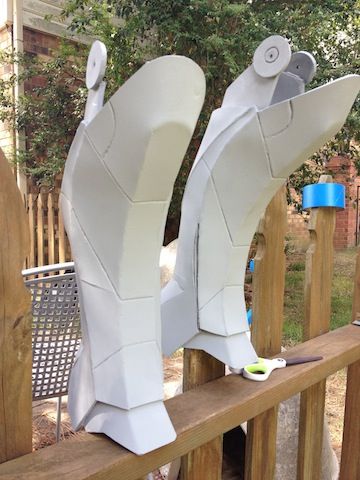
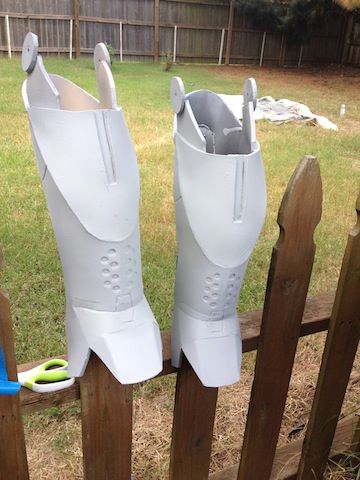
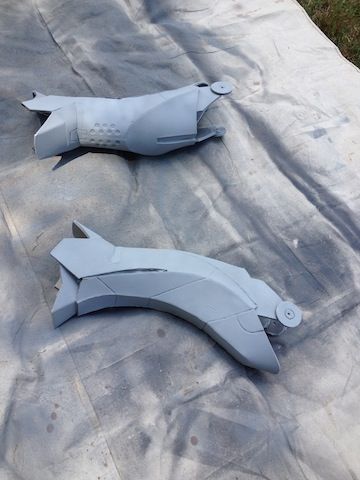
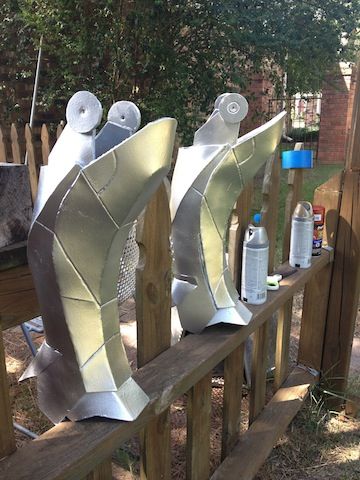
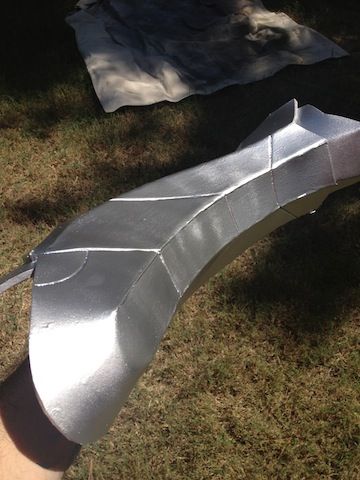
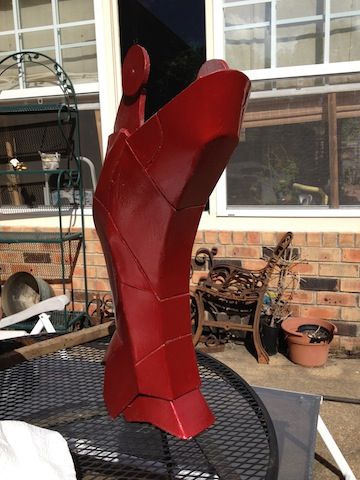
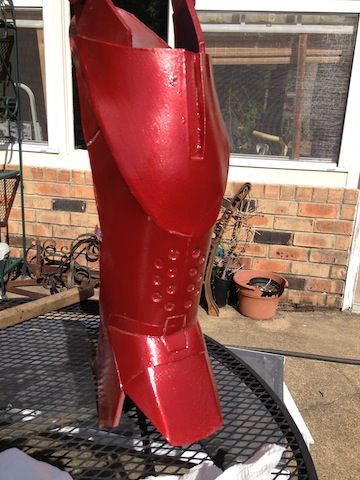
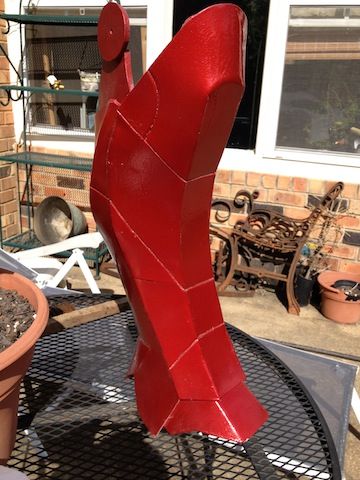
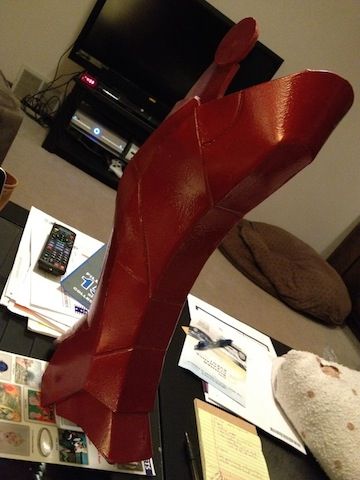
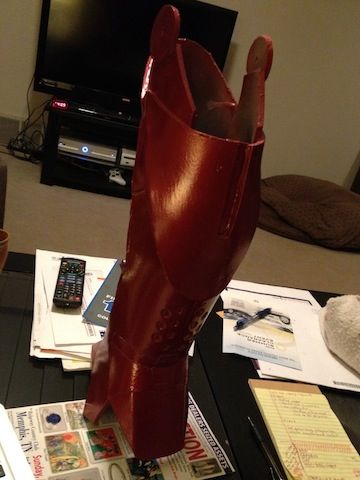
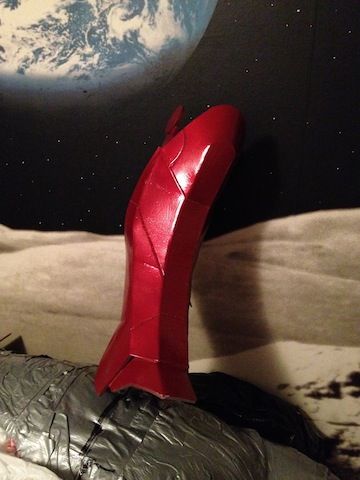
Thanks man I appreciate it!!! I will be painting soon, and am looking for tips on what will work with EVA foam. I have started the process of coating the suit in PVA glue, and will plasticize some parts that I want to be rigid. Then prime and paint. if you know of what types of paint can and can't be used on foam, please let me know! I have limited funds, so will probably stick with krylon or rustoleum unless I hear otherwise. Not sure if you can use auto grade paints on foam. Thanks again!


I'm not much of an expert when it comes to foam builds but I think this thread may provide some help with what sort of paint(s) to use :)
How the hell do you paint foam? - RC Groups
 
Re: WIP first Iron Man foam build+knowledge share

This is looking really great mate !
Can't wait to see it painted.

thank you man, and thanks so much for your hotknife input your lines were inspiring!

Paint is an issue for me, because I just learned of docholiday's mod podge, plastidip, adhesion, etc. method after I had already PVA'd the legs. Going to try to experiment today.

thanks again friend!(y)thumbsup:thumbsup
 
Re: WIP first Iron Man foam build+knowledge share

Ok, so I began PVA'ing the legs, aiming to coat them with smooth-cast 321 or 65D (the former which I currently have some of) a la XRobots, and as I was letting them dry, I came across docholiday's method for painting foam.

The aim for his method is to maintain a good amount of flexibility, but still have a good non-foam, metallic look. The problem is, like I said, I had already PVA'd the legs. But, I decided that I don't mind if they are rigid, so I am currently doing smooth-on and paint tests next to docholiday's method.

First of all, I am very very happy with the color, which is impossible to truly get across in an iPhone shot, but it is Duplicolor Barcelona Red Metallic, a Toyota look alike. I'm currently waiting for them to dry long enough to test flexibility inward and outward. The good news is docholiday's method looks very much like the smooth-on, except for the texture, which I don't mind.

Anyways... so for now...

IMG_1058.jpg
the drying PVA

A close up of the smooth-on 321 two thin layers (a light sand in between) on some scrap foam. being new at this I can help to be excited about the look:

IMG_1063.jpg


The two on the left: smooth-on 321 on foam, and the two on the right: docholiday's foam method (involves modpodge, plastidip, adhesion promoter, and more)

IMG_1064.jpg


I shall return with the test results(y)thumbsup
 
Re: WIP first Iron Man foam build+knowledge share

just a quick hint:

Not saying this is the best idea in the world, but perhaps a quick and easy option. Like I said I lined the inside of the chest circle with an electrical-taped scotch tape cardboard roll, then I measured the tap light I bought for the chest, which I will be working with more later. I just measured the tap light, made a little circular "shelf" for it to sit in , because the light ended up being slightly bigger than the cardboard roll. wahlah:

IMG_1053.jpg
 
Re: WIP first Iron Man foam build+knowledge share

Wow, dude. I really first see a very nice foam model of IM suit. Good luck in next steps and.... don't fcuk this up. :D
 
Re: WIP first Iron Man foam build+knowledge share

Wow, dude. I really first see a very nice foam model of IM suit. Good luck in next steps and.... don't fcuk this up. :D

Hahaaa thank you dude. I don't plan on f'ing it up! the beauty is that if it does happen, a good repair is always 3-6 hours away :cool
 
Re: WIP first Iron Man foam build+knowledge share

question... anyone had any luck attaching the shoulders? debating on whether to attach them to the "traps" of the back, or to the upper-outer biceps. watching the movement in the films looks as though it may be easier to move if attached to the bicep
 
Re: WIP first Iron Man foam build+knowledge share

Well, the bad news is that I'm going to have to do more tests trying to get docholiday's fleximethod down for foam. Still trying to do it without cracks.

The good news is that I did a trial of 2 thin coats of Smooth-cast 321 on some scraps of 3 layers of PVA'd (3:1 glue to water ratio) 6mm foam, and it actually has minimal but good flexibility without cracking! However, it does crease if the flexing is inward or "crushing..."

Bottom line: I will see if I have enough 321 to cover the legs, and try to get Docholiday78's method down before proceeding.

Here's a link to his method and my test results by the way... the method is on page 8, i think my test results are on 12:

http://www.therpf.com/f24/foam-rondo-hardcore-battle-damage-149883/index12.html#post2443835

ed4b3170.jpg
this is the 321 coated 6mm foam, 2 layers of Duplicolor Barcelona red metallic, and 1 coat of Krylon triple thick clear glaze

3c7ea7cd.jpg


and this final pic is of the crease produced by an inward flex:

66597351.jpg
 
Re: WIP first Iron Man foam build+knowledge share

HOLY CRAP. Now I'm fairly new at costume building, but not at paint. I don't want to get too far ahead of myself, but I might have stumbled across a great method... THIS IS ABOUT TO GET PIC HEAVY because as hard as I've tried, I just can't get the color to show up on film as it does in person...

Please trust me that this red is MUCH MUCH deeper in person, VERY close to the Mark iii actual color... Ive analyzed it plenty... and it's much smoother looking, it actually does look like the leg is made of metal. I'm very excited about my build now, because right when I got to the second clear coat, it looked like crap for about 10 minutes... I came back to it and it seriously looks awesome.

CHECK IT...

Priming...

0680bd6c.jpg


fbe4ade5.jpg


3e3c141b.jpg


AND the silver first and second undercoat:

3d9a02c1.jpg


edf93596.jpg


and the red, after clearcoat. the amazing part is right when I was close to being done, wind kicked up and dirt got into the seams in just the right places... it looks great in person!!!! Again the red in reality is much deeper

f6beb34d.jpg


ce9ff11e.jpg


a11045c4.jpg


29108291.jpg


326df130.jpg


2e84b22a.jpg


All of these pics and still no where near as good as it looks in person. I think I'm on to something :cheers
 
Last edited:
Re: WIP first Iron Man foam build+knowledge share

This is looking really great mate.
I'm jaleous, I'm still far from the painting process but I'll catch up to you ;)
 
Re: WIP first Iron Man foam build+knowledge share

HAH thanks man I'm actually only about 93% done building (need elbows and filler parts, etc.) but I had to jump ahead haa
 
Re: WIP first Iron Man foam build+knowledge share

by the way, this right shin went like this:

1.) 3 coats of 1:3 water to elmers glue
2.) 2 semi thin coats of smooth-cast 321, sanding in between
3.) 2 light coats primer filler
4.) 1 coat valspar silver (Lowe's)
5.) 2 Coats Duplicolor barcelona red metallic
6.) 1 coat Krylon triple thick Clear glaze, with a little on top to even out patchy areas

I would say next time I would try to sand the smooth on just a little better, or apply the glue thinner. There was a minute amount brushiness that I thought would be gone by the time I got to paint after a little sanding, but it's still there a little. Still looks great though!

The smooth-cast is thin, not super hard, and pretty flexible actually. According to the tests I ran, after 48 hrs of curing, the paint does not crack or chip. we'll see how long it lasts! so far so good.
 
Re: WIP first Iron Man foam build+knowledge share

Wow man, nice work! I'll be tackling the Mk III pretty soon.

Btw, do you apply the smoothcast with a simple chip brush the same way in xrobot's tutorial then sand down the brush marks after it cures?
 
Re: WIP first Iron Man foam build+knowledge share

Wow man, nice work! I'll be tackling the Mk III pretty soon.

Btw, do you apply the smoothcast with a simple chip brush the same way in xrobot's tutorial then sand down the brush marks after it cures?

Man, I very much appreciate the compliments, especially coming from you... your blue mark VI is unreal! Great work.

Yes, the smoothcast I just bought a BUNCH of chip brushes... you will go through them like crazy. It is, as far as I know, exactly like Xrobots method, except for I only had 321. So I did the tests, which seem to be holding up after 48 hrs of curing on the legs.

If you plan on using the 321, I would say just be prepared to work quickly and carefully. that stuff gets thick quick, which makes it tough to keep smooth. I think I literally used about a tsp of part A and be for each "outing" on the leg. you just have to get a feel for it... after you first slather it on, keep brushing lightly to smooth as well as you can, and do it in good lighting so you can watch for drips. this will save you time in sanding. I feel like as soon as it gets gell-y, it's hard to keep a smooth layer, because it certainly doesn't self-level like the 65D.

Anyway, take your time with letting the layers dry, and be prepared to do at least some light sanding. For me, it worked out great... the left leg is not finished painting, I actually had to go buy more red... but I think it turned out smoother than the right (pictured).

anyway dude sorry I get long winded. Good luck and thanks again, can't wait to see what you come up with!(y)thumbsup
 
Re: WIP first Iron Man foam build+knowledge share

Great info... your work came out very clean looking.Wish I could afford the Smooth on products.
Where did you find the 90 deg. cutter?
I'm loving your work. I tend to use a bit to much hot glue in the seams.

-----------------------------------------------------
Iron man Mk4 first attempt:

http://www.th

erpf.com/f24/ironman-mk-4-first-attempt-foam-build-158310/

Hey man thanks very much!
You might actually be able to afford them, I just got the trial size of the 321, and I honestly think it will get through what I want it to, I hope. There are parts of the suit that I don't plan on using it for, such as the abs.

Out of about 18cm of the size of the bottle (height), both parts A and B I've only used about 2cm of each. Like I said the layers are pretty thin, all I wanted to do was get the plastic finish with flexibility, so it isn't granite rigid when it's dry.

As far as the glue, the tailbone part of the lower back is covered in glue... I will be cleaning it up with a hotknife xacto type blade, you basically heat it and drag the heated blade lightly over the surface and it gets the majority of the glue hot and thus removes it. You can also rub at the heated glue to take it off then. But mostly, I used a bunch of masking tape until I felt good about making seams without it. Pain in the butt. Thanks again man!
 
This thread is more than 9 years old.

Your message may be considered spam for the following reasons:

  1. This thread hasn't been active in some time. A new post in this thread might not contribute constructively to this discussion after so long.
If you wish to reply despite these issues, check the box below before replying.
Be aware that malicious compliance may result in more severe penalties.
Back
Top